Adobe Premiere Rush Camera and Editing App now on Android
Premiere Rush is a smartphone camera and editing app in one by Adobe. While the app was released back in October last year, it was only available for iOS. But Finally I get to have a hands on experience, as Adobe have just released an Android version.
The app is aimed at those of us looking for an “all-in-one” solution to shooting and editing smartphone video. One would guess it’s mostly aimed at those producing content for social media platforms.
As someone who already has a Adobe Creative Cloud subscription, there’s no extra cost to me to download and use the app.
First Impressions
The app is large – over 400mb need to be downloaded. Once installed, the app offers to take you through quickly through the basics. If you choose not to skip the tutorial, you are asked to choose some test footage supplied by Adobe. Perhaps this footage is what causes the large download size?
After you select at least 3 clips from these test videos (of a trip to a beautiful island somewhere), you are taken through the basic functions of the editing part of the app. Trim, rearrange clips, add titles, add transitions and export or share the final video.
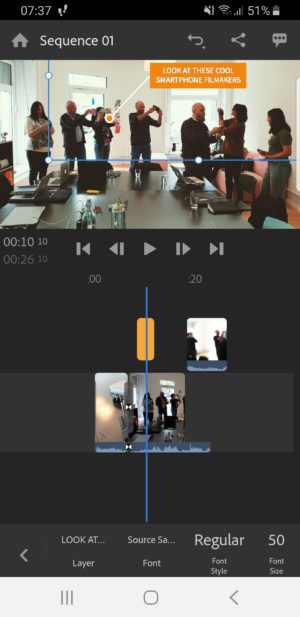
Now I’m going through the app with my own footage. These are clips from our Shoot Fast smartphone filmmaking workshop at the last festival in Zürich. Note that clips, photos, and audio can be added from local storage, a linked Dropbox account, or your Creative Cloud account.
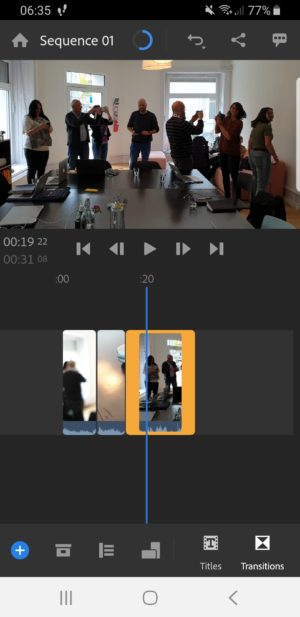
Dragging a clip upwards creates a new video track and allows you to drop the clip onto it. Then clicking on that icon with 3 bars brings up the track controls, which anyone who use Premiere Pro will recognise the look of.
The blue circle with the cross allows you to add more media. Meanwhile, the row of icons along the bottom can be scrolled along left to right with your finger to reveal more functions.
The button to the right of the 3 bars switches the format from landscape to portrait – handy for Instagram and Facebook stories – or square. You can add basic titles and transitions, which can be custom edited pretty easily, change font size and so on.
Double-clicking a clip brings up a list of edit options along the bottom, which can again be scrolled left and right to reveal more. You can adjust position, rotation by individual degrees, opacity, crop the image on any edge or add a feather.
Color and Audio
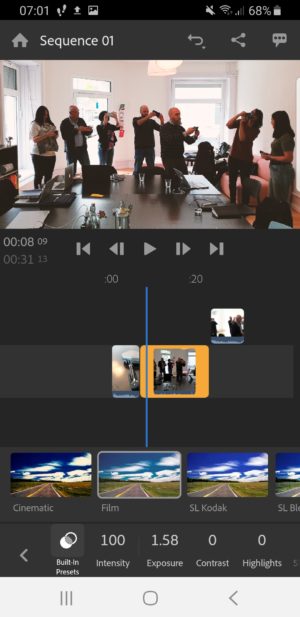
The color button brings up a list of preset filters to apply, in the way we are all used to on social media. Rush allows you to have some control over the filter, too. If you like the look but find it too strong you can tone it down. You can also adjust the intensity of the filter, plus the exposure of the clip, contrast and more.
There’s 11 presets loaded with the app on installation. Externally created presets aren’t supported yet, but they are planned for the future.
Color controls:
- Exposure
- Contrast
- Highlights
- Shadows
- Temp
- Tint
- Vibrance
- Saturation
- Faded Film
- Sharpening
- Vignette
- Feather
Audio
The audio button brings up audio controls for the selected clip. There are check boxes to select if you want to use “Auto Volume” or “Balance Sound”. There’s filters to “reduce noise” and “reduce echo” plus “enhance speech”.
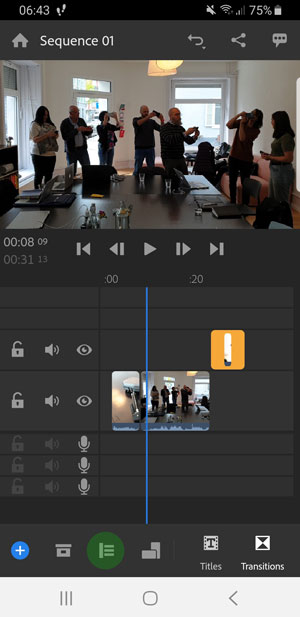
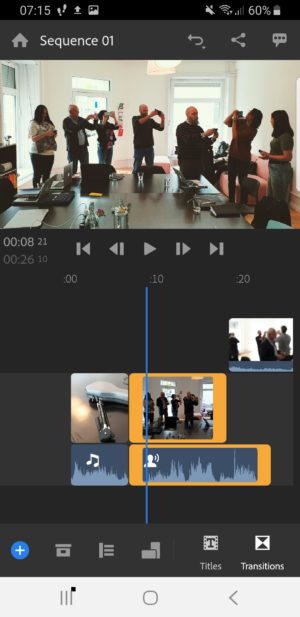
The next function I discovered is a pretty essential editing tool, which isn’t always available in editing apps. If you tap and hold on a clip, you get an option to “expand audio”. This makes the audio track of a clip drop down as a separate item.
Now if you tap and hold the edge of the video part, you can move it independently of the audio. This allows you to having overlapping audio. See in the image below how the audio track from the highlighted clip now overlaps the following clip.
There are currently 3 transitions available: cross dissolve, dip to black and dip to white. The length of each can be adjusted with a simple slider. Although you can’t fine tune the speed to my eyes the cross fade come out more smoothly than the Premiere Pro preset crossfade (which I fund suddenly drops off at the end of the fade).
Titles
The titles are something in Rush which really stand out from other Android editing apps, with 38 preset options to choose from.
These presets are editable too. So you can change a lot of the elements within the preset such as font, background colour, font size, character spacing and more.
Editing the text on your smartphone screen can be a bit fiddly. I also found my Samsung S9 struggling a bit, just processing the text editing as I was typing in the letters. And I felt the phone start to warm up in my hand.
But as I was getting a little impatient, I found the title could be moved around the screen. I’m not exactly sure what I did to make it happen, but hopefully I can repeat that in future…
OK, so to move the title around the screen double tap on it (but not on the text box as this just opens up the text editor). Once you have selected it this way (and you get that blue box around it) you can use 2 fingers to alter the size of the text element.
Camera App
Adobe Premiere Rush is not only an editing app. There’s also an inbuilt camera app which gives you some manual control over your camera.
On opening the app, you are presented with a screen showing previous projects. At the bottom, there is a + sign. Click this to open up the options:
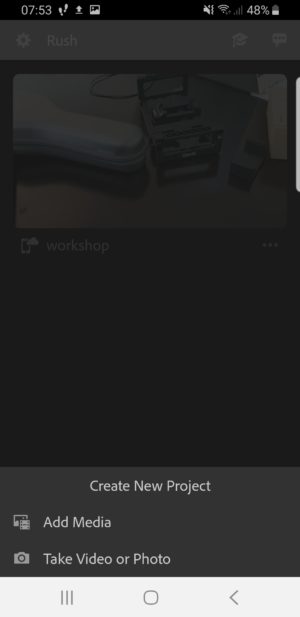
Below create new project you will find the options to add media or take a video or photo. Choosing the bottom option opens up the Rush camera app.
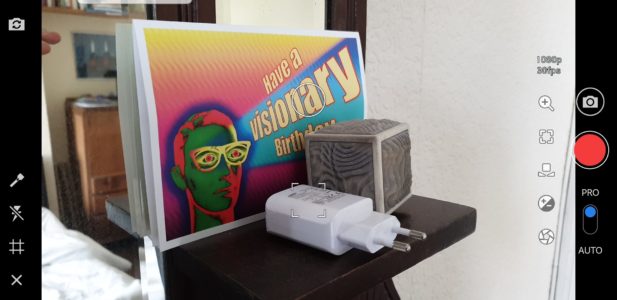
You can toggle between PRO mode and AUTO mode. PRO mode allows you to access the manual controls for your camera. You can change resolution up to 4K. But for frame rate it seems (at least on a Samsung S9) you are stuck with 30 fps.
The 4 icons on the left of the screen are: flashlight, flash setting, guide lines and quit.
In the centre: tap on the square to lock focus – tap on the circle to lock exposure.
The buttons on the right are: resolution / frame rate, zoom, focus control, white balance, exposure bias, ISO / shutter speed.
Strangely, the manual shutter speed allows you to go as low as 1/16, even with you obligatory 30fps. I could be wrong but isn’t it physically impossible to have such a slow shutter speed at that frame rate? 1/16 means your shutter is open one 16th of a second, so the maximum frames you could have per second is 16. I tried filming with this setting and the result was jerky footage (as you’d expect).
So compared to well known camera apps, the Rush app is about halfway there. Having said that, if you don’t already have a camera app – or you just like being able to shoot within Rush and start editing immediately – this could do a job.
You are able to lock off focus, exposure and white balance which enables you to produce more professional looking footage.
Use with Adobe Premiere Pro
If you are using Premiere Pro already, the editing software can open your Rush projects. This means you could start editing a project while on the move using your smartphone, then do more major work on it on Premiere Pro later.
Here’s Adobe’s promo video for Rush:
If you don’t already subscribe to Adobe Creative Cloud, you can still try Rush using the free starter plan. This gives you 3 exports and 2 GB of cloud storage.
If you are not a subscriber to the full CC package, then Rush can be bought alone for $9.99/month (£8.32).
Find Premiere Rush on Adobe’s Website.
Eager to learn more?
Join our weekly newsletter featuring inspiring stories, no-budget filmmaking tips and comprehensive equipment reviews to help you turn your film projects into reality!