DJI Mimo Tutorial: Every Feature Explained
If you’re using the DJI Osmo Mobile 3 or the DJI OM 4, the Mimo app adds essential functionality to the gimbal. In this article, I’m going to go through and explain absolutely every single feature contained within the DJI Mimo app.
The Mimo app works for both iPhone and Android devices, however not all features work at the same level. I will cover the available features for both systems, using an iPhone 12 Pro Max and a Samsung Note 20 Ultra.
I’ve already covered installing the app in my previous tutorial on the Osmo Mobile 3 setup. So you might want to have a look at that first.
After reading this article, make sure to read my tutorial on how to Master Your DJI OM 4 or 3.
Bluetooth Connection
For your gimbal to work with your smartphone, it needs to be connected via bluetooth. So make sure you have bluetooth enabled on your smartphone.
Best practice is to mount the smartphone to the gimbal before powering on the gimbal. Once you have powered on the gimbal, you can check that your smartphone can find the device. If you want to connect before you open the Mimo app, that’s fine.
When you open the Mimo app, if it’s already connected to the gimbal, then it should automatically switch to the camera interface of the app. You can always switch back to the home page by tapping the small house shaped icon in the corner.
Assign the M button
When I first installed the Mimo app on my iPhone a message popped up, basically asking what I wanted the M button to do. If you want the M button to be used for switching gimbal modes, for example, assign it.
But don’t worry, you can assign this later in the settings.
Mimo App – Home Page
This is one of the things DJI does really well in the Mimo app. You can access so many resources from this home page and it’s all laid out nice and clear. At the top some news updates and articles.
There’s links to DJI Support, a DJI online forum and many DJI related videos, tutorials and stuff shot using DJI kit.
When you’ve had enough of the home screen, then tap the camera icon labelled device. Now you’re ready to start shooting.
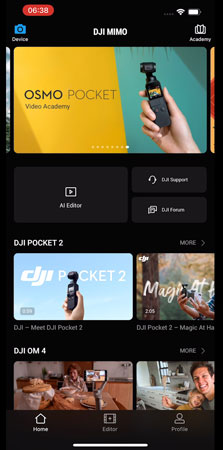
AI Editor
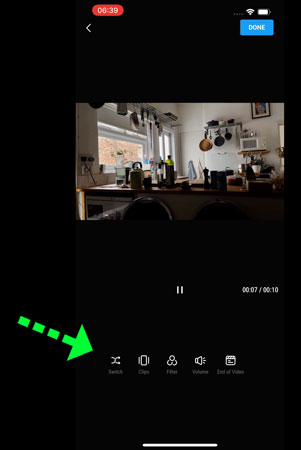
The AI editor allows you to select a bunch of clips from your library, then the app will cut them together and add some music. There’s different templates to select and to download to fit the style you’re looking for.
You can select a template and then customise it, changing the length of the clip, filters, volume, and the end message. I found that the iPhone version has more options to edit here.
The strange thing is that many of these templates include text, but the button to edit that text is not always available. It seems that some templates allow the text to be edited but not others. Obviously it would be much more useful if we could edit all the text or just remove it.
But there’s really a ton of templates to download and have fun with.
Academy
Tap this button to access a bunch of DJI tutorials. You can select which device you want to learn about. When I tried to access the manual, I just got a blank screen on my iPhone. Using my Samsung it directed me to download a pdf.
Portrait – Landscape Switch
The gimbal always defaults to portrait mode when you first power up. Double tap the M button to switch between these modes.
Record/Shutter Button
The big red circle is – you guessed it – the record button. In video mode, tapping this will start recording. In Photo mode, it will take a photo. Pressing the shutter button on the gimbal handle will have the same effect as tapping the circle on the screen.
Camera Mode Menu
To the right of the record button is a camera mode menu that you can swipe up and down to access all the modes.
Video mode and Photo mode are pretty self explanatory.
Pressing and holding the zoom control on the gimbal will zoom slowly in. Tapping the zoom control will move the zoom between the points at the bottom of the screen. When it says wide-angle, it’s referring to the ultra wide angle.
The zoom works the same for video and photo. You can also zoom in and out by swiping the zoom level indicator circle.
While the Mimo app has access to my iPhone tele lens, it does not have access to the tele lens on my Samsung. But that’s to do with Samsung, who do not allow 3rd party apps access to the tele lenses.

Slow Motion
Switching to slow motion means the video will be in slow motion when played back. There’s no options to change resolution or frame rate. The app seems to use the iPhone 12 Pro Max’s slow motion strategy, which seems to aim for about 200fps. Because when I check the info on slow motion clips, they are close to 200fps – 195, 199 fps and so on. This is possibly down to phones producing variable frame rate.
Using the Mimo app with my Samsung, there is no slow motion mode.
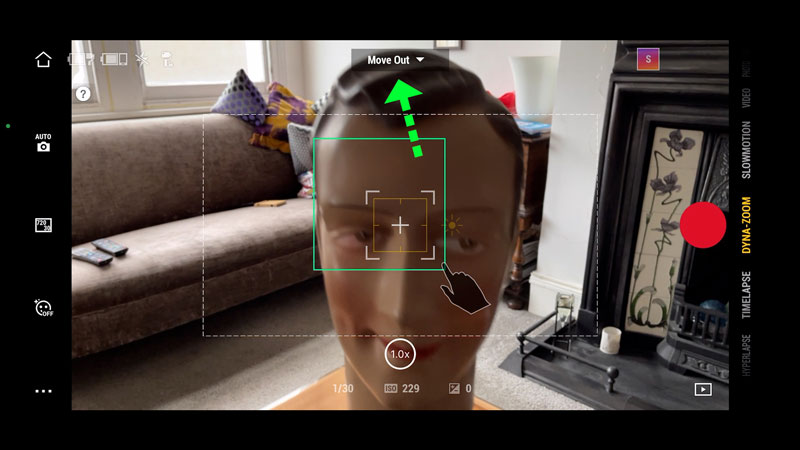
Dyna-Zoom
Dyna-zoom creates that Vertigo shot where the subject appears to remain static while the background is sucked inwards or blown outwards. This shot was made famous after it was used in a film called Vertigo by Alfred Hitchcock.
You can choose whether to make the background expand or shrink by choosing move in or move out. Select then click done. Now draw a box over the subject in the frame. Start recording and move slowly towards or away from the subject, depending what you chose before.
Timelapse
Timelapse shoots images at a very slow frame rate and then plays those frames back much faster, so time appears to be moving extremely fast.
Once selected, Timelapse controls appear at the top of the screen. The first setting is how often you want the camera to shoot a frame, measured in seconds. You can choose from every half a second up to once per minute.
The higher this setting, the faster your timelapse will go. Next you can set how long you want the camera to keep shooting. If you leave it set to infinity, it will keep shooting until you stop it manually.
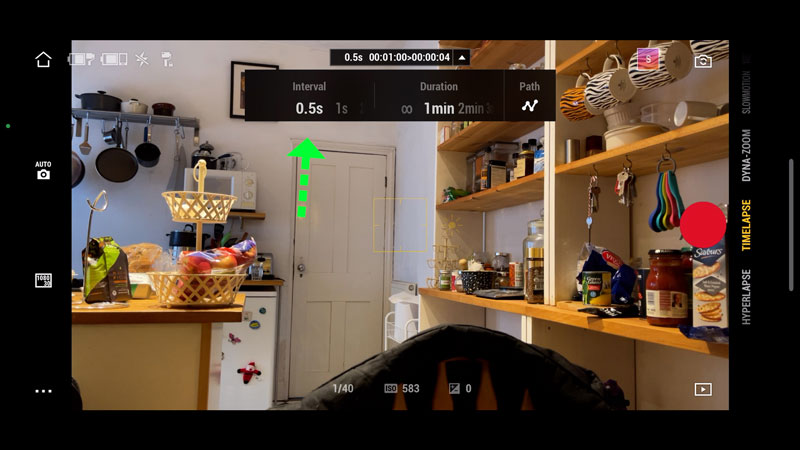
The final setting is path. If you want the gimbal to move the camera during the timelapse, then use this setting to program in a path. You can add up to 4 points that you want the camera to move between.
If you do decide to set a path, notice that you can’t also have duration at infinity. The Mimo app needs to know a duration, because it uses this to measure the time between each point.
It’s a good idea to lock exposure and white balance before recording. Once everything is set, press record and Mimo will begin capturing your timelapse.
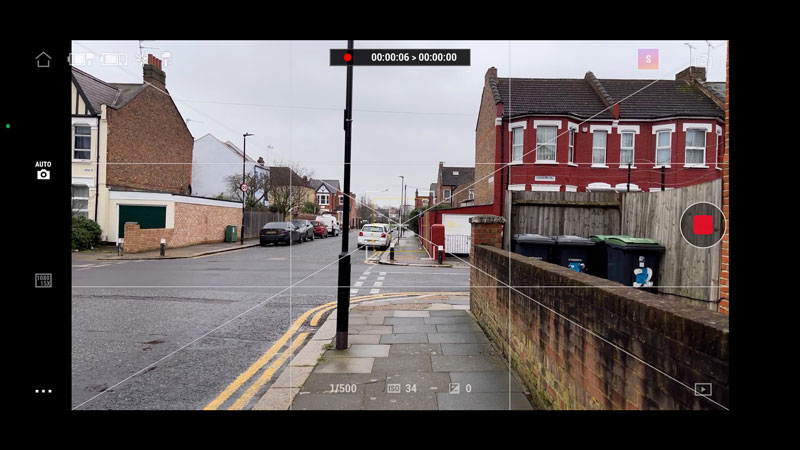
Hyperlapse
Hyperlapse is pretty similar to Timelapse. The difference is timelapse is designed to be used with a stationary camera, while hyperlapse is for a moving camera. For example, a shot captured by walking along a street where all the passersby and cars whizz past as you move along.
There’s no extra settings here. Just hit record and start moving.
Pano
Pano is short for panorama and gives you 3 different options for taking a panoramic photo. Once selected, a Pano selector button becomes available on the left of the screen.
The first, default option shoots 9 photos to cover a wider field of view and then edits them together. What you end up with is like using a very wide angle or fisheye lens.
The second option takes 7 photos from left to right. The final result is a very wide 240 degree field of view.
CloneMe
The 3rd option is Mimo’s CloneMe feature. This takes 3 photos from left to right, but this time one or more subjects should be in the frame. And they need to move for each photo, so that in the final image the subject has been cloned.

Story
The final camera mode is story mode. This mode creates a video from a number of shots and each shot follows a preset movement, dictated by the preset you choose.
Once you have selected a preset, the app guides you through the shots you need to capture. In the top left corner, a little video shows you what you are aiming at. In the middle of the screen arrows tell you how to move. At the bottom is a series of boxes and each one represents a shot needed to complete the final video.
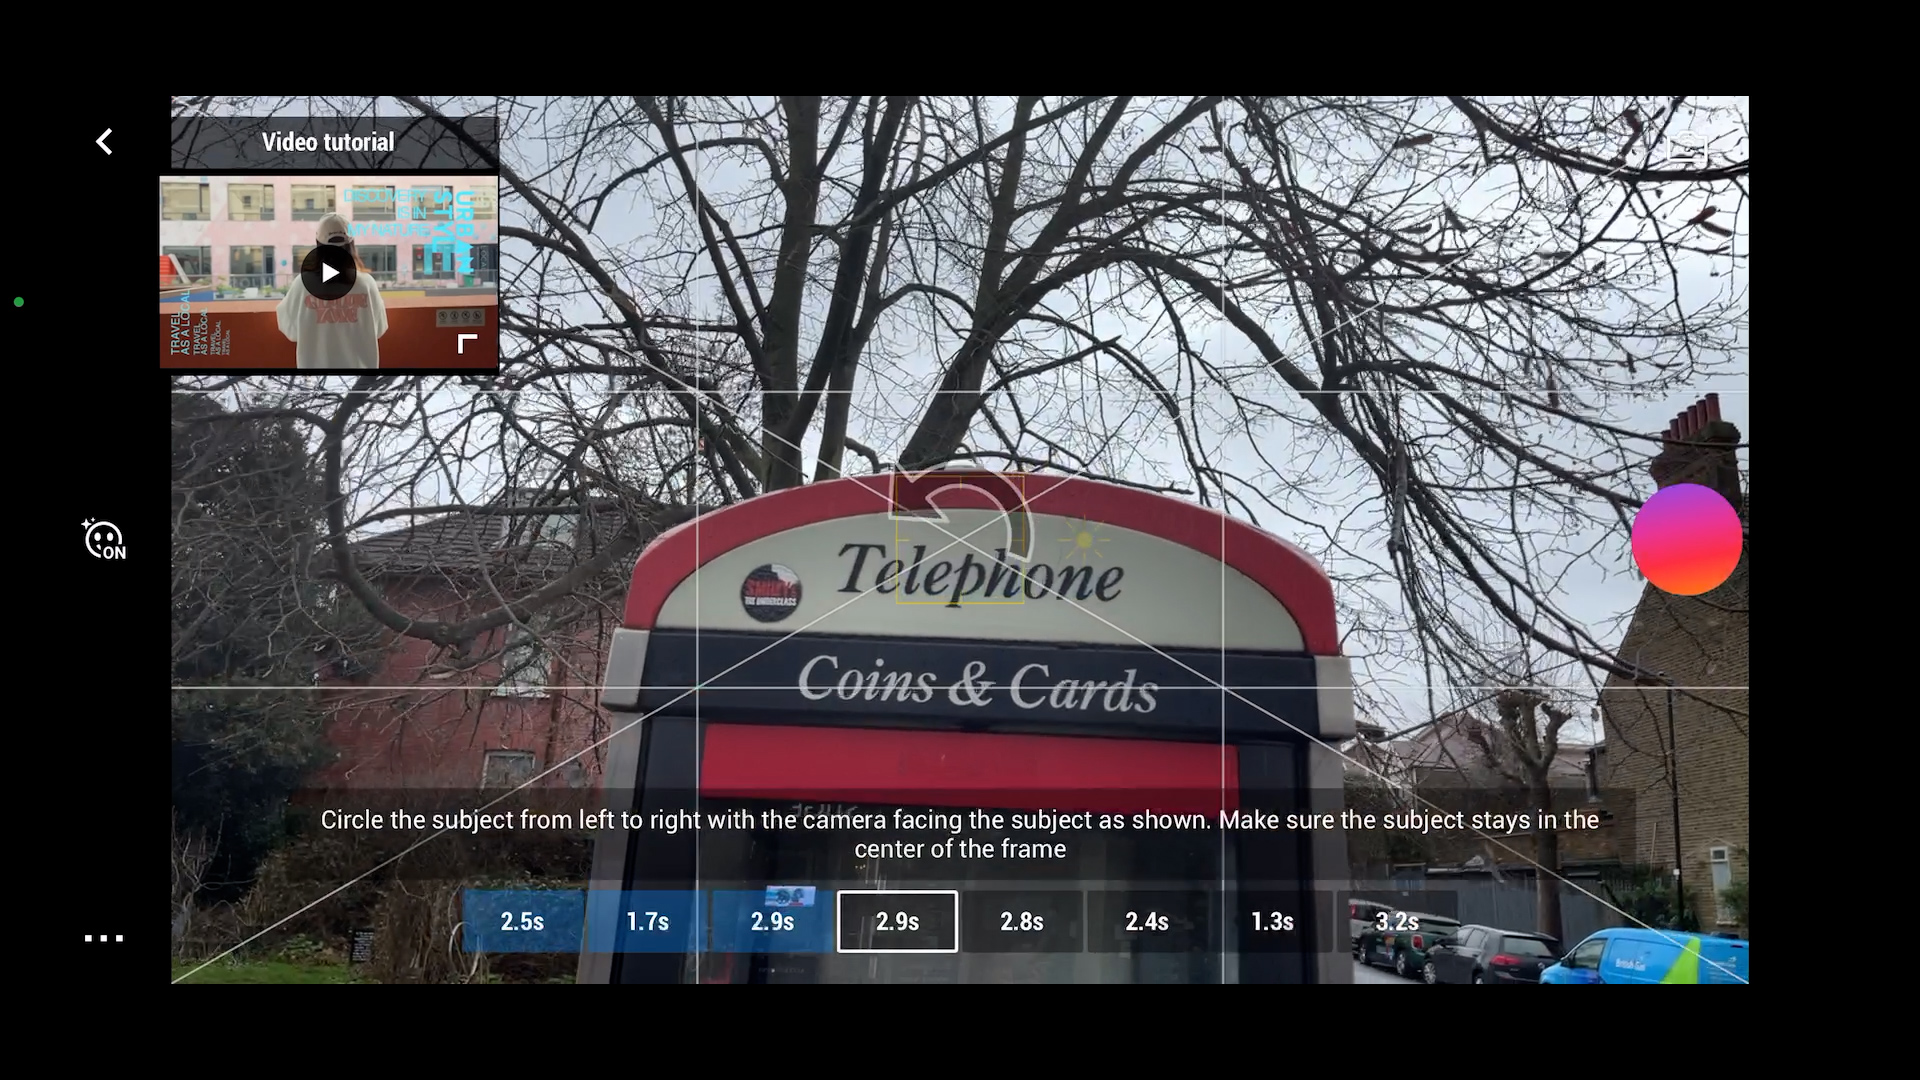
Inside each box is a duration and this is the time each shot needs to last. Hit record and capture your first shot. You can go back and retake a shot if it’s not quite right. At the end of the process, export the final video and Mimo will cut it all together and add music.
You can also access Story mode by tapping the pink and orange button in the top right corner with an S in it.
Next to that button is the selfie camera switch button.
Selfie Camera
Using my iPhone 12 Pro Max, I was able to access up to 60fps at 4K resolution. But if you want to use glamour effects 30fps at 1080p is the max quality setting.
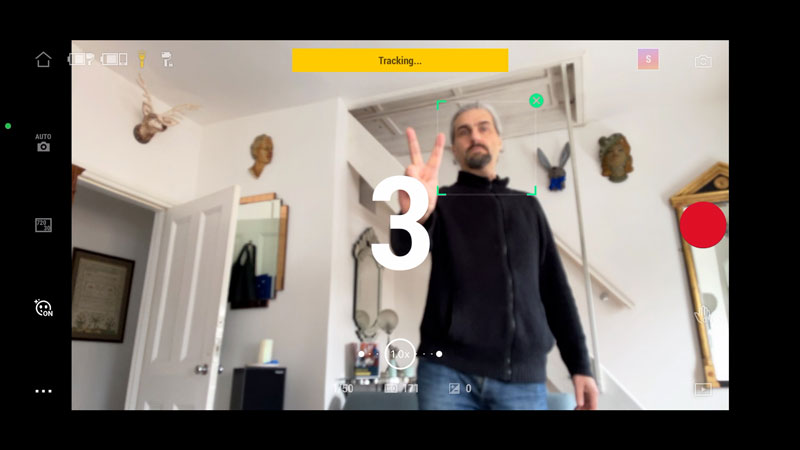
Gesture Control
The hand-shaped button below the record button allows you to switch gesture control on and off. If you switch this on, you can set the camera to start recording when you make a gesture to the camera – a V sign to start and an open palm to stop.
There’s 2 modes for gesture control. Follow and shoot means the camera will start recording and try to track and follow your movements. Shoot only is just to start and stop recording, no tracking.
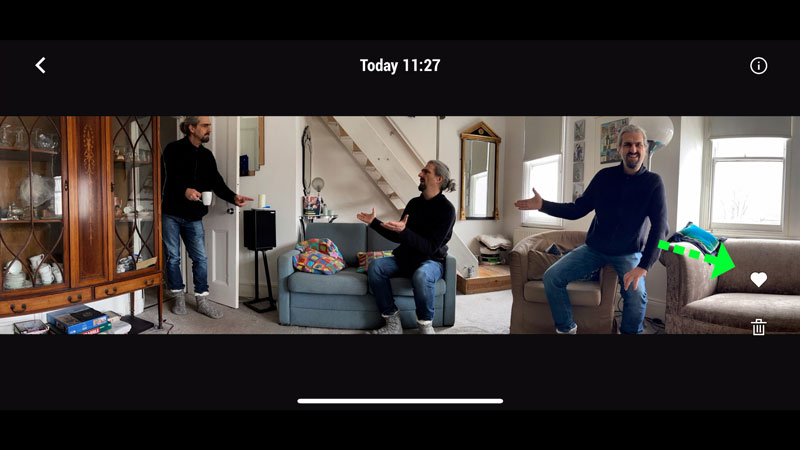
Media Gallery
Below the gesture control button is a play arrow in a square button which allows you to access the media gallery. You can view your photos and videos all together, just photos or just videos.
When you tap to open a photo or video there’s a heart shaped button. You can tap this to select this shot as a favourite, or “like”.
Back in the main gallery, if you select the like heading, you will see only the videos you have liked by tapping that heart. So this is useful for going through footage, selecting the good takes, so later you can filter out the stuff you don’t want easily.
This is something I always wish I had done. Whereas usually, I just shoot away. Then 50 video clips later, I have to go through each one again to find the good ones.
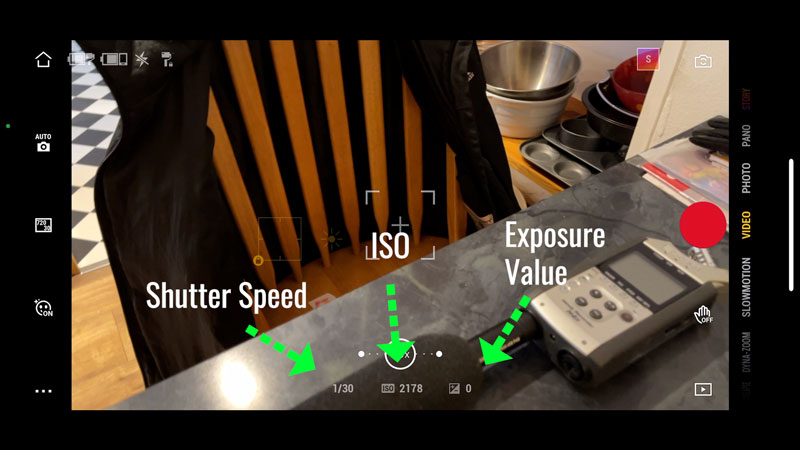
Exposure Values
Below the zoom level indicator 3 settings are displayed. This shows you the camera’s current shutter speed, ISO and exposure value.
Shutter speed is how long the sensor remains on for each frame. ISO is how much the sensor adds gain to increase brightness. If ISO is too high there might be extra noise in the image. Exposure value is an indication of whether the camera thinks the frame is over or under exposed, with negative being under exposed.
Personally, I like to use my own judgement as well as using the exposure value to get a sense of how bright the image is.
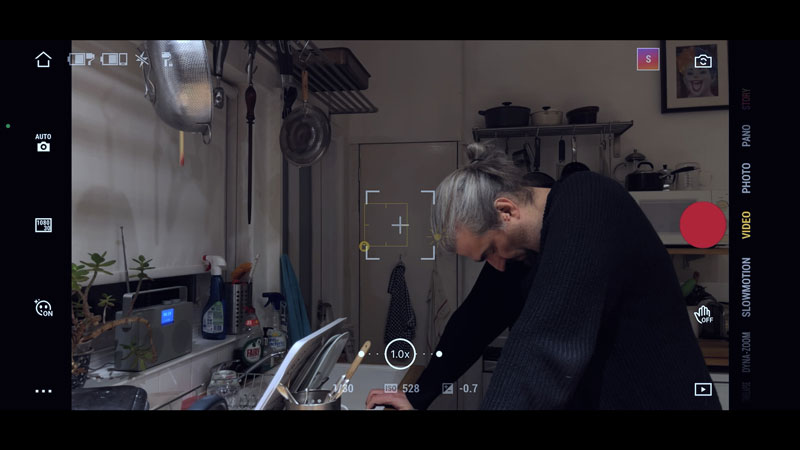
Exposure & Focus Reticle
Like in the native camera app of your device, the Mimo app has a yellow reticle which allows you to set and lock exposure and focus.
In Mimo, it’s a yellow square. Tap the screen where you want the camera to set exposure and focus. Tap and hold until you see a yellow padlock to lock settings.
Once locked, you can slide your finger up and down the screen to change the exposure level.
How high you have this exposure value depends on what you are filming and the mood you want. If you were filming a cooking show in this kitchen, you would probably want it to be quite bright. But if you were filming a drama scene, you might want it darker and more moody.

Indicators
At the top left of the screen are 4 symbols which indicate certain things. First is gimbal battery level, second is the phone’s battery level, next is your flash setting and the last one tells you which gimbal mode you are in currently.
If I change modes, you can see that symbol change. It’s quite small though and the change is pretty subtle. Perhaps if it changed colour as well it would be more useful.
Now, on the left side we have 4 more buttons.
Auto – Manual Mode (iPhone Only)
If you tap the button where it says Auto, you can switch your camera to manual mode. This allows you to set your ISO and shutter speed yourself.
Here you can set ISO manually or set it to remain in auto but with an upper limit. As I say, high ISO creates extra noise so by setting this to a max of say 200, you can be sure you won’t get really bad noise.
When I had it in auto, the camera had the shutter speed and ISO higher. So this would create less motion blur and more noise. But if I want the natural film look, I’d rather have a slow shutter and low ISO.
Again, this is iPhone only. There is no manual mode in the Android version of this app.

Resolution & Frame Rate
The next button down allows you to set your resolution and frame rate. With my iPhone 12 Pro Max I can go up to 4K and 60fps here. Using my Samsung, I only get 30fps but I can shoot up to 4K.
Choose 24 or 25 fps for a film look style. 60fps is good for slow motion, if you play back at 30 or 24 fps. In an editing program, slow the clip down by 50% or 40% (if it’s a 24fps sequence).
Note that the options here change depending on the camera mode. For example, when you have hyperlapse selected, you now get resolution and speed options. There’s no frame rate options.
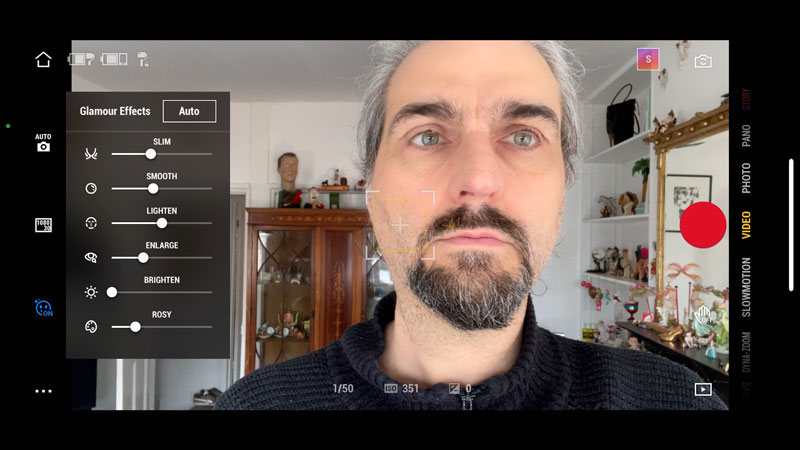
Glamour mode
Below that button is the glamour mode button. Switch this on if you want to beautify your subject with digital effects. The sliders can be used to adjust things like how slim your face is, smoother skin, make your eyes bigger and so on.
But you can’t use this at 60fps or 4K resolution.
Extra Settings
The final button, which is 3 dots, opens up lots of extra settings and 3 more buttons.
Video
The top button is some extra video settings. Switch your flash on and off. Set and lock your white balance manually. If you really want to be pro, then make sure your white balance doesn’t change during the shot by locking.
If you choose one of the white balance light colour presets, it will be locked at that setting. If I’m outside and I choose the cloudy sky setting, it will stick to that setting until I change it. But if I leave it in auto, the colour might change during the shot and this is not good for the pro look or for grading later.
In iPhone, you can set a custom white balance but in Android you cannot.
Grid gives you 2 options for guides on the screen to help with your framing. You can have the old rule of thirds grid. Or add diagonal lines too, to help with your targeting.
You might use these diagonals for shooting a hyperlapse. If you want to make sure a certain object in the frame remains in the same position, for example. This will give you a smoother, more impressive hyperlapse.
If selfie flip is on it means the image is flipped when using the selfie camera. Normally, the selfie camera shows the reverse image, so if you have text in the shot it will be like looking in a mirror.
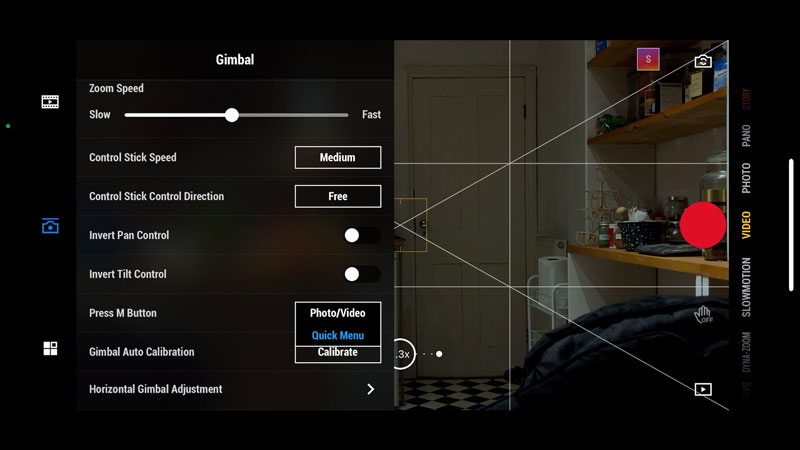
Gimbal
The next button opens up custom gimbal settings.
The top 2 buttons allow you to set the gimbal mode manually, including toggling sport mode on and off.
In the main modes, there’s a little movement delay to create nicer smoother shots. So you need to compensate for this when you shoot. Start a little bit early and end a little bit early.
For example, if I’m panning to an object I won’t move all the way. I will stop just before and let the gimbal ease into the final position.
Modes
Follow mode sets the gimbal to follow your movements, both pan (left and right) and tilt (and and down).
Tilt locked as you might guess stops the gimbal following your up and down movements. This is good for those dolly shots where you want to create an up and down shot, but you don’t want the camera tilting during the shot.
FPV is “first person view”, which makes your gimbal react like a camera in a video game. The main difference is that your gimbal won’t keep the camera level with the horizon. It will rock left and right if you move that way.
SpinShot is the same as FPV except the moving the joystick left and right makes the camera do a barrel roll. This can be fun if you want to create some kind of crazy fly over shot with the camera rolling at the same time.
Sport mode just makes the gimbal react less smoothly. It’s more sensitive to your movements, which means it is not as elegant but allows you to keep up with fast action.
Zoom Speed
Adjusting the zoom speed allows you to set the speed at which the camera zooms in and out. If you want a slower, more elegant zoom, adjust this downwards. If you want a zoom shot which creates more of an impact, set this higher.
Control Stick
There’s 2 settings for the control stick, otherwise known as “joystick”. Change the speed, again slower for more elegance, faster for more drama.
The control stick direction is either free or locked to up and down or sideways movement. If it’s set to free, the control stick can be used to pan and tilt simultaneously. But if you set it to Horizon / Vertical, then it will only pan or tilt.
So you might want this if you know you only want a pan or a tilt, and you don’t want clumsy thumb movement to ruin the shot.
Invert Pan and Tilt
These toggle switches basically change the way the control stick works. Which one you prefer depends how your brain is wired. If you want the gimbal to tilt the camera down when you press the control stick up, then invert the tilt control.
Press M Button
This setting allows you to allocate the M button on the gimbal, either to switch between video and photo mode or to switch between the gimbal movement modes.
Gimbal Calibration
The final settings in this menu allow you to adjust the level of the phone camera in the gimbal. Calibration goes through a process and at the end the gimbal should hold your gimbal perfectly horizontal.
Place the gimbal on it’s legs on a flat surface and start the calibration. In a few seconds, your gimbal should now be set correctly.
The final setting allows you to adjust this manually. So if calibration doesn’t work perfectly then you can adjust the angle until you’re happy.
General
And now the final menu.
Device management allows you to connect or disconnect the gimbal.
In device name you can check or change the name of the gimbal. This is the name you see when your phone is looking for a gimbal to connect via bluetooth. So you might want to change the name to something more recognisable or personal.
The final setting allows you to switch the gimbal so that when idle it starts a demo mode. The gimbal will start moving to a set preset pattern.
With Android, there is an extra option here. Tapping instructions leads you to a message explaining why Android users have less options than iPhone users. Truth is, it’s down to Android devices and what each device allows access to.
Smartphone Video – Beginner to Advanced
If you want to know more about smartphone filmmaking, my book Smartphone Videography – Beginners to Advanced is now available to download for members on Patreon. The book is 170 pages long and covers essential smartphone filmmaking topics:
Things like how to get the perfect exposure, when to use manual control, which codecs to use, HDR, how to use frame rates, lenses, shot types, stabilisation and much more. There’s also my Exploring the Film Look Guide as well as Smartphone Colour Grading.
Members can also access all 5 episodes of our smartphone shot Silent Eye series, with accompanying screenplays and making of podcasts. There’s other materials too and I will be adding more in the future.
If you want to join me there, follow this link.

Simon,
Love your site, your films and the review. However, I don’t understand why gimbals aren’t made to accommodate smart phones in a case.
BTW,from the looks of your outdoor clips, I’m wondering if the sun ever shines where you are. 🙂
Be well,,
Richard
thanks Richard! Depends if I’m in Switzerland or England. In England as Bill Bryson observed, living in England is like living in a tupperware box…
Thank you for your article. Do you have to stay logged into your Mimo account while using the app? Also, do you have to enable the location service of your phone for using the app? I’m interested in the product, but s bit concerned about exposing all the photos/videos to the manufacturer.
How do I stop the annoying pop up “tips” that come up every time I have already successfully completed some action? Turning it off seems to be hidden in a labyrinth of menu options. I thought I looked everywhere, but still a window pops up in the middle of the screen every time I press any button.