How to Create the FILM LOOK with a Smartphone . FiLMiC Pro Tutorial . Super 16 Tutorial
How do we make our smartphone videos not only look more cinematic, but also add the quality of moving images shot using film stock?
With a camera app and some colour tweaks, it can be done. For this tutorial, I’m going to be using FiLMiC Pro. But you could use another app. There’s free ones like Open Camera for Android. There’s McPro24fps, also for Android.
I’m going to show you the basic techniques, but I also want to tell you about this fantastic app called Super 16, which I’m using alongside FiLMiC Pro.
What is the Film Look?
People love films and people love the look of film. The look has been tried and tested since cinema was invented over 100 years ago.
Not so long ago, reproducing the look of film was quite difficult, without using any actual film. But digital cameras keep improving every year, making it easier and easier to achieve.
With an app like FiLMiC Pro (or McPro24fps for Android), we can certainly achieve a good film look using our smartphones. We will also need an ND filter to help when conditions are too bright.
Film can have a dream-like quality that video doesn’t, unless you use certain settings and colour enhancements. And when we try to create the film look, we attempt to emulate these key characteristics of film, but using a digital medium.
First, we have to be careful not to confuse the term “film look” with the term “cinematic”.
Film Look vs Cinematic
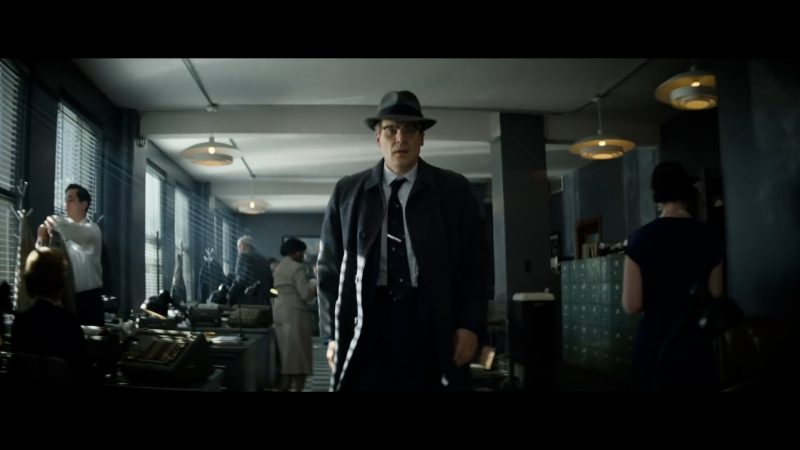
For example, old TV shows like Seinfeld and Friends were actually shot on film. Whereas most modern feature-length movies destined for our theatres are shot using a digital camera.
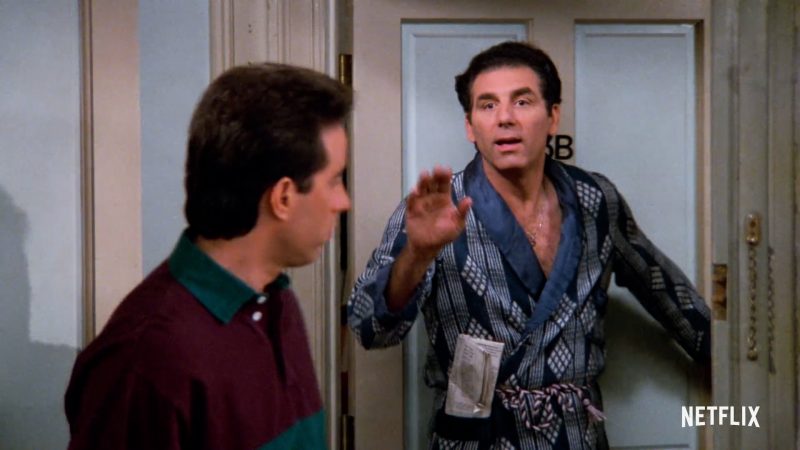
While those old sitcoms both still look pretty good, they don’t necessarily look too cinematic. Therefore, seeking the film look is part of creating more cinematic looking videos, but it’s not the whole story.
Digital video, whether you shoot it on a smartphone or a $60,000 cinema camera, looks very clean and precise. But people that love the look of film, love the character that film gives to an image.
Compared to standard smartphone shot video, film has less contrast, is less sharp, has grain instead of noise, has colour aberrations and distortions and various other qualities.
But before we look at these more distinct qualities of film, there are some basic FiLMiC Pro settings we need to get right.
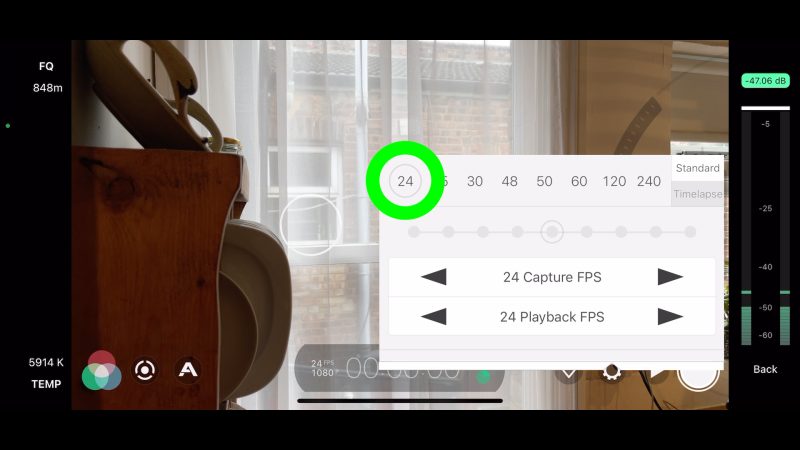
The first thing we need to do is switch our frame rate to 24fps.
24fps
24fps is the standard for movies and TV shows, which has been established for about 100 years. This frame rate came from a compromise between a smooth-looking motion and the practicality of moving 35mm film stock through a camera or projector without it breaking. Not to mention the cost of buying, processing and delivering rolls of film.
Therefore, when we shoot at 24fps our video will look a bit more like film. Especially if we also manage to keep the shutter speed to something similar to the speed film cameras use (1/48).
In FiLMiC Pro, open up camera settings and tap frame rate, now tap 24. If you’re using an android device, you might find you cannot set 24fps. That will be down to what the device manufacturer has allowed 3rd party app developers to change in the device.
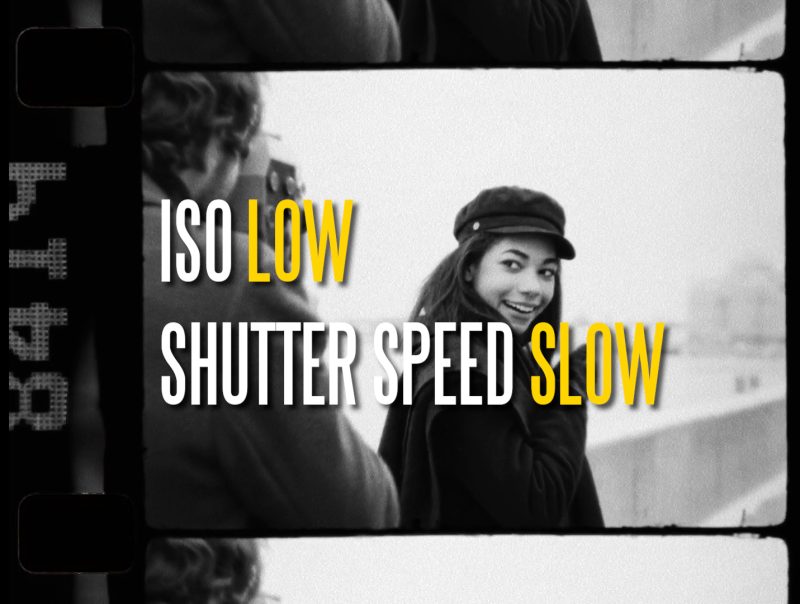
In smartphones, we generally have 2 ways to control exposure: shutter speed and ISO. And there’s a saying I have to help remember what we’re aiming for:
“Keep the ISO low and the shutter speed slow”.
Now, one big difference between a digital camera and a movie film camera is that a film camera uses a rotating shutter.
Rotating Shutter
In a photo camera the shutter is like a door which flips open and closed for each photo.
In a film camera, however, the rotating shutter is a disc which spins around behind the lens. A portion of the disc is set to allow in the light, as it spins around, and normally this will be set to 180°.
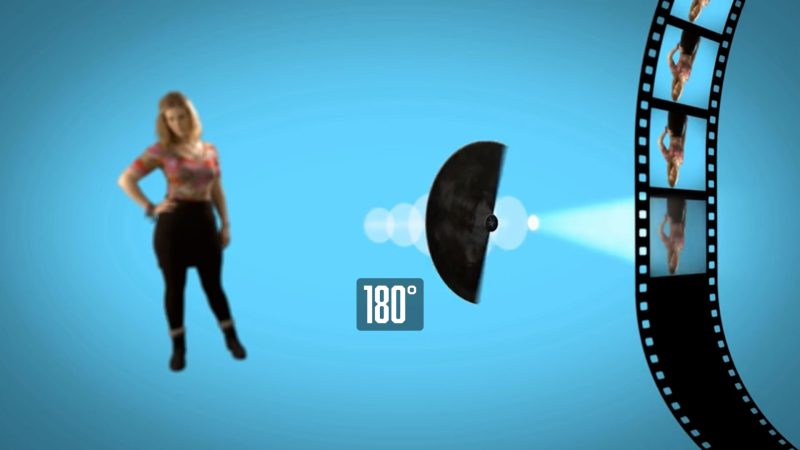
When setting a shutter speed in a film camera, we often refer to it as the shutter angle. And is measured in degrees rather than fractions of a second.
Remember, there’s 360° in a circle, so 180° is half of a circle. A 180° shutter angle therefore means the shutter is open half the time and closed half the time.
With 24 frames of film going through the gate every second, that means there’s a new frame every 1/24th of a second. But a rotating shutter set to 180° will be open for half that time. In other words, 1/48th of a second.
When the shutter speed is at 1/48 there’s a certain amount of motion blur. This blur makes video look smoother, as well as making it look more like film. That’s because film is nearly always shot using this combination of 24fps and 1/48 shutter speed.
However, I recommend you don’t get too obsessed with sticking to the 1/48 shutter speed. Shutter speed can be set to 1/50 or 1/60 and will give us an almost identical amount of motion blur.
Setting Shutter Speed
To make sure your shutter speed stays at 1/48, you can set it and lock it.
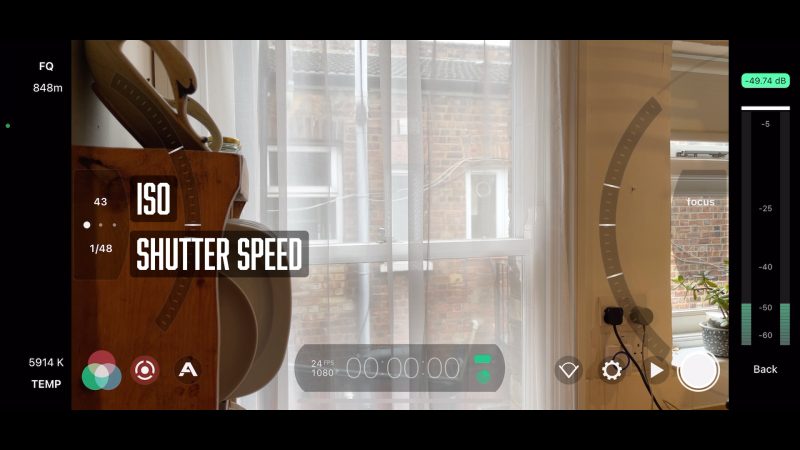
- Open up the manual controls by tapping this button here – like a circle inside a broken circle. Now you have shutter speed on the left at the bottom and ISO left at the top.
- Drag that wheel up and down until shutter speed says 1/48.
- Tap it to lock it and it turns red.
- Now, when you drag the wheel up and down it only changes the ISO setting.
Therefore, the only way you can now adjust exposure is by changing the ISO. But what do we do if it’s too bright and we can’t lower ISO any further? Then our only option is to reduce the light hitting the sensor. And for that task, one popular option is to use an ND filter.
ND Filter
An ND filter blocks some of the light, like putting sunglasses on your camera. This allows you to reduce the light hitting the sensor without pushing shutter speed too high.
This kit by Sandmarc comes with 3 strengths of ND filter and a PL (or polarising) filter attached. We need to choose one which will reduce the light, but not so much that I need to boost the ISO when setting exposure.
Filmmakers use ND filters to achieve slower shutter speeds. They also come in different strengths. For example, an ND8 allows through 1/8th of the light.
Sharpening & Noise Reduction
Smartphones use a high level of digital sharpening, which makes the video they produce look less like film. Generally speaking, film has a softer look.
Film is made of celluloid and chemical crystals and is exposed in a mechanical device, where light can leak and bounce around (especially with older cameras). For that reason, it simply doesn’t have the razor sharp image quality created using digital sensors.
In FiLMiC Pro, we can switch off digital sharpening. Currently, this is only possible using Android devices (and possibly not all android devices either). If you have an iPhone, I will show you how to fix this sharpness problem later.
In the settings screen, tap Device and scroll to the bottom of the list. There (in Android devices) you will find 2 settings, for Noise Reduction and Sharpness.
Just disable sharpness here
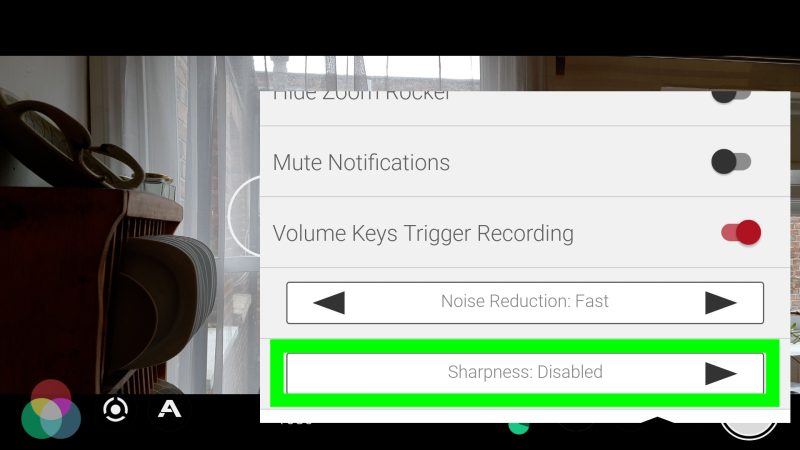
Personally, I have noise reduction on fast. Some people prefer to switch this off and use noise reduction in their editing software. But I find my Samsung devices have good noise reduction capabilities.
If you set noise reduction to High Quality, the camera will sacrifice processor power to make sure noise reduction is applied. Then, if your camera processor finds itself struggling to cope, the quality of your video will be sacrificed to maintain noise reduction. Therefore, either switch this off or set it to fast.
One thing we might want to look at is the aspect ratio.
Aspect Ratio
Like I say, we shouldn’t confuse the “film look” with something being cinematic. Having a wide screen ratio isn’t really a quality of film, but we do associate it with cinema and making things look cinematic.
The standard aspect ratio is 16×9. That’s the default.
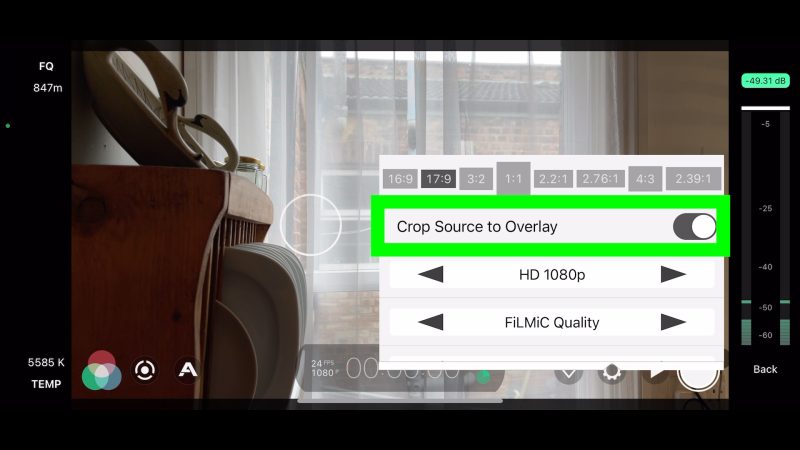
In FiLMiC Pro, tap the cog icon to open up the settings menu. Tap Resolution and now you can choose a wider aspect ratio. If you toggle on Crop Source to Overlay, then FiLMiC Pro will output your video at that ratio.
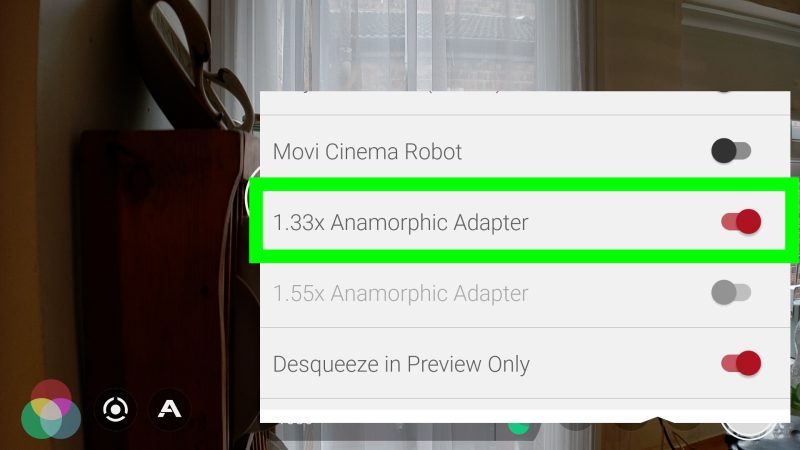
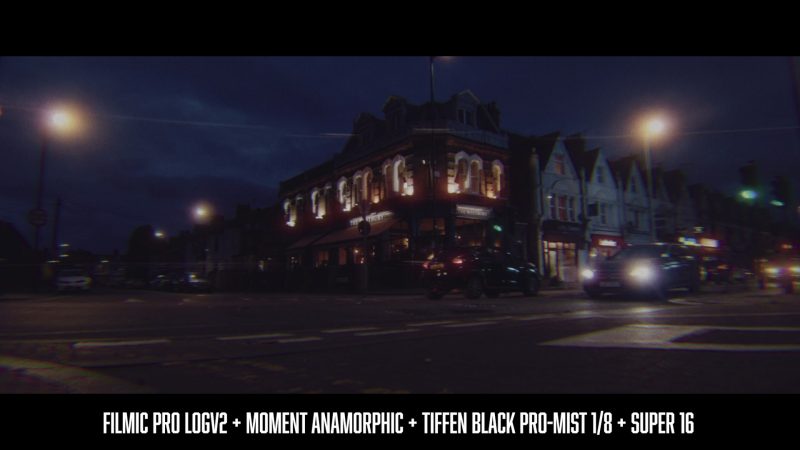
Instead of using a simple crop, I’m going to use my Moment Gold Flare anamorphic. Then use FiLMiC Pro to desqueeze (but only for monitoring as Super 16 will crop any non-16×9 footage). In hardware, I’ll toggle on “1.33x anamorphic adapter”.
Again, the anamorphic lens has nothing to do with film. However, it does add some character to the image such as lens flare, chromatic aberrations and distortions. Basically, it helps to ruff up that clean digital image.
Other Settings
I have my resolution set to 4K and my bitrate to Filmic Extreme. That’s going to give me high quality video files to work with.
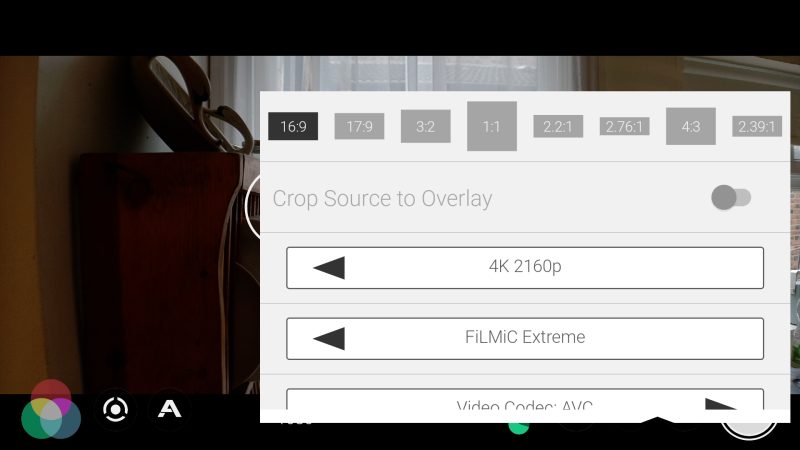
I’m also going to use the 8-bit LogV2. This will produce a flatter image – less contrast, less saturation. In FiLMiC Pro, to get Log and Flat profiles is an extra in-app purchase.
OK. Now I want to tell you about this great film look app called Super 16.
Super 16
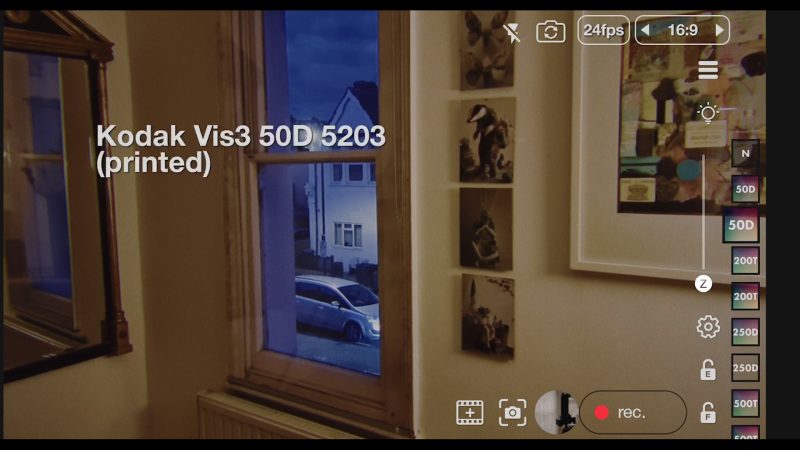
Super 16 is an app that lets you apply film look effects to videos and photos. Within the app there are preset looks which emulate the appearance of certain film stocks.
For example, the first preset is Kodak Vis3 50D 5203. The Vis is short for Vision. This is a real film stock still supplied by Kodak but is actually a 35mm film stock which, by the way, would cost you over $300 for a 400ft roll, which is roughly 3.5 minutes worth.
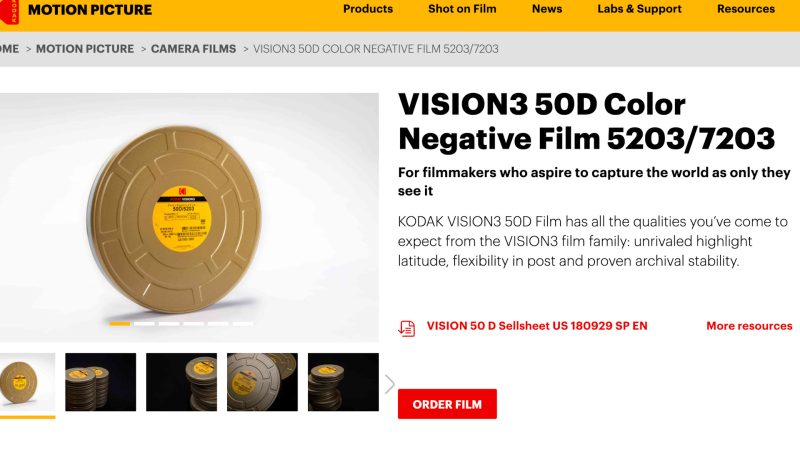
The 16mm version of this stock is the 7203, which is around $200 per 400ft.
When using Super 16, you will notice there are 2 versions of each preset. A raw version and a printed version. I’m guessing that the first version mimics the look of film after filming and processing. Whereas the 2nd version represents what happens when, further down the line, you add the process of creating a final print for distribution.
The Super 16 app is like a stripped down version of Dehancer, except for £5 a year. Dehancer is an awesome tool for creating the film look, but it’s not cheap – like $400.
Choosing a Film Stock
Now, whether these Super 16 emulations are close to what the actual stock looks like, I’m not enough of an expert to tell you. But I really like the look these filters add.
To choose a filter just swipe up and down. After the film stocks, you’ll find loads of preset colour grades. For this video, I’m just using the film stock presets.
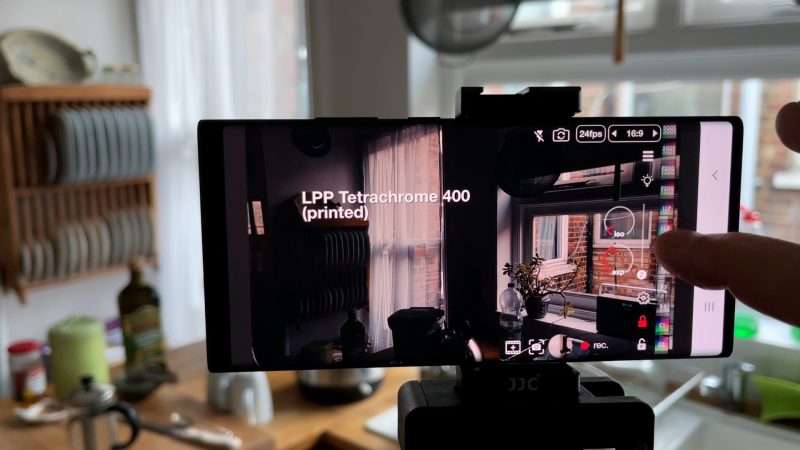
When the Super 16 app first came out you could only use it as a camera app with filters. But you can now bring in photos and videos from your gallery. This means we can shoot using FiLMiC Pro (or another app) to get better control (and to shoot Log if we want) and then bring clips into Super 16.
So I think this makes this a great companion app to use with our camera apps. But how much does it cost?
Super 16 Cost
Super 16 is available for free and is actually pretty good. But if you want the full feature list, then it’s about £5 a year, which is affordable compared to some others I’ve looked at (especially on iOS). I’ve purchased it for a year, so I can show you around the app properly.
The app is also a camera app, so you can shoot videos directly in the app. However, there’s a 1080p maximum resolution and limited exposure controls, so you’re probably better off shooting with another app in 4K and then importing those files. Those files can then be exported from the app at 4K as well.
Another reason to use a different app to film with is that you get to keep the ungraded version of the file. If you shoot using the app, you won’t be able to change the look of it later. That said, it’s obviously much quicker to shoot using the app.
Let’s take a look at the settings.
Super 16 Settings
At the top of the Super 16 screen, you’ll notice it’s set to 24fps and 16×9 by default. You can change the frame rate, if you wish, depending on your device.
You can set the camera to a 4×3 ratio or use one of these effects. I mean it looks like the projector is broken and is showing the edges of the film. But it might be useful as a transition or other other kind of novelty use.
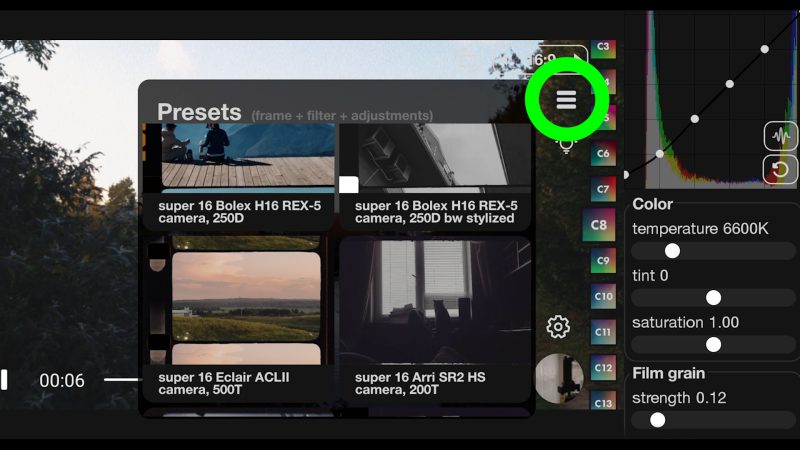
Tap the menu icon to get a bunch of presets. You can also save your own preset here.
When shooting film, light can leak into the camera when it’s not supposed to. Or you can accidently expose the film to light while you are changing the roll. Or maybe there’s a hole in the film can.
If this happens, you might get what’s known as a film burn.
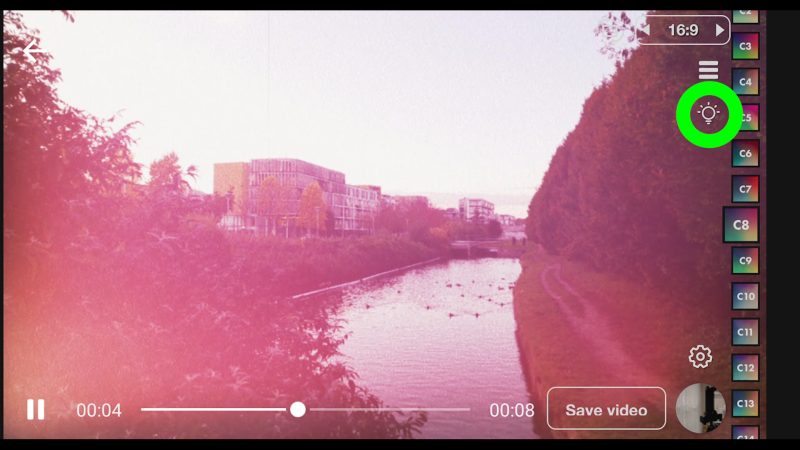
Film Burn
If you tap the light bulb button, you create a film burn. You have to do this live, as there’s no way to program it in. So if you’re filming a shot and want a film burn, tap the button at the moment you want it to appear.
I don’t think I would use this too much. Again, it might be quite nice to use during a transition or at the end of take.
Tap the middle of the screen to open up more options to customise the look. Let’s scroll down a bit to film grain.
Film Grain
As I said at the start, grain is one of the qualities of film that video doesn’t have. There’s actually some similarities with ISO and grain. Whereas with digital cameras we can set ISO, film stocks are made with a set ISO.
When it comes to film, the ISO number of the film refers to how sensitive it is to light. If you wanted to shoot in a low light situation, you might use film stock with a high ISO. But high ISO film stock tends to have more observable and bigger grain.
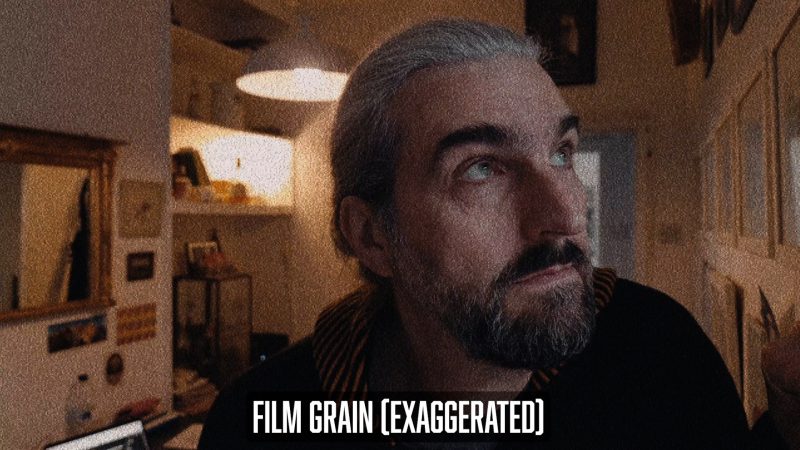
So, it’s kinda similar to when we push up ISO in our digital camera and get lots of noise. Difference is, grain probably looks nicer than digital noise. It just looks more organic.
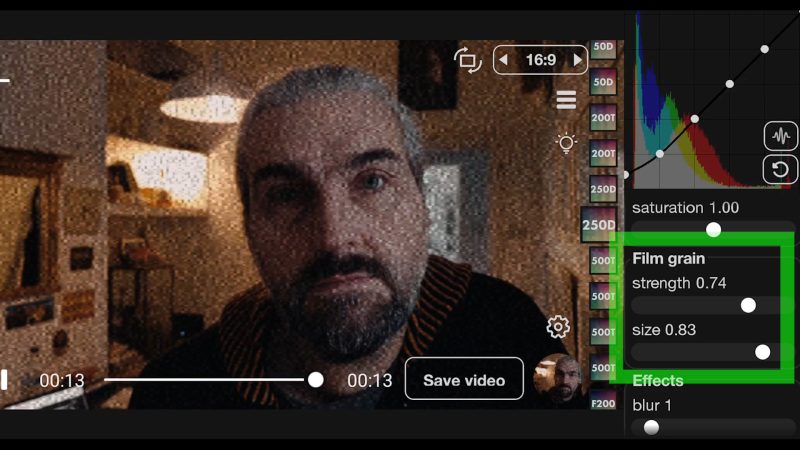
Here, we can adjust the strength and the size of the film grain. I think it’s a good idea to keep this effect subtle. That said, the bigger the film the smaller the grain size. So if you want to emulate 8mm film you would want a bigger grain size. 16mm has smaller grain than 8mm and 35mm has smaller grain than 16mm.
But let’s look at other ways to add film grain.
Film Grain via VideoLUT
If you are using an iPhone, there’s a great affordable alternative app for adding film grain called VideoLUT. Import your file, use this drop down menu and select Adjust.
Swipe to a setting called Noise. There’s 3 settings: Denoise Strength, Grain and Grain Size.
If you want to remove digital noise, you can try the top setting.
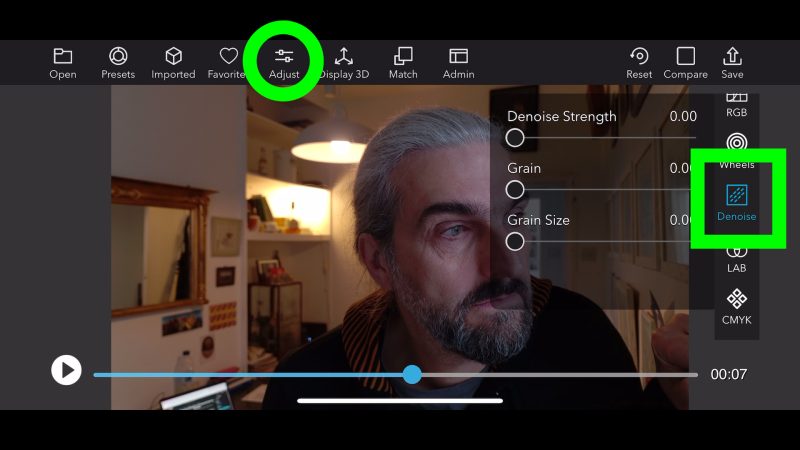
But if you want to add film grain, use these 2 sliders. Remember, the size of grain generally relates to the size of film you want to emulate. Big for 8mm, medium for 16mm and small for 36mm. Or even smaller for 70mm.
Film Grain via an Overlay
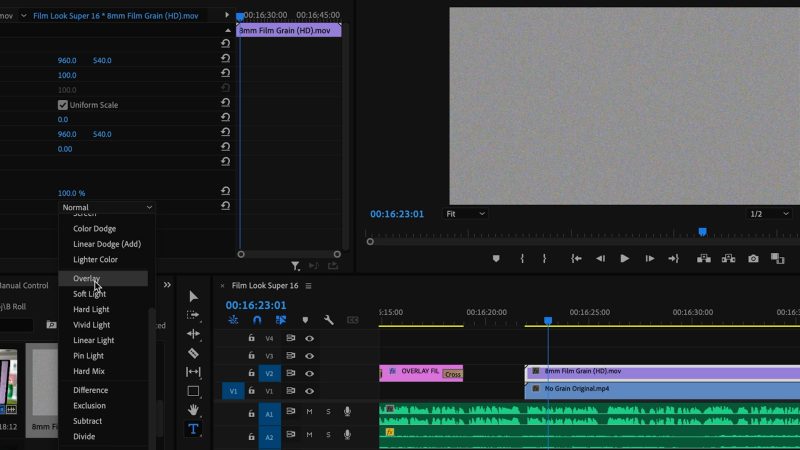
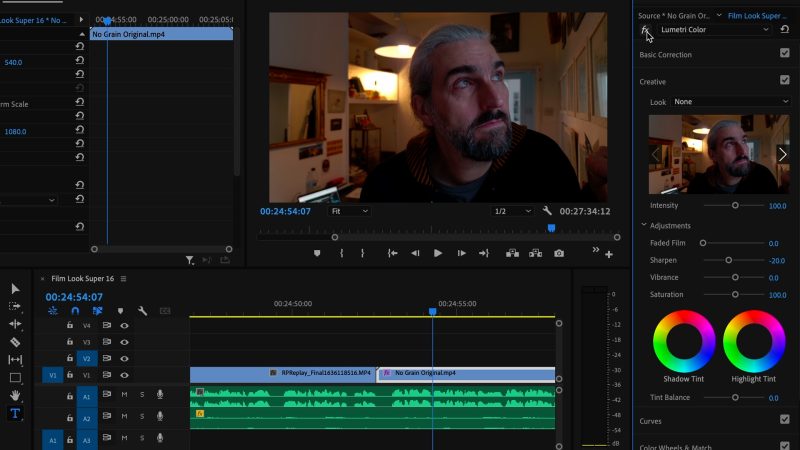
Another way to add film grain is to use an overlay layer in your editing software. You can find these film grain overlays online. I downloaded this one for free, which is an 8mm film grain. I don’t actually remember where I got it from.
It’s a video and if I play it you can see it looks like old TV static from analog times. The grain is moving around. In Adobe Premiere, I place it on the timeline above the clip I want to add grain to. Now I switch the blend mode to overlay and adjust the opacity which controls the amount of grain.
We can add this in most editing programs, including editing apps like LumaFusion. Then you would need to copy the file multiple times so it covers all the clips you intend to have the film look.
So that’s a couple of alternative ways to add film grain. Back to the Super 16 app and next up is blur.
Blur
Blur is simply a small amount of softness applied to the video. If we can’t remove sharpness when filming, then we can use blur here. Again, I would keep this effect subtle.
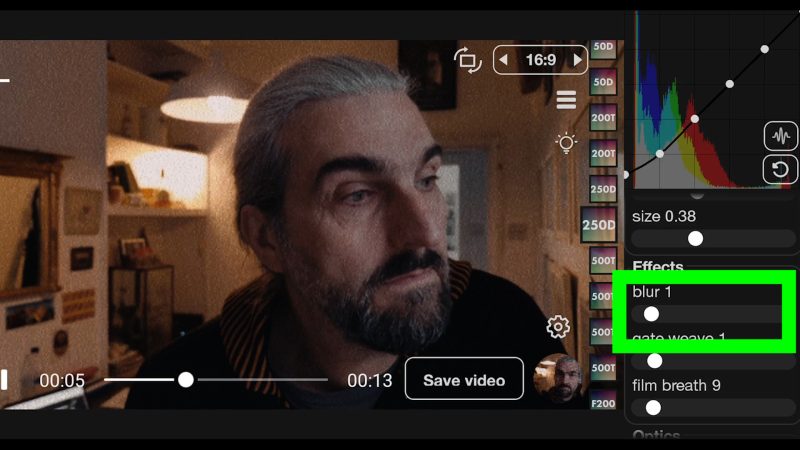
Next up is gate weave.
Gate Weave
Gate weave is when the film shifts position as it’s pulled through a frame window in a film camera or projector. By default this is set to 3, which is why the image is juddering around the frame a little.
If I put it up to 10, you can see the effect more clearly.
Now, this is really an effect for making your video look like an old film. However, even a new film might experience a very subtle amount of weave. Personally, I usually switch this to 0 which is off or just have it at 1.
Next is film breath.
Film Breath
Film breath refers to an accidental change in exposure, contrast and colour from frame to frame as the film moves. This is caused by uneven emulsion coating, the instability of the camera shutter, or maybe film development issues.
Again, this is more obvious in older films or films shot with lower budget film cameras.
Modern 35mm and 70mm films shot on top grade cameras, developed and scanned in a professional lab shouldn’t show film breath.
This effect is again to emulate older films or indie films shot on limited budgets. What we might consider to be lower quality can add character. Just like people grew to love the character of polaroid photos or 8mm film.
Next we have 2 settings under the heading of optics. First is chromatic.
Chromatic
Using the chromatic setting we can add chromatic aberrations. An aberration usually refers to a flaw. When we talk about chromatic aberrations, we are talking about a failure of a camera lens to focus all colors to the same point.
When this happens, there’s what looks like a slight shadowing or messiness to the image. Because the blue is positioned slightly differently to the red and green, for example.
If I push this up to maximum, you can see it’s like we’re looking through a really cheap lens we bought off AliExpress for about $0.53.

So this isn’t really a look of film, it’s more to do with the lens. Again, keep this effect to a minimum. The anamorphic lens I’m using will likely add some as well.
Then there’s Vignette.
Vignette
Vignette creates a slight shadow around the edges of the frame. This is something we often add when grading. It just makes the frame less harsh as well as focusing the audience’s eyes to the centre of the frame. This might occur in a film camera when using a small aperture.
The next bunch of settings allow us to add film look defects.
Defects
The defects here are scratches in the film. So, agan, this is something to be used to age the look of the film.
Over the lifetime of a film print, after it is passed through a projector over and over again, they often develop these long vertical scratches. They’re vertical because that is the way the film is passing through the projector and maybe they caught something on their way.
You can also adjust intensity, which just refers to how observable these scratches are.
If you set the vertical scratch to zero, you still get other marks and scratches. More like holes, particles of dust and so on.
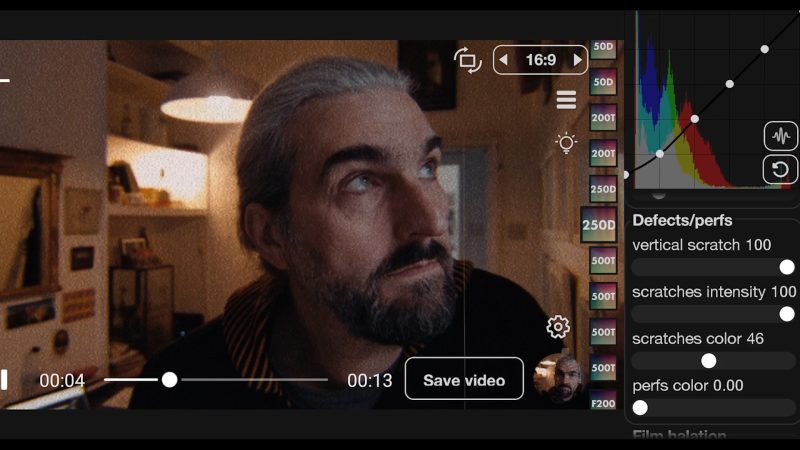
Scratches colour goes from black if you set it to 0 to white, if you set it to 100, with shades of grey in between.
When we talk about perf we are referring to the perforations per frame of video. Perforations are those holes at the side of film which is used to pull it through the camera and projector.
One thing that’s a bit annoying is you can’t turn these defects off completely. Even when you turn intensity down to 0, there are still some marks popping up now and then. Hopefully they will change this, because this is really an effect to age the look of the film.
I reached out to the developer of the app and they told me that this will be fixed in the next update. So we will be able to remove the defects completely, which is good news.
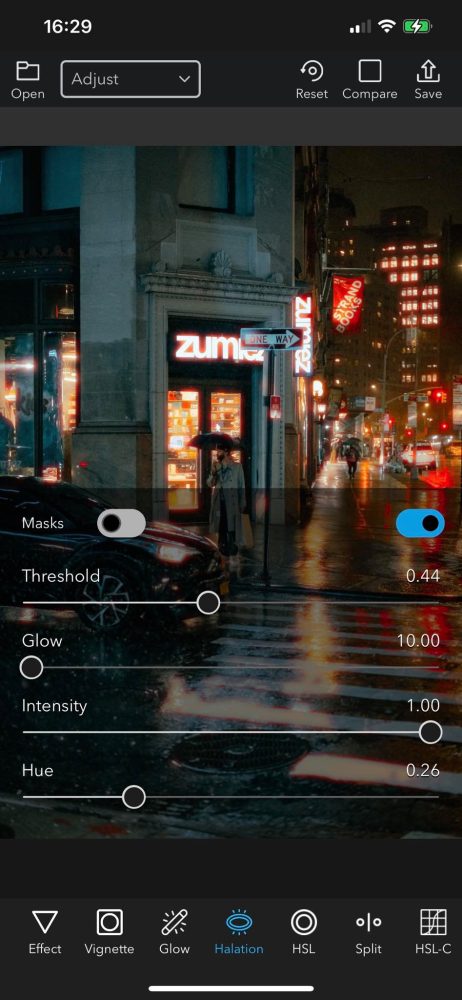
So below this we have another really cool effect which is halation.
Film halation
Film halation is like a glowing effect around the brightest areas of the image. If we’re filming with lights in the frame, halation creates a red / orange glow around the lights.
Film normally contains an anti-halation layer which acts to prevent this effect occurring. It happens when light passes through the film, bounces off reflective surfaces within the camera and hits the film again from the back.
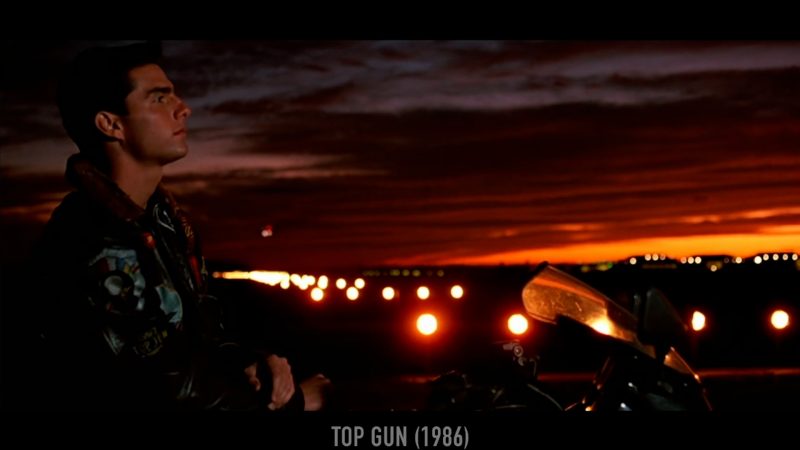
Because film is made up of 3 colour layers with red at the back, this reflecting light hits the red layer first, causing the red halation.
Radius adjust the size of this glow while intensity adjusts how strong the colour is.
So this effect starts in the whites and spreads into the greys, depending on the cut off setting. If we reduce the cut off setting, the effect pushes further into the midtones of the image.
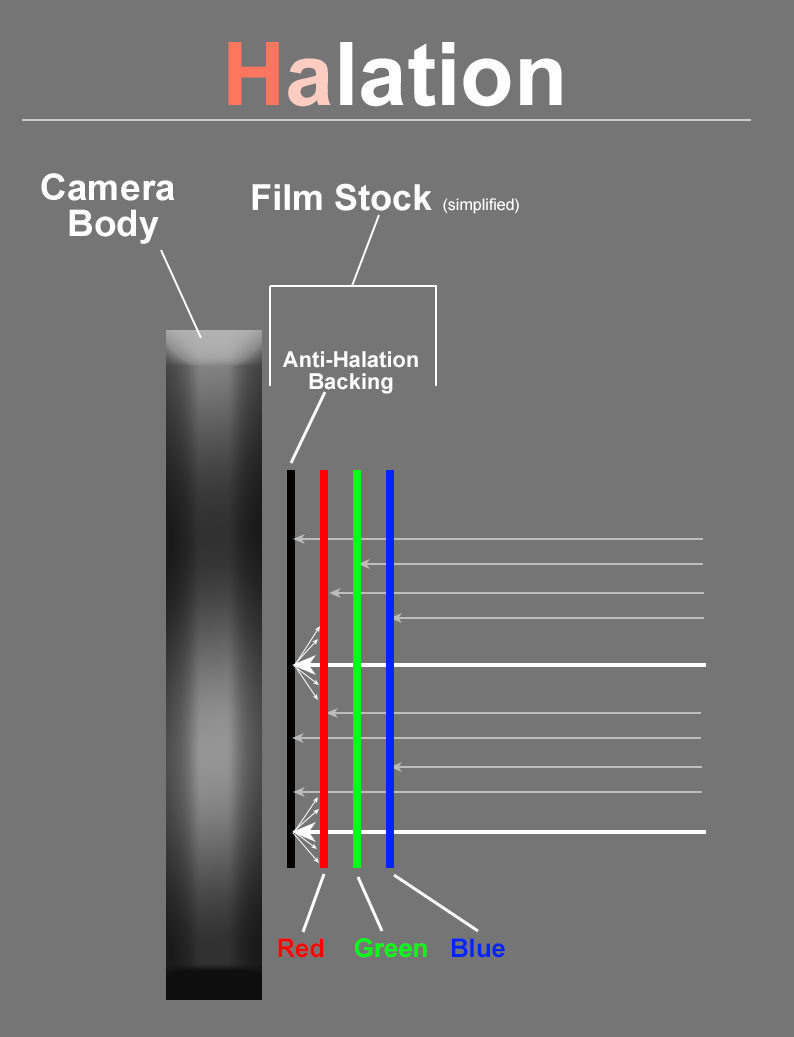
You can also add an extra amount of green and or blue to adjust the colour of the halation.
Too much of these halos around light sources and over-exposed image areas are seen as a flaw. However, small subtle halos are often seen as a desirable aesthetic when shooting on film.

If we go back to the top of the settings, there’s some extra options here.
UPDATE: the VideoLUT app for iPhone now has a FILM HALATION setting included!
Extra Options
First we have a histogram which is also a place to adjust the luma curve.
Drag these white dots up and down to adjust the look some more. If there’s too much contrast in the image, push up these middle dots. If there’s not enough, pull them down. It’s generally best to try to keep this black line in a smooth curve.
Below that are basic white balance settings. If the colour looks off you can adjust the temperature and tint. You can also increase or decrease colour saturation.
So those are very basic colour adjustment tools, but useful to have.
iPhone Option
I hunted around for a similar iPhone app, but there’s really nothing which allows you to import video clips and add authentic film stock looks, as well as adjust each one to your needs.
DaVinci Resolve has a free version and I’m guessing the Dehancer plugin will work with it. But that’s quite an investment. There’s another plugin for Resolve called Filmbox, but that’s a $1000 purchase.
I did ask the developer, who told me an iOS version is in the works but gave no indication of how long we might have to wait.
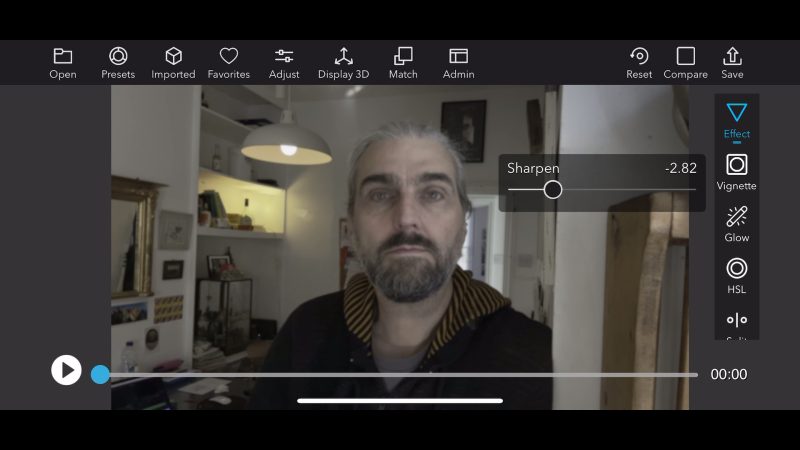
Fixing iPhone Sharpness
A simple way to reduce this extra sharpness we get from smartphones is to use a tiny amount of blur. In Adobe Premiere Pro, you can adjust sharpness to a negative value, for example. Or you could add a blur effect and turn it right down.
Another option is to use this great grading app for iOS called VideoLUT.
VideoLUT app
Compared to some of the apps for iPhone, this one is very good value and is a great app in its own right. I spoke to the developer and asked them to add a de-sharpening option and they did it.
This app even has presets for FiLMiC Pro LogV2 and LogV3 and Flat profiles.
Plus, as we talked about before, you can denoise your video and add film grain with this app.
Making Video look like Film
So all the features in FiLMiC Pro and Super 16 I’ve gone through here give you an understanding of the subtle differences that make film look different to video. Dehancer has even more features as well.
Many of the looks from Super 16 can be achieved in different ways. For example, there are LUTs available to mimic film stock, but they only change the tone and colour. We could use a glow effect to mimic halation, which we can apply in editing software like Final Cut Pro, Premiere and DaVinci Resolve.
We could use a diffusion filter, which adds some similar properties to film as well. Or rather the look of older lenses with less anti-reflective coating, which can result in a more misty image.
Remember, there’s no one film look. But there are lots of characteristics of film that are usually missing in video. Which of these characteristics we want to add is a creative choice that comes from the story you want to tell.
If we wanted to show a scene from the past, we might use big grain, lots of scratches, gate weave, and so on to make the video look like an old 8mm film that’s worn out over the decades. The look then becomes a quick way to tell the audience this scene happened a long time ago.
The most important thing is to play around and have fun with it. And hopefully this video has given you some ideas to try out.
Smartphone Videography – Beginner to Advanced
NEW: EXPLORING the FILM LOOK companion guide to download.
If you want to know more about smartphone filmmaking, my book Smartphone Videography – Beginners to Advanced is now available to download for my members on Patreon. The book is 170 pages long and covers essential smartphone filmmaking topics:
Things like how to get the perfect exposure, when to use manual control, which codecs to use, HDR, how to use frame rates, lenses, shot types, stabilisation and much more.
Members can also access all 5 episodes of our smartphone shot Silent Eye series, with accompanying screenplays and making of podcasts. There’s other materials too and I will be adding more in the future.
If you want to join me there, follow this link.