How to Get Shallow Depth of Field Bokeh with a Smartphone
In this video, I’ll show you how to get a shallow depth of field using your smartphone camera. In photography and cinematography, a shallow depth of field is great for separating the subject from the background. You can also make your images more dreamy looking with background Bokeh, especially with lights behind the subject.
It’s not as easy to achieve as with a DSLR or dedicated camera. But it can be done, so let’s find out how…
Smartphone Camera Limits
Every tool and every camera has its plus and minus points. A DSLR can have a bigger sensor and the possibility of a greater range of high quality lenses. But a smartphone is an all-purpose device that many of us find indispensable for daily life, it fits in your pocket, so you can snap or shoot away whenever the opportunity arises.
Smartphone cameras are improving year by year. And with increasing sensor size, multiple lens options, powerful AI and HDR software, smartphones are getting closer and closer to matching a DSLR or cheap cinema cameras like Blackmagic.
But there’s one major thing missing: a Bokeh-creating shallow depth of field.
They’ve tried software-driven live focus solutions where the camera tries to mask the subject and blur out everything outside the mask. I’ve spent hours doing this by hand in some of my smartphone films, so I understand how difficult it is.
This software solution isn’t quite there… yet. But it is looking like it will one day be possible to add a Bokeh effect to smartphone video at some point in the near future.
But before we look at software options, let’s look at the simplest way of doing it.
Get Close to the Subject
Smartphones generally have wide lenses, with small sensors which means long focal depth. In other words, pretty much everything is in focus. This is actually really useful for general snapping and video shooting because you don’t have to worry so much about focus.
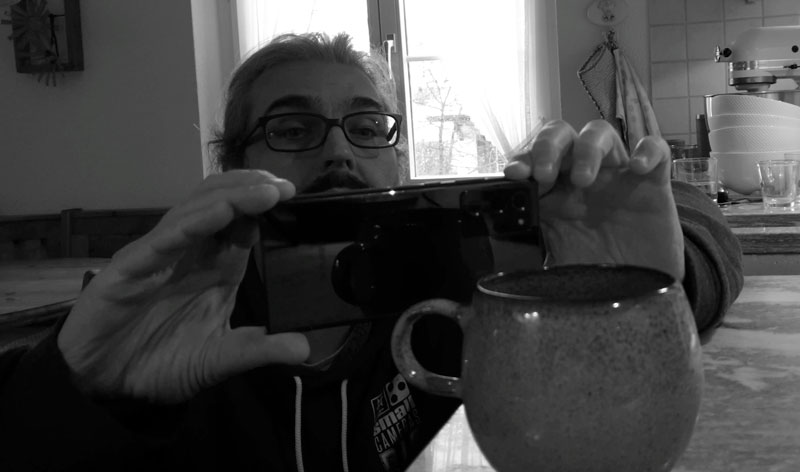
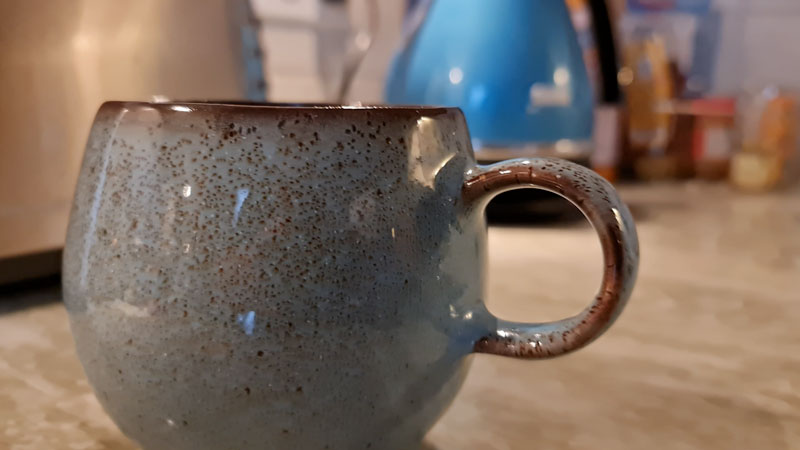
Put simply, the closer the subject is to the camera, the more out of focus the background will be. So, if you put a subject a few centimetres from the lens and focus on it. This can be pretty cool, especially when you’re shooting a cup of coffee, or small details.
However, we often want to film people and people’s faces. But, if we place the camera close enough to a face to get a blurry background, it won’t fit in the frame.
So, while this technique is easy to do, it has limited applications. Having said that, it’s an important thing to understand, as all lenses work like this. The closer the subject, the blurrier the background.
Add a Tele Conversion Lens
The 2nd method for shallow depth of field is to add a telephoto lens. While the effect on depth of field is minimal, it makes some difference.
I have these 2 tele conversion lenses, a Beastgrip x3 tele and this is an Ulanzi x2 65mm. If you have never seen one before, they sit over the lens of your smartphone camera and “convert” it to a different type of lens.
They both narrow the field of view as well as give you a bit of extra background Bokeh. I already made a video about these lenses, so check that out after, if you’re curious.
Use Software
Many smartphones include software for faking a shallow depth of field. On Samsung phones there is Live Focus for still images and Live Focus Video for video. Essentially, what this software does is try to mask around the subject and then put a blur on anything it decides is not the subject.
This is a pretty crude way to add a shallow depth of field look. That said, for still images it is quite effective. Look closely and you’ll spot that it’s fake, but that’s probably fine for social media and other casual uses.
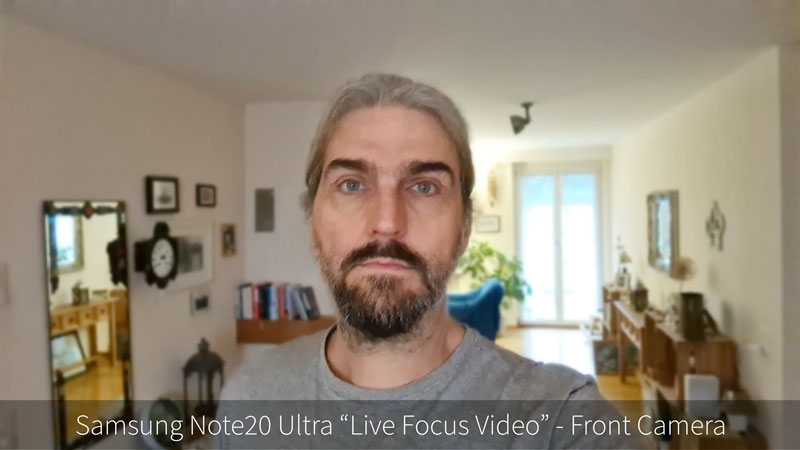
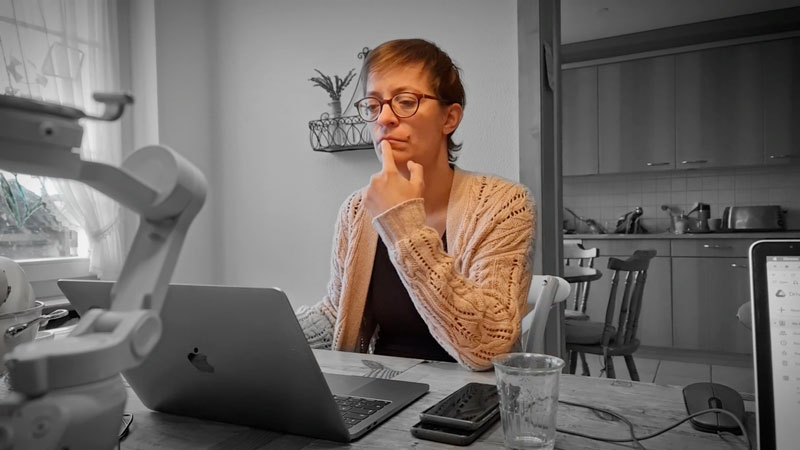
Now, Live Focus Video is improving all the time, but because the subject is moving, it means the software has to keep adjusting the mask. This is Samsung’s Live Focus Video and when we switch it to the black and white background effect, we can see exactly where the mask is.
If you have an iPhone, you might want to look at an app called Focos and Focos Live. This app gives you a more sophisticated fake Bokeh. From what I understand, it uses the phone’s depth sensor, rather than simply drawing a line around the subject.
This means you can even pull focus using this app, which you can’t do with these other fake Bokeh programs. And this can even be done after you have taken a shot. Which, when you think about it, could be a revolution for cinematography in the future.
Use a DoF Adapter
If you really want that dreamy shallow depth of field in your smartphone videos, one way to do this is to add an actual DSLR lens to your smartphone.
You’ll need what’s known as a DoF (or depth of field) adapter.
Adapters like this were actually invented many years ago, to be used with prosumer digital video recorders. This is because while these cameras were very affordable, and shot great quality video for the time, you could not add your own lens.
British director Gareth Edwards works in Hollywood now, shooting blockbusters like Star Wars and Godzilla. But he started out shooting with a prosumer Sony EX3, which could only shoot up to HD. For that cinematic shallow depth of field, he used an adapter to add 35mm lenses.
A couple of companies have made adapters for smartphones – Beastgrip and Ulanzi. While the Beastgrip has an RRP of about $270 the Ulanzi sells for about $150.
How does a DoF Adapter work?
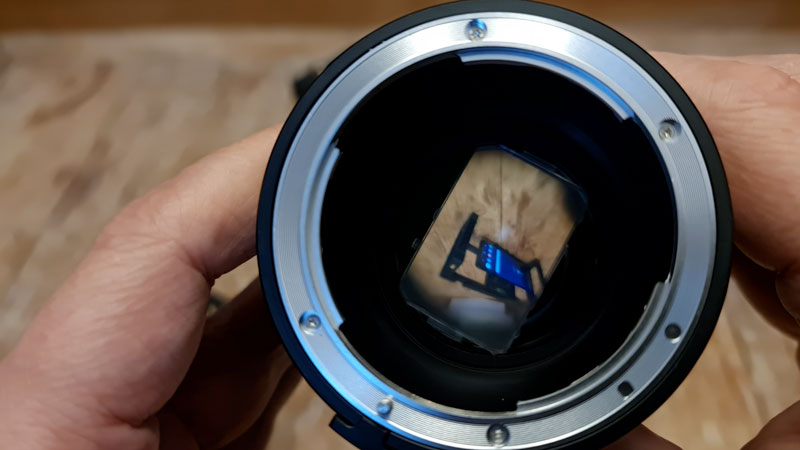
They’re actually quite simple. Inside, is a piece of frosted glass. When you mount a DSLR lens to one side, it places the image on this glass – known as the “focusing screen”. Then your smartphone camera needs to focus on this focusing screen and take the image from there.
So it’s important that your smartphone lens can maintain focus at such a short distance. I know, for example, the Beastgrip DoF MKII is not compatible with the new iPhone 12 Pro Max as it cannot focus so close.
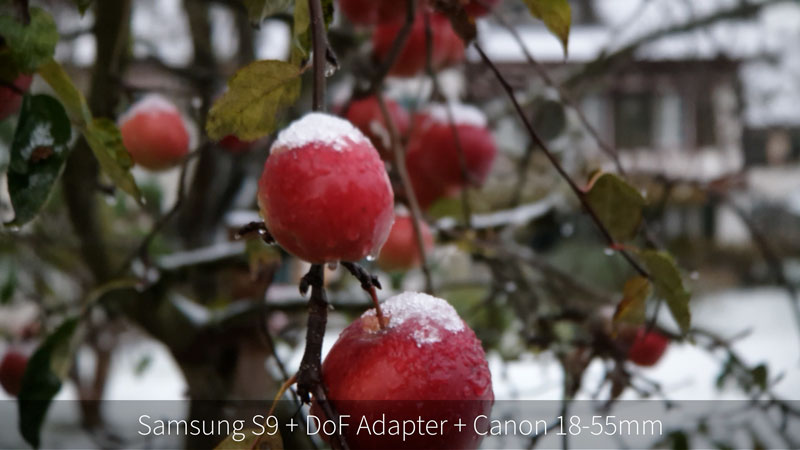
When I use my Samsung S9, I have to set focus to the shortest possible distance, which is concerning. Because I’m worried that the glass is too close and it’s giving me a slightly soft image.
How to Use a Ulanzi 2020 DoF Adapter
First thing you need is some way of mounting this to your smartphone. The adapter has a 17mm thread, so any cage with a 17mm thread should do it. Here, I’m using my Zecti cage.
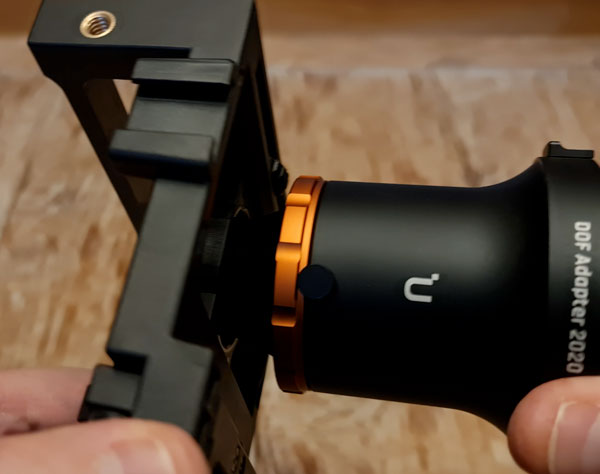
You need to make sure the adapter sits over the smartphone camera with the lens right in the middle to avoid vignetting and aberrations.
There’s also this screw on the top. So the barrel of the adapter can rotate, if you loosen this screw. Because we want that glass to be perfectly level inside here and we can adjust that and then tighten the screw so it doesn’t move.
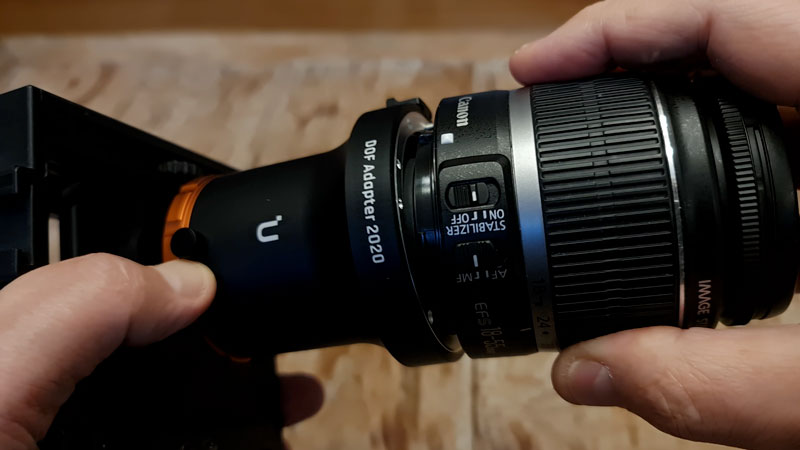
The final step is to add a DSLR lens. While the previous version of this Ulanzi was designed for Sony E mount lenses, this one is designed for Canon EF mount lenses. But you can use an extra adapter for different lenses.
Ulanzi recommends using a fast, full frame lens with manual focus. You will not be able to use autofocus with this adapter.
Add a 3rd Party Camera App
Now, when you’re all set up you will see that the image is now upside down. And using it this way is really hard, although you can probably get used to it with practice.
However, if you use an app like FiLMiC Pro, McPro24fps, even a free app like Open Camera or HedgeCam2, there’s a setting to flip the image. So, now you can use it as normal.
Loss of Light
When you add all this stuff in front of your smartphone camera it’s going to reduce the amount of light going in. When you’re shooting outside in daylight, this is probably a good thing as you might not need a ND filter.
But if you are shooting in low light situations, then this could be a big problem. Smartphones already struggle in low light due to their small sensors. Filming at night might not be possible or you will need to bring extra lighting power to your shoot.
There may also be imperfections in the focus screen which can show up in the video. I don’t mind that too much. It adds character. But if you love your video looking clean and perfect, this might not be for you.
With this setup, the image is looking a little bit soft. Plus there are some distortions around the outside.
Smartphone Video – Beginner to Advanced
If you want to know more about smartphone filmmaking, my book Smartphone Videography – Beginners to Advanced is now available to download for members on Patreon. The book is 170 pages long and covers essential smartphone filmmaking topics:
Things like how to get the perfect exposure, when to use manual control, which codecs to use, HDR, how to use frame rates, lenses, shot types, stabilisation and much more. There’s also my Exploring the Film Look Guide as well as Smartphone Colour Grading.
Members can also access all 5 episodes of our smartphone shot Silent Eye series, with accompanying screenplays and making of podcasts. There’s other materials too and I will be adding more in the future.
If you want to join me there, follow this link.
