Insta360 ONE RS – 1-inch 360 Edition vs X3 vs ONE RS – Review & Tutorial
In this article you will learn everything you need to know about the Insta360 ONE RS 1-inch 360 edition. And that’s a pretty long name for a camera. You might be a little confused, as I was when I first heard about this camera, because Insta360 makes a camera called the ONE RS as well as the ONE RS 1-inch 360 Edition.
There are 3 rival 360 cameras by Insta360: ONE RS, the Insta360 X3 and the ONE RS 1-inch 360 Edition. Which one is right for you?
What’s the difference between ONE RS and 1-inch 360 Edition?
Insta360’s One RS is an action camera that has swappable modules. It pretty much looks like a regular action camera and it comes with different modules including a 5.7K 360 camera option.
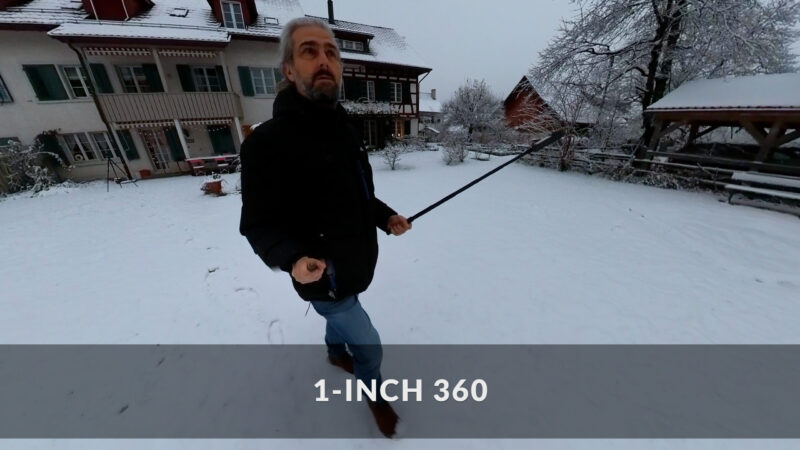
The ONE RS 1-inch 360 Edition is like the premium version which features dual 1 Inch sensors and 6K resolution video. The lenses are co-engineered with Leica.
One big difference is that the 1-inch 360 is designed to be used with the invisible selfie stick, while the original ONE RS is more of a regular action camera but can also be used as a 360 camera. So the ONE RS is more versatile.
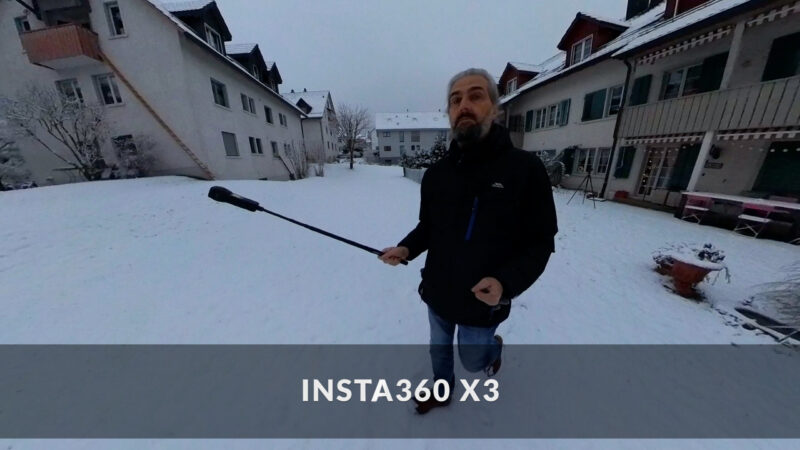
The 1-inch 360 Edition is more comparable to the other Insta360 cameras. Like the X range – the latest version is this: the Insta360 X3.
Insta360 X3 vs ONE RS 1-inch 360 Edition
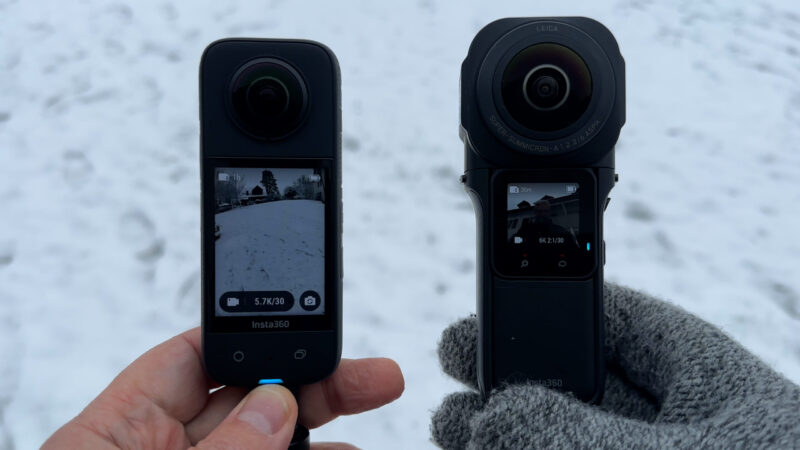
While the Insta360 X3 uses two 1/2” sensors the ONE RS 1-inch 360 Edition uses two 1-inch sensors.
The 1-inch 360 is quite a bit bigger than the Insta360 X3. Essentially, they work in a similar way – mount them to an invisible selfie stick and walk around or use mini tripod legs and have them standing in a fixed position.
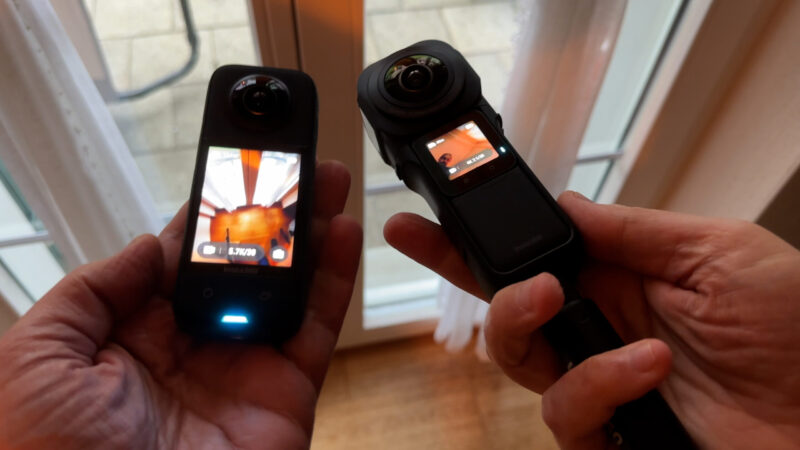
The Insta360 X3 is more portable and it can be used under water. As well, the X3 can shoot up to 120fps at 4K resolution, while the 1-inch 360 can only go up to 50fps and then only at 3K resolution. If better image quality is your top priority, then the 1-inch 360 Edition is the one to go for.
The 1-inch 360 Edition gives you a greater dynamic range, which means if you’re filming indoors windows are less likely to blow out. When you’re filming outside in the daylight you should get a more even image, tonally. If you have a low dynamic range camera sensor, you might find you either have to choose between a dark landscape or a blown out sky.
As well, in low light conditions the bigger sensor is more sensitive and therefore you should get good nighttime images without tons of digital noise appearing.
X3 vs 1-inch 360 Edition for Photos
While the Insta360 X3 can shoot 360 photos up to 72MP, the 1-inch 360 Edition is limited to 21MP but with the addition of PureShot HDR, which adds extra dynamic range.
Another difference is that the Insta360 X3 has single camera mode, which means you can capture images using only 1 camera, which saves memory and allows your X3 to act more like a traditional action camera. Meanwhile, the 1-inch 360 Edition only captures media with both cameras.
The Insta360 X3 also has fun features like Me Mode (up to 4K 60fps) and Bullet Time (4K 120fps slow motion) and generally more social media type options where image quality isn’t top priority.
Read my full review and tutorial of the Insta360 X3.
1-inch 360 Edition First Impression
Although it is a bit bigger and a bit heavier than the Insta360 X3, I didn’t find it made any difference to the filming experience. In fact, having a slightly heavier camera can make it easier to keep the camera steady. That extra weight counterbalances your muscles to make movements smoother.
As you can see it was cold. In fact it was -6 degrees. If you live in Canada or something you will probably think that’s no big deal, but as a softy Englishman I’m not used to that kind of temperature. At first, I kept taking my gloves off to switch on the camera and start recording, but then I realised I could keep my gloves on.
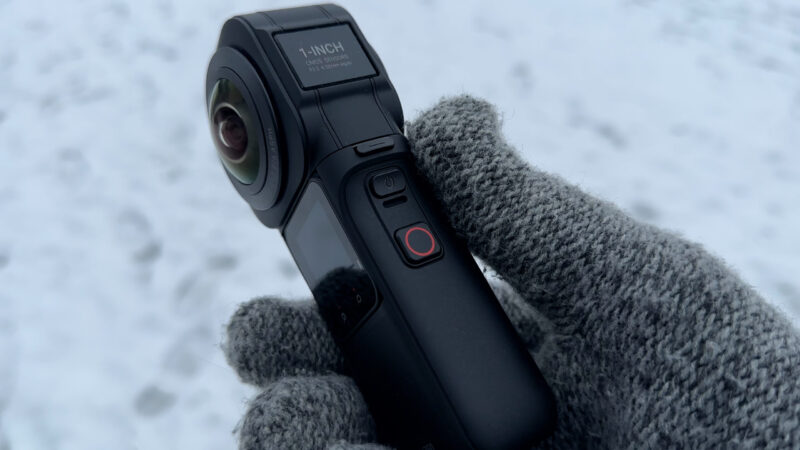
I really like the way this is designed. The power on button is at an angle in the corner, which makes it easy to find and use. Even with these big woolly gloves on. As well, I was able to press the record button no problem. So that made this a really nice filming experience.
On the downside, I missed the big touchscreen on the Insta360 X3.
The 1-inch 360 is back to something similar to the Insta360 X2’s touchscreen, so it’s more fiddly. I do find these buttons and functions sometimes difficult with my big fingers. Sometimes it takes a couple of taps. And you can forget using it with gloves on.
For that reason, you’re probably better off connecting to the app and changing settings using the app, which is a bit less fiddly.
How do 360 Cameras Work?
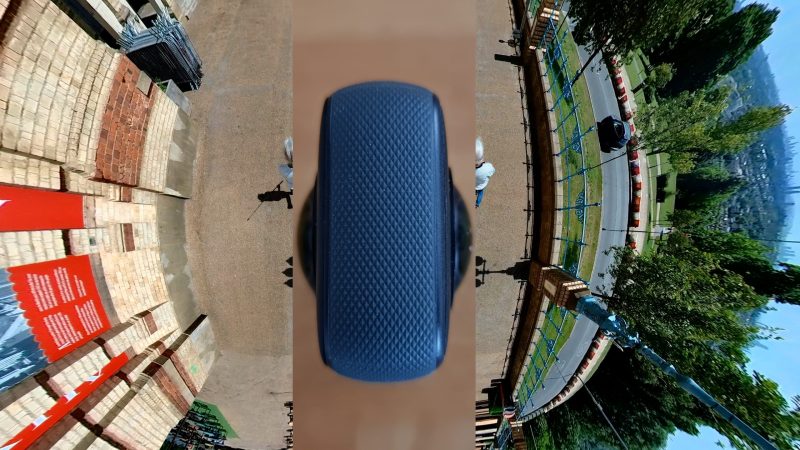
These 360 cameras work by using 2 cameras, each with a 180 degree view. The 2 videos are then stitched together along a “stitch line” – the line of the side of the camera. Anything that sticks out from the side will become invisible, as long as it’s thin enough so that it doesn’t overstep the stitching line.
This allows you to add the famous invisible selfie stick as well as a microphone and it won’t appear in the shot.
What are 360 Cameras for?
360 cameras capture photos and videos of the full 360 degree view and there’s 2 ways you can use them. One is to capture 360 degree media which can then be viewed later using smartphones, VR headsets or on a computer.
The second use is to capture 360 degree media for the purposes of reframing it using the Insta360 app or Insta360 Studio, or there are even plugins so you can reframe 360 video in your regular editing platforms like Adobe Premiere Pro.
This means you can easily animate smooth camera movements during the post production process. And this is the big advantage of the 360 cameras. You can’t do this with any other camera.
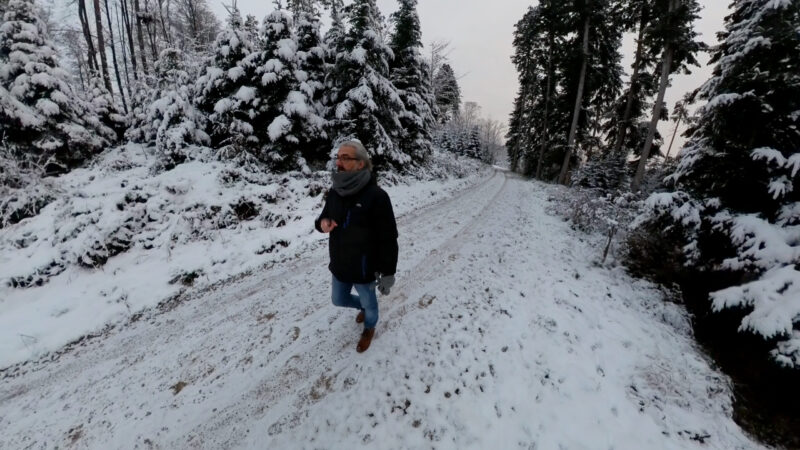
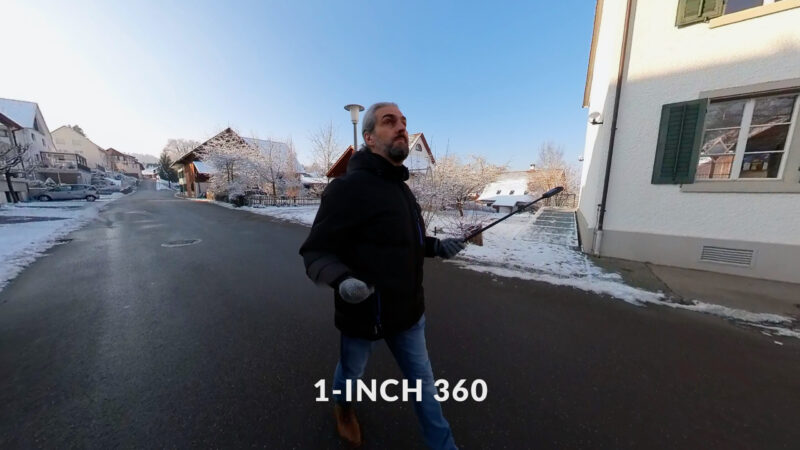
For example, there’s no other camera that lets you film solo and get these kinds of shots, where you’re walking along and it feels like the camera is floating some way off. Almost like you have a friend along with you, filming you.
Another great advantage is that you can get more than one shot from each take. For example, we can frame ourselves walking along, export this shot, then reframe looking forward and export this shot, then reframe looking to the side and then export and so on. So we now have 3 different shots from one take, which we can edit together.
On the downside, you don’t really get any kind of shallow depth of field. Basically, wherever you do, everything is in focus. But there’s no reason you can’t mix your smartphone footage with reframed Insta360 footage.
If you are familiar with Insta360 cameras, you will feel at home with this device. It works in a very similar way to other Insta360 devices. Here’s how to get set up.
Setting Up 1-inch 360 Edition
To set up your 1-inch 360 Edition, first take off all the plastic protectors. Before using, you need to install a microSD card and download the Insta360 app, which you will need to activate your device.
To install the microSD card, you need to take the whole thing apart.
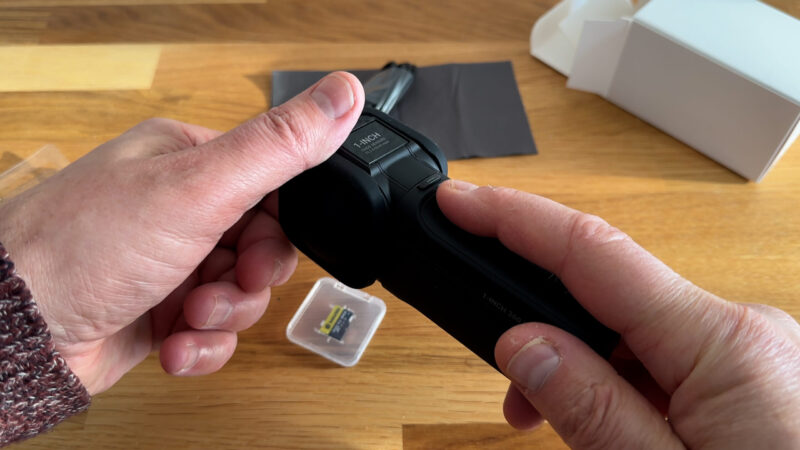
First, press in the 2 catches at the side and then pull off the lens module. Open the USB C cover which is at the bottom on the side. The next 2 sections need to be removed from the sleeve. It can be a bit tricky, but I found I could push gently upwards using the USB C socket.
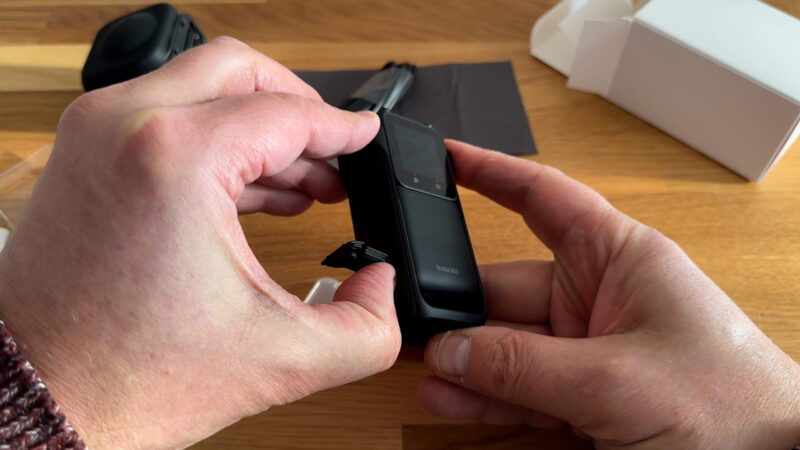
Now pull these 2 sections apart. You will see they’re connected by a USB C connector. The microSD card slots in the middle section below the USB C socket. You need to press it in until it catches and is locked in place.
Now reassemble the different parts of the camera and power on.
To choose the language, tap the tick in the corner. The 1-inch 360 might now format the microSD card. After that, you can connect the camera to the Insta360 app and activate.
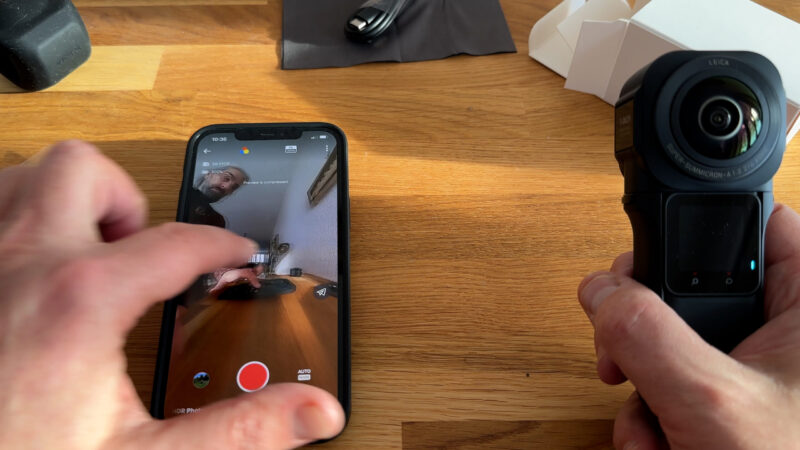
Make sure your smartphone has bluetooth and wifi enabled. Connecting can take a few seconds, especially the first time you connect a new camera. Now tap the camera icon at the bottom in the middle to get a view of the 360 camera. Swipe the screen to change the view.
This won’t affect any video you record as this camera will always capture the full 360 view, no matter what you do.
Charging 1-inch 360 Edition
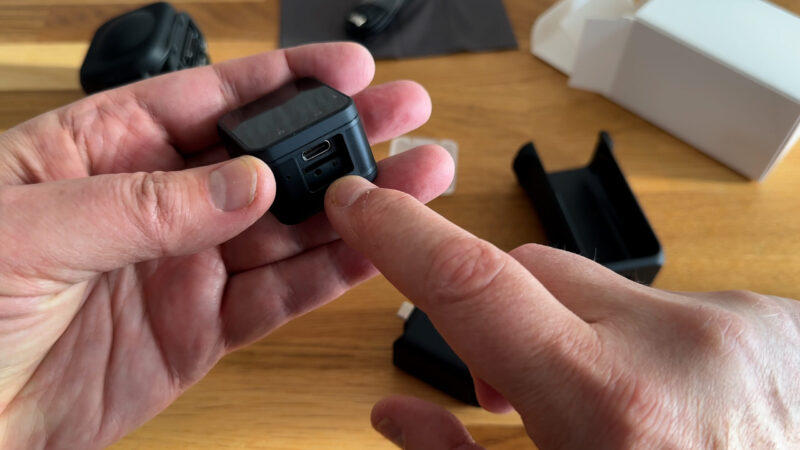
To charge the 1-inch 360 open the USB C cover at the bottom and connect to some kind of charging adapter. I use the same cable and adapter I use for my MacBook Air. The light here will be red while it’s charging and then switch off once it’s fully charged.
Firmware
Make sure your camera has the latest firmware. Normally it will automatically detect if there’s new firmware to install and ask if you want to install it. Otherwise you can open settings in the app and check there to see if there’s a new version available.
1-inch 360 Edition Mini Screen Controls
When you switch on the 1-inch 360, you will see the camera view with some information at the edges. If you do nothing for a few seconds, the information disappears and you are left with just the camera view. And if you do nothing for a few more seconds, the screen switches off to save battery.
Tap the screen to wake it up. Tap again to bring back the info graphics.
There are 2 buttons at the bottom of the screen. They’re quite faint, but you can see a magnifying glass icon and a speech bubble icon.

Tap the magnifying glass to switch the style of camera view: default, fisheye and tiny planet view. The speech bubble opens up a Quick Menu of preset settings.
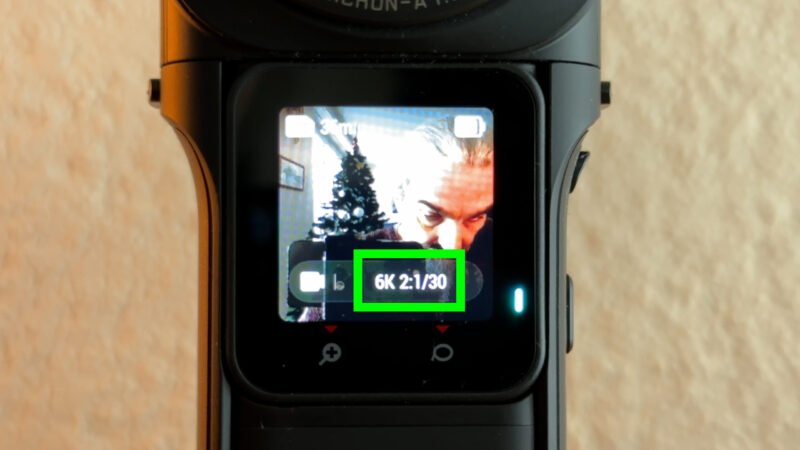
Top left is the remaining memory, top right is the remaining battery. At the bottom we have the current camera mode on the left and the current camera settings. At the moment you can see the camera is set to 6K 2:1 and 30fps. I guess the 2:1 means 2 sensors are being used, combined to create 1 video.
If you double tap the screen, it changes mode. You can now swipe the screen to change view. Tap the arrows in a circle button to switch between the two cameras.
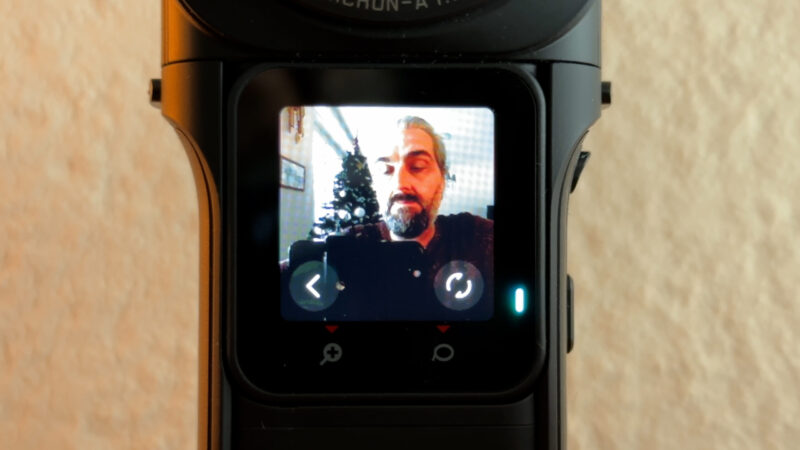
Again, this does not affect the recording, it just changes the view on the screen. Tap the left arrow to return to the normal screen mode.
Change Video Settings
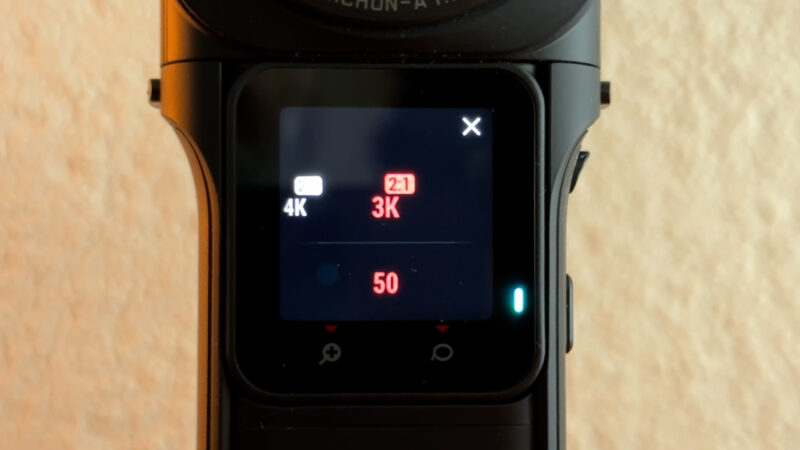
If we tap this setting we open up the resolution and frame rates. We can select between 3K, 4K and 6K.
When in 6K or 4K, there are 3 different frame rates: 30, 25 and 24fps. 24fps is the film look frame rate, 25 is for filming in Europe and other places with 50hz electricity supply and 30fps is the highest frame rate which will look a little smoother but also a little less like film.
If you set the resolution to 3K you can now shoot at 50fps.
To learn more about how frame rates, resolution, shutter speed, ISO and other settings affect the look of your video, you can join us on Patreon where we have video lessons and e-books dealing with this stuff.
Tap the X in the corner to close these settings.
More Camera Settings
Swipe from the right to open up more settings. Here you can switch between auto and manual exposure.
If you don’t want the exposure to keep changing as you move around, or if you want a specific setting, for example a slower shutter speed, then use manual. For more convenience, keep this on auto.
We can swipe along the bottom here to find different settings. The 3 circles is for color profiles and we can choose between vivid, standard or log.
Vivid adds extra contrast and saturation and is good if you don’t want to do any colour work on your video when editing. Log is low contrast and saturation and gives you the most options when colour grading. Standard is somewhere in the middle, so good for if you want to do a little bit of colour work.

Swipe to EV which stands for Exposure Value. Change this if you want to keep using auto exposure but you want it to compensate darker or brighter.
Swipe along to set white balance. Again, for convenience leave this on auto. If you don’t want the colour to keep changing, set this manually.
Switch on Isolated Exposure if you want the 2 cameras to set exposure independently. You would only use this in certain situations. For example, if you are in a car with one camera facing outside and one facing inside.
Even more camera settings
If you swipe down from the top, you open up another group of settings.
Swipe to the 2nd page of settings and tap the cog. Tap General and scroll down to sharpness. For best results, it’s recommended to use one of the lower sharpness settings. Either medium or low.
Unless you specifically want a sharp image, lower sharpness means any noise in the image will be less obvious. If the image is too sharp it can be a bit harsh on the eye. As well, you can always add extra sharpness later if you need it.
Anti-Flicker helps you reduce or remove that flicker you sometimes get from artificial lights. Some countries have 50hz electricity, some have 60hz electricity. So, choose the one appropriate to the country you are filming in.
Now we’re ready to get filming some high quality 360 degree content.
Recording Video on the 1-inch 360 Edition
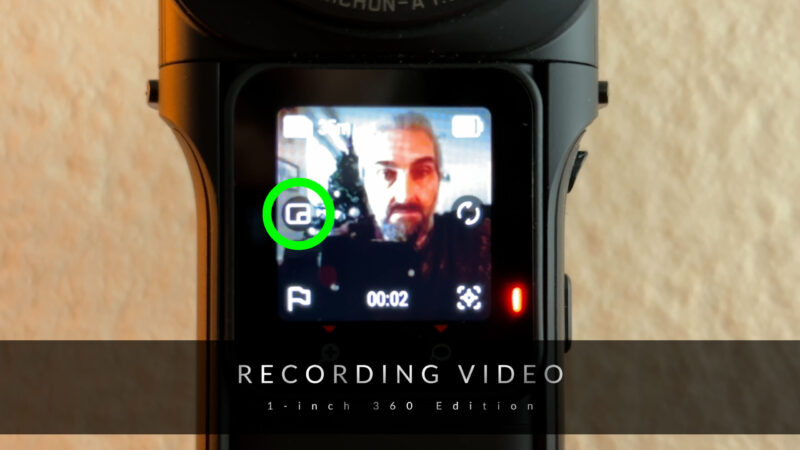
When you’re recording video, you get different buttons on the screen.
On the left middle is a picture-in-picture button. This allows you to show 2 different angles at the same time. This is something you can do in the app as well.
On the right, the circle arrows button reverses the camera view. Like switching from front to rear camera in your smartphone.
The flag button adds a marker at that point in the video clip. So it will be easier to find that moment in the clip later.
On the right at the bottom is a tracking button. Tap this to start tracking.
Where’s my Footage?
To view the footage you have recorded, swipe up from the bottom of the screen.
Top left you will see an icon and the number of media files stored, next to the number you are currently looking at. Swipe left and right to change clips and press the play button to play the clip.
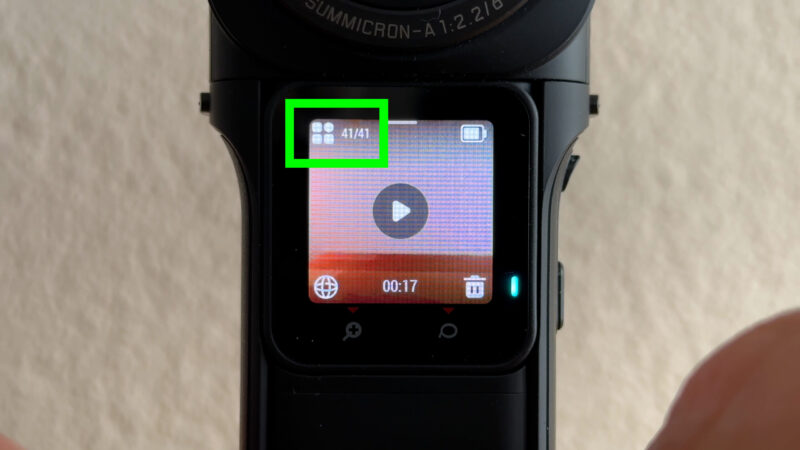
While a clip is playing, you can swipe the top of the screen to change the view. Swipe the bottom half to scrub through the clip to find the part you want.
Tap the icon in the left corner to view all the clips in a gallery format. Swipe left and right to scroll through your clips. Tap the select button and then choose 1 or more clips. This is a good way to delete multiple files quickly.
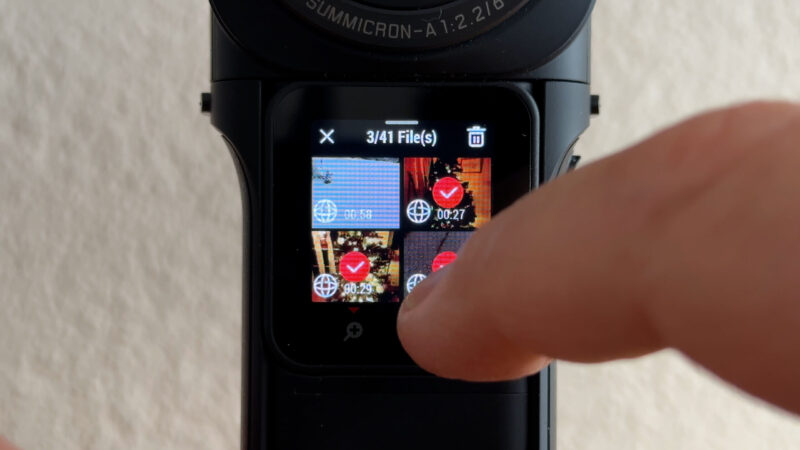
Tap one of the files to return to normal gallery mode. Swipe down to close the gallery.
Editing 1-inch 360 Edition Videos
To use the footage you’ve shot on your 1-inch 360 Edition, you need to get it from the camera to your smartphone or your computer.
If you want to edit and reframe your footage using the Insta360 app then you can connect as I showed you before. Then either edit with the footage still on the camera or import it onto your device.
If you want to edit and reframe your footage using the Insta360 Studio then you need to connect your camera to your computer using a cable. Open Insta360 Studio and it should automatically detect the camera and ask if you want to import the footage.
Should I use the Insta360 app or Studio?
The Insta360 app and Studio are completely different platforms, with totally different user interfaces. They also enable you to do different things. The main difference is that the Insta360 app can only export at a maximum of 1080p while the Studio software can export at 4K and higher resolutions.
If you want the highest quality then don’t use the app, use Studio.
Connecting 1-inch 360 Edition to your Computer
Use the cable provided, or a USB C to USB C cable if your computer has USB C ports, as my MacBook Air does. You need to set your camera correctly otherwise it won’t connect.
Swipe down from the top, go to the 2nd page, tap the cog.
Tap General and then tap USB mode and make sure it is set to U-Disk Mode.
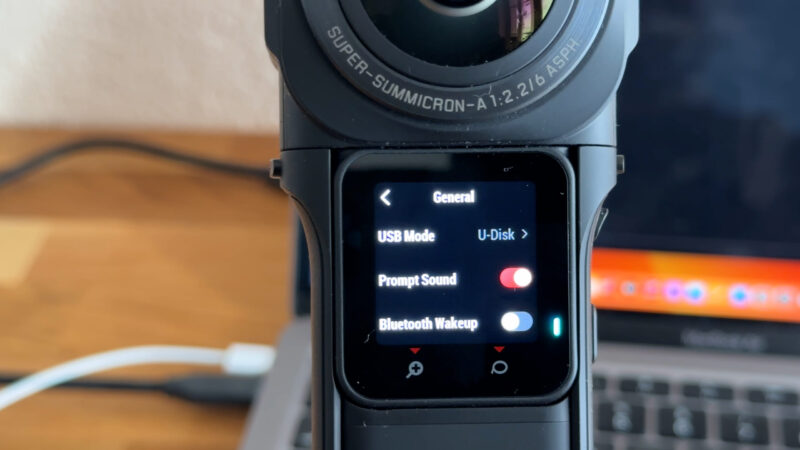
Now connect your camera and give any permissions you need to give. Open Studio and choose whether to import all or pick individual files to import.
Now you can add keyframes which means you can animate camera movements.
Adding an External Microphone
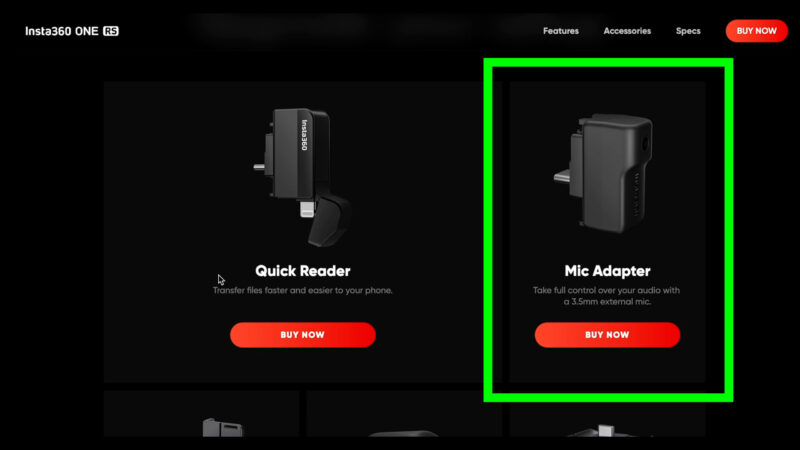
If you want to connect an external microphone to your 1-inch 360 edition, you need to get an adapter. Insta360 makes one which you can get from their store or other online stores.
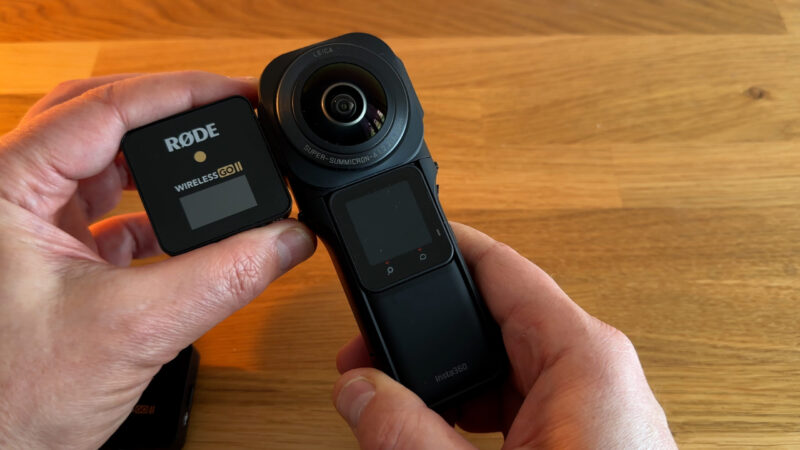
The adapter plugs into the USB C socket at the bottom. There’s also a bracket you can get which locks onto the side. Then you can add a wireless mic, like the Rode Wireless GO 2 system.
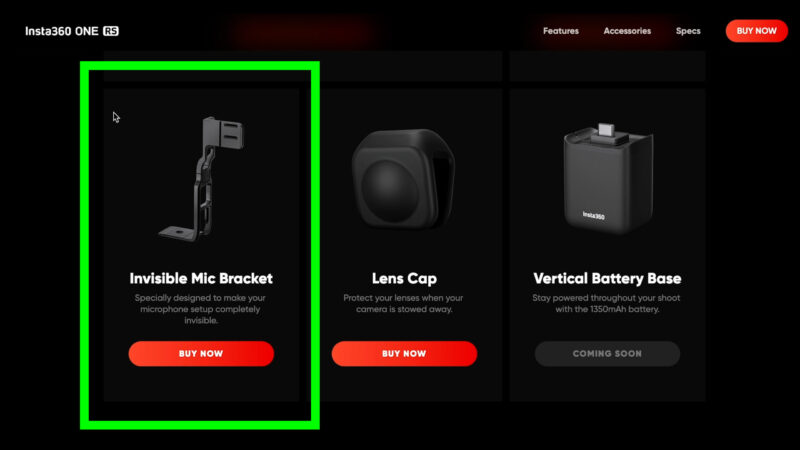
So the receiver would mount here and then you can connect that to the transmitter which you hook onto your clothes. Because of the way the 360 camera works, the mic will be invisible.
Videography – Beginner to Advanced
If you want to know more about filmmaking, my book Smartphone Videography – Beginners to Advanced is now available to download for members on Patreon. The book is 170 pages long and covers essential smartphone filmmaking topics:
Things like how to get the perfect exposure, when to use manual control, which codecs to use, HDR, how to use frame rates, lenses, shot types, stabilisation and much more. There’s also my Exploring the Film Look Guide as well as Smartphone Colour Grading.
Members can also access my regular filmmaking podcast, as well all 5 episodes of our smartphone-shot Silent Eye series, with accompanying screenplays and making of podcasts. There’s other materials too and I will be adding more in the future.
If you want to join me there follow this link.

I upgrade from One X to 1-inch but still get the same issue (compared to DJI Pocket)
The exported footage feels broken / bad quality (shadow are blured) where the original footage seems ok. I shared a sample on Twitter (https://twitter.com/JpEncausse/status/1687484055938314240)
I think it is the app and studio algorithm that stitch to hardly the footage for no reason. It’s like it add some motion blur.