Sound Recording: How To Use A Boom Pole
So you read the article on the Best Boom Poles for Low Budget Filmmaking. Now you need some tips on how to use one.
We’ve already talked about how to use lavalier (clip on) microphones when filming. Here, I’m going to go through the basics of using a boom pole (or fishpole) with shotgun mic attached.
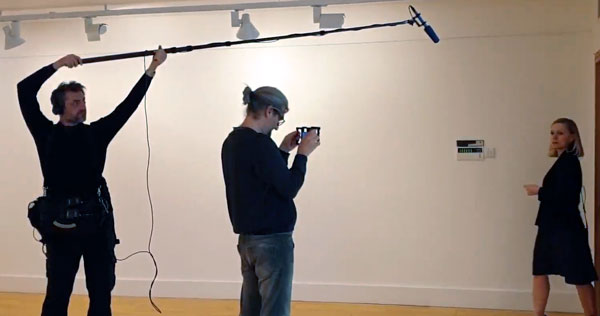
If you’ve seen a picture of a film set which includes a boom operator, it might seem pretty simple and obvious. Just hold the boom so the mic points at the actor. What’s the big deal?
Well, there’s a few other little tips and tricks you might not know about and you wouldn’t notice from a simple behind the scenes still image.
“The first noted use of a boom mike was on the set of Beggars of Life (1928) when director William A. Wellman wanted a tracking shot of two actors walking down a street, and the sound man refused, telling the director that the actors had to be static and the microphone had to be hidden in a flowery vase. Wellman said “that’s crazy” and instructed the sound man to put the microphone on a broom-handle and walk along the actors just outside of the frame.” wikipedia
Advantages of booming
Overhead positioning gets the microphone closer than leaving the microphone mounted on the camera. A boom operator can adjust the angle of the microphone “real time”. This helps to better reject background noise while putting the dialogue audio in the pickup zone of the microphone.
Compared to using a lavalier, a good boom operator can avoid any extra noises from the microphone itself. Whilst when using a lavalier there’s always a chance the actor or their clothes will brush against the mike attached to them.
The obvious advantage of a lavalier microphone is that it is always at the same distance from the actor’s mouth. So each method has advantages and disadvantages. Many sound recordists use a set up combining both.
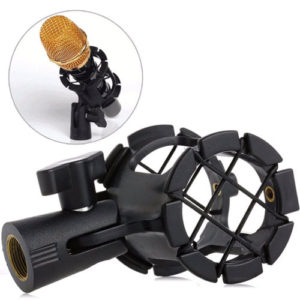
Make sure to use a shockmount
A good shock mount will isolate any handling noise from the boompole. When mounting the microphone, crisscross (or over-under) the rubber bands. This makes sure the microphone is securely supported.
Not all shock mounts use this rubber band criss-cross method. I have the RØDE Blimp Wind Shield and Shock Mount System.
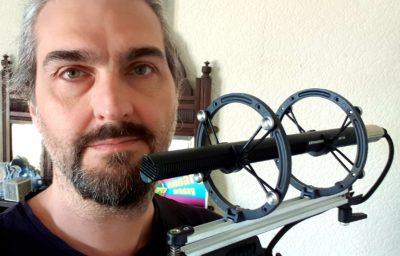
You can see my Sennheiser 416 is mounted via plastic clips which are themselves suspended on rubber bands. I’ve had this for about 6 years and never had anything break or wear out. The system works very well.
When I was filming Third Contact, we didn’t have this mount (although this is the mike we used). Instead I had one of the cheaper RØDE shock mounts, which looked more like the one above. We shot a whole feature film with it, so certainly they can be good enough.
The advantage of the more expensive shock mount is that it comes with a windshield blimp. This makes it easier to record sound in windy conditions. You can also use it to encase the mike while travelling to protect it.
Without the blimp windshield, you can use a foam windshield instead. They’re not quite as effective but they do work. The Sennheiser 416 comes with a foam windshield, for this purpose.
Further preparations
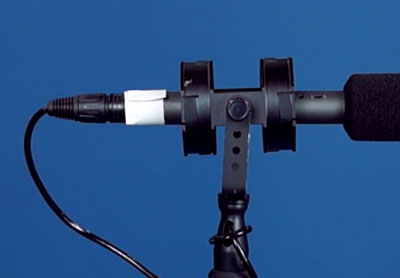
Once the microphone is mounted to the shock mount, connect the audio cable. You may want to wrap the cable one half or full turn around the pole to prevent excess cable slapping against the pole.
Tip: place a small piece of cloth camera tape where the mike plugs into the cable connector. This should stop any metal clicking where the two pieces meet.
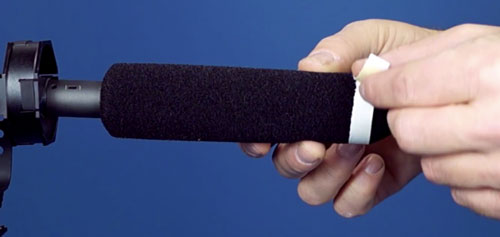
Tip: if you are using the foam windscreen, wrap a circle of tape around the end. Now the mike is easier to spot when it moves into shot.
Establish frame line
Working with the camera operator, establish your frame line. One way is to begin with the mike lowered completely into the frame. Now bring the mike slow up until it just clears the viewfinder. This shows you where the very edge of frame is.
Tip: With multiple takes, you might forget where the edge of frame is, as you rest the mike between takes. So sometimes it’s a good idea to find a point in the background as a mark for where to return the mike to for the next take.
If the camera and actors are moving in the shot, things get more complicated. So it can be a good idea to rehearse the shot a few times, with the actors and camera op to coordinate movement.
Managing the boom pole
One method when extending your boompole is to first slide each section out as far as it will go, then bring it back in a little before tightening. Then, each section will overlap slightly and create a more solid support.
Tighten the pole just enough to stop the sections moving and not too much so it’s a struggle to loosen them after.
Holding and positioning
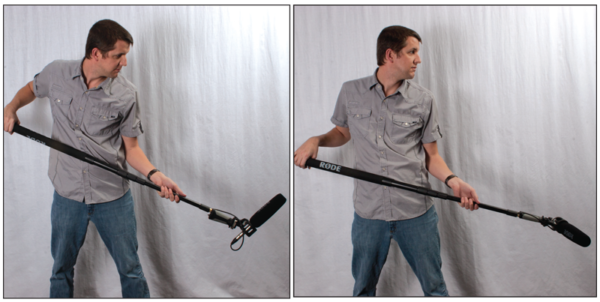
There’s no one correct way to hold a boom pole. But the standard position is with the boompole completely over your head, with the mike at an angle. Aim the mike at around the actor’s nose.
That’s the basic position, but it depends on how tall you are compared to the position of the actors and other factors. As a boom op, you need to adapt to each situation.
This standard position is great for moving the microphone around and gives you good flexibility. The big downside is the physical demand of holding the mike and pole this way for extended periods. So to save your muscle pain you can move to a less strenuous position, like this:
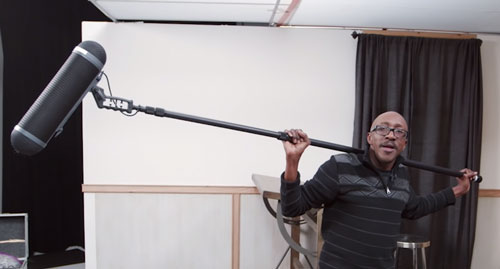
Apart from the overhead position, you can also employ the boom from below the bottom of the frame. You can watch the whole video where professional boom op Anthony Q. Artis walks you through the positions.
Tip: extend the pole to almost maximum length and move your hands closer to the center. Now the boom will have some counter-balance so the weight isn’t all at one end.
As a micro-budget filmmaker, I would also encourage you to improvise and think practically about the job. There are set ways that you are taught to do things in films school, but these aren’t the only way you can record sound.
Remember, there wouldn’t even be boom poles if someone hadn’t rebelled against the perceived audio recording practices of the time.
2 more more actors
Some people will advise you that if there are 2 or more actors speaking in the scene, then absolutely must record all dialogue from every actor.
I really have to disagree with this rule. If it’s possible, without causing extra issues with the shooting then fine.
As a director/editor who has also recorded sound for many films, I need the audio from the actor whose lips are in shot. If you are filming 2 actors but the shot is from behind one of them, then of course the 2nd actor’s dialogue is very much a low priority.
Why do I recommend you don’t move the boom from actor to actor unless you have to? As a filmmaker, I only need live audio if it syncs with the actor’s lips. Moving the boom mike can mean you miss part of this essential audio, if you don’t get the timing spot on. It can also mean the boom shadow moves across the frame and across the actors. There’s also a chance moving the boom can create a noise which ruins the audio.
I believe that in film school you will be taught that if you don’t swing the boom around, you are failing at your job. So that might be important for you to know when working in an industry situation. But from my point of view as a micro-budget filmmaker – ask the director what he wants you to do and do it.
My advice for low budget film sets: keep it simple.
Who wears the headphones
If you have the luxury of an extra crew member to operate the audio-recorder, but you only have 1 set of headphones, there can be confusion about who wears them. My choice is the boom operator as it helps to position the mike better if you can hear the audio you are getting. A little turn of the mike a few degrees and you can find the audio is suddenly clearer.
Working with the camera crew
In my experience, the way it works on a regular film set is the camera crew set up the shot. Now the sound crew pops up and tries to set up around them, to the undisguised irritation of a camera crew… haha just kiddin (or am I?).
Basically, it’s important that the sound crew and camera crew work well together. Communication is the key to making things run smoothly on set.
Anyway, this is a fun intro to a boom pole op’s masterclass where he talks about his experiences getting into the job and starting out.
Unfortunately, the video doesn’t include the actual masterclass.
Check out our best boom poles for low budget filmmakers.
Eager to learn more?
Join our weekly newsletter featuring inspiring stories, no-budget filmmaking tips and comprehensive equipment reviews to help you turn your film projects into reality!
As an Amazon Associate I earn from qualifying purchases.
[…] A boom pole can help you get shots at a distance. It’s best used for outdoor filming, but it’s possible to use in other situations (Source: momofilmfest.com). […]