Filming on iPhones and Smartphones – Tips & Best Practices
Although I’ve already written The Ultimate Beginner’s Guide to Smartphone Filmmaking, if you want to make sure you are getting the best results from your smartphone video, here are some tips and best practices.
1. Be Careful Using Digital Zoom
What is “digital zoom”? Actually, what the heck is “zoom” anyway?
The zoom lense was invented over 100 years ago, right at the beginning of cinema. A zoom lens is a type of camera lens that is offers the photographer or cinematographer a useful range of different focal lengths in a single lens. Put simply: you can go from a wide frame (so you can see more of what’s in front of the camera) to a close up frame (where you restrict the frame to something smaller).
You can the same effect by changing lenses. However, a zoom lens allows you to “zoom” from wide to close up in a matter of seconds. This brief documentary on the history shows the zoom effect being used as a shot style during the 1930s.
What do I mean by a shot style? I mean actually including the effect of changing the lens frame from wide to narrow in the shot – so the audience see you zooming in to something in the frame.
In the 1970s and 1980s, this shot was often used to save budget. So it got the reputation of being a rather cheap effect. However, you can also use a zoom lens for its convenience – it’s a multi-purpose lens which saves you from changing lenses or from owning several lenses to cover each framing.
Using a mechanical lens to achieve this effect is known as “optical zoom”. After digital cameras were invented, a new type of zoom was possible – the digital zoom.
The digital zoom is accomplished electronically, with no moving parts involved. Digital photography is achieved using a sensor to capture light. With digital zoom, your device simply expands and crops the image which usually results in increased pixelization.
The other problem with zooming in to get a close up is image stability. Once you are zoomed in, any movements in the camera become more exaggerated. Handshake becomes much more pronounced.
Having said that, you can stabilize your smartphone on a tripod to avoid the handshake. Also, the new top-range smartphones have better quality digital zoom (plus optical zoom options). The other thing is, some people actually like the aesthetic of low-quality – high pixelation.
2. Lock Focus and/or Exposure
The great thing about using smartphones to shoot video is that they are set up to be very simple to use. This are consumer cameras and they are intended to be used by the general public – not just expert photographers.
This is why, when you open the inbuilt camera app on your smartphone, almost certainly it will be set to “auto”. This means the camera app will trying to get the best results for you, automatically.
Settings such as ISO, shutter speed and focus are set by the software, after it has taken readings of the image you are pointing at. When you move the camera, left or right, up or down, the software changes the settings to fit the image. If you move the camera while you are filming, you will record the changes the software makes as it gets new information.
For example, panning from right to left from a painting on a wall to a window. If it is daytime, most likely the light coming from the window is much brighter than inside the room – so the camera app reduces the exposure settings to do the best job it can. It’s trying to correctly expose the window for you, without you having to do anything at all.
However, this is often considered to be unattractive (or a sign that the video is “unprofessional”). Well, yes you can use this effect. Your video will look more “rough and ready”. Thing is, we’ve started to get used to seeing this, now that so many of us are using our phones to make videos.
We even see these videos showing up on TV news, as witnesses to a news event are there on the scene shooting and the channel will ask if they can use the footage. So we’re getting familiar with it and it communicates a certain “live” feeling to the footage.
But… there are many times when you do not want this effect. Often it is distracting. You video will look more “polished” if you lock the exposure and/or focus.
Thing is, even if the camera doesn’t move much, small fluctuations in the light can lead to the camera app making small adjustments as you’re filming. If you don’t want this “live” feel – simply lock the exposure and focus.
Above, you can see the difference when the exposure and focus is locked and when it is set to “auto”. Plus, how to simply lock the exposure and focus by pressing and holding (using the Samsung camera app – your app may work differently).
3. Take Care With Audio
When it comes to audio, the inbuilt mic that comes with your smartphone will be of variable quality. These mics are designed to record general audio surrounding the phone, which is not the best option when you want to record someone talking and have a clear, crisp sound.
No matter how good your hearing is, none of us enjoy trying to listen to someone when their voice is drowned out by background noise.
These days, even home-run YouTube channels use good quality mics to get nice, rich and clear voice audio. Our our modern TVs also have great quality speakers (compared to old TVs). Even our laptops and smartphones generally produce great, crisp audio.
This means a 21st century audience is very used to hearing great quality sound. So, if you don’t pay attention to your audio quality, your audience will skip your video and go and find something they find acceptable. The same applies if you are working for clients and you want them to employ you again.
My Samsung S9 actually has great inbuilt stereo mics. But these are best for when you want ambient audio. For recording voice I use external mics.
Here’s our list of the best microphones for smartphone filmmaking.
4. Good Exposure
Whether you use a dedicated camera app like FiLMiC Pro or the app which comes with your smartphone, make sure you expose your video well. If you are using auto exposure, then the camera app will be doing that job for you – but as I said above, this doesn’t always look the want you want it to.
The most simple way of doing this is via the following steps:
- have your smartphone camera app on auto
- point at the most important part of the image
- wait for the app to do its work
- lock the exposure
If you want to be more advanced when setting exposure, check out our articles on that:
ISO for video – basics explained.
Shutter Speed for video – basics explained.
Frame Rate for video – basics explained.
5. Good Camera Stability
Because smartphones are small, they are very prone to handshake. Again, this is a creative decision. But in many cases, a stable image is better than a shaky one.
There are various ways to stabilize your video.
- simple tripod
- gimbal
- inbuilt camera stabilization
- smooth or remove shake from footage using editing software (such as Adobe Premiere pro).
Like with auto exposure and focus, people have got used to shaky camera too. When witnesses to a news event capture footage, we accept it will be wobbly. Again, it adds to the “live” feel. In fact, if we watched eye-witness footage which glided smoothly across the scene, we might suspect the whole thing fake.
That’s why shaky footage can create a feeling of authenticity. Aside from that, most viewers are annoyed by shaky camera footage. If you are making an advert for clients, they’ll most likely want something as polished as possible.
If you are going for the shaky cam effect, make sure it is in keeping with the creativity and theme behind the video. A video about firefighters in action might suit the shaky cam urgency, whilst a video promoting a new brand of eye liner might not…
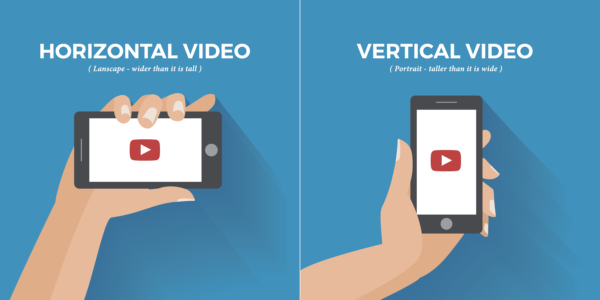
6. Don’t Shoot Vertical Video… unless you want to
Remember when people used to get annoyed by vertical video? That’s so 2016, isn’t it?
What’s vertical video? Its video shot with your smartphone upright – so the video is taller than it is wide.
That issue has mostly gone away now. And that’s because we are increasingly viewing vertical video – on our smartphones, of course.
With almost 2.5 billion people watching streamed or downloaded video content, and up to 75% of that predicted to be via our smartphones, it starts to make more sense that videos are displayed in ways which are more comfortable to the user.
Holding your smartphones vertically is easier, so you’ll be happy watching video displayed vertically.
Added to that, since video “stories” became a big feature of platforms such as Facebook, Instagram and Snapchat, videos need to be produced to fit.
So that’s the reason to shoot vertical. But, aside from those situations, you will want to shoot video horizontally.
If you need to shoot for both formats, you can always shoot in the highest possible resolution (4K or 2K for example) and then crop your horizontal video into a vertical format.
In this case, I would recommend you shoot horizontal and crop to vertical, rather than the other way round. Vertical viewing (basically on a smartphone) requires less image quality, so you can afford to crop down.
7. Great Framing Creates a Great Shot
This one is probably the hardest to advise on with a simple explanation. There aren’t really any set rules for nice framing, but I’m sure there are a million how to guides online.
YouTube include a set of frame composition lessons in their creator academy.
Of course, it really depends on what you are shooting. Which means there’s infinite possibilities. How shots are going to be edited together also makes a huge difference – poor editing can turn good shots into bad ones.
Sure, you can just show up, point the camera at the thing you want to film and press record. Go home and edit.
But if you want to improve your video work, take more care over framing.
I recommend that you copy other people, to start with. This is one of the best ways to learn. With so much being available online, these days it is so easy to find something close to what you are trying to achieve.
Are you making a 60 second ad for a new app? So search online and find ones you like. Analyse how they frame each shot and how each shot is edited to create an engaging, flowing story. Now replace their product with yours. Maybe make a storyboard to follow when you’re filming.
Once you have this as your basic template, you can improvise around it to make it your own. Do this a few times and the framing process will start to click faster. Then you’ll be able to get filming without having to refer to other work, beforehand.
8. Know your tools
You’re about to get some shots for a video project you’re working on. You’re at the location and people are waiting for instructions. Following my advice, you open up the camera app and try to work out the controls…
Well, better to have got familiar with the controls before you start shooting. If you’re working entirely alone and have no urgency during the shoot, then fine – use it as a practice session too.
But if you need to be on the ball, then make sure you spend a good few hours shooting some practice footage (and preferably editing it too). It’s amazing what difference you can make to your videos simply by having a good knowledge of your equipment.
It’s far better to use a camera you know like the back of your hand, than a more pro camera which you have to spend hours fumbling with to work out what you’re doing. Know it’s strengths, know it’s limitations. Get used to getting the best exposure and focus with it – build a close relationship between you and your gear.
Get familiar with your workflow. Only once you come to editing do you discover some issues which can be resolved and then done better next time you shoot. So a few practice runs from shooting to editing will be a huge asset when you are filming in a more pressured situation.
Eager to learn more?
Join our weekly newsletter featuring inspiring stories, no-budget filmmaking tips and comprehensive equipment reviews to help you turn your film projects into reality!