FREE Film School: Using the Over the Shoulder Shot
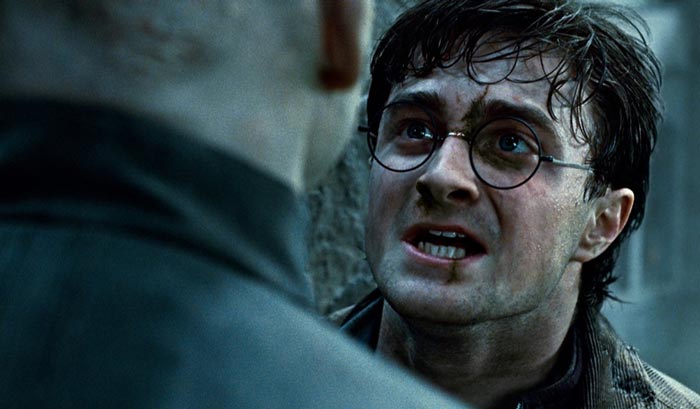
An Over the Shoulder shot is literally a shot taken from behind one actor who is usually in conversation with another actor. The 2nd actor is the subject of the frame. And this shot is probably the most common way to shoot a conversation in a movie.
This standard method has become such a trope that Oscar-winning director Steven Soderbergh once said, “If I see another over-the-shoulder shot, I’m going to blow my brains out.”
In fact, that quote came via Matt Damon in 2012, when Soderbergh had just announced he was quitting making feature films. Damon also said Soderbergh was about to start a career as a painter, so perhaps we shouldn’t take it too seriously.
I guess he has a point, though. If shots are chosen without thought for the story and simply because “that’s how it’s done” then we lose a bit of the creativity involved in filmmaking. It’s a bit lazy. It’s also a rather safe option to choose.
But why has the over the shoulder shot become such a staple? There must be reasons why it feels like a safe option and why it’s so popular amongst professional filmmakers.
A Comfortable Point of View
When considering shots, it’s useful to think about where the shot places the audience in the scene. I’ve written previously about how shots depicting character action tend to be wide, while dialogue tends to be shot close up.
A lot of this is down to the need to show a character’s full body if they’re doing some major action. Meanwhile, conversation is something we need to experience more intimately.
But we could be close to the actors without sitting the camera behind a shoulder. Of course, being behind the shoulder places us in a good position to see an actor’s face. It also gives a subtle indication to the audience of the 2nd actor.
Usually, the second actor (their shoulder and side of the head) is out of focus. So while the audience can see the actor is there, the softness of the focus helps us concentrate on the actor who’s speaking.
A Connected Point of View
In our last Silent Eye episode, I had to shoot a dialogue scene between the main actors sitting beside an open fire. Because I didn’t want to show the background, I couldn’t get a direct over the shoulder style shot of one actor (Louis Bernard). Instead, we have this 45 degree side-angle.
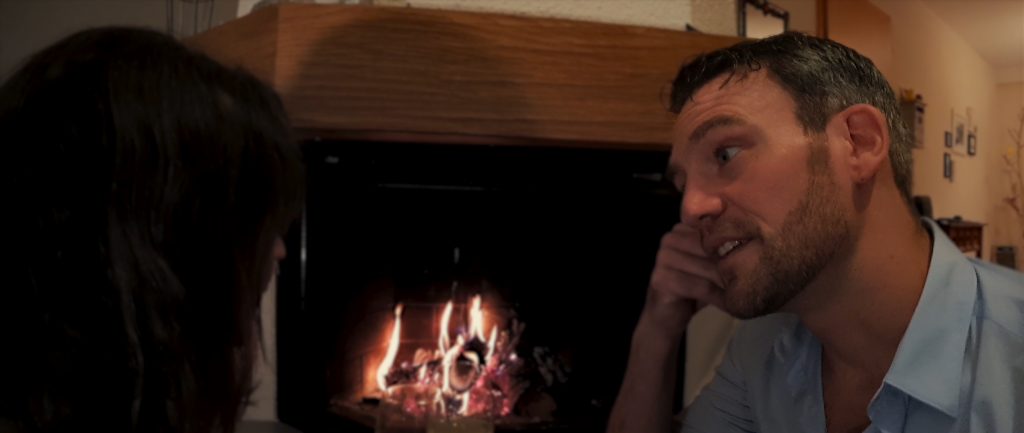
I liked the angle anyway, as it kept the fire roaring in the background and added extra interest to the frame (as opposed to a ordinary background of a wall). But notice how we feel less “connected” to the actor with this framing. By moving to the side, the audience can become less emotionally involved and more like a detached witness to the scene.
Switching Sides
Part of this set up is the understanding there will be a “reverse angle”. In other words, there will be 2 angles, 1 on each actor, but both from behind the shoulder. During a dialogue scene, the editor will cut back and forth to show both actors.
Remember, generally we need to observe the 180 rule here. This means only filming from one side of the 2 actors. Therefore, one angle will be over the left shoulder and the other will be over the right shoulder.
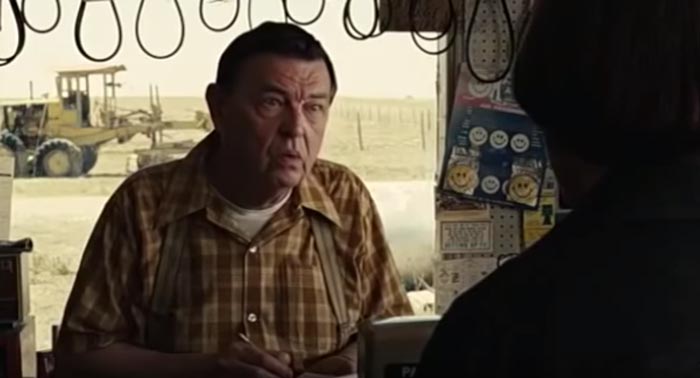
Here’s an example from No Country for Old Men.
Over Left Shoulder
Over Right Shoulder
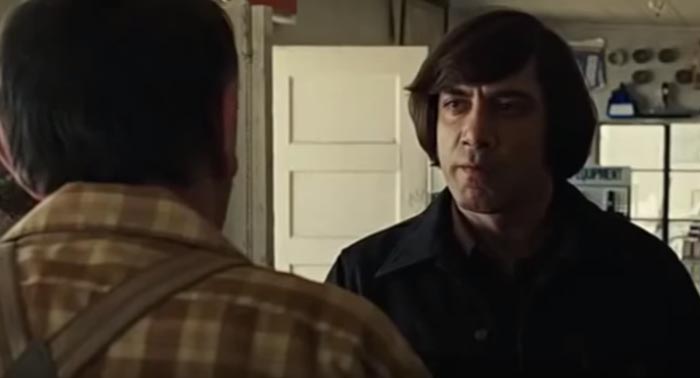
This is a great illustration, as it shows why the 180 rule is used: each actor appears on the same side of the screen in both shots.
If you shoot both angles over the same shoulder, however, the actors will keep switching position in the frame with each edit. Then every time the editor cuts between the 2 angles, the cut will feel more obvious to the audience. Cutting this way feels clunky and jars you out of the scene a little.
Editing an Over the Shoulder Conversation
Watch the scene and see how the editor weaves the two over the shoulder shots together. This may look simple and easy, but it really isn’t.
Now, bear in mind the editor will have multiple takes of each over the shoulder angle. Let’s say he or she has 5 takes of each side. Each of the 5 takes will also last the whole scene.
Therefore, the editor has 10 complete takes of the scene to weave some magic.
Don’t always cut on the dialogue (if ever)
This is a tempting (and therefore easy) mistake to make. Often, new filmmakers keep the angle on the actor talking and as the other actor starts to talk they cut to that actor. So each cut is simply placed between the actors lines.
This might seem logical – that the audience want to see the actor talking – but it can look crude and clumsy. One reason for that is, like breaking the 180 degree rule, it makes us aware of the cut. But if the audio/dialogue starts to overlap the cut, it smooths out the edit and makes it less visible.
Acting is reacting
Another result of only showing someone talking is to remove the actor’s reactions from the scene. The trap we are falling into here (again) is to think the dialogue is the most important element. In fact, a character’s reactions to the other character are equally (if not more) important.
Now, watch the scene again and see how the editor leaves in certain reactions. This can either be while the other actor is still talking or by creating a pause in the dialogue.
Creating a Pause?
Ever heard the term “dramatic pause“? When editing, it’s very easy to forget to create these dramatic pauses in a scene. Yes, as an editor we can create these moments even if they weren’t in the original performance.
If we imagine the editor has 10 complete takes of a scene, there are many spaces in each take where an actor isn’t talking. This might be because the actor put in their own dramatic pause OR they were simply listening to the other actor say their line.
But the editor can use that space by simply removing the audio of the speaking actor, thereby creating a pause that might not have been there when they performed the scene.
This is another reason why the over the shoulder shot is useful. Because an out of focus hint of the other actor often doesn’t reveal their mouth or jaw movement. This means we have more room for maneuver in the edit and the option to add a little moment here and there.
Of course we can also do the opposite. We can remove pauses to create extra pace. You can even have lines of dialogue crossing over each other to create a sense of urgency, even if the actors didn’t perform it that way.
A very flexible shooting style
So you can see this over the shoulder shot brings a great amount of intimacy for the audience and flexibility for the editor.
Now that you have examined this style, and considered how the performances of the actors can be altered in the edit, perhaps you will think differently when it comes to directing a scene like this.
A new director shooting he first movie might be tempted to focus entirely on how the actors speak their lines. But an experienced director knows an actor should always be doing something, even if they’re not speaking.
That’s a tip for actors too, by the way. Some actors I’ve worked with have the bad habit of only performing while they’re speaking. As soon as the other actor starts talking, they switch off and appear as if they’re just waiting for their next turn. If an actor performs this way, it’s pretty horrible to edit a scene with them in it. As an editor, you have less to cut to.
Now watch the scene from No Country For Old Men again and see how the editor uses the actors’ reactions as well as dialogue. The storekeeper reveals how nervous and confused he feels, while the threatening demeanor of his customer comes over as almost emotionless.
And if you think this all came from the actors, think again! Much of the mood and emotion of this scene is created by highly skillful editing. And it just looks so simple, doesn’t it?
Exceptions to the rules
While I was watching The Grand Budapest Hotel (2014) directed by Wes Anderson the other day, I began to notice how he does things differently. One is his love of symmetry in his use of framing. Another is that he often deliberately edits on the dialogue, as I just told you not to do.
As with all rules and techniques, some people break or defy them and get away with it. Check out this clip below and see how Wes Anderson does things. Not an over the shoulder shot in sight, but look at those dramatic pauses…
What you can see here is a director deliberately not following cinematic conventions. 180 degree rules are broken as he switches from side to side. There are jump cuts too. What else can you see that goes against the supposed rules of filmmaking?
Rather than hiding the filmmaking process, Wes Anderson displays it. In other words, he makes a point of revealing his edits and framing – most often for comic effect.
In this movie, the shooting and editing style purposely draws attention to itself. We might compare this to a painter like John Constable, who painted with skillful craft to create a realistic version of what he observed. Meanwhile, a painter like Pablo Picasso deliberately made us aware we were looking at a work of art.
When studying a portrait painting by Picasso, at no point do we feel we are looking at a real person. Likewise, when watching a Wes Anderson film, at no point do we feel a scene is really happening. Rather, we’re totally aware we’re watching actors performing for our amusement. And Anderson wants us to see his films that way.
This Week’s FREE film School Exercise
For these lessons in different types of shot and their uses, the best way for you to learn about them is to put them into practice. You can shoot a scene from a book or a play using whatever camera you have to hand. Then practice editing it to create this smooth dialogue scene. Don’t worry about production polish, this is all about practicing.
If you don’t have volunteer actors to hand, you can always use toy figures and record yourself speaking the dialogue. Now edit it together to practice creating a dialogue scene with dramatic pauses. Experiment with pacing: remove pauses, add pauses, cross dialogue etc.
Eager to learn more?
Join our weekly newsletter featuring inspiring stories, no-budget filmmaking tips and comprehensive equipment reviews to help you turn your film projects into reality!