From MacBook Pro & Premiere to iPad Pro 2020 & LumaFusion
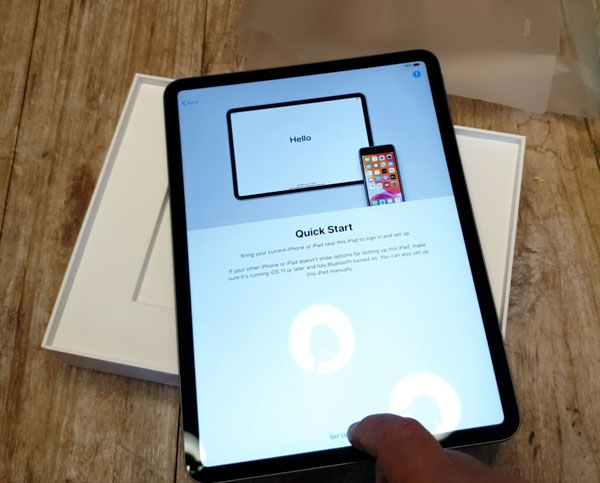
I just bought an iPad Pro, the 11 inch screen version. I’ve never had an iPad before, so this is an unboxing and my first impressions. I bought it because I’m a mobile filmmaker and wanted a more mobile editing system, compared to my old Macbook Pro (2015 model) and Adobe Premiere Pro.
So I’ll be purchasing and installing LumaFusion for the first time too. In this video, I’ll go through setting up the iPad Pro, getting a first look at it.
And this iPad Pro has cameras, so it’s like having a giant iPhone. I’ve never owned an iPhone before, so this feels like I almost bought my first iPhone. Whoop.
11 inch or 12.9 inch
I pretty much assumed the 12.9 inch iPad Pro would be more powerful than the 11 inch. So I had that all lined up to purchase online. But with some research I found out there’s basically zero difference between the two, even though the 11 inch is 2nd generation while the 12.9 inch is 4th generation.
The only difference is that the 12.9 inch has a bigger screen. So I opted for the smaller screen. Smaller and more mobile, right? And, I believe, a little bit cheaper.
Why choose the iPad Pro?
For the last couple of years, I’ve been editing everything on my 2015 model MacBook Pro using Adobe Premiere Pro. 4 episodes of Silent Eye plus everything so far on our channel. And day by day, it’s been getting slower and slower so that 1080p clips, with no effects, can’t even play in Premiere.
The only way I have been able to view the edit recently, is to render out the video and play it in Quicktime. So I looked up the minimum specs for Premiere and this old MacBook Pro is no longer fit for purpose.
People have been saying that the new iPad Pro is a dream for editing. Fast, doesn’t heat up like the MacBooks, renders out in real time. I realise that LumaFusion is going to have a lot less features than Premiere, but maybe it’s good enough for mobile filmmaking.
Plus, I’m a fan of simplifying workflows so I can spend more time being creative. So let’s see what we can do with this machine.
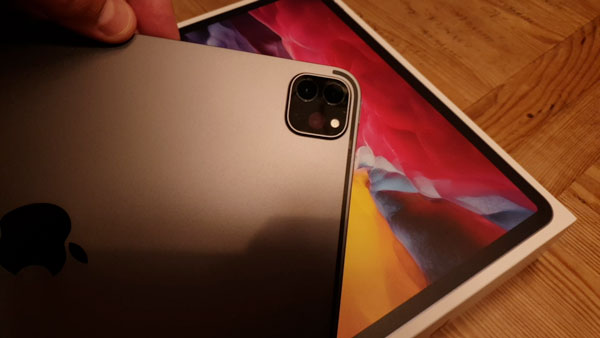
iPad Pro Cameras
Let’s not forget, this is a film-shooting device too. The iPad Pro has cameras, like the iPhone. There’s a dual camera system that includes a wide lens, an ultra-wide lens and a LiDAR scanner.
So that’s a 12MP wide (f/1.8) and 10-MP ultra-wide (f/2.4). With these you can shoot 4K video up to 60fps using the native app.
The iPad Pro 2020 has a new A12Z Bionic processor with an 8-core CPU and a new 8-core GPU to generate a powerful graphics performance.
LumaFusion
LumaFusion is one of the most popular editing apps for iOS. While many people use it with their iPhone, using an iPad obviously gives you a bigger screen to work with.
So I purchased LumaFusion in the app store for £28.99.
On booting up the app for the first time, I was asked if I would like a tutorial video. As this is my first time with the software, I opted to watch the video. But then it took me to a list of tutorials by LumaFusion, rather than a specific beginner’s guide, so I bailed out of that.
Opening the All Photos and Videos folder revealed my test video and the screen recorded video. Beneath each file is the video resolution, which is nice to have there.
So apparently my test video was shot in HD at 16×9. Now I’m going to try to edit a video using LumaFusion. But first, how to get video files from my Samsung S9 into LumaFusion on the iPad.
Google Drive
I’ve been using Google Drive for years. I just find it brilliant for film production, pre-production and post-production. It’s free, although if you want to increase the 15gb limit for files stored you can pay for extra space.
So, I installed Google Drive on the iPad via the Apple Store then logged in using my normal account. Now, Google drive on iPad works as it does on a smartphone and not how it works on a desktop – so that’s a bit different.
But you can connect LumaFusion directly to your Google Drive and access files which you’ve uploaded from within LumaFusion.
So I uploaded the iPad unboxing files from my Samsung S9. This is how I would normally do it when editing on Adobe Premiere Pro. Except, using the desktop version, I would then download the video files from the drive onto my laptop.
As I say, using LumaFusion, I can access those files from within the app. So that should speed things up a bit.
Connect Google Drive to your iPad Pro
Tap the Import Media icon and open up a menu of possible media sources to which you can connect LumaFusion. For example, you could sync the app to Dropbox. But I’m going to use Google Drive, so if you want to use that also select that and it will take you through a connection process.
You’ll need to sign in and give LumaFusion permission to access your Google Drive. Once you have done that, you can navigate to the folder containing your video or audio files. By selecting the file and tapping the download icon, the file then downloads onto your iPad at the same time as importing into LumaFusion.
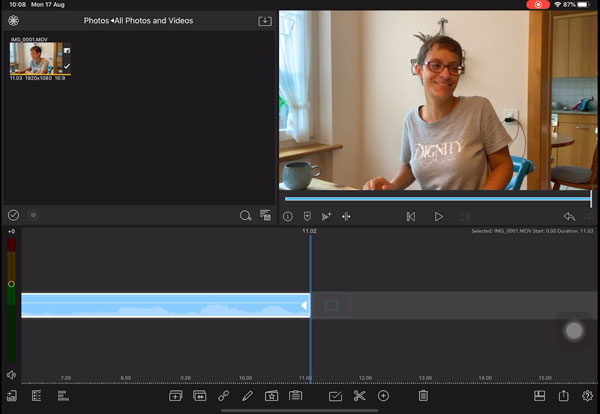
LumaFusion Layout
So the layout is pretty straightforward and similar to other editing software. Imported clips are here in the top left window. The current clip on the timeline appears in this window on the right.
To add a clip to the timeline you can simply tap and hold on the clip in the top left window. Then drag and drop onto the timeline. You can place it next to an existing clip or on a new track above it.
The line down the middle indicates where you are in the video. When you press play, you can see the video moving along. When you hit stop the video stops and the current position is again indicated by this big line.
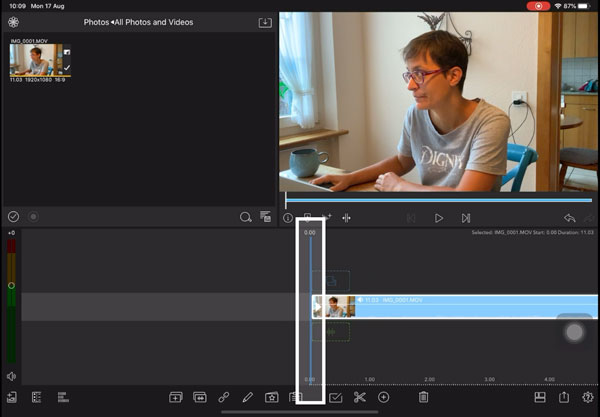
At the top of this line, you can see the position of the line in the timeline. The left number is seconds and the right number is fractions of a second measured in frames. So because this project is 30 frames per second, when it reaches .29 the next movement takes you to the next second.
There’s also a measure at the bottom of the timeline to indicate the seconds. You can zoom in and out of the timeline by using your fingers, just like zooming in and out when using your smartphone camera.
4K Video
I tried some 4K video to see how the iPad and LumaFusion handles it.
To switch to 4K we need to go into settings and scroll down to camera. Now we can switch to 4K at 30fps.
Then I opened the iPad camera and shoot some video. To the right of the time counter it tells us we are shooting 4K at 30fps.
Back in LumaFusion, the video is right there ready to edit. So now I tap, hold and drag to get it on the timeline.
The iPad Pro played the 4K video with no problem, as we would expect. So I added some extra burden to the graphic processor by changing the colour of the video.
Changing Colour in LumaFusion
If you double tap a clip on the timeline LumaFusion opens up a load of extra settings and effects. Tapping the Color & Effects icon located bottom right of the window opens up colour options.
I chose the Vibrance preset. At this point, I could keep the preset as is or adjust the settings some more, if I wish. In this case, I just tinkered slightly with the settings.
OK, so I’ll tap the back arrow top left and we’re back in the LumaFusion timeline. And when playing the video, the iPad Pro had no problem playing the 4K video plus colour effects.
Performance Compared
If I compare that to my old MacBook Pro with Adobe Premiere Pro, Premiere can’t even play HD video with no effects smoothly any more. And as it used to be able to do this, I can only assume updates to Premiere have made this happen. Basically, it’s pretty much impossible to edit with this setup now.
As I said before, I realise this MacBook Pro no longer has the specs to run Adobe Premiere, so I’m not complaining. But this is just to demonstrate that an iPad Pro with LumaFusion – which costs a one-off fee less than £30 – can do a better job than a Macbook Pro and Premiere. Albeit a 2015 model.
Meanwhile, the Adobe Creative Cloud suite I’m currently paying for has an RRP of almost £50/month now. Of course, you’re getting a lot more than LumaFusion. But if you don’t need all that extra software and just want a simple but powerful enough editing setup, LumaFusion is much more affordable.
Also, being able to shoot video with the same device you edit on could be very convenient in many situations. File transfer time is basically reduced to zero.
You can connect iPad Pro and LumaFusion to any folder on your iPad. So, if you use FiLMiC Pro, you can open the folder containing FiLMiC Pro video files directly within LumaFusion. Of course, you can also do this with an iPhone, too.
Things I’m going to miss
There will be some downsides to editing with iPad Pro and LumaFusion compared to a MacBook Pro and Adobe Premiere. For example, I keep all my files on a Samsung T5 SSD and edit directly from that drive. That can’t be done with LumaFusion, but perhaps they’ll update that at some point.
There is no masking function, which is something I use quite a bit. There’s no stabilising feature, like Warp Stabiliser in Premiere. Again, something that’s useful to have for smoothing out shots if they’re a bit too jerky.
Those are the features that immediately come to mind. But I’m sure I’ll find others along the way. Whenever you switch editing software, you will always miss something. Especially when you’ve been using this software for about 5 years or more.
On the other hand, what I’m hoping to gain is simplicity, speed and convenience. Which is what mobile filmmaking is all about.
Eager to learn more?
Join our weekly newsletter featuring inspiring stories, no-budget filmmaking tips and comprehensive equipment reviews to help you turn your film projects into reality!