How to Make Bad Video Look Good
We can’t always get the perfect shot every time. Actually, I never get the perfect shot any time. My perfectionist inner demon always finds some part of the image to find fault in.
There’ll be a beautiful shot on my Adobe Premiere Pro timeline and my inner demon will say things like:
“If only the right side of his face was a little less underexposed.”
“If only the left side of her face was a little less overexposed.”
“I wish I hadn’t lost focus just at that moment.”
“Pretty good, but too shaky for my liking.”
“Nice shot. Just could be a bit more shaky don’t you think?”
My inner demon is never satisfied. The best thing to do is send him to get some groceries. He always gets stuck at the bread section, “Hmm, this loaf is too soft while this loaf is too solid…” Meanwhile, I can get on with the edit in peace.
Tip 1: Re-Shoot
If your shot isn’t up to standard, just go and re-shoot. This is probably the best option. But I’m guessing you’re reading this because you can’t re-shoot.
Maybe it was a once in a lifetime opportunity or there’s just no budget to get everyone and the location together again. For whatever reason, you can’t go and re-take this footage. So, moving on…
Tip 2: Out of Focus
If the main subject of your shot is a little out of focus there are some options to try to improve the shot. If the object is totally out of focus, then there’s not much you can do.
For a slightly soft looking image, you can try the “sharpen” filter. This is available in editing software such as Premiere Pro (and presumably all top editing platforms). There’s only so much it can do, however. But it might just be enough to make the shot acceptable.
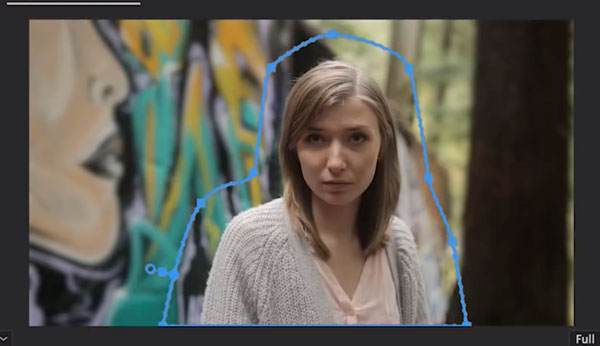
Another option is to mask around the slightly soft subject and blur out the background around them, which gives the illusion of them being more in focus. This is called masking or rotoscoping and can take lots of time, especially if the subject is moving around a lot. Then you have to animate the mask, sometimes frame by frame.
Tip 3: Shaky Footage
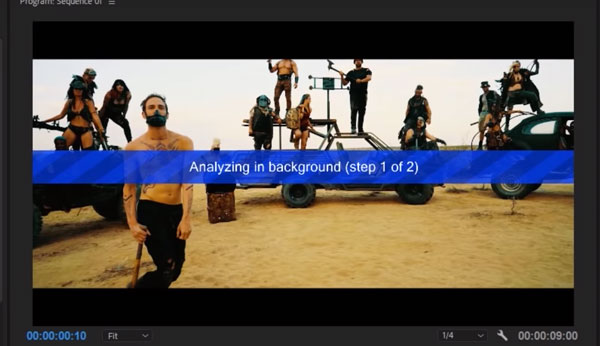
Most major editing platforms have some kind of stabilizing feature. In Adobe there is a feature called Warp Stabilizer. The software first analyzes the entire shot. Then the stabilizer will attempt to manipulate the video frame by frame to make it appear more stable.
This can involve moving the video left-right and up-down. It can also involve bending the image around to try to make it look smoother. Sometimes this works well and sometimes it makes your shot look like it’s made of jelly.
With the footage I’ve shot with my Samsung S9 and FiLMiC Pro I’ve found Warp Stabilizer can really struggle and often makes it look less stable. I’m not sure what’s going on there – possibly something to do with variable frame rates.
Note: One option to fix the variable frame rate problem with smartphone footage is to convert the shot into another file format (one without variable frame rate).
But you can play around with the Warp Stabilizer settings to try to achieve the best result.
Another option is to turn your shaky footage into a slow motion shot. Using features such as “optical flow” when slowing down footage in Adobe Premiere smooths out the motion between frames. With the shot slowed down, the movement will become less apparent.
Or you can try a combination of these two methods to smooth out your footage.
Tip 4: Overexposed Footage
When a shot or part of a shot is overexposed, the parts of the image that are “blown out” white appear unsalvageable. It looks like those parts of the image and the detail within are lost forever.
But Premiere and other programs have a setting called “exposure”. In Premiere Pro it is in the Lumetri – Basic Correction section. If you pull this down a touch, you might find recover some of that information within the blown out white areas.
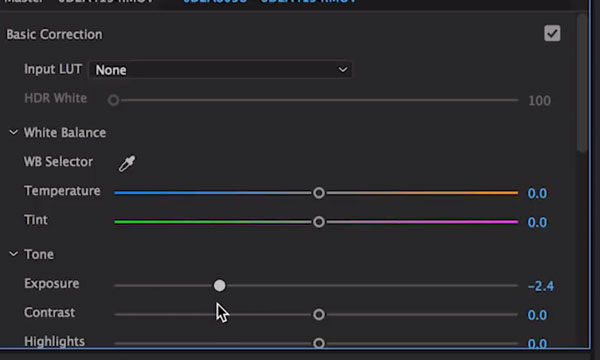
If some details start to appear, now you can try using the “highlights” slider, bringing that down as well. This should reveal even more from within the overexposed areas.
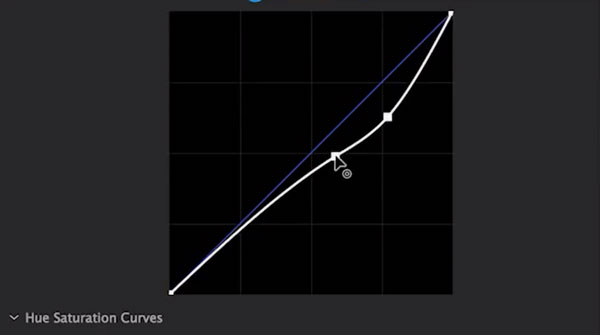
Try using “curves” to play around with the light levels of the image further. This is always a process of balancing the look of the whole image. If you bring levels down too far, darker areas of the frame can go too dark or even get lost to blackness.
Again, you can even mask out certain areas and only apply the recovery process to the lighter portions of the frame. One of the most common places this technique is used is in shots where the sky is overexposed.
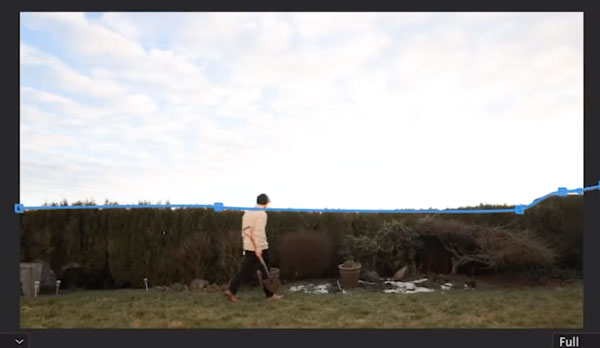
Using this method, you could also completely replace the sky with the perfect sky from another image. The difficulty of this task increases if your shot moves a lot. A still tripod shot will be far easier than a shot where the camera pans, tilts or moves a lot.
Tip 5: Artificial Light Flickering
If you have been filming with artificial lights around, you might experience a strange flickering in the image. The lights themselves can flicker, or the light they cast causes everything around to flicker.
How does this happen? It happens because artificial light is going on and off, but so fast our human eyes can’t see it. Lights flicker at a certain rate and if your frame rate is at a different rate, then this out of sync flicker occurs.
Now, light flicker rates depend on where you are in the world. For example, in Europe lights flicker at 50hz. Therefore, to avoid flickering you can set your camera’s frame rate to 25 fps or 50 fps. Or another rate which syncs with 50hz (like 100).
If your footage is flickering, there are some plugins and features which can reduce or remove it from the video. One such plugin is Flicker Free plugin. Unfortunately, the plugin itself isn’t free. Nor is it cheap.
Are you going to pay $150 for a plugin that does one little thing? Anyway, here is a tutorial by a guy who says you can fix it without a plugin. I actually tried this, but it didn’t seem to work. Again, possibly from variable frame rate.
Tip 6: White Balance
If your white balance came out slightly off, the colours can come out not looking quite right. Perhaps skin tones are a little too red, for example.
It’s tempting to get to work adjusting colour levels to try to get things correct (that’s why it’s called “colour correction”). However, that can be a very long job and also requires that you have a colour accurate monitor.
So a simple way this can be fixed is by using the feature in your editing software which sets the white balance depending on an area you select from the image.
Here’s a shot from a short film I’m working on (part of the Silent Eye series). The walls look orange yellow and the skin tones of Henk a little too red. Luckily, I know the walls in this room where actually white.
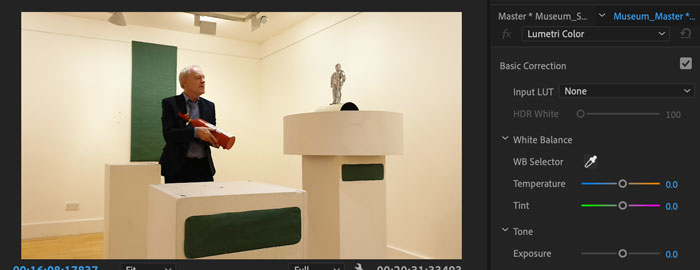
So all I need to do to correct the white balance is choose an area on the wall and click it with the white balance eye dropper.
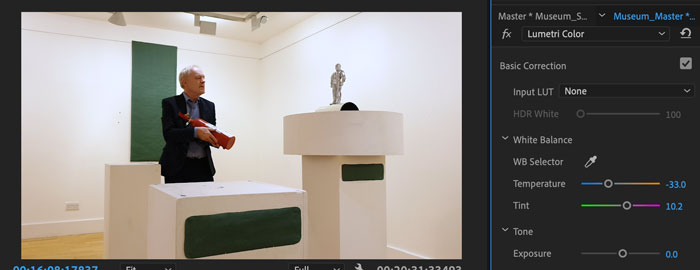
You can see now the walls are much closer to their actual colour and Henk’s skin tones are more realistic. On the right, you can see Temperature and Tint have automatically adjusted to correct the colour.
So, if your image has any area which contains an object which you know is supposed to be white, you can click it with the white balance eyedropper. This is a quick way to correct the colour. It’s not a replacement for proper colour work, but it’s a good place to start.
Tip 7: Be Creative
Sometimes you just can’t fix your footage. Either that, or you simply don’t have the time to do it. But perhaps you can turn your “mistakes” to your advantage by being creative.
I think a lot of people get so hung up on the technical side of things. And I’m old enough to have witnessed things get much much worse since the digital age brought us infinite virtual knobs to tweak.
I started as a professional composer when I had a big mixing desk which took up half my dining room. I had a rack of compressors and reverbs. They were physical and were limited in what you could adjust.
Now we have all this kit inside our laptops the amount of tweakable stuff has exploded. And it sucks you in with the promise of the ultimate perfect footage… if you just tweak it just a little bit more.
Now, more than at any other time in history, we need to remind ourselves we are doing creative work. Remember that legendary Python and director of big budget movies Terry Gilliam started out cutting up bits of magazines and animating them.
My tip here is if you have less than perfect footage, go with it. Add some lens flares, sun streaks from the overexposed sky, or blur out parts of the image.
Use your editing skills to make the story work. Make your shaky handheld footage even more live with fast cuts.
Basically, make it look like you did it on purpose. Which is actually the best description of being an artist going. Probably.