Zhiyun Smooth 4 – Smartphone Gimbal How To Guide
This is a guide to cover the operation of Zhiyun’s Smooth 4 Gimbal, from first opening the box onwards. If not the most popular, then certainly the Zhiyun Smooth 4 is one of the most popular smartphone gimbals. But the amount of features can be overwhelming, so here’s a guide to help you get started.
NEW: read my full review of the Zhiyun Smooth 5.
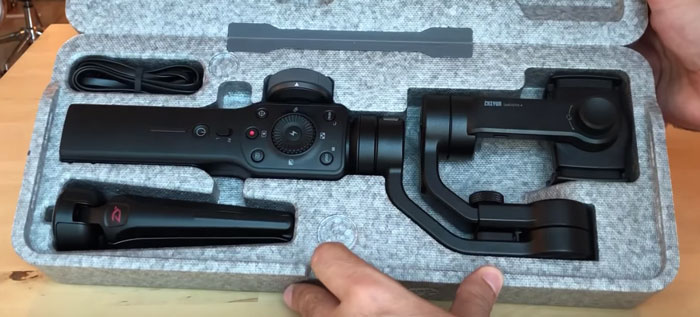
The cable in the top left of the box is a USB-C cable for charging the gimbal. Bottom left is a small, wide-base tripod which attaches to the bottom of the gimbal. Then there’s the gimbal itself in the middle.
Control Panel and Wheel
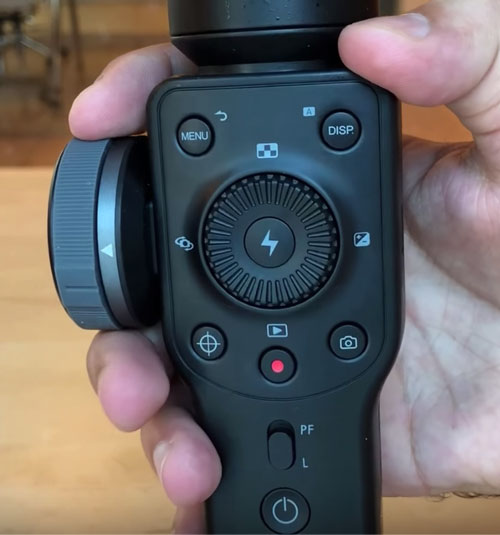
This is the control panel. There’s quite a few buttons, a switch and 2 control wheels. So plenty to get used to to operate the gimbal.
1. Place you Smartphone in the Gimbal
The gimbal grips your smartphone across the width of the phone. This is achieved with 2 elasticated clamps. Stretch the 2 clamps wide enough to slip your phone between them and release so that the clamps hold the phone in place.
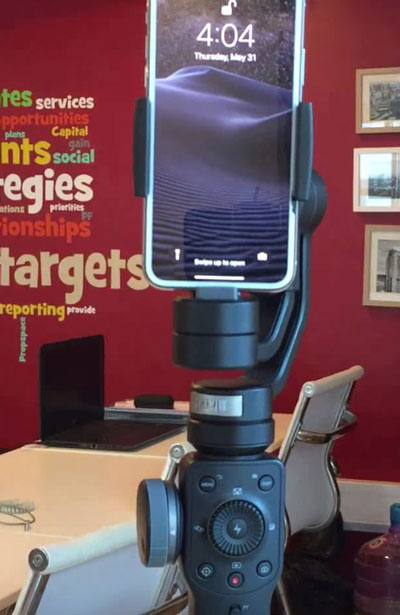
2. Balance the Smartphone
Once the smartphone is in place, you will probably find is flops to one side when you try to place it horizontal. This is because the smartphone needs to be balanced.
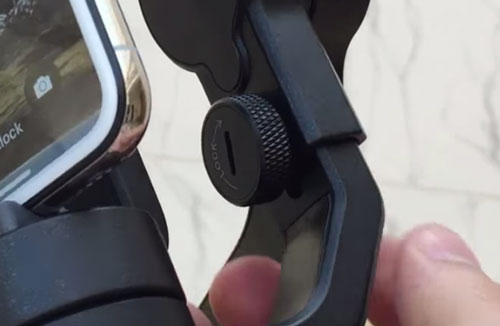
Loosen the screw (in the image above). Move the arm in or out to adjust the length. Try to find the perfect length that will allow the smartphone to balance evenly and tighten the screw.
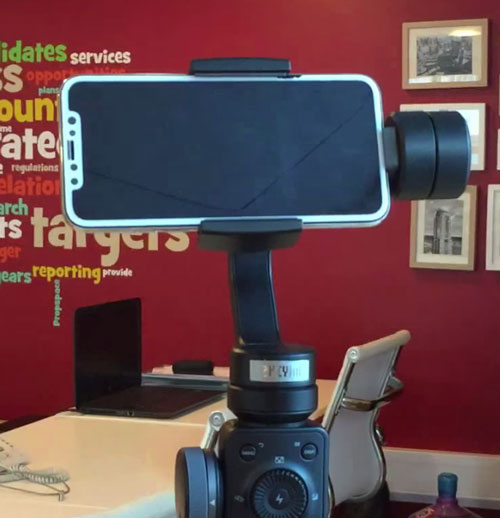
Now your smartphone should sit in the clamp level, as in the picture above.
Now turn on the gimbal, by pressing and holding the power button. This is the bottom button beneath the control panel. The motors now kick into action, and will hold the smartphone at this position.
You can now try this out by gripping the Zhiyun Smooth 4 handle and moving it around. The smartphone should be kept pointing in the same direction, no matter the angle of the handle.
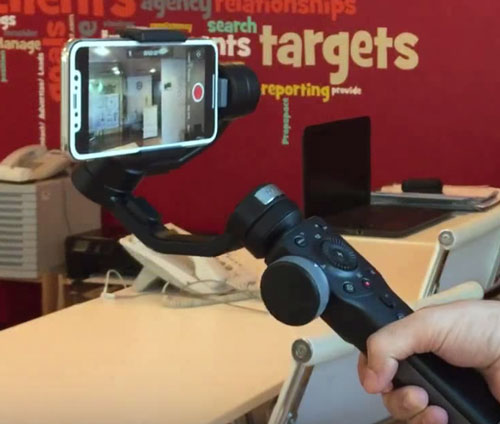
You can actually use the gimbal this way, without any further knowledge of the gimbals controls. However, there are extra features and controls which can be used if you connect the gimbal to smartphone. This is achieved using the Zhiyun Play app.
3. Connect Gimbal to Smartphone
Turn on Bluetooth in your smartphone then open the app. Click “Connect Your Device” to connect the smartphone.
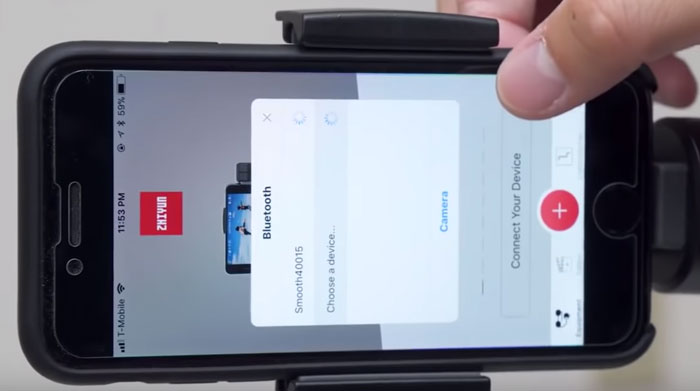
If the app does not connect to your smartphone automatically, then select your device manually.
Zhiyun Play App Screen
Using the Zhiyun Play app, as you can see below, the control of the gimbal gets a lot more complex.
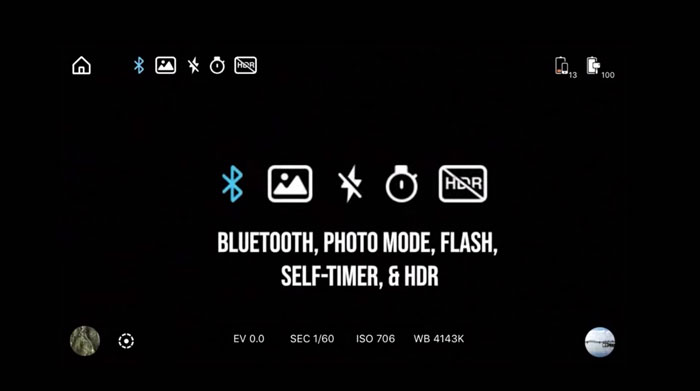
Icons are:
Home (top left), then Bluetooth connection, Photo Mode, Flash (on or off), Timer, and HDR (on or off).
Top right: Phone Battery Level and Gimbal Battery Level.
Bottom left: Album button and Object Track button.
Bottom right: Filter indicator
Lower middle: manual camera controls, which includes shutter speed, ISO and white balance settings.
4. Recording
With your gimbal and smartphone connected, to start recording simply hit the red record button in the control panel. To stop recording, press the red record button again.
The button to the right of the record button (with the camera icon) takes a still photo.
5. Gimbal Modes
The Zhiyun Smooth 4 has FIVE gimbal modes.
1. Pan Follow Mode
By default, the gimbal boots up in Pan Follow mode. Notice the toggle switch above the power button, with PF at the top and L at the bottom.
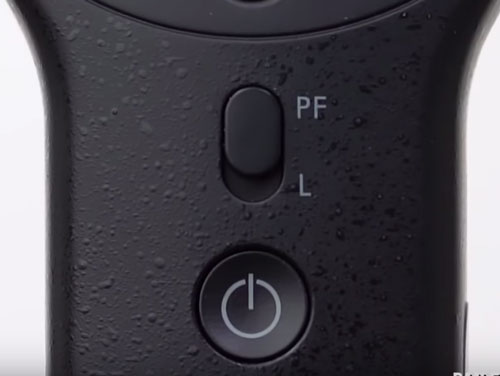
The gimbal should unbox with the toggle set to PF (Pan Follow). In this mode you can pan left and right and the camera will turn left and right as you move.
2. Locked Off
Switch the toggle switch down to L and the gimbal will be in locked off mode. Now the gimbal will not follow your left and right movement. This is helpful for following shots along a straight path, as it will prevent the camera drifting to the side.
3. Follow
On the back of the Smooth 4 handle are 2 triggers.
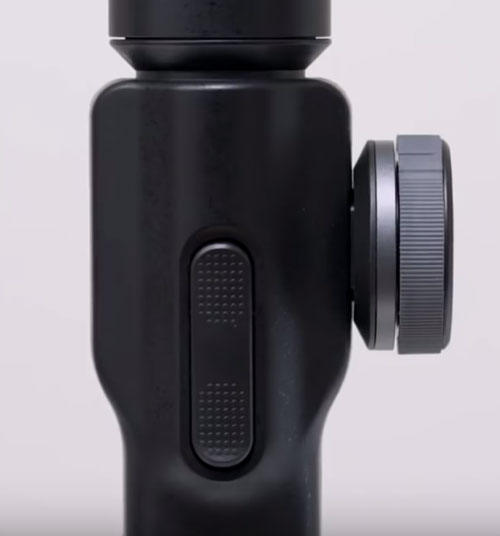
Holding the bottom trigger puts the gimbal into Follow mode. You camera will now follow all your movements, either left-right or up-down.
By holding down on the bottom trigger, set your camera at the desired angle. Now release the trigger. The gimbal will keep the smartphone in the position as you released the trigger.
To reset the smartphone position, double tap the bottom trigger.
4. PhoneGo Mode
Hold the top trigger to place the gimbal into PhoneGo Mode. This allows you to move the gimbal quickly into position without the slow gimbal movement slowing it down.
5. Standby Mode
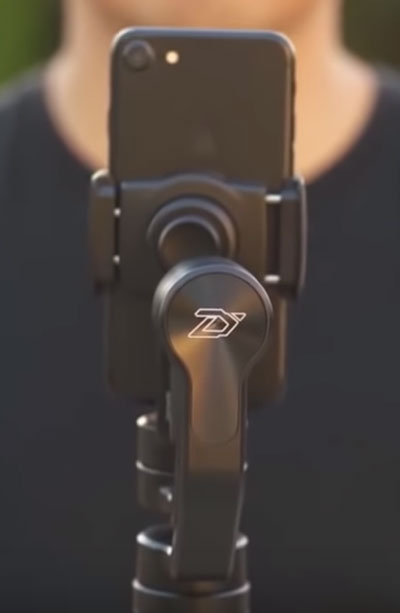
Standby mode keeps the phone locked in position while you do something else, take a call on your phone or whatever. Simply rotate the phone from horizontal to vertical where it clips into place.
6. Control Panel
Once you have your smartphone and gimbal connected, most things can be controlled using the control panel. This means you rarely have to touch the screen of your phone.
The Menu button brings up the menu of on the smartphone screen.
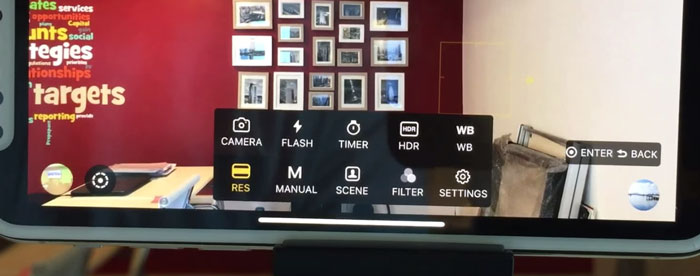
Notice that the central wheel also has 4 button functions. Press the wheel left, right, top or bottom to use as buttons. These buttons can be used to navigate through the icons on the screen. Use the central button to select a function once it is yellow.
The Menu button is also a Back button. To go back one step, simply press the menu button.
The target button, which is to the left of the record button on the control panel, switches between zoom or focus mode.
Focus & Zoom Wheel
Using the wheel on the left of the handle, you can adjust the zoom and focus. Toggle between the modes using the target button.
Flash
The central button inside the middle wheel with a flash icon can be used to select items in the menu. It can also be used to change the flash setting. Press and hold the flash button to turn on the smartphone’s flashlight.
Display
The display button on the top right of the control panel brings up the manual exposure settings of the smartphone camera. ISO, shutter speed and so on.
Wheel Buttons
The right wheel button opens up the general exposure compensation control. Once selected, use the wheel to darken or brighten the image.
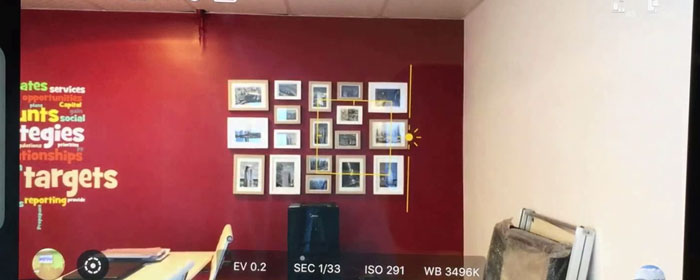
The left wheel button toggles between front and rear facing cameras.
The bottom wheel button brings up the gallery of photos and videos taken with the app.
The top wheel button brings up the video resolution options. Use the wheel to navigate and the flash button to select the desired resolution.
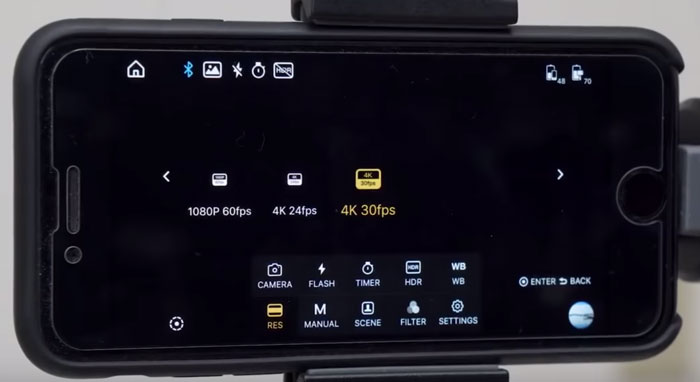
7. Menu
Pressing the menu button in the control panel brings up the menu on the screen. Use the wheel to navigate the different icons.
Camera
Selecting the camera icon brings up different modes to choose from. These include panoramic, long exposure, slow motion, time lapse, motion time lapse, vertigo.
After selecting a mode, press the camera button on the control panel to activate the feature.
There’s a lot of modes to go through, and with some experimentation you should be able to work them out.
But just to note the Vertigo mode allows your camera to a shot made famous in the film Vertigo, as well as the film Jaws. First you will be prompted to input settings to control your vertigo mode shot.
Most of the other functions in the menu should be self-evident to anyone who has used a digital camera.
The flash icon gives you various flash settings including keeping the flash on continuously.
The timer icon allows you to set a delay up to 10 seconds before taking a photo.
The HDR icon toggle HDR on and off.
The WB icon allows you to set white balance.
The resolution icon brings up all the resolution options available to your smartphone.
The manual icon allows you to toggle between auto and manual control of your camera. Manual mode allows yout to set shutter speed, ISO and white balance.
The scene icon changes the responsiveness of the gimbal. Are you walking or moving fast. Selecting motion will set the gimbal to react quicker.
The filter icon allows you to shuffle through a set of Instagram-style pre-set colour filters.
The settings icon brings up a new menu which opens up even more settings to fine tune your gimbal.
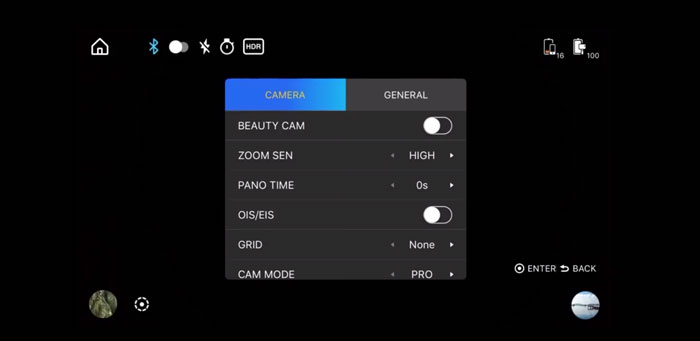
One important setting here is then OIS/EIS toggle switch. This is to switch your smartphone’s inbuilt stabilization on and off.
Now, we often have problems when the phone and the gimbal’s stabilization are working at the same time. This can create all sorts of weird jerking and wobbling in the image. So it is often best to switch off the inbuilt stabilization.
8. Object Tracking
Remember that icon in the bottom left corner of the Zhiyun Play app screen? That is the toggle on-off Object Tracking button. When selected on, you need to draw a box around the object you want to track.
![]()
Now, if the object selected moves during the shot, the Zhiyun Smooth 4 will automatically follow them. This feature has limits – if you move too fast it won’t be able to keep up.
Find the Zhiyun Smooth 4 Smartphone Gimbal on Amazon.
Smartphone Video – Beginner to Advanced
If you want to know more about smartphone filmmaking, my book Smartphone Videography – Beginners to Advanced is now available to download for members on Patreon. The book is 170 pages of essential smartphone filmmaking topics:
Things like how to get the perfect exposure, when to use manual control, which codecs to use, HDR, how to use frame rates, lenses, shot types, stabilisation and much more. There’s also my Exploring the Film Look Guide as well as Smartphone Colour Grading.
Members can also access all 5 episodes of our smartphone shot Silent Eye series, with accompanying screenplays and making of podcasts. There’s other materials too and I will be adding more in the future.
If you want to join me there, follow this link.
Simon Horrocks
Simon Horrocks is a screenwriter & filmmaker. His debut feature THIRD CONTACT was shot on a consumer camcorder and premiered at the BFI IMAX in 2013. His shot-on-smartphones sci-fi series SILENT EYE featured on Amazon Prime. He now runs a popular Patreon page which offers online courses for beginners, customised tips and more: www.patreon.com/SilentEye


bonjour et merci très complet .
cdlt papy =)
Please please help with a question. I know that object tracking supposedly comes with the app, but it’s not listed in the description section under the app section. Reading various reviews I don’t think it works very well. Zhiyun haven’t been very helpful confirming anything. I will be using an Apple iPhone 7plus. I think they’ve had a few bug issues..Thank you for any feedback. Alistair
It appears to work but as someone who uses motion tracking a lot in my work, no device has 100% success when tracking objects. It will depend on how easy it is for the software to tell the difference between the object and the background. So an object with similar colour to the background will be difficult to track.
my smooth 4 did not connect to my phone it shows that red light indicator error or connection error too.. please help me out
i have the same issue
Perhaps ensure your “Play” app is connected, that bluetooth is active on your phone. I have had the situation where I thought the app was paired, found I couldnt record, but when I went and reconnected to the program, all was fine. Top left button on screen on your phone in the app takes you to reconnect page. I hope this is the problem, if not , sorry!
Why there is no sound settings in ZY PLAY App? It doesn’t record audio.
It may not be the case but when I tried to connect my Smooth4 to Iphone 12 pro the phone could not see the gimbal at all. It was frustrating and I almost gave up. However the problem was that the app can work with a few different gimbal models and Smooth4 is not set as a default one when you try to connect to it. After I switched to Smooth 4 model on the initial screen the gimbal was found and connected almost straight away.
Make sure its recharged and not pulgged in and charging while trying to connect.
I’d just like to sincerely compliment you on this clear and easy to understand manual – much better than the manufacturer’s – yours is so well laid out, and easy for someone not technically minded to understand.
Thanks Simon. Can you help me with sound? I bought a mic that plugs into the base of my iphone 7 but if I want to film a vertical shot I can’t get it in as the base of the phone is sitting in the gimbal. What can I do please?
Hi Patricia. Either you can use a bluetooth mic or record audio on a separate device
So…can’t find the method of controlling the cameras on Pixel3 to move to a selfie setting…seems pretty straightforward but mind boggling that a quick search can’t answer this question…I’d appreciate your help you seem to have created a clear and efficient support layer.
It’s the left wheel button 🙂
Thanks for the fantastic tutorial.
Please spare my ignorance – but does this have video pause button/option (not stop/play) as my daughter want to record stop-motion videos. Thanks
For stop motion you can just take still photos. Otherwise, maybe you mean time-lapse in which case yes you can. Filmic Pro has a pause resume function, if you use that app with this gimbal. The Osmo Mobile 3 and 4 gimbals have programable time-lapse, as does the Moza Mini MX and probably others.
I am looking for a Gimbal/stabilizer that will also attach to a tripod – and allow me to do 360 panoramas in portrait mode
I this possible with the smooth 4 ?
360? no
We are using our smooth 4 for live broadcasting. After connecting via bluetooth to wirecast we are unable to use the zoom dial because it becomes disabled. Any help in resolving this issue would be appreciated
Great tutorial and site. Thank you.
I have a Smooth 4 which I only bought a few days ago so still getting used to it. I’ve a problem – when I film footage using the ZY Play app, import it into Photos on my iMac and then export it to a folder to load into iMovie the sound jumps slightly out of sync with the video. This isn’t the case with footage filmed using iPhone’s own camera app, however of course it means I can’t use any of the buttons and options on the Smooth 4. Any idea how to fix this?
George
Is the ZY Play app compatible with using an external microphone? Pixel 5, Seramonic Blink 500 B5
I’m finding that parts of the Smooth 4 become very hot during use. Am I doing something wrong?
Mike R
are you mounting a lot of weight to the gimbal – phone, lenses, filters, mics etc?
how do I download the videos and pictures onto my computer?
Why isn’t there any pan control for left and right , up and down?
The first Smooth q had these controls, it seems strange, how can i control the movement of the gimbal left right and up down on the tripod if there is no control for these?
Please enlighten me!