How to Use StaCam with Zhiyun Smooth 5
In this video I’m going to guide you through the features of Zhiyun’s StaCam app.
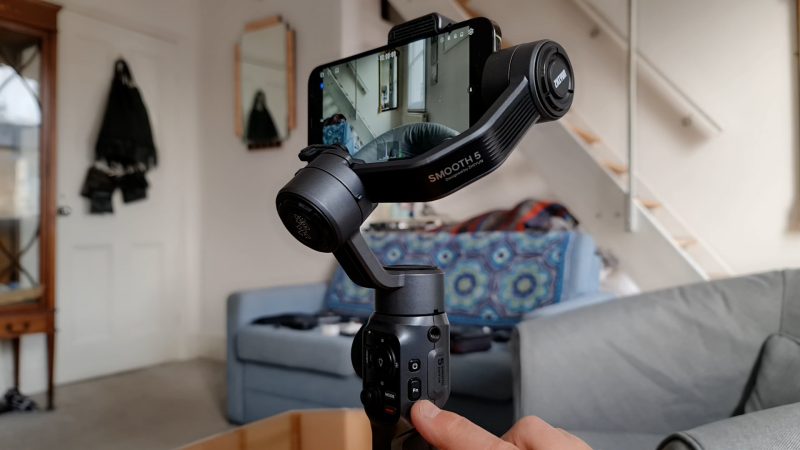
When the Zhiyun Smooth 5 was first released, it was only supported by the ZY Cami app. Thing is, one of the unique features of the Smooth 5 is this wheel, which you can use to adjust the zoom or the focus.
Just tap the button in the middle of the wheel to switch between zoom or focus. Pretty cool.
ZY Cami
The snag was, the Cami app would only allow focus control when in manual mode. And the android version of the app had no manual mode. Therefore, no focus control for android phones.
FiLMiC Pro
All our hopes rested on FiLMiC Pro providing support for the Smooth 5, as they had for the Zhiyun Smooth 4. But we’re still waiting for that, and there was no indication as to when that might arrive.
Then came the StaCam app. Again, there’s a version of this app for both iOS and Android to download. This app is a bit like FiLMiC Pro in that it gives you not only focus control, but all the basic manual controls, like shutter speed and ISO and so on.
So let’s look at what we can do.
Connect StaCam to Zhiyun Smooth 5
First, balance your phone on the gimbal and power on. Make sure bluetooth is switched on and open the StaCam app. You might find it connects automatically.
If the phone and gimbal are not paired, the bluetooth icon in the top left corner will be kinda pulsing. Once it’s connected you will just get a blue icon – no pulsing.
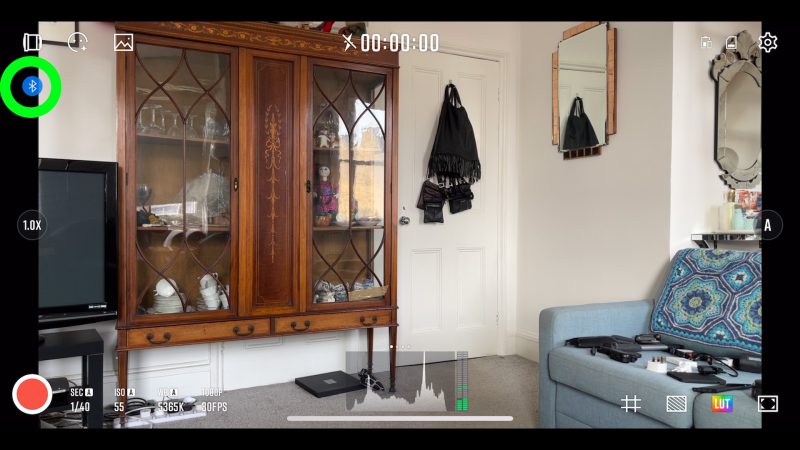
If it is pulsing, you can tap the blue button and try to connect or reconnect that way.
Zhiyun StaCam Overview
The Zhiyun Smooth 5 can control various settings in the Zhiyun StaCam app using the controls on the handle.
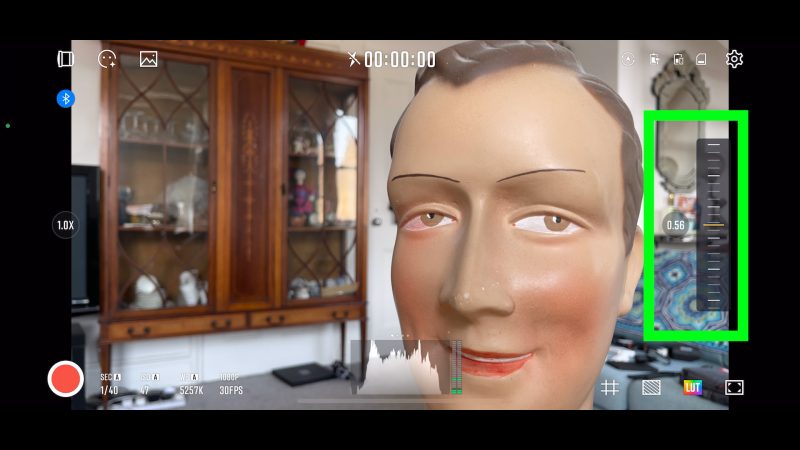
Like every other gimbal, there’s the record button. Press to record, press again to stop. Aside from that, there are 2 wheels which allow you to change settings in the app. The zoom and focus wheel on the side, and the adjustment wheel on the front.
There’s also 3 other buttons which control the app. The menu button, the lightbulb button in the centre of the wheel and the Fn button on the side.
Locking Exposure
To simply lock exposure and focus, tap and hold on the area where you want focus locked. You can use the slider to adjust exposure as well.
Zhiyun StaCam Adjustment Wheel
The side wheel is really nice to use but the adjustment wheel can be a bit fiddly. It takes a bit of practice but you can use it if you want. But you might find it easier just to tap and swipe on the screen.
There are 4 buttons if you press down on the wheel: left, right, up and down.
Resolution & Frame Rate
Tap up on the wheel to get resolution, filming mode and frame rate settings. Use the wheel to move around the settings and then tap the centre button to select that setting. To close this screen, press the menu button. Or just tap on the middle of the screen.
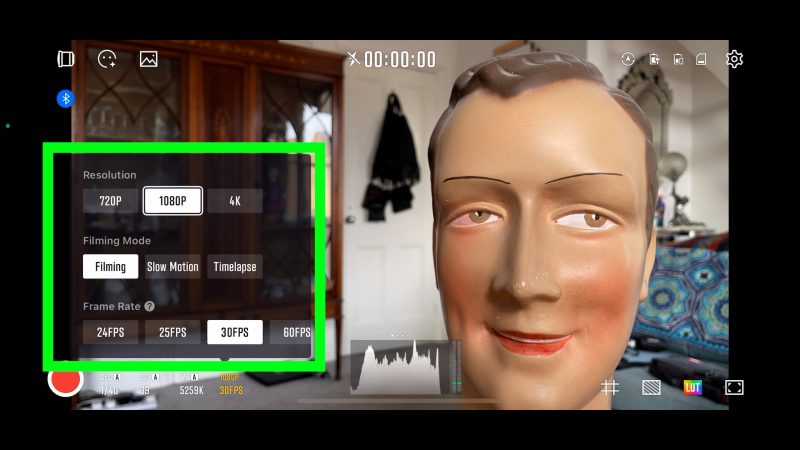
To access these settings without using the wheel, just tap where it displays resolution and frame rate, next to white balance and exposure settings.
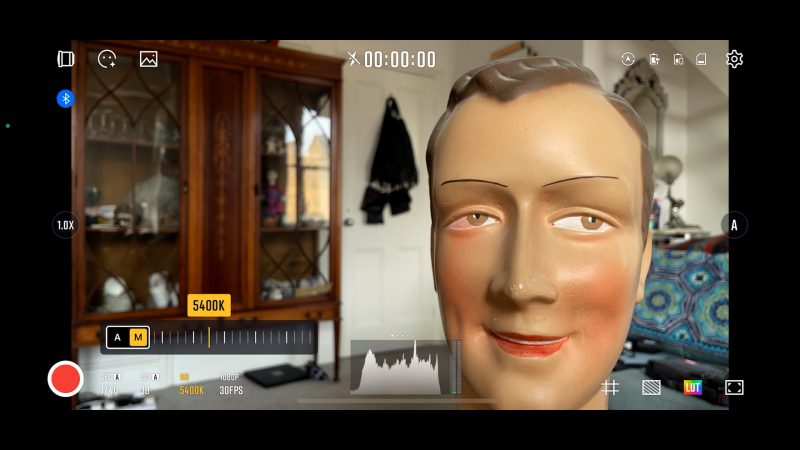
Zhiyun StaCam Exposure Settings
Tap right on the wheel to get exposure setting controls. Keep tapping right to cycle through shutter speed, ISO and white balance. Choose a setting you want to adjust and now tap the centre lightbulb button, which switches exposure from auto to manual mode.
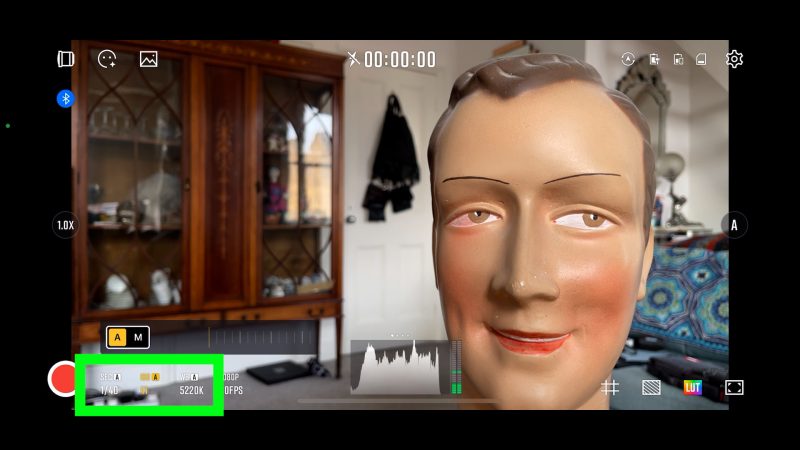
You can see that the auto – manual toggle switch is switched to M for manual. Tap the centre button again to revert to auto.
Use the wheel to adjust the setting. As with all the StaCam settings, you can simply use the screen, if you find that easier.
White Balance
With white balance, again there’s a toggle switch between auto and manual. Most of the time, it’s enough to just switch to manual and that will lock white balance.
You will probably notice that the white balance changes slightly when you do so. That’s because the manual white balance adjusts in 100 increments, so when you switch to manual it rounds it off.
The thing about having a locked white balance is it won’t adjust during the shot. If you really want to be accurate with it, you will need to adjust the white balance in your editing software later.
Pressing the menu button closes the exposure and white balance settings.
Zhiyun StaCam Gallery
Press down on the adjustment wheel to open the gallery. Spin the wheel to scroll through videos that you have captured with StaCam. Press the lightbulb button to select a video. Press again to play or pause the video.
In the top right, an information button allows you to see the technical information of the clip. Using an iPhone, the download button exports the clip to your iPhone photos app.
If you tap the heart icon on a video, that video will appear under the like heading. So this makes it easier to find the best takes later on, if you have a lot of takes.
If you tap select on the screen you can select a batch of videos and then like or trash those videos as a group. It’s a little bit eccentric.
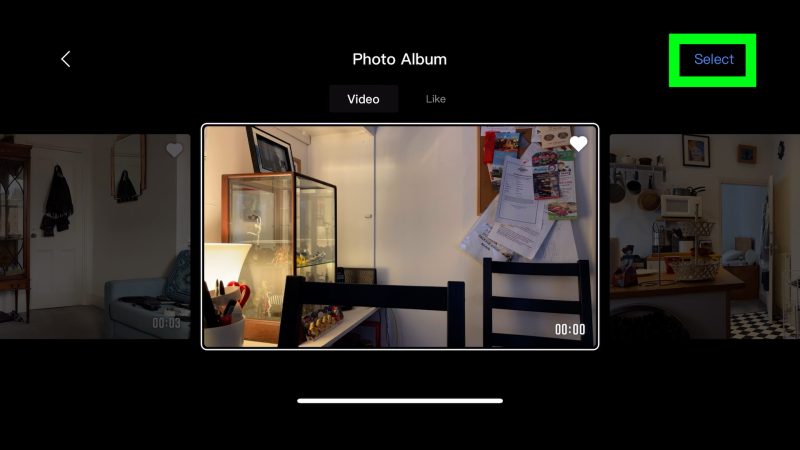
If I select one video here by tapping on the screen, I can now use the wheel to scroll through the videos and use the bulb button to select the videos. It seems you have to do the first one by tapping the screen though.
To access the gallery without the wheel, tap the photo icon top left. To close the gallery tap down again on the wheel or tap the arrow in the top left.
Interface
If you tap left on the wheel, it removes the interface so you get a clean screen. And you see the icon in the bottom right turns yellow.
Tap the menu button to return to the normal interface.
Camera Selector
To switch between different lenses on your smartphone, tap the lens picker in the top left corner. (On the iPhone) there’s an auto option and I’m not exactly sure what that does.
To select a camera just tap on the screen. But you can also use the wheel and button to navigate and then select the camera.
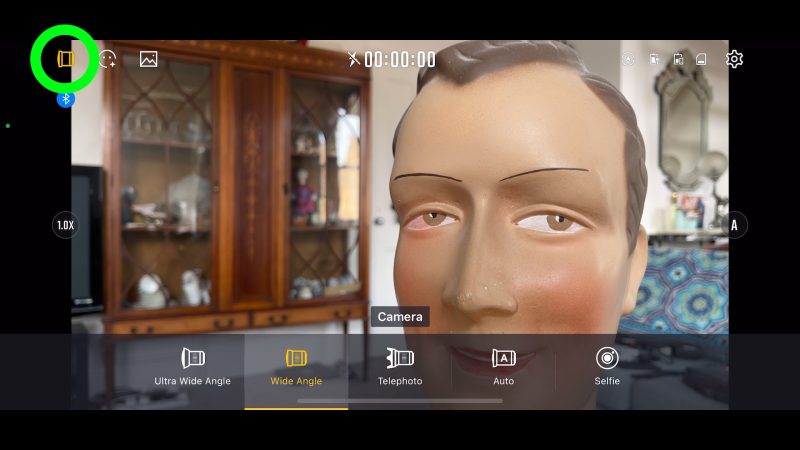
To close this, tap the centre of the screen. Or you can use the menu button.
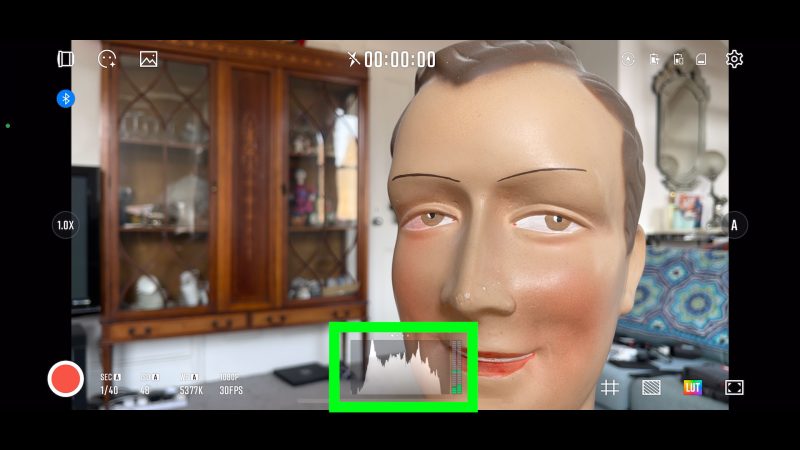
Histograms & Audio Levels
Bottom centre you will find the histograms which basically help you get good exposure. Tap on the screen to cycle through the different histogram options.
Next to the histograms are the audio level meters.
Zoom & Focus Wheel
By default, when you turn the wheel at the side, it will zoom in and out. Press the button in the middle of that wheel to switch to focus control. Now when you turn the wheel you adjust focus.
This can be really useful for doing focus pulls or simply getting accurate focus. It’s easier to use this wheel than swiping a control on the screen.
When I tried this wheel using an android device, I found the zoom is fine but the focus is not smooth. And I tried 2 different devices. Hopefully this is something they can fix in the future.
How to Switch Back to Auto Focus
When you switch to focus and start using the wheel to control focus, or even if you swipe on the screen, focus switches to manual mode. At first I couldn’t find a way to switch back to auto focus. But this is how you do it: just tap the screen until you get the exposure reticle. Focus will return to auto mode, until you adjust it manually again.
OK, so those are the essential controls. There’s also some interesting features accessed in the bottom right of the screen. The first 2 give you a lot of options for different guides. The LUT button opens up a menu of different preset filters.
Bear in mind, many of these features are only available in the paid version. But I will quickly show you a few options so you can see if it’s worth paying.
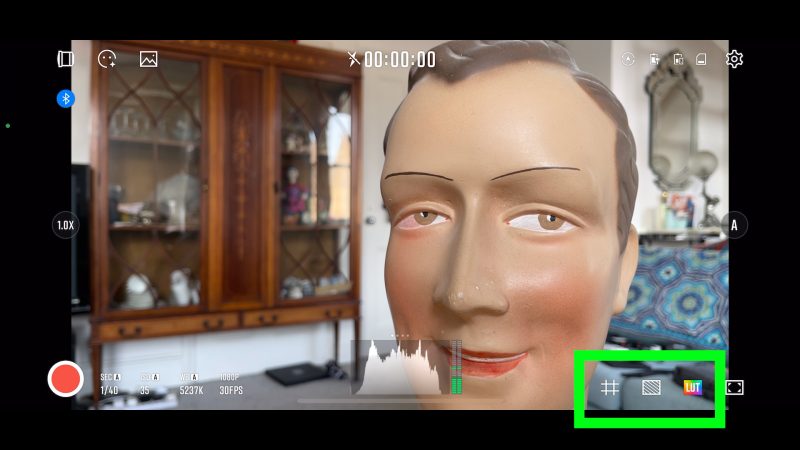
Frame Guides
The first button in this row opens up various guides which assist framing shots.
You have to open this option by tapping the screen. But once open, you can choose to use the wheel and button on the front of the gimbal.
Aspect Ratio
Top is a set of overlay guides dealing with aspect ratio. They won’t do anything to the video you record, they’re just for reference. For example, if you want to shoot video that will eventually be cropped to a wide screen ratio of 2.39:1, this guide will help you when you are framing your shots and avoid nasty shocks later when you’re editing.
Guides
In guides you have 2 options for grid overlays, plus a switch for adding diagonal lines. Again, this helps when framing. For example, if you wanted to use the golden ratio in your framing. I’ve talked about that in previous videos. As well you can learn about that in my e-book for members on Patreon: Smartphone Filmmaking – Beginner to Advanced.
Level Indicator
The final guide here is pretty useful. Enable this and you will get a level indicator. When this line is yellow, it means your smartphone is level with the horizon. When it’s white, it’s not level.
Roll the camera and see how the line indicates the level of the horizon.

Safe Frame
These safe frame overlays are useful if you want to make sure no important part of the image could find itself cropped out of the image. It’s a bit like the frame ratio guides, but this time it crops in a preset percentage from all sides.
Again, it does nothing to the video file. It’s just a guide to assist you.
Footage
Tap the next button along to open a menu called footage. I don’t know why it’s called footage, because this is not footage. These are actually various live metering guide options.
You can also open and close this menu by pressing the button on the side, below the power button, marked Fn.
So tap on the screen or use the wheel and button to select and deselect various live meters.
Focus peaking overlays a green line around the in focus areas of the frame.
Zebra Pattern overlays blue for underexposed and red for overexposed areas.
False Colour is an overlay which shows different exposure levels as different colours.
Highlight Clipping is an overlay which is like the Zebra but this time it indicates where information is lost. This is known as clipping.
Monochrome Display switches between red, green, blue and greyscale. This does nothing to the video. If you choose blue you won’t get a blue video, for example.
Advanced settings simply allows you to customise all those live metering options to suit your preference.
More Settings
Now, if you tap the cog top right this opens up a bunch of other settings.
You can toggle between portrait and landscape.
You can switch on a tone which sounds when you stop and start recording. They are different tones, so that helps you avoid that mistake where you think you started recording but actually stopped.
Use LUT means the LUT you apply from StaCam’s preset filters will be added to the final video. Otherwise it will only be used as a preview guide. I have no real idea why you would only use it for preview unless you had exactly the same LUT to apply in your editing software. Perhaps you can also access these same LUTs in a Zhiyun editing application somewhere.
Anti-shakes applies stabilisation.
Bitrate allows you to adjust the quality of the video. Higher bitrate files are higher quality but are also bigger so take up more space. The maximum is 16mbps which seems rather low.
Coding allows you to switch between the h.264 or h.265 codecs. The 265 is more modern but sometimes not compatible. Again, I explain all this stuff in my e-book for members, if you want to understand it better.
We would expect the bitrate to change when we change the codec here, but it doesn’t. Which makes me a little suspicious of this bitrate number.
Filming countdown allows you to set a timer before the video starts recording.
LUTs
Tap the LUT button to access a bunch of preset filters, including a Log setting. You can also adjust the strength of each filter. They will need downloading before you can apply them to your video.
Again, some of these are not available in the free version.
And that’s pretty much it for this app.
Ah one last thing – if you tap the flashlight symbol at the top, it switches on your flashlight for extra lighting. So be careful not to tap that by accident because that will drain your phone’s battery.
Smartphone Video – Beginner to Advanced
If you want to know more about smartphone filmmaking, my book Smartphone Videography – Beginners to Advanced is now available to download for members on Patreon. The book is 170 pages long and covers essential smartphone filmmaking topics:
Things like how to get the perfect exposure, when to use manual control, which codecs to use, HDR, how to use frame rates, lenses, shot types, stabilisation and much more. There’s also my Exploring the Film Look Guide as well as Smartphone Colour Grading.
Members can also access all 5 episodes of our smartphone shot Silent Eye series, with accompanying screenplays and making of podcasts. There’s other materials too and I will be adding more in the future.
If you want to join me there, follow this link.
