Master your DJI Osmo Action 3
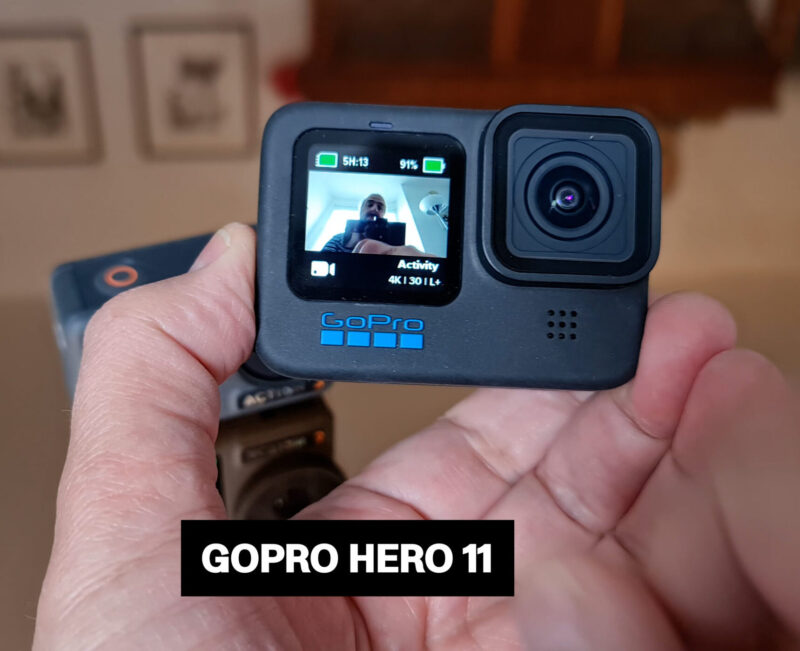
This is the guide where you learn everything you need to know about your DJI Osmo Action 3. What I like about the DJI Osmo Action cameras is they’re small and versatile, without compromising on the video quality. I’ll talk about the different modes and settings, when to use them and how to get the most from them. I’ll talk about the DJI Mimo app and how it works with the Osmo Action cameras. As well, I will occasionally compare the camera with the GoPro Hero 11, in case you’re using this as a buying guide.
Contents:
- Getting Started
- Battery Care
- Camera Case
- Quick Record Tip
- Magnetic Mounting
- Recording Video
- Transferring Media
- Two Touch Screens
- Ease In, Ease Out
- Stabilization Settings
- Touch Screen Navigation
- QuickSwitch Button
- Best Video Settings
- DJI MIMO App
- Horizontal & Vertical Modes
- How to Set Manual Exposure
- The ND Filter Problem
- EIS Priority
- Field of View
- Slow Motion
- Timelapse & Hyperlapse
- Using Your Phone as a Remote
- Audio Controls
- Anti-Flicker Setting
- How to Save Battery Power
If you’ve just bought one and you’re getting started for the first time, the next section is for you. If you’ve already set up your Osmo Action and have some experience using it, you can skip to the following part.
Setting Up
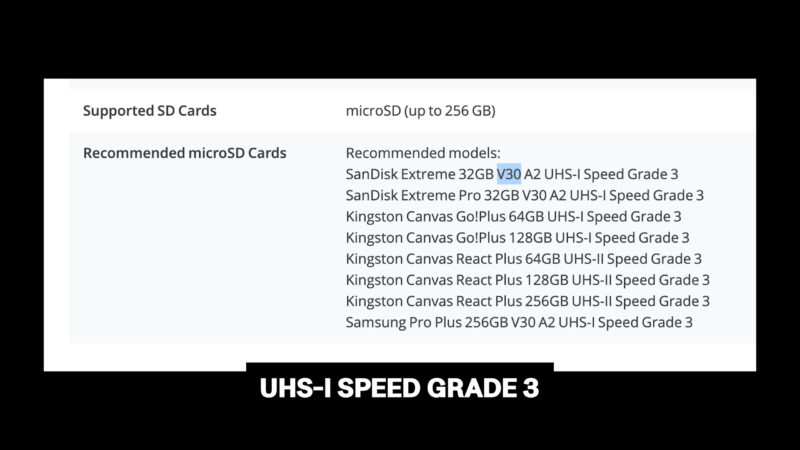
Firstly, like every other action camera, you will need a microSD card for your Osmo Action 3. I’m using a card made by Insta360 and it works fine with this camera. DJI says you need a UHS-I Speed Grade 3 microSD card to be able to read and write high resolution video.
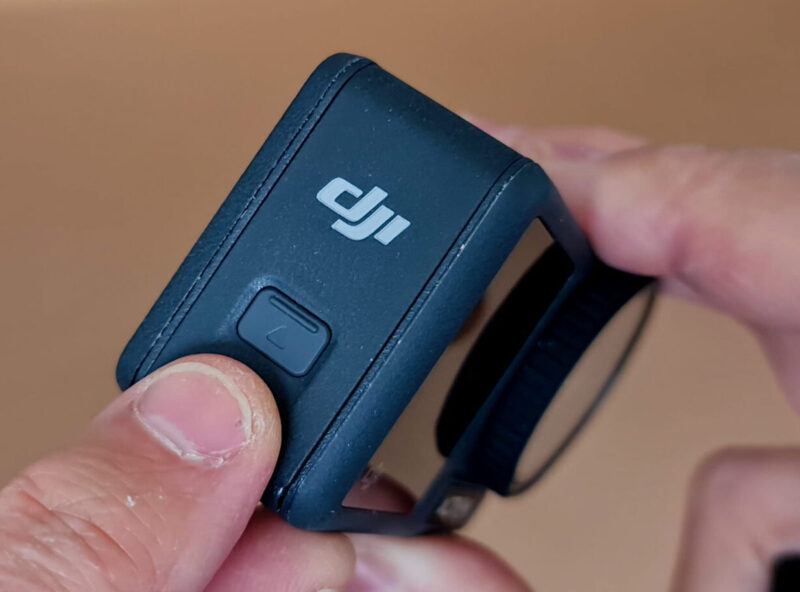
Remove all the protective stuff. But leave the little strip on the batteries, because you use this to remove it from the camera. To open the battery compartment, push upwards in the direction of this arrow: towards the top of the camera, where you’ll find the red record button.
Slot in your microSD card. Press it down so it clicks into place. Place the battery inside and batten down the hatches.
If you see any orange, that means your camera isn’t sealed properly and therefore not waterproof. So make sure the hatches are closed correctly if you’re taking the camera underwater.
Battery Life
This adventure combo pack includes 3 batteries. DJI says 1 battery will last up to 160 minutes, if you’re shooting at 1080p. But most likely you’ll be shooting at a higher resolution. I know I will be.
Bear in mind, DJI says you can use this camera at temperatures of between -20 and plus 45 degrees centigrade. Also be aware, it’s dangerous to use this camera at temperatures above 45 c, which is 113 F.
Compare that to the GoPro Hero 11, which can last up to 120 minutes shooting 1080p 30fps, which is 40 minutes less. As well, the battery can only perform at temperatures as low as -10 centigrade.
One thing to note, the hotter any battery gets the worse it will perform. So if you’re at 40 degrees, that battery is going to drain quicker.
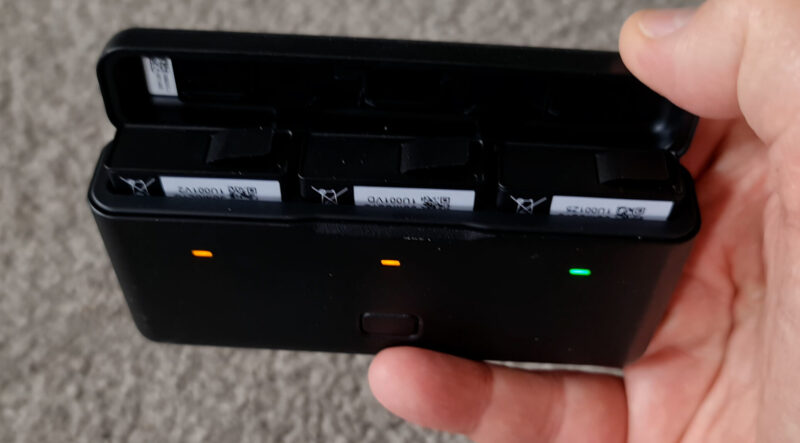
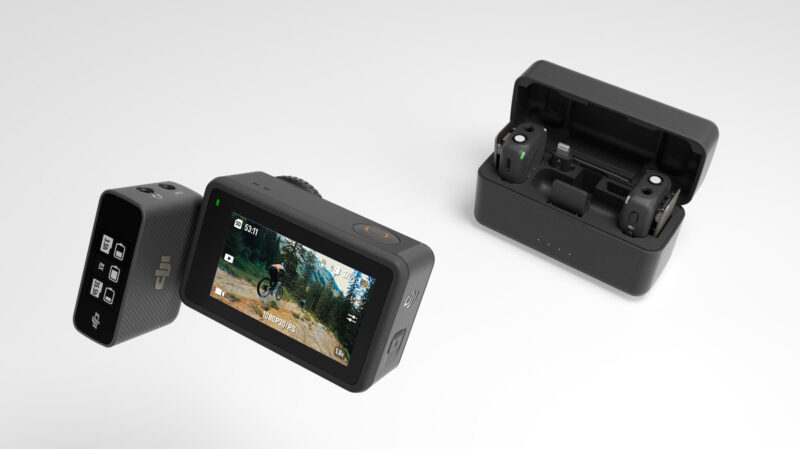
With the DJI Adventure Combo, you get extra batteries and the GoPro also has package options which include extra batteries. By the way, when you open the lid of the battery charger, you get green lights to tell you which batteries are fully charged and orange for those not fully charged.
To charge the battery while it’s still in the camera, open the USBC hatch. Same as the battery hatch door, press in the direction of the arrow. This is also where you plug in an external mic.
Camera Case
Once you’ve taken everything out of the box and all the protective coverings off, where should you store this camera? At least you have a protective covering over the camera, which you can switch with a filter. More about that later.
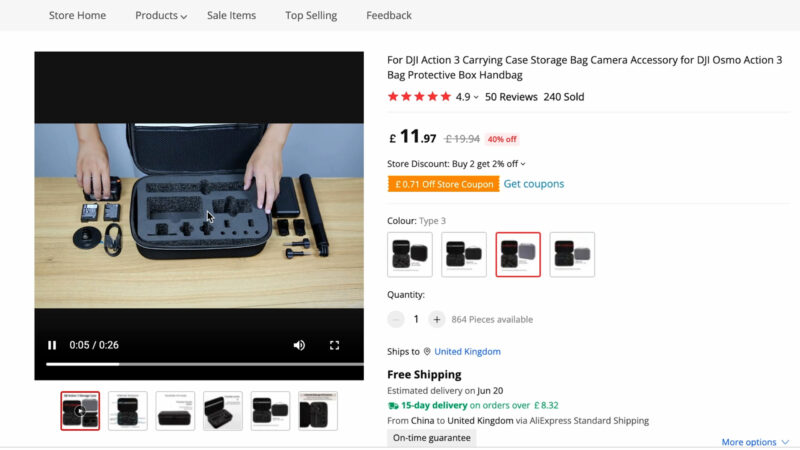
The DJI Osmo Action 3 does not come with a case, as the GoPro Hero 11 does. But I’ve seen a few pretty cool looking cases on AliExpress for not too much money. So that might be worth investing in.
Find Osmo Action 3 case on AliExpress
How to Activate the DJI Osmo Action 3
If you don’t have the DJI Mimo app, you’ll need to download it to be able to activate your camera. If you are using an Android device, you will need to download the Mimo app from the DJI website, as it’s no longer in the Play Store.
The app also allows you to control your Osmo Action remotely as well as providing other features, such as editing, change settings, livestream, switch modes and so on. Open the app and connect to the camera. Activate the camera and install any firmware updates, if you’re prompted to do so.
Quick Record Tip
Like the GoPro Hero 11, the DJI Osmo Action 3 has a Quick Record function. This means that you can quickly start recording when the camera is switched off, simply by pressing the record button. The camera switches on, starts recording and then switches off.
The difference between the Action 3 and the Hero 11 is that when you press stop to stop recording, the DJI device gives you 3 seconds to stop it from switching off. The GoPro does not, it just switches off.
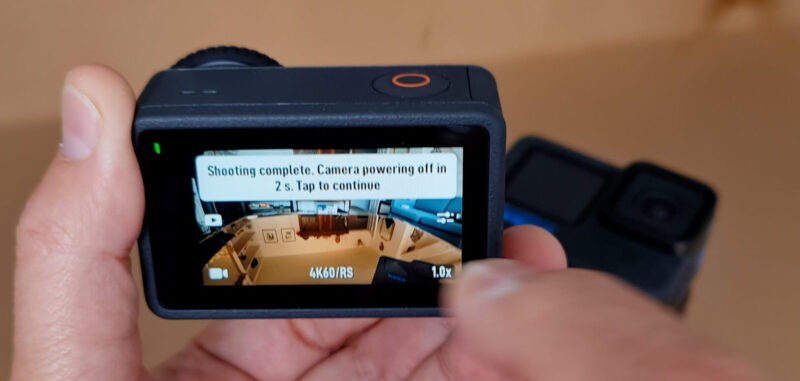
Why is this an advantage? You might have seen an opportunity for a great shot and you can quickly get recording. But what if you then see another great shot? With the GoPro, you will have to wait for it to power up again, with the DJI you can keep shooting.
Magnetic Mounting System
The DJI Osmo Action 3 has a magnetic mounting system which makes it easy to remove from your selfie stick and place it on a chest strap or helmet mount, for example. As well, the magnet can be used to stick the camera to a metal object, like a lamppost. This is great for improvising shots on the fly.

With the GoPro Hero 11, you need to unscrew the camera from the 2 prong screw mount every time. So that’s somewhat slower.
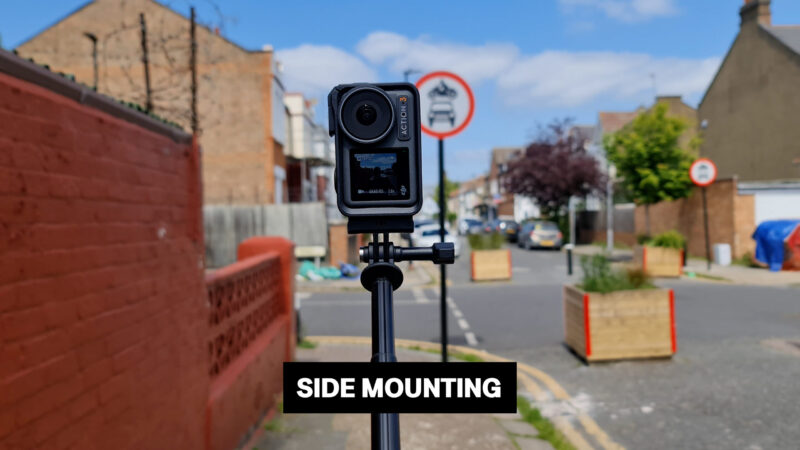
The magnet system on the Osmo Action 3 also uses a catch, so it’s very secure. Press in at the sides to release the catch. When you have the camera in the protective frame, you now have the option to mount the camera on the side.
Now you can film using a vertical framing. Or you might want to mount the camera to your bike or car from the side. Basically, this system gives you a lot of extra versatility when it comes to mounting and positioning your action camera.
Recording Video
To power on long press the power button on the side of the camera. This is also the Quick Select button, but I will talk about that later.
Note that when you power on you get a rising melody, and a falling melody when you power off. It’s good to remember if you are using your camera in a situation where you might not be able to see it. If you’re wearing it while biking, you can power on and keep riding.
Press the record button on the top of the camera. Now you get a ping sound and it starts recording. Press the record button again to stop recording and you get another falling melody. Again, useful to remember for situations where you can’t see the camera.
As well, one of the most common mistakes made when recording video is thinking you are recording when you’ve just turned the camera off. Then you get clips of all the bits in between. We’ve all done it.
Transferring Files
Now that we’ve recorded some video, how do we access it so we can use it?
Transferring Files to a Phone
Connect Osmo Action 3 to DJI Mimo. Tap the Playback icon to preview photos and videos.
Click the download button to download photos and videos to your phone. You can edit videos & photos directly in the Mimo app or share them to social media platforms.

Transferring Files to a Computer
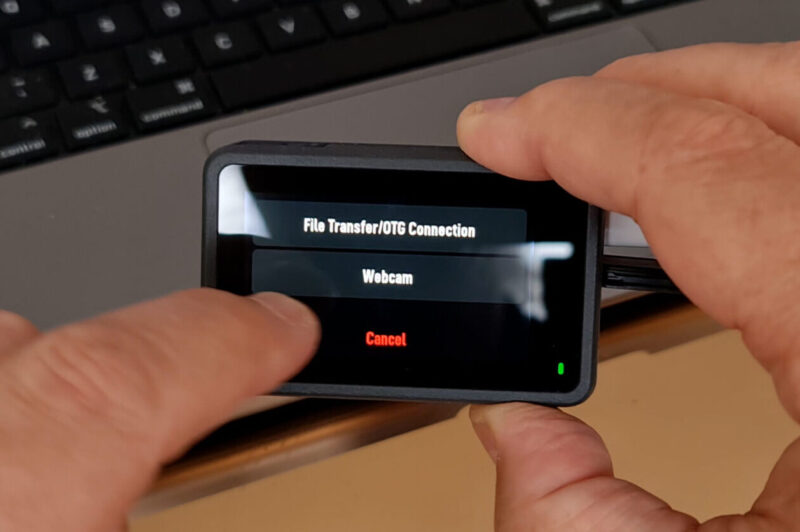
To transfer files to a computer, power on Osmo Action 3 and connect it to a computer using a USB cable.
A pop-up will appear, prompting you to select the USB connection type on the camera touchscreen. Tap Transfer File to download the files from the camera to the computer. When transferring a file, the camera cannot take photos or record videos.
A Tale of Two Touch Screens
The DJI Osmo Action 3 has 2 screens: a small one on the front and a bigger one on the back. And both screens are touch screens. The GoPro Hero 11 also has 2 screens, but only the rear screen is a touch screen.
On the DJI, both screens can be used in the same way to change settings, but the front screen is about half the size. Therefore, it is a little more fiddly to use.
Ease In, Ease Out
Notice that when you move, the camera eases in and out of the movement. The camera doesn’t move exactly as you move. Rather it slowly speeds up, so it’s behind your movement and then it catches up.
As well, when you stop moving, the camera doesn’t just stop dead. It slows to a stop. See, there’s like 1 or 2 seconds after you stop moving before. This is a characteristic of digital stabilisation.
I’ll talk about that more later, but before you go any further, it’s a good idea to just spend a moment playing around with this. Get a feel for it, because you might want to incorporate this into your camera movements when you’re filming.
If you don’t see this ease in, ease out characteristic, that’s probably because you have the stabilisation switched off. How do you know?
Look at the bottom of the touch screen and you will see the current resolution and frame rate. Next to that will be your current stabilisation setting. If there’s nothing there, then stabilisation is switched off.
How to Change Stabilisation Mode
To change stabilisation mode, tap the resolution and frame rate setting. Or you can swipe up from the bottom of the screen.
In the top right corner you have the current stabilisation setting. Tap that and swipe along the bottom of the screen to choose your preferred mode of stabilisation.
First option is off. Notice the camera zooms out a little bit when you turn off stabilisation. Digital stabilisation requires cropping of the image to stabilise it and the more powerful the stabilisation, the more it crops in.
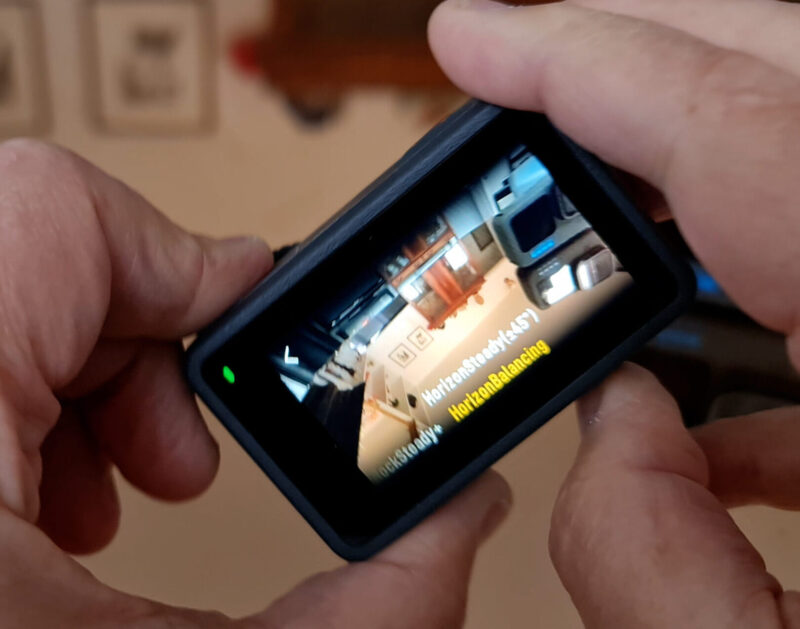
Regular stabilisation is called RockSteady. If you want even smoother footage, choose RockSteady+ but now it will crop in further.
There’s 2 horizon stabilising modes: HorizonBalancing and HorizonSteady.
HorizonBalancing will keep the horizon level at an angle of up to 45°.
HorizonSteady keeps the horizon level for the full 360° roll (just keep rolling as much as you want). However, to get HorizonSteady you will need to use 2.7K resolution or less.
To get back to the main screen, tap the little arrow or swipe down from the top.
Touch Screen Navigation
Let’s now look at basic navigation of the touch screen.
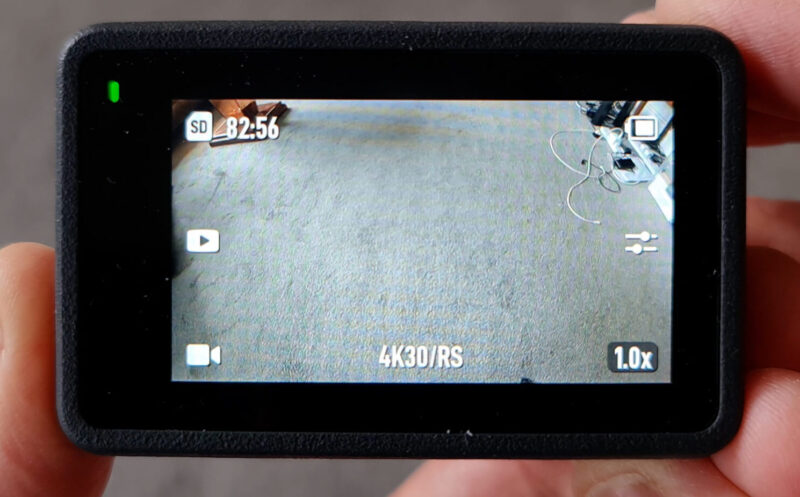
Top left is the remaining microSD card memory in hours, minutes and seconds. This will change depending on the video setting. If you switch to a higher quality setting, the amount of available memory will decrease.
Top right is the battery level. Tap it to see the level as a percentage.
Middle left is the gallery button. Tap to open the gallery and preview your saved photos and videos. To delete one or more files, tap the thumbnail view button, tap the select button, select the files you want to delete, tap the 3 dots and finally tap the trash can.
Middle right is a settings button, Tap to access those settings and to switch into Pro Mode.
Bottom left is the mode button. Tap to switch modes and then swipe up to return to the main screen. You can also access this menu by simply swiping in the middle of the screen.
Bottom right is the zoom setting. Press and hold here to bring up the zoom wheel. Swipe to zoom in and out.
Tap the resolution and frame rate settings to access that menu as I showed before. You can also swipe up from the bottom of the screen.
Swipe down from the top of the screen to access a general menu.
QuickSwitch
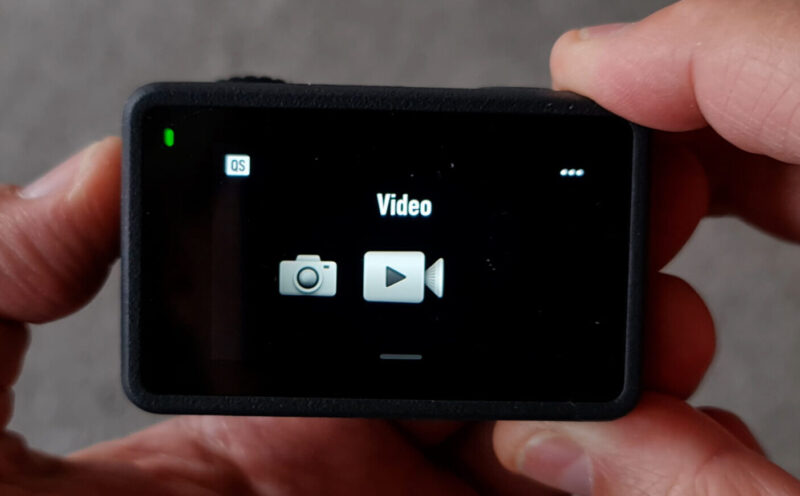
The power button doubles up as a mode switch. After powering up, short press to bring up mode options. Short press again to switch. Then either tap the screen or simply wait and it will select the mode you’ve chosen.
By default, you can see we just have 2 options – photo and video. But if we tap the 3 dots here we can add more modes and options.
Scroll down and add a check next to all the functions you want to be able to access via the QuickSwitch. Why not just add them all? you might say. But as you have to cycle through them to reach the one you want, you’re better off just adding the ones you will use most.
Best Video Settings
For me this is where the DJI stands out, because changing simple video settings on the GoPro Hero 11 is not straightforward. In fact, when I first got the GoPro I was swiping around looking for simple frame rate and resolution settings. Once you figure it out, it’s ok but there’s much more of a learning curve.
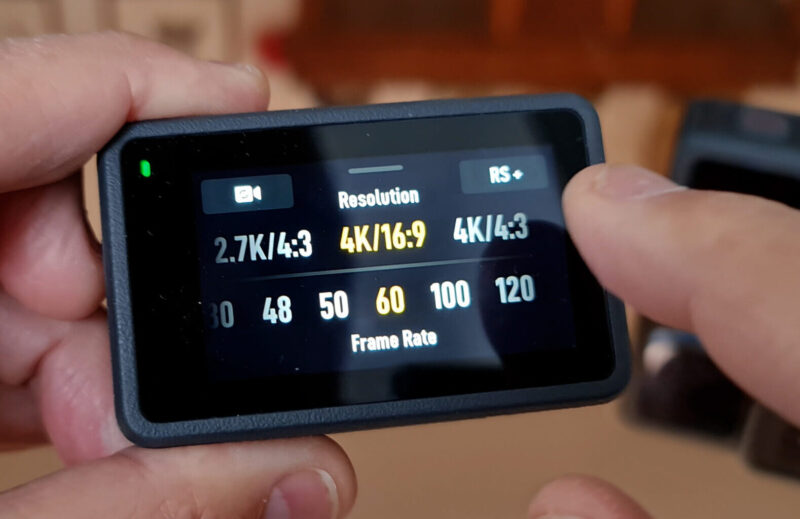
With the DJI Osmo Action 3 setting frame rate and resolution is very simple and clear.
If you want standard, good quality video, switch to 4K, 16:9 and 30fps.
But the Osmo Action 3 also has the option to shoot in a 4:3 frame ratio. This will actually use more of the sensor and will also give you more options when editing. For example, you can adjust the framing or you can crop the image to a square ratio for social media.
If you want to record a lot of footage while saving the battery life, then switch down to 1080p.
Which Frame Rate?
You can choose different frame rates depending on what you want to achieve. 24fps is the movie frame rate, for example. But obviously you will need more than just a frame rate setting to make your video look like a Hollywood blockbuster.
24, 30, 48, 60, 120 and 240 fps all fit together nicely when editing. 25, 50 and 100 also fit together when editing. But if you try to mix up the 2 groups, you might have problems.
This is key filmmaking knowledge and I go into all this stuff in my video lessons for members on Patreon. So the 25, 50 and 100 fps settings are what’s known as PAL and are used in Europe and other countries with a 50hz electricity supply. However, even though I live in Europe I still use the 24, 30, 60, 120 and so on. I just find it more convenient.
The only reason to use 25fps is if you have an issue with artificial light flickering. Again, it’s all explained in my members’ video lessons. Later in the article, I will show you another way to deal with flickering, as well.
If you shoot at 60fps, you can slow the video down when editing to 30 or 24fps to create slow motion. 120 and 240 fps will obviously create slower slow motion. So it really depends on how dramatic you want the slow mo.
Bear in mind, to get 240 fps you need to shoot at 1080p. To get 120fps you will need to shoot at 4K 16:9 or less. At 4K 4:3 ratio the max frame rate is 60fps.
This is where the GoPro Hero 11 has an advantage being able to go a bit further with higher frame rates and resolution combinations. For example, you can shoot 240fps at 2.7K.
Video Compression
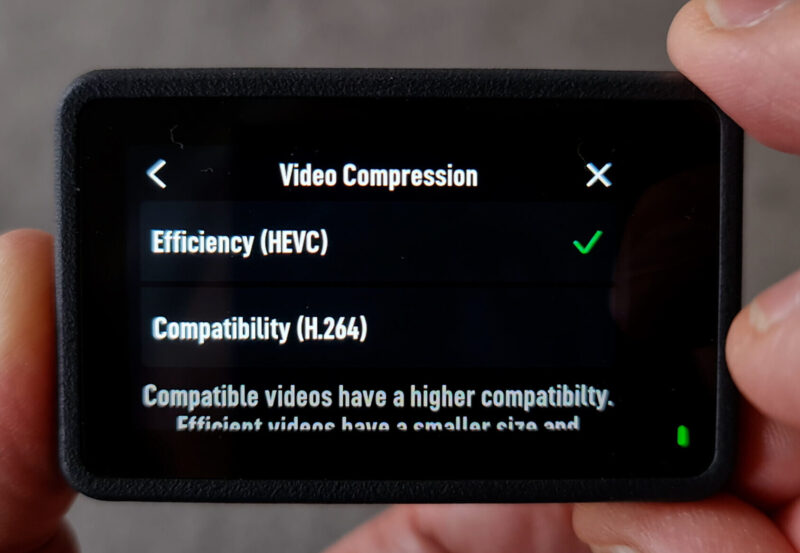
Swipe down on the screen, tap the bolt button and swipe down until you reach a setting called Video Compression. By default it’s set to HEVC, which is the newest and most efficient version. However, if you are sharing files directly to social media, you might be better off with h.264 here.
I used to upload HEVC files to YouTube. But recently I found I had so many issues, waiting forever for YouTube to process those files. Now I upload all my videos in the h.264 format and never have a problem. They are bigger files, but it saves these processing issues.
As I’m never going to upload directly to YouTube, I will leave this as HEVC.
10-bit Colour
The DJI Osmo Action 3 can shoot in 10-bit colour as well as the regular 8-bit colour. It might not sound much of a difference – it’s only 2 bits right? But actually this 2 bits makes a big difference to the amount of image information captured by the camera.
To switch to 10-bit mode, just swipe the middle of the screen until the HDR 10-bit icon is in the middle. This setting uses up more memory and requires more processing power. Which is why you can only shoot up to 30fps in 4K.
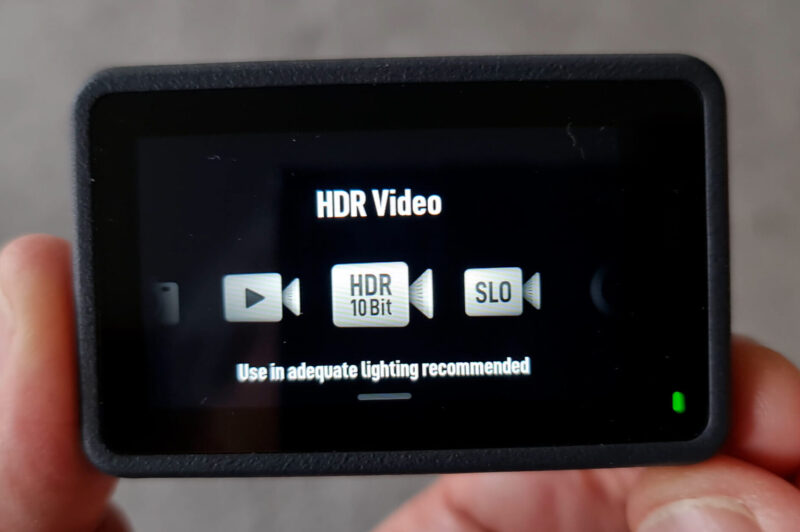
That basically prevents you from shooting slow motion. If you want to shoot slow motion you need to switch to D-Cinelike.
D-Cinelike
If you want 10-bit colour but you don’t want HDR, you can choose the D-Cinelike. Tap the settings button and switch to PRO mode. You can now enable D-Cinelike 10 bit colour, which is like a LOG setting.
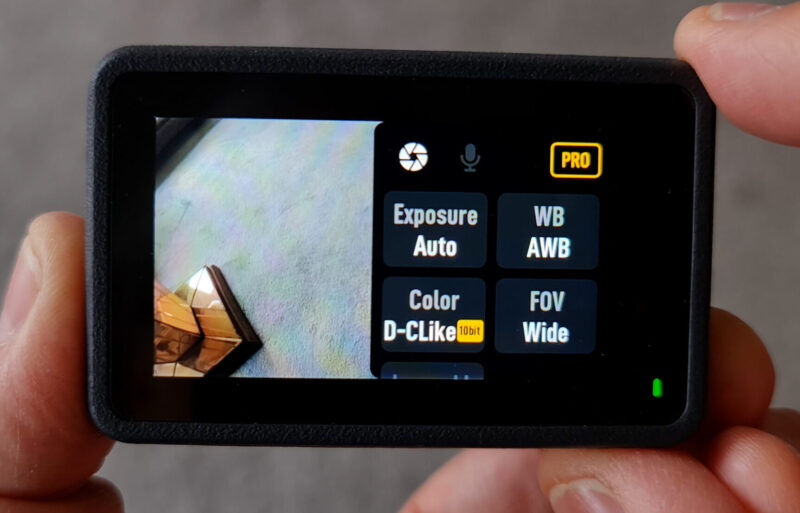
So this is a good setting if you want to do colour work on your video. What it does is reduce contrast and saturation so that you have more room to manoeuvre when grading. To my eyes, the D-Cinelike profile gives you more of a pro camera look rather than the sharpened action cam look.
Using this profile you will be able to achieve more natural skin tones and a more natural looking image.
That said, do you really need 10-bit colour? Probably only if you want to go deeper into colour grading your footage. If you’re not bothered with colour grading or just want to make a few minor adjustments, 8-bit colour is good enough.
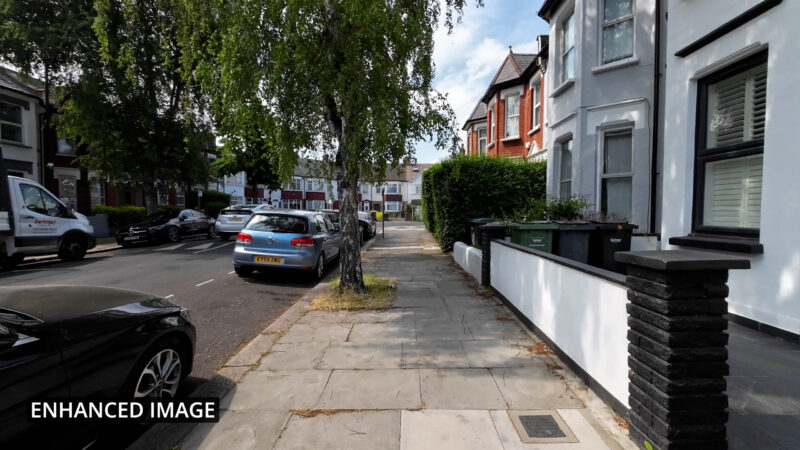
Enhanced Image Quality
The DJI Osmo Action 3 has a setting called Enhanced Image Quality. The advantage of using this is the extended dynamic range, which adds more highlight and shadow details. My guess is that this is some form of dynamic tone mapping like you get in smartphones these days.
The disadvantage is it drains the battery quicker and limits the resolution options slightly. For example, you cannot shoot 4K 4:3 using this setting.
To enable it, tap the settings button on the right to open this menu. Tap the bottom button so that it stays on. If it’s greyed out and says off, you probably have the camera set to 4K 60fps.
Using Ease in, Ease Out
Remember I talked about this ease in, ease out characteristic. If you’re using the DJI Osmo Action 3 to shoot B roll, you can use that to create more pro looking shots.
For example, tilt down onto a subject, but stop moving a little bit early and now let the camera ease into framing. See how it eases out of shot?
You can use this for other movements too. This only works if you have stabilisation switched on.
DJI Mimo app
Essentially the Mimo app allows you to do most things you can do with the Osmo Action 3’s touch screens. The advantage is you can use it as a remote and you get a bigger screen. You can also use it to transfer media files from your Osmo Action 3 to your smartphone, then edit them together using the Mimo app or use another editing app.
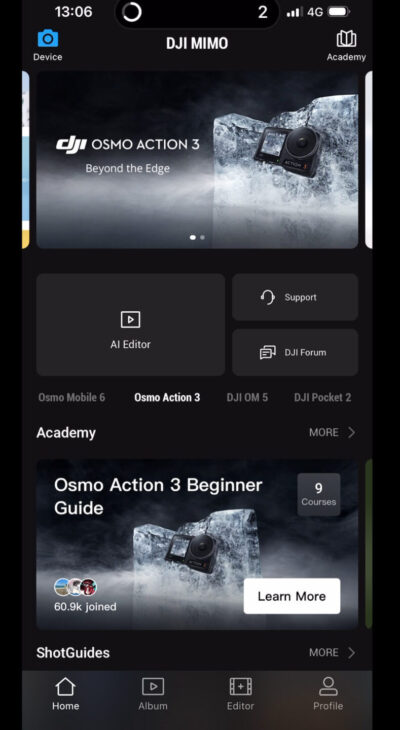
You need to have bluetooth and WiFi enabled on your device. Open the Mimo app and if your Osmo Action is powered on, the Mimo app should detect it and connect. In the home screen you will see a list of all your registered DJI devices.
There’s an AI editor here, which takes the sweat out of editing. I’ve found that these AI editors do a better job if you trim off the bad parts of your clips first. If you just import all the good bits, it does a decent job. So there’s the AI editor and the template editor, if you tap the button at the bottom.
Tap the Device button (top left) to enter the camera screen. Obviously the big red button here is the shutter or record button.
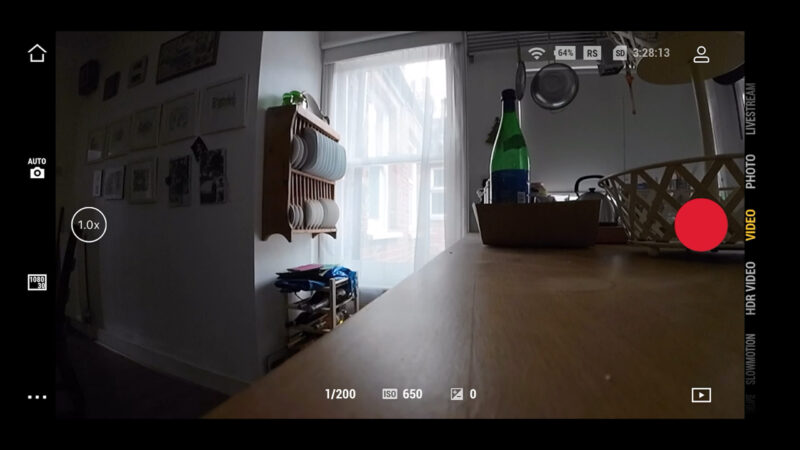
Try recording from the app and you will see you now get an audio level meter (at the top) which you don’t get on the Osmo Action 3 touch screen.
On the right there are the various modes in a menu. Swipe to select. There’s also the livestream option here.
At the top right, you have indicators for connection, battery level, stabilisation mode and remaining memory.
Centre left is a zoom control. And to the left of that we have frame rate and resolution settings. You can also switch between original and enhanced image quality.
Below that we can access further settings and information. Again most of this is available within the camera but it’s just a bit easier to see and adjust things here with the bigger screen.
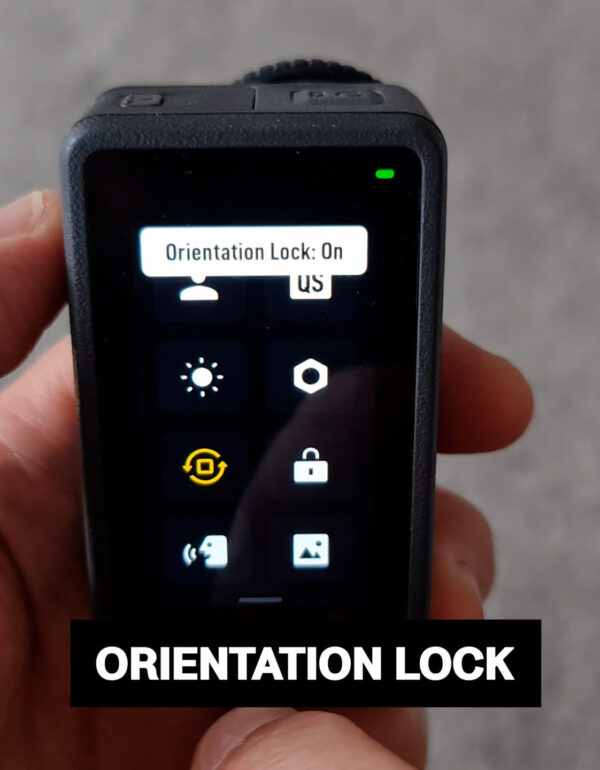
Horizontal & Vertical Mode
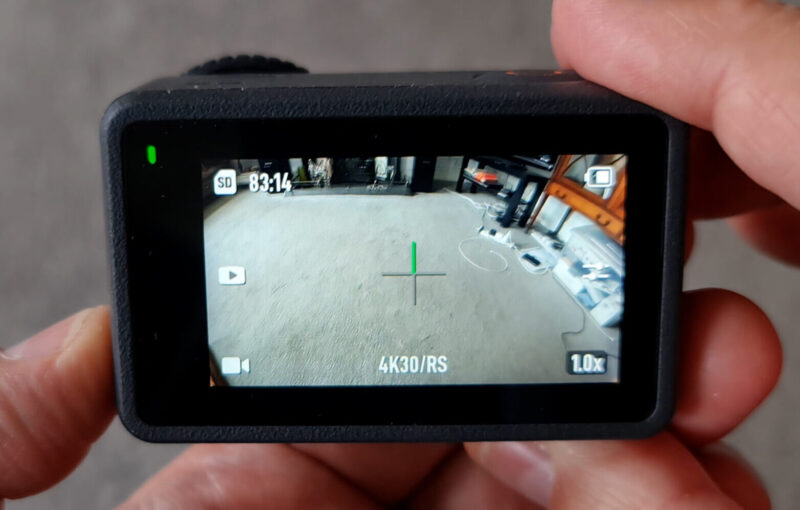
Normally we shoot 16:9 video with a horizontal aspect ratio. If you want to shoot vertical video for social media, just turn the camera 90°.
When you do this you will see this cross in the middle and a green line, showing you which way is up. As well, the user interface switches to vertical mode.
If you don’t want the orientation to switch when you rotate the camera, you can lock it. Swipe down on the screen and tap the orientation lock button to enable it, so that it turns yellow.
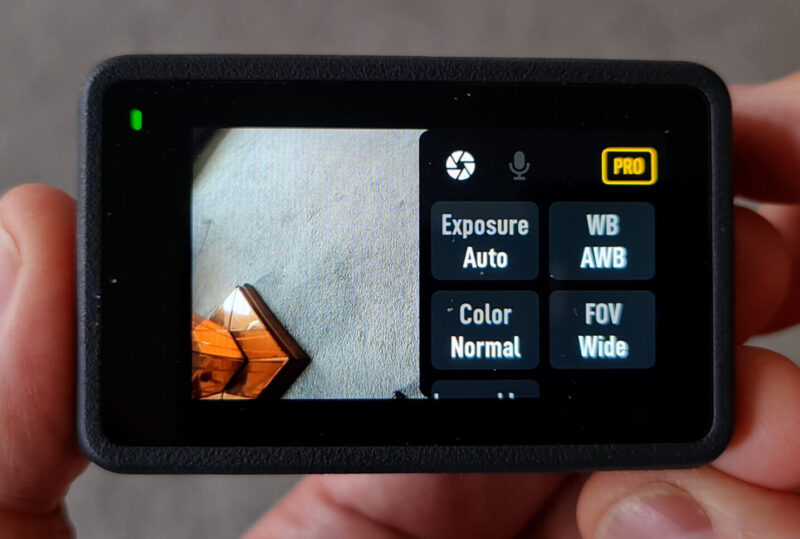
How to Set Manual Exposure
Setting ISO, shutter speed and white balance manually means you can lock exposure so it doesn’t keep changing during the shot. This will make your video look a bit more professional, but it’s also a bit more time consuming.
Tap the settings button on the middle-right. Tap the greyed out PRO button so that it goes yellow.
Now you have 4 buttons to set Exposure, White Balance, Color Profile and Field of View.
Exposure
Tap Exposure. If you leave it on Auto and swipe up and down on the left of the screen, you can set an EV – or Exposure Value. This means the camera will set exposure automatically, but compensate up or down depending on what you set.
If I think the image looks too bright in general, I can bring the EV down a few points, for example.
Tap M for manual. Now you have shutter speed on the left and ISO on the right. In general filmmaking, we usually want as low an ISO as possible and a slower shutter speed. A slower shutter speed adds motion blur to your video which makes it look smoother and more natural.
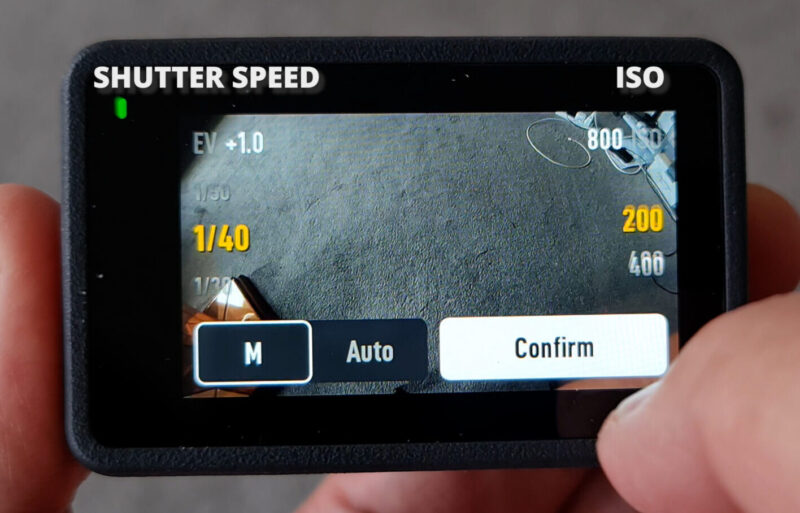
That said, motion blur also causes problems for your digital stabilisation. So that is something to consider. If you select a slow shutter speed here, you might find you start getting ugly artefacts in the video. Particularly if your video involves a lot of movement from skiing or cycling, for example.
And that’s why you probably don’t want to add ND filters to your Osmo Action 3.
ND Filter Problem
When shooting video with a regular camera, we usually want to slow down the shutter speed to get natural looking motion blur. Problem is, digital stabilisation prefers a nice clean, crisp image. Because it uses details in the image to make reference points, so that it can first track and then fix shaky footage.
But if the reference points are blurry from motion blur then the software struggles to hang onto those points. This is why the stabilisation of these cameras struggles in low light, too. And as well in low light there is less detail in the image and more noise.
The DJI Osmo Action 3 has this protective cover here, which you can easily remove by unscrewing it. Then you could place an ND filter here to reduce your shutter speed. If you want to do that, you might be better off switching off stabilisation and stabilising the video with your editing software. Or you could mount the camera to a gimbal, for example.
So it still might be worth using ND filters, just be aware it might reduce the video quality if you have stabilisation switched on.
There’s actually a setting in the Osmo Action 3 which deals with this called EIS Priority.
EIS Priority
EIS stands for Electronic Image Stabilisation. Tap the settings button on the right of the screen and you will see this setting EIS Priority. If you enable this setting in low light situations the Osmo Action 3 will try to remove motion blur and disable anti-flicker.
The fact that it disables anti-flicker suggests to me this is a shutter speed thing. My guess is that to remove motion blur the camera will push up ISO so that it can select a higher shutter speed. In other words, this will sacrifice that film look and maybe add some noise to achieve better stabilisation in low light.
How to Change the Field of View
Another important setting is the field of view.
Tap the settings button on the right. The FOV or field of view setting is top left. There are 3 settings available to select by swiping up and down on the left of the screen.
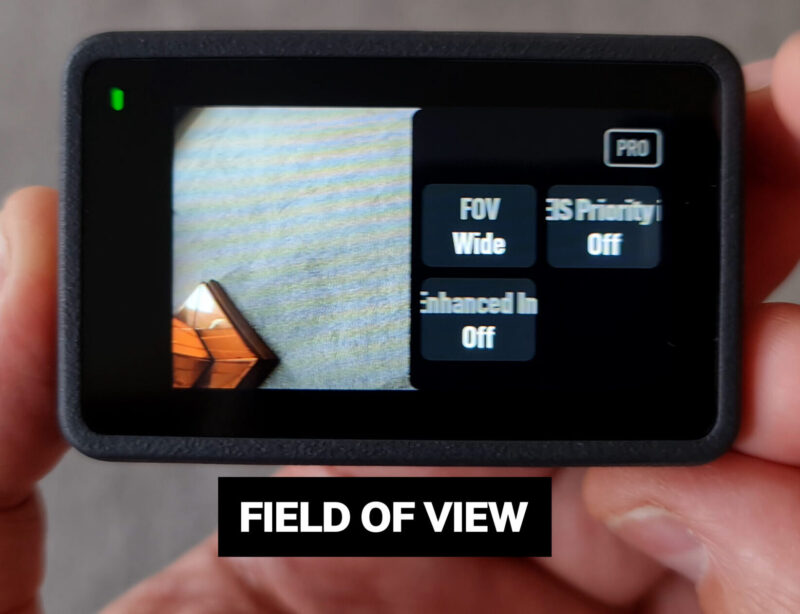
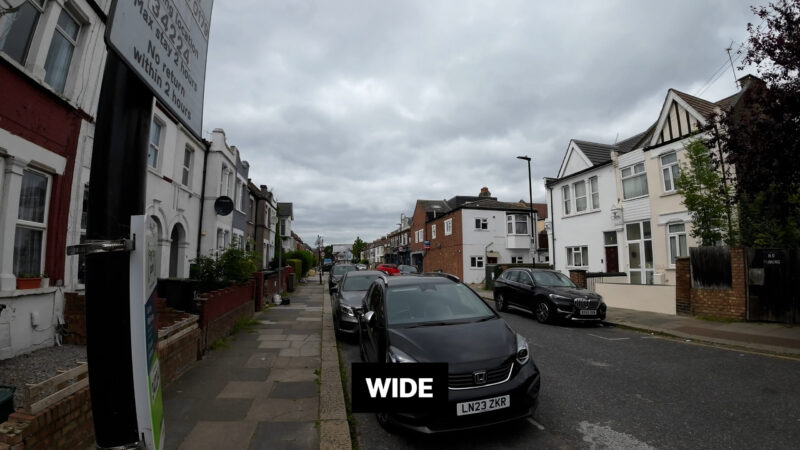
The default setting is wide.
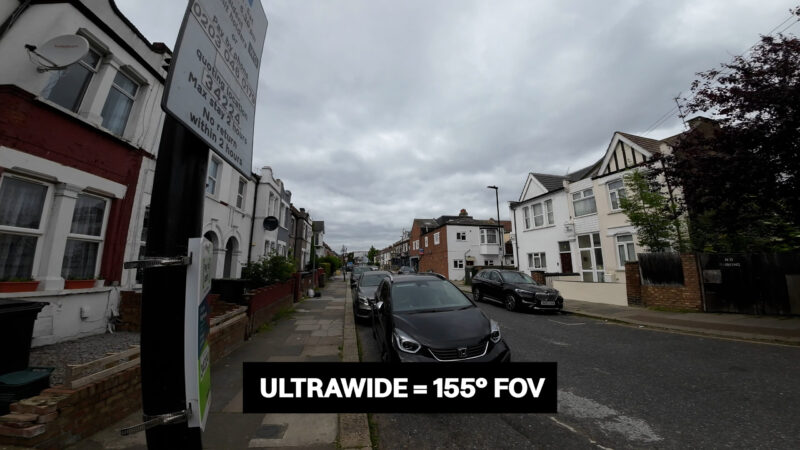
Ultrawide gives you a wider 155° field of view. This has that classic action camera fisheye characteristic, with bending lines.
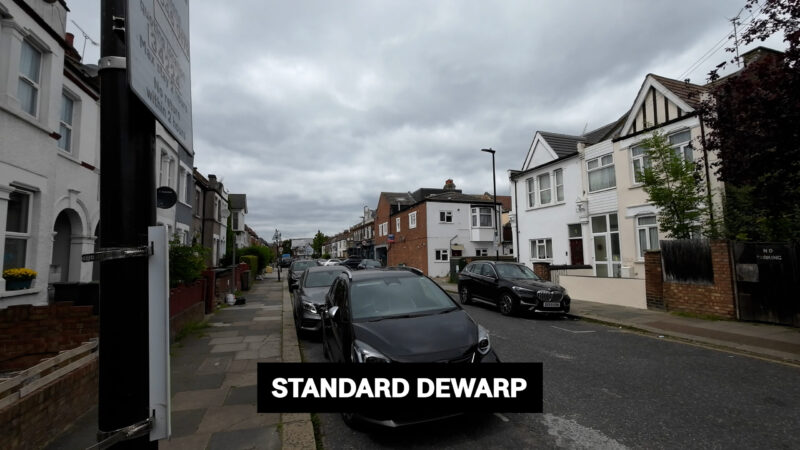
Wide has a narrower field of view with less fisheye distortion. Finally, Standard Dewarp is even narrower and also removes the fisheye distortion. So this is more like a smartphone camera.
DJI suggests that you use the Wide setting underwater to reduce distortions. In fact, the Osmo Action 3 can go up to 16 meters underwater, which is 6 meters more than the Hero11.
How to Shoot Slow Motion
Slow motion can benefit our videos in a few ways. Firstly, it adds drama and excitement to a video. This can be helpful for making a video more engaging and visually appealing. Secondly, slow motion can also help you show your audience the action more clearly. As well, slow motion makes any camera movement appear smoother.
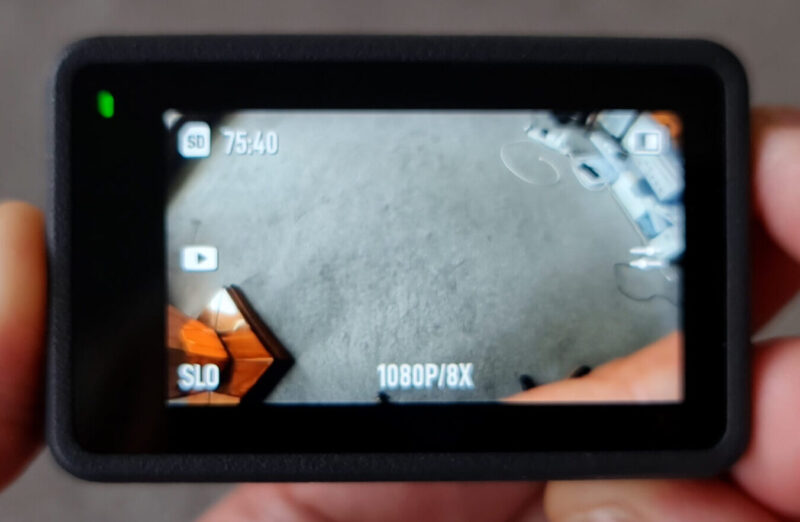
If we swipe to the slow motion mode, at the bottom now it says 1080p and 8X. The 8x means the motion in the frame will be 8 times slower. If we tap on it, we can now change this slow motion setting.
At 1080p we have the option to create motion 8 times and 4 times slower. At higher resolutions, we can only create 4 times slower motion. The four times setting is obviously equivalent to the 120fps setting, except using the slow motion mode, the motion is already slowed down. The eight times settings is equivalent to 240fps.
Video shot using slow motion mode doesn’t preview in slow motion when you play it back in the camera. It plays back at the same frame rate you shot at. But once you download it to your phone or computer, it should now playback slow motion.
If you open the file in QuickTime, for example, you will see these markers and this is where the camera has told it to start the slow motion. Now you get that speed ramp type effect as it goes from 120fps or 240fps to 30fps.
Edit Slow Motion
You can actually move these markers to start the slow motion at a different point. If you’ve filmed some action, it can look cool if you have the slow motion kick in at a key dramatic moment. That also avoids the slow motion being too boring. Don’t make your audience sit through 30 seconds of one action.
Alternatively, you can simply shoot a high frame rate video, which is basically anything above 30fps, and then when you edit the video have it play back at a slower frame rate. But make sure you get the calculation right, or you’ll get stuttering, juddering video.
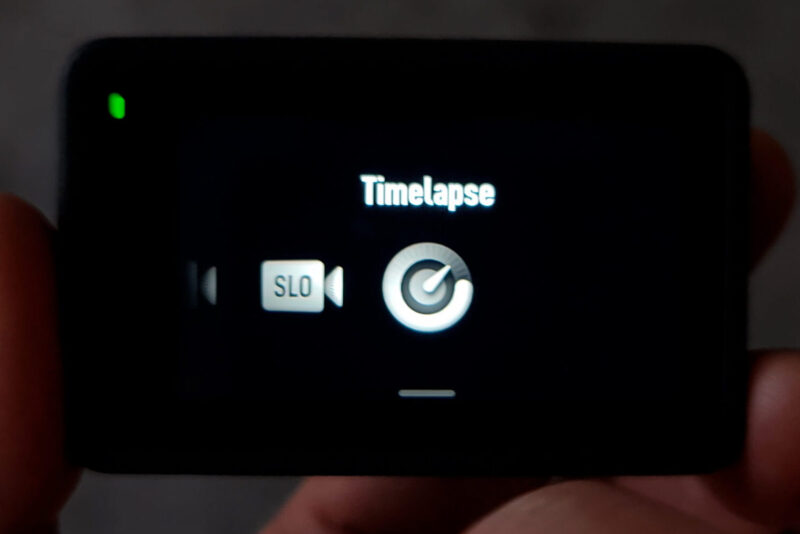
How to Shoot Timelapse or Hyperlapse
Timelapse video can be used to show how something changes over time and can be visually appealing and engaging.
Swipe along to the timelapse mode and select it. At the bottom you can see the timelapse will be shot in 4K at an interval of 2 seconds. That means a frame is captured every 2 seconds which will then be played back at 30fps.
Tap the setting to open up the settings control window. There’s 3 custom presets and a customisable option, where you can set your own recording duration and interval.
The presets are Crowds, Clouds and Sunsets.
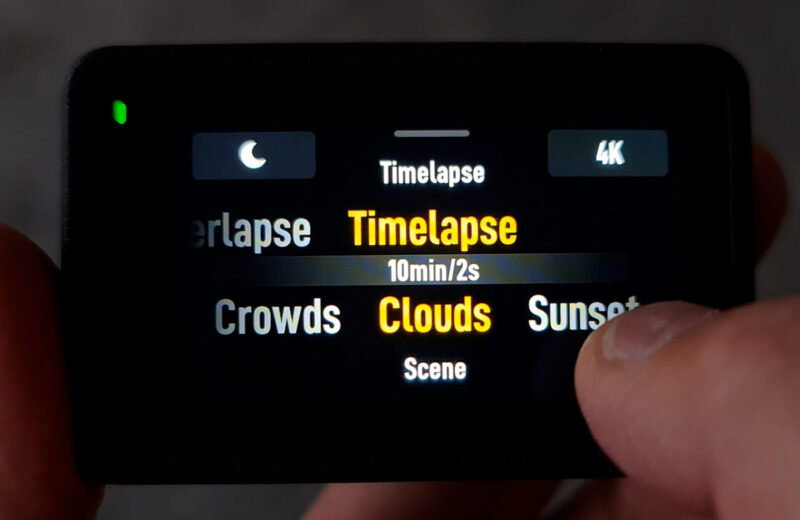
Swipe along to Custom and then swipe up to set the parameters. Unless you’re not going to be around to stop recording, you might as well set the duration to infinity. Then set the interval depending on how fast you want to speed up time. You can go all the way up to 1 frame every 40 seconds, but you would only use that if you were filming for several hours or maybe the whole day.
The presets give you a clue here. For crowds DJI has a frame every half a second, for clouds it’s every 2 seconds, for sunsets it’s every 3 seconds.
By the way, if you have custom selected here, back in the main screen you can now tap the settings in the top left to go directly to adjust those settings.
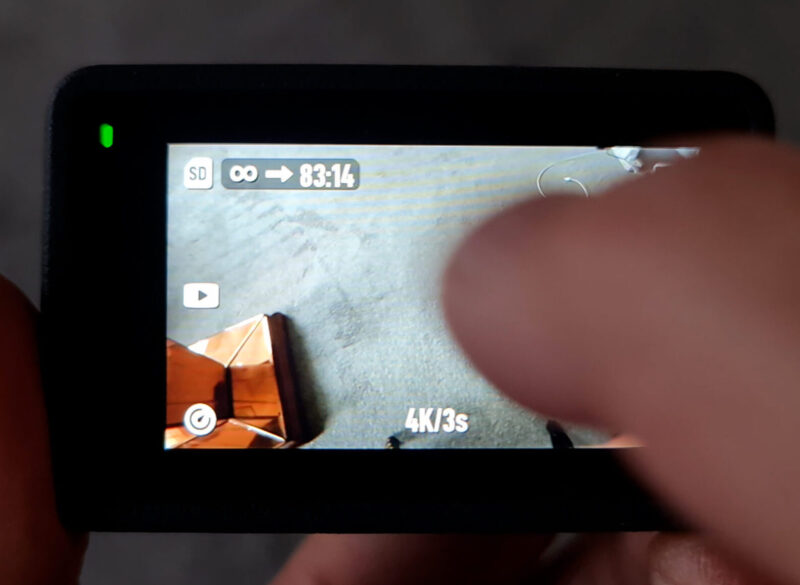
Top right you can change the resolution. Keep this at 4K unless you want to save memory space.
Top left is this moon symbol which is the low power mode for timelapse videos. When the low power mode for Timelapse is enabled, Osmo Action 3 remains in low power mode between frame capture. This reduces power consumption and allows for longer recording times.
For timelapses I recommend you think about setting exposure manually, using the same method I described earlier in the video. If you don’t, the exposure and colour of the video might change during the shot and this can look a bit messy, especially if clouds are crossing the sun and changing the light.
Once you set shutter speed, white balance and ISO manually they will be fixed in place.
Hyperlapse
Swipe to select Hyperlapse. A hyperlapse is where you set the interval and duration like with a timelapse, but this time you move the camera by walking, running or attaching it to a vehicle.
Again, I would switch this to 4K. Instead of settings here, you have Auto or you can choose how much you want to speed up time manually. If you choose Auto, the camera will speed up time depending how long you film.
Again, you might find you get a better result here by setting exposure and white balance manually.
To make hyperlapses even more cinematic, I like to add motion blur using CapCut. Passing cars and people will then have this blurriness which just enhances the hyperlapse effect.
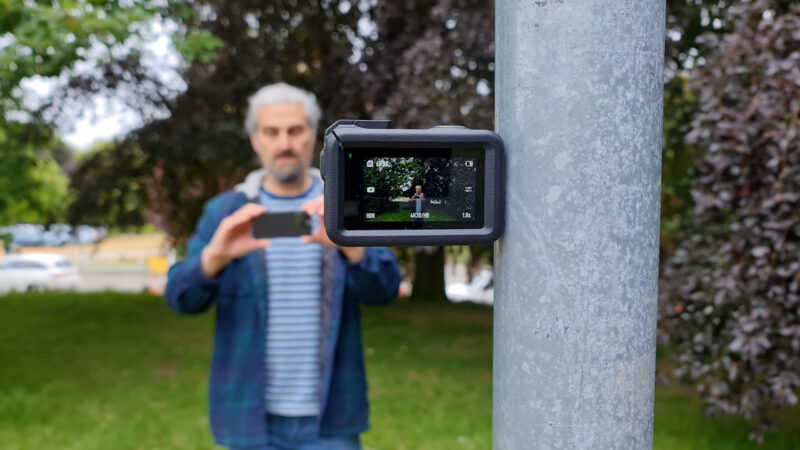
Using Your Phone as a Remote
It can be really useful to use your phone as a remote. Connect to the DJI app and now you can monitor and control the camera. Here’s some ideas.
Stick the camera to something metal and now you can use your phone to take a picture of yourself and anyone with you. This way, you don’t have to mess about with the timer and then try to run into position. More relaxing and better framing.
If you mount your phone to the end of the extension rod, you can do all kinds of shots. You can achieve these shots without using your phone but this makes it easier.
Voice Control
You can also control the camera remotely using voice control. Swipe down and enable the button with the head talking. Tap the bolt button and scroll down to voice control. Select and scroll down again to find the list of commands.
The only languages are Chinese and English. The commands are Start Recording, Stop Recording, Take Photo and Shut Down. And I think they are all pretty self explanatory.
Audio
Another useful feature for vlogging is being able to switch off the rear mic so the camera only records from the front mic. This helps to reduce any background noise when you’re talking.
Tap the setting button middle-right. Enable PRO mode. Then enable directional audio. You can also switch on wind reduction here, if it’s windy. When you’re recording outside, you should have this switched on.
If you want to add an external mic, you need to connect it via the USB C charging port. If you have the DJI Mic for example, the transmitter can plug directly into the camera here.
By the way, when you want to add a mic to the GoPro you will need to add an extra module to the camera. So the DJI is more convenient and cheaper when adding external mics.
Once you have a mic plugged in, you should see a mic icon in the right corner of the main screen, picking up the sound.
If you have a wired USB C mic, you can also plug that in here.
Anti-Flicker
There’s actually another way to deal with artificial light flicker. Swipe down to open general settings. Tap the bolt button, swipe down until you reach anti-flicker. For the US set this to 60hz, for Europe set this to 50hz. For other countries, check your electricity frequency.

How to Save Battery Power
If you want to reserve battery power when using your DJI Osmo Action, there’s a few settings you can change to be more efficient with power.
Swipe down on the screen and tap the sun symbol. This is screen brightness which is by default 100%. If you bring it down to about 80% you will save some power there and it should still be bright enough.
Switch off Voice Prompt. If you’re using Voice Prompt, turn it off to use less power. This might also be draining power even when the camera is switched off. You can also enable screen switch which means you can only have 1 screen on at a time.
Another option is to set the camera to turn off the screen when recording. Swipe down, tap the bolt icon, scroll down and find the Screen Off When Record option. By default this is set to never. But you can choose a time after which it will switch off the screen.
On this same screen you can disable the LED on the front. This will also save a bit of battery.
If you’re filming in a hot country, try to keep your camera out of direct sunlight as much as you can. As soon as the camera reaches 40 plus degrees the battery starts to drain faster.
I’m not recommending you to switch all these things off for regular use. But if you’re in a situation where you really need to save battery power then you have these options. Maybe you’re filming in a situation where it’s hard to switch batteries, for example.
Just bought the action 3. Thank you for the info. Really useful.
Hi Simon, this is a very useful list, it has added greatly to my enjoyment of the Action 3!
One useful MIMO feature you seem to have overlooked, (as well as every other tutorial I’ve seen) is the variable speed zoom that is only accessible in the app. The further from the centre, the faster it zooms. Also you can zoom to the full extent smoothly, which is impossible using the camera interface. I find it adds a bit of polish to my live zooming!