Review: How Good is the iPhone 12 Pro Max for Shooting Cinematic Video?
I’m a long time Android user trying out an iPhone for the first time ever. We know the iPhone 12 Pro Max has great cameras for shooting video. But what is the experience of shooting video like for a Samsung fan?
I know I’m late to the table, but I haven’t been in a huge rush to get this review out to catch the early wave, like most others. Therefore, I can hopefully give this phone a more considered test.
Dolby Vision and 10-bit Log via FiLMiC Pro, those 2 features have been the main talking points since Apple released their new top of the range device.
At an age where I’m nearer the end than the beginning, this is the first time in my life I have ever owned an iPhone. I’ve been a happy Samsung user, shooting video with S8, S9 and then a Note 20 Ultra. In that time, I’ve never felt I was missing anything. But then came Dolby Vision.
So I’m really curious to see what can be done with this new technology. New to iPhone at least. As I say, I’m also coming at this from the point of view of a happy Android user. Let’s see if I love or hate this iOS system.
The Cameras
The iPhone Pro has 3 rear cameras: Ultra Wide, Wide and Telephoto. All 3 cameras use 12MP sensors.
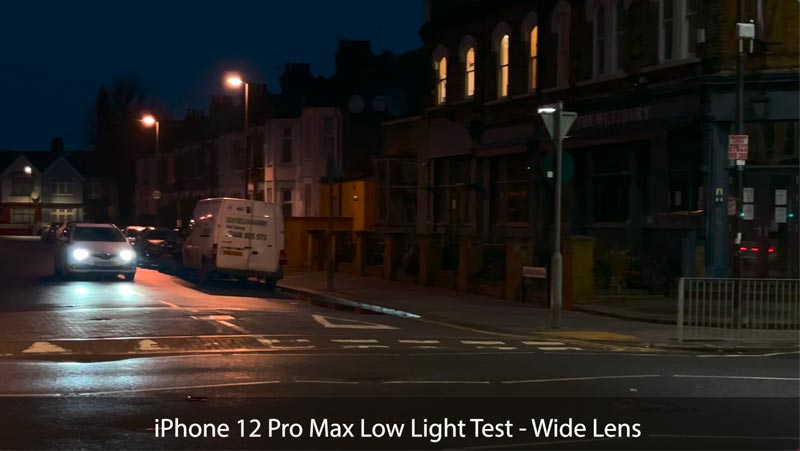
The main difference between the Pro Max and other iPhone is the size of the device’s main camera sensor – which is 47% bigger. A bigger sensor means it’s better in low light conditions as well as producing a shallower depth of field.
When it comes to aperture, the wide and the ultra wide are the same in both the 12 Pro and the 12 Pro Max. When it comes to the telephoto, the 12 Pro actually has a slightly wider aperture, but less magnification 2 x instead of the Max’s 2.5 times.
The 12 Pro Max’s main camera aperture of f1.6 is bigger than on the iPhone 11 Pro Max, which was f1.8. So that should allow a shallower depth of field.
Switching lenses
Just tap one of the 3 icons, ultra wide, wide and tele and the lens switches with a snap. This can also be done while you are recording, if need be.
It’s pretty glitch free, although while first testing I switched to the tele lens and it wouldn’t focus immediately. Eventually it locked on, though.
The main wide lens is the best quality, as you would expect, considering it has the best sensor.
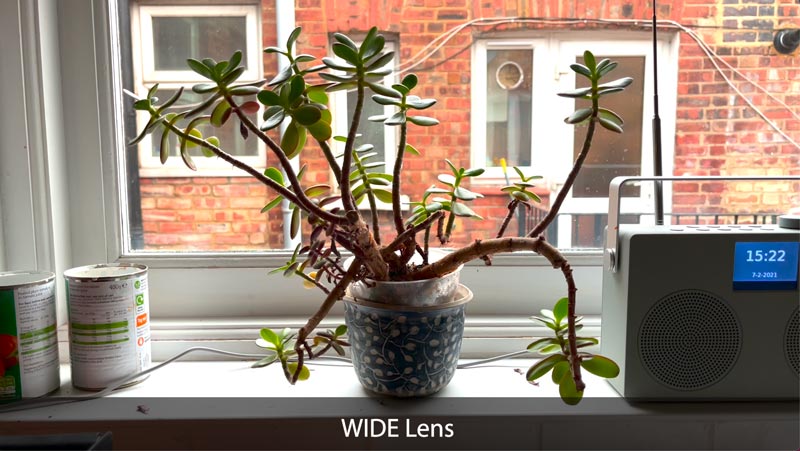
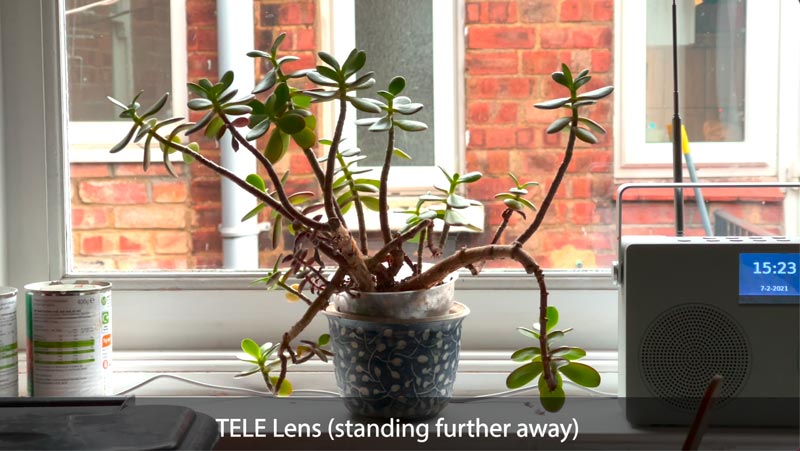
Using the wide and the tele, I started to notice extra noise appearing. This was especially the case with the tele lens. Even in daylight filming, where I really wouldn’t expect to see noise.
What you will find with tele lenses in smartphones is that they don’t give you a shallower depth of field, as you might hope. All they really do is get you closer and narrow the field of view. You will actually get a shallower depth of field with the main lens, due to the bigger sensor and wider aperture.
The Interface
Although this is my first iPhone, I certainly recognise the interface. It’s almost iconic now, as it hasn’t changed too much over the years. It has an authentic camera feel about it. You know, in these times of fast moving tech, there’s almost something old fashioned and reassuring about the never changing iPhone camera user interface.
It’s nice and clear and simple. Although there’s a few things which immediately seem a little quirky. The way the camera settings are set up as default, for example.
Native Camera App for Video
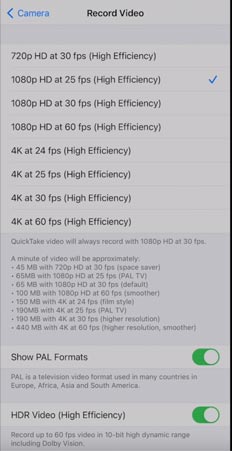
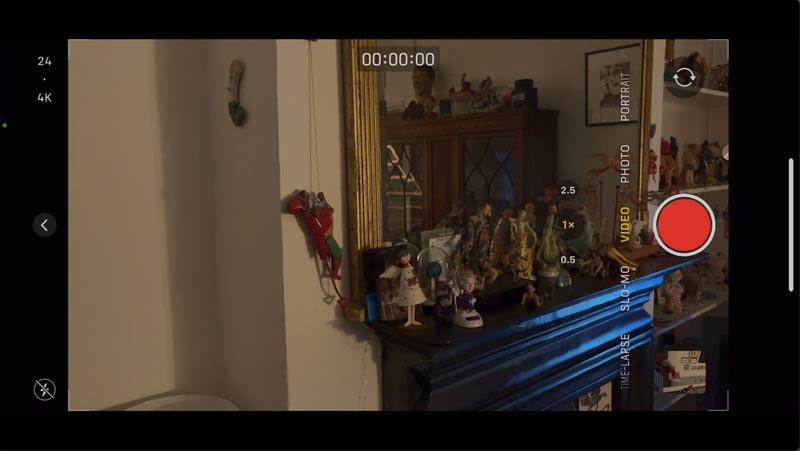
In the native app, you can’t shoot 24fps at 1080p – you can only shoot 24fps in 4K. That seems strange. Tap here to set the resolution and fps, then grab a shot. But when you open the camera again, it reverts back to the default 30fps and 1080p. So you have to change again.
In the settings, you can stop it doing this. You can also change the default resolution and frame rate. So the camera will now open with these settings as default.
It seems the iPhone now also records in HEVC by default – the h.265 codec. Only trouble is, this codec is not always supported. Again, you can go in and change this in the settings. But certain features like 60fps and HDR only work in HEVC.
You can’t navigate to camera settings directly from the camera app, like you can with Samsung phones. You have to switch out of the camera app, go to settings, go to camera, then find the video settings… so that’s like 3 steps to get to video settings. It would obviously be much more convenient to have video settings accessible directly when you are in video mode.
Stabilization
This device comes with a new “sensor-shift” optical image stabilisation. This means the sensor moves to remove hand shake instead of the lens. And Apple says this can make adjustments at up to 5000 times per second.
As far as I can see, there is no way to switch off this stabilization. Although, using FiLMiC Pro, you can. There’s also no option to make the stabilisation more aggressive.
Personally, I prefer to have the option to switch off certain settings. Whether you want your footage to be stabilized is a creative choice. When you can’t set this yourself, it means the device is making that creative decision for you.
Bear in mind, it’s only the main camera which uses the sensor shift. The other cameras use dual optical image stabilisation. Those systems can adjust at about 1000 times per second, a fifth of the sensor shift version in the main camera.
Dolby Vision
Dolby Vision is an HDR feature, which comes new to the iPhone 12 Pro Max. Dolby Vision is a system which adds extra dynamic range to our photos, videos, TV sets and now iPhones. Of course, most of us know about Dolby Sound and Surround Sound and indeed Dolby Vision comes from the same company – Dolby Laboratories.
Now, Dolby Vision HDR is not that straightforward. These days, many smartphones carry some kind of HDR. Added to that, there’s different levels, some of which you can’t switch off.
Essentially Dolby Vision, like other HDR systems, adjusts different parts of the image to create a greater dynamic range. That means it analyses each frame, and maybe boosts the shadowy parts and pulls down the overblown highlights.
These adjustments are then stored as metadata which goes along with the video. If your monitor and software can read it, it applies the metadata. If not, or you don’t have it set right, it won’t or it will display the video incorrectly.
How to Enable or Disable Dolby Vision
Dolby Vision is enabled by default. But it’s pretty simple to switch it off.
Open up settings, then camera, then record video and scroll down until you find the switch.
Why would we want to turn it off? Well, as I say not all devices can play Dolby Vision. If you shoot something in HDR (and view it on the iPhone) you’ll see it has this extra zing to it. Simply put, the brighter parts of the image are brighter.
As well, HDR tone mapping adjusts different areas of the image, which might not be a look you want. Although I believe it is not possible to switch off this tone mapping in iPhones, even if you toggle off HDR.
Thing is, these HDR features in smartphones are there to really get the maximum out of a tiny sensor and a tiny lens. They help to push the quality of the image so that they now sit closer to low budget DSLRs in terms of quality. The downside is tonal fluctuations in parts of the image.
Camera Apps
iPhones have limited native manual control. Yes, you can change frame rate and resolution. But you have almost no control over focus, ISO, shutter speed and white balance. So if you want to shoot with manual control, you will need a 3rd party app.
Of course, we’ve all heard of FiLMiC Pro. But there are others such as MAVIS, Moment, Beastcam, ProCam, Protake and many more.
I’m a FiLMiC Pro user, but I’m used to using it on a Samsung. It feels a little bit smoother on iOS. Doing a focus pull seems a little bit nicer. But there’s no option to switch off sharpness and noise reduction, as there is in the Samsung version.
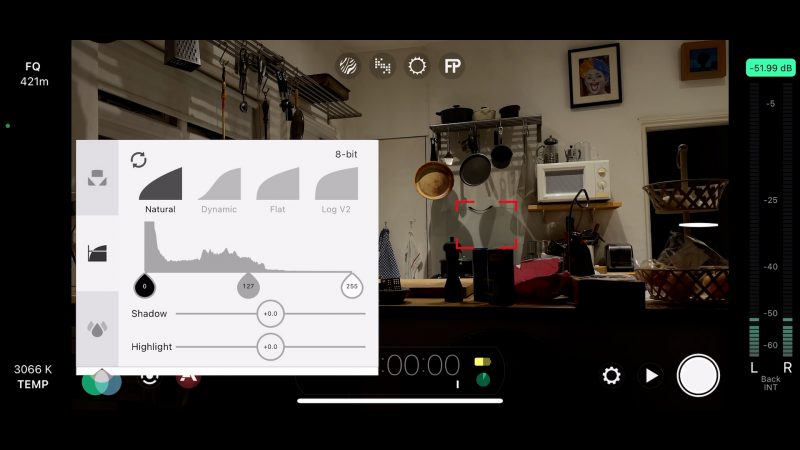
On the plus side, there’s 10-bit colour, 10-bit log and Dolby Vision. And one major reason why I finally decided to try the iPhone 12 Pro Max was the ability to shoot Dolby Vision with manual control.
FiLMiC Pro
FiLMiC Pro works really well with the iPhone 12 Pro Max. You can switch between 8-bit, 10-bit colour and Dolby Vision. You also have access to all the lenses.
Not all lenses give you full manual control. The ultra wide has a locked focus, but that’s down to the device not the app.
However, the tone mapping on the iPhone means sometimes you can lock exposure but it will still change during the shot. When you move the camera between light and dark areas for example.
25fps
Maybe a small thing but it’s nice to have this option. 25fps is considered to be a PAL TV setting. PAL TV is used in Europe, Africa, Asia and South America.
In camera settings for video you can switch this on and then you will have the option to shoot in 25fps using the native app.
So this leaves us in the strange situation where we can have 25fps at 1080p but not 24fps. It’s just a small thing, but if you shoot a lot of video, it’s nice to just have a quick 24fps option. Then again, my Samsung Note20 Ultra only allows 24fps in the native app using 8K.
Lens Flare Issue
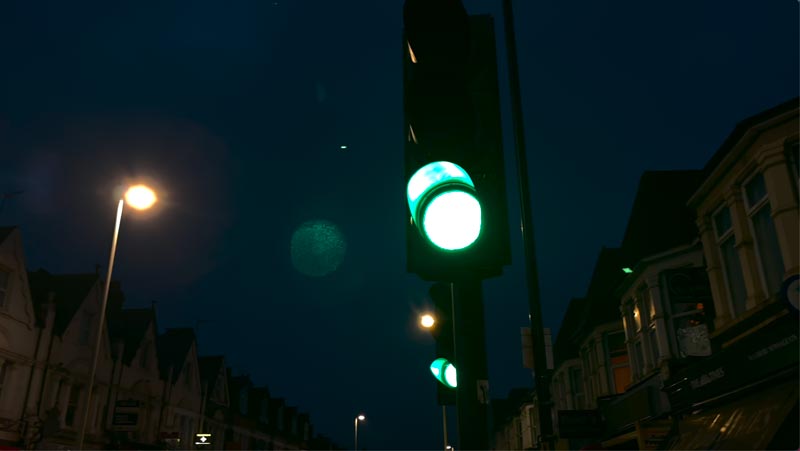
As has been spotted by others, the new iPhones sometimes produce quite an exaggerated flare. If there’s a light or the sun at the wrong angle, you get 1 or more bright dots moving around the screen.
I also get this with my Samsung phones, but it’s not so pronounced. Lens flares can be cool, of course. But when it’s a tiny dot, it looks more like someone’s aiming a laser sight at you.
Whatever device you use, there’s always going to be some kind of flaw. No camera is perfect. But this is quite an important problem, I think.
We can try to avoid shooting at that angle. But night shots in a city, where there are lights everywhere, that can be almost impossible.
Conclusion
Summing up, I think the iPhone 12 Pro Max has great cameras for shooting video, as you would expect from Apple’s top of the range device. But there are some caveats.
I didn’t experience much noise when using the main camera. However, switching to the ultra wide or tele lenses you suddenly find a lot of extra noise. Using FiLMiC Pro and the main camera, I was able to use very high ISO settings without getting overwhelming noise. But not with the secondary lenses. That said, my Samsung Note 20 Ultra performs similarly – so this is down to the weaker secondary sensors.
In fact, this is a reason why we might not abandon those conversion lenses just yet. Especially in low light, using a conversion tele or ultra wide over the main camera could provide better quality than the inbuilt options.
So, my 2 main down thumbs for this phone are the exaggerated lens flares and the aggressive tone mapping that can’t be disabled.
My thumbs up are the access to 10-bit colour via FiLMiC Pro and other apps, Dolby Vision, good low light performance of the main sensor, sensor shift stabilisation, and one thing I haven’t mentioned is the long lasting battery – which I believe is down to Apple’s A14 Bionic chip, which is said to be very power efficient as well as super fast.
Eager to learn more?
Join our weekly newsletter featuring inspiring stories, no-budget filmmaking tips and comprehensive equipment reviews to help you turn your film projects into reality!
Simon Horrocks
Simon Horrocks is a screenwriter & filmmaker. His debut feature THIRD CONTACT was shot on a consumer camcorder and premiered at the BFI IMAX in 2013. His shot-on-smartphones sci-fi series SILENT EYE featured on Amazon Prime. He now runs a popular Patreon page which offers online courses for beginners, customised tips and more: www.patreon.com/SilentEye


