Best Colour Grading App for iPhone or iPad
Every feature film, episodic TV series or big brand commercial uses colour grading to give it the final finish. If we want to create professional looking videos, colour grading adds that final polish. But can we do this with an app?
In this video, I’m going to run through the best colour grading apps for iPhone or iPad that I’ve found, that I think give you some of the controls you need to colour grade videos.
Most editing apps have colour tools within them. VN, CapCut, LumaFusion and others, they all have very good basic tools for working on the colour of video clips. As well, we can edit the colour of clips directly in the native iPhone or iPad photos app.
But if we want more than these basic controls, something more like what you get in Adobe Premiere, Final Cut Pro or DaVinci Resolve, then we need a dedicated app. Hopefully, at some point in the not too distant future, LumaFusion will add scopes and colour wheels. Because it’s nice to have the grading done within the editing software.
Until that glorious day, we will need a separate app for more serious grading work. The first one I’m going to look at is VideoGrade
VideoGrade
VideoGrade is a one time payment app. In the UK it’s £4.99 and it’s $5.99 in the US.
The app is nicely laid out on both iPhone and iPad. We have basic controls: exposure, contrast and vibrance. Then we have white balance controls: temperature and tint. There’s also some white balance presets here.
I like the vignette control in this app because you get the falloff control, which allows you to adjust the smoothness of the effect.
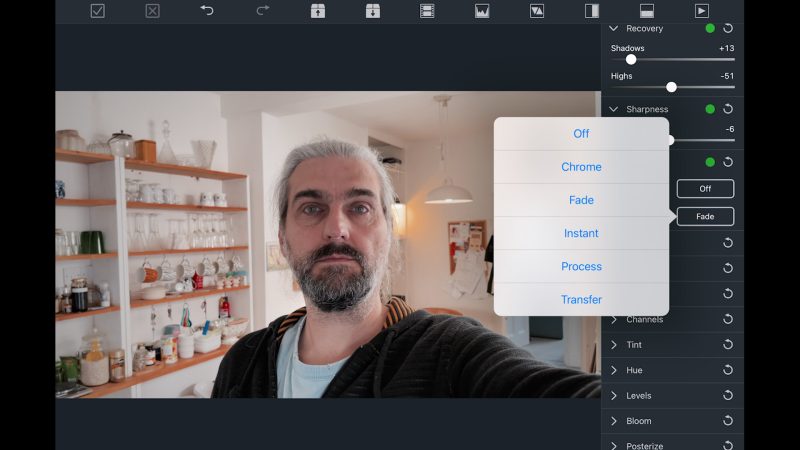
Under the Recovery heading the shadows and highs sliders allow us to push up brightness in the shadows and recover detail. Or bring down the highlights, to recover detail there. This will also reduce contrast in the image.
If you want to create the film look, then you might want to use this control to add shadow and highlight rolloff.
Under Sharpness there’s just the sharpness slider. We can make the image sharper, but we can also slide into negative sharpness. Which basically adds blur to the whole image. Thing is that smartphone video is often over sharpened so adding a negative value here will soften the image and make it look more like film as well.
Under Looks we have some presets: Monochrome and Color. So a bunch of black and white options first then some colour ones. Not too many to choose from and there’s no way to adjust the intensity of the look. So I give the VideoGrade looks a down thumb.
VideoGrade Tools
Noise allows us to add some noise reduction and sharpness, again. So perhaps these sliders could have been grouped together. Do we need 2 sharpness sliders?
Saturation allows us to adjust this setting for the whole image as well as in the shadows, mids and highs. Being able to reduce saturation in different areas is pretty useful because shadows and highlights generally look better desaturated.
So if we push up saturation in the mids and pull down saturation in the shadows and highs, we get a more cinematic looking image.See how we get these nice blue-ish shadows contrasting with the yellow orange light. As well, on my face there’s a nice orange highlight so we’re getting close to that orange and teal look.
If we want to compare with the original, we can see them side by side.
Using Brightness controls, we can again adjust for the whole image, shadows, mids or tones. I’m just going to bring down the shadows and mids a little.
Now we have Channels which allows us to adjust the RGB balance for each channel. If we pull down the blue level in the red channel and pull down the red level in the blue channel, we get quite a good teal and orange look.
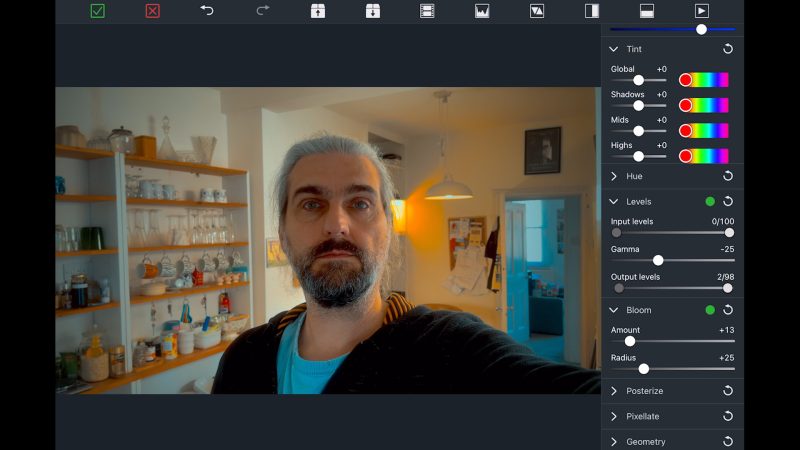
Below we have Tint, and again for shadows, mids and highs. Level controls allow us to rolloff the shadows and highs, as well as adjust gamma – which is basically mid tones.
Bloom?
The Bloom effect seems to add a general haze to the image, but I don’t see any real bloom effect on the lights. But it’s quite useful for softening the image. A bit like adding a diffusion filter.
We have one basic histogram we can toggle on and off. We can load and save presets, as well. And finally a preview button allows us to watch the clip in motion with the grade applied.
So I would say that overall this is a very solid app that comes at a very affordable, one-off price.
Darkroom
Darkroom is pretty expensive for an app. There’s various subscription deals or we can opt for the £44.99 buyout option.
You can try the app for free. Just install, open and when you get this screen just tap the cross to close it. Now pick a video clip and start editing.
To export something you will have to pay (or take the 3 day trial).
There is a row of buttons at the bottom to select various editing options. First up is various rotation and cropping options. If you quickly want to change the aspect ratio for social media stuff, you can do that here. You can also adjust angle, rotate 90° at a time and do a mirror flip as well.
 You can even adjust the skew. But I think that might be more useful for photo editing than video editing.
Presets
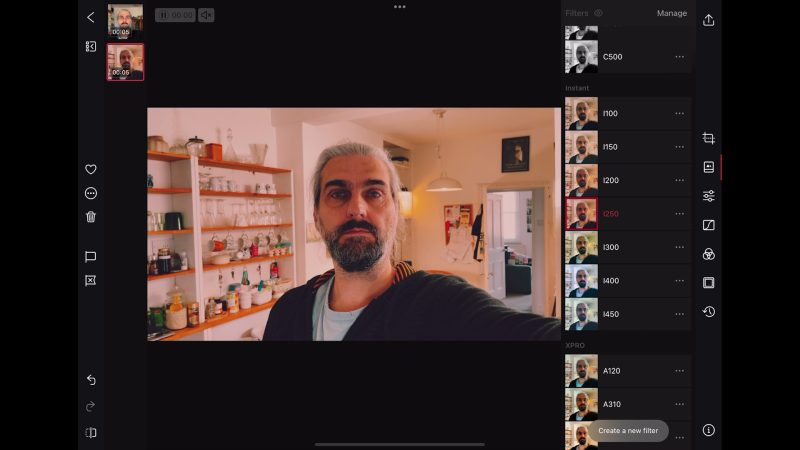
Next button opens up the preset looks. Swipe along and select. Once selected, just tap the look again to open up a slider to adjust intensity.
Next button opens up our basic colour grading tools, all in one long list. Having everything in one like this makes it very intuitive and quick to use. It’s so easy to work on these sliders to correct or enhance the look.
There’s not as many options here as some of the other apps. There’s no glow, halation, bloom. We do have grain and vignette, but just one slider for the amount you want. We can’t fine tune those effects, like grain size for example. Or vignette rolloff.
Fast & Simple
That makes this app nice and simple and fast. But if you like to go deep into settings, then this app probably isn’t for you.
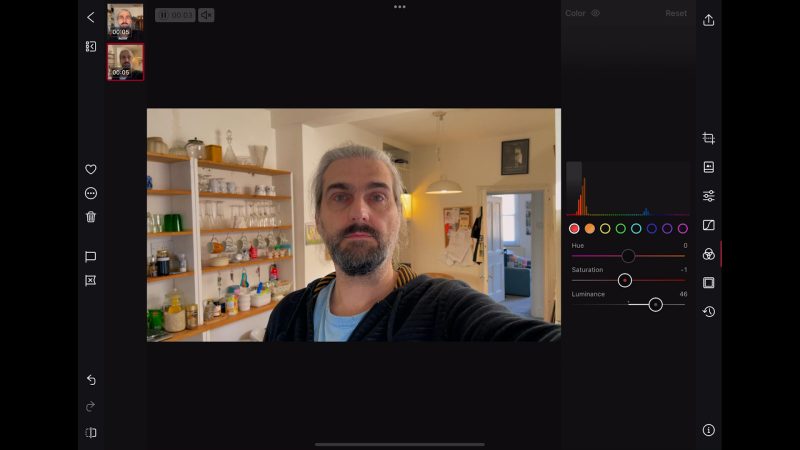
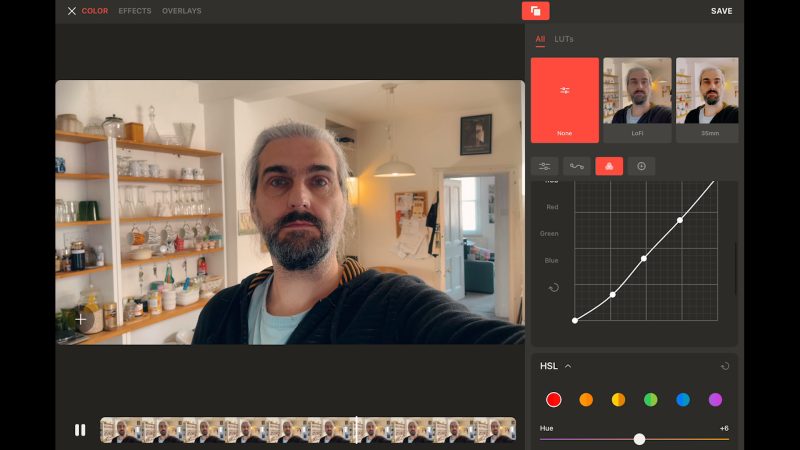
I also really like this colour setting panel. The top part tells you how much of each colour is already in the image. We can see there’s a lot of red and orange here, with some blues as well.
If we decide this is too much red and orange, we can bring down the saturation of that colour. The red and orange is mostly around my face and in this image we might feel my face is too much in shadow. So if I select that colour and push up the luminance, I can brighten only my face.
Normally, if we wanted to brighten one area of the image, we would have to use a mask. So this is a really neat little tool.
To save your settings as a new filter, so you can apply it to other clips, use create new filter. Just give it a name and save. There’s even a history panel, so you can go back through your grade step by step. Overall, the app has a nice feel to it. In general, it’s just nice to use.
VideoLUT
Whereas Darkroom is stripped down to the basic colour grading tools, the VideoLUT app is pretty much the complete opposite. This app is crammed full of colour controls and presets.
The app is one of the cheapest out there, at $5.99. Bear in mind though there are 2 apps, one for iPad and one for iPhone. The blue one is for iPad and the purple one is for iPhone.
Each app is a separate purchase. However, it’s possible to use the iPhone app on your iPad. At least I can on my 2020 iPad. There is a different layout and, as the developer is (as far as I know) one person, the apps are not always in sync in terms of features.
Anyway, let’s talk about the app.
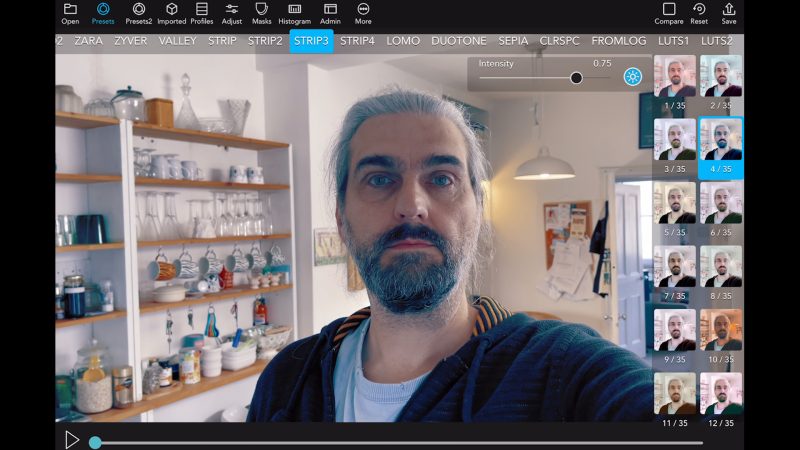
First of all, the preset looks and emulations. The app contains literally thousands of presets. I’m told by the developer there are more than 3000 presets here.
Swipe through and choose one. To adjust the intensity, tap the preset a 2nd time to open up a slider. There’s also a button here which allows you to retain the original luminosity, which means you’re only changing the colours, not the contrast.
The iPad version also now contains film emulation looks. You can also import and export LUTs. This means you can import a video or a frame grabbed from a clip in LumaFusion, grade the file, export the grade as a LUT, then import that LUT into LumaFusion and apply it to clips there.
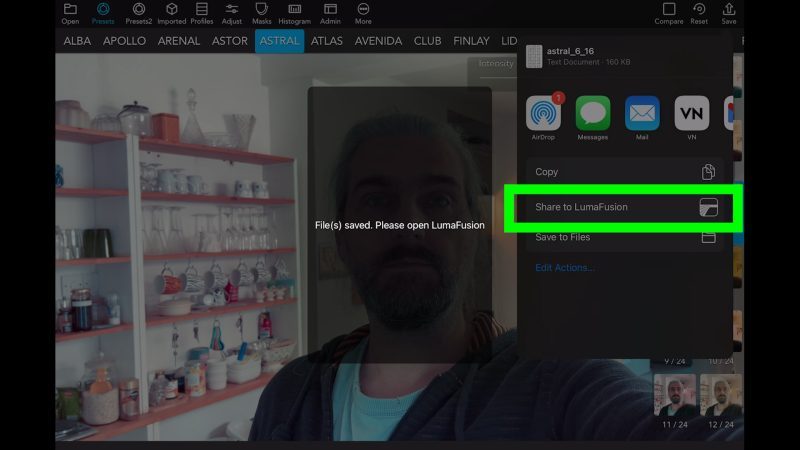
That’s quite a long winded process but until LumaFusion develops more powerful grading tools, it might be a good 2nd best option.
If we open up the Adjust menu, we get a long list of tools we can use.
Grading Tools
We have basic stuff like exposure, highlights, shadows. There’s a handy auto white balance tool for fast colour correction and white balance adjustments. There’s level controls as well as a sharpness slider which allows you to remove sharpness if you want a softer, film-like look.
The vignette controls also go a bit deeper than the other apps. There’s a simple version and a more complex version with more controls. We have the glow heading which gives us 3 really useful for getting a film look: Glow, Fade and bleach.
Glow gives you that misty look you get from things like diffusion filters and older cinema lenses. Fade gives you that faded film look and Bleach allows you to apply what’s known as a bleach bypass look.
This effect is also known as skip bleach or silver retention, is a chemical effect which entails either the partial or complete skipping of the bleaching function during the processing of a colour film. This results in reduced saturation, along with increased contrast and graininess. You can see it used on several shows and movies, most notably on Steven Spielberg’s Saving Private Ryan.
Film Halation
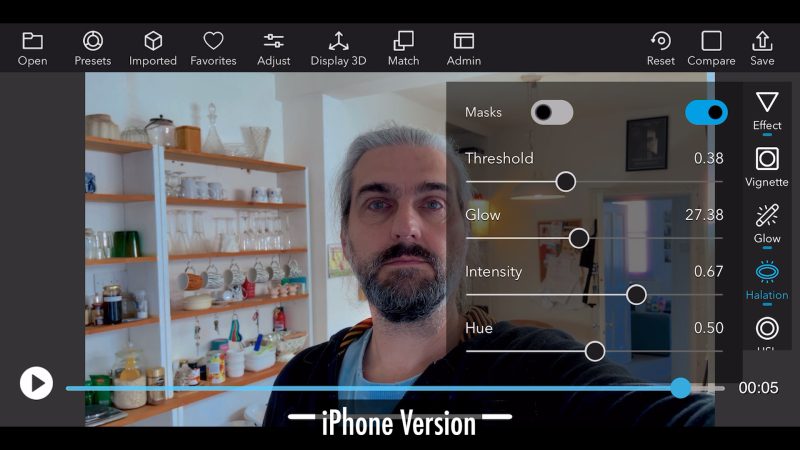
So the next setting is one I actually requested from the developer: film halation. This is a look of film stock, even modern film stock, which adds a red – orange halo around high contrast areas of the image. Most notable, around lights.
If you toggle on Mask, it shows you exactly where the effect is being applied. You can even adjust the colour of the glow.
And there’s even more to dive into here, including various curve controls as well as colour wheels. Under the noise heading we have denoiser as well as being able to add film grain.
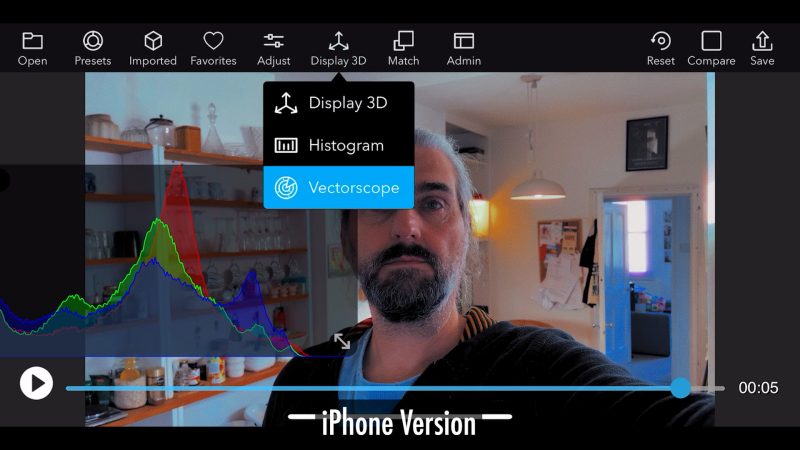
There’s also 2 scopes, a histogram and vectorscope option, which is really useful for serious colour grading. There’s actually too many tools to go into in this video.
The only downsides of this app are that maybe there’s actually too much choice. Having over 3000 presets to scroll through can be a bit overwhelming. At the moment, I don’t see an option to save presets to a favourites list, which would help us return to looks we like.
Also, be aware the iPhone and iPad version might not match 100% in the features they offer. This is just down to the developer having time to update both versions. The intention is for them to function identically.
Grain
Grain is an app by Moment, a company well known to smartphone filmmakers. When the app was first released, there was a lot of negative feedback. This was down to some glitches and performance issues but actually the big complaint was the cost of the app.
I thought that they might reduce the price in light of that, but I guess they’re sticking to their guns and hoping improving the app will bring in paying users at some point. There’s a yearly and monthly subscription option, or you can buy the app outright for £50 in the UK, or $70 in the US (I believe). That places Grain as the most expensive of the 4 apps I’ve looked at in this article.
Again, if you just want to try this app without signing up or paying, when you get the subscribe window just close it by tapping the X. You will have access to some of the basic features and presets. Enough to get a feel for the app I think.
The app feels slick with an animated interface. Although I’ve noticed some glitches with the interface not appearing until you tap a button. I’m guessing the animation causes this. Overall, the app is pretty similar to Darkroom. Nicely laid out, but not too many controls.
This will appeal to people who just want simplicity and a user interface that’s easy on the eye.
Select a clip or clips and then tap create new. You can either select a template or create a new look. If you choose a template you can use it as it is or edit it. Click the settings button to open up editing options.
Now we have 3 headings:
Color, Effects and Overlays
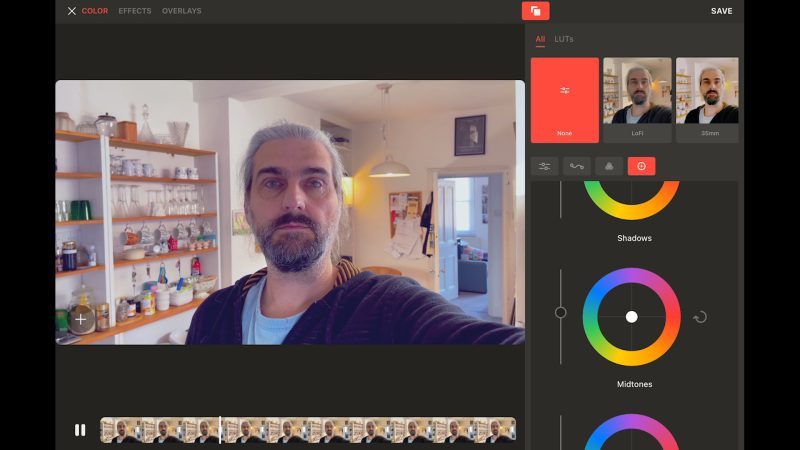
Under Color we have most of the basic grading tools. We have RGB curves and colour wheels as well.
Selecting Effects brings us vignette controls, plus bloom and glow controls. They aren’t separate from each other, so to get glow you need to have bloom. These are pretty good, but I couldn’t create a film halation effect using them.
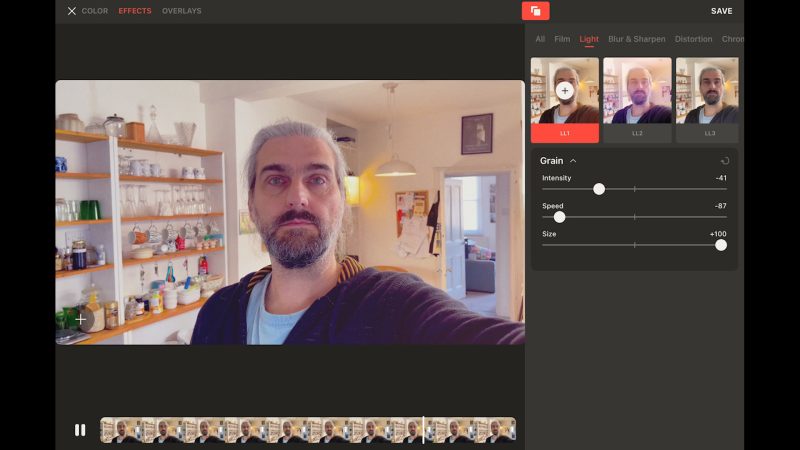
There’s also a bunch of other effects here in another menu. We have film grain and film dust presets, which can be edited. Grain works well, and even has a speed control for how fast the grain moves around the frame.
Dust allows you to make your clip look like old film, with scratches and dust. You can change the shape of the dust, the speed, intensity, density and switch the colour of the dust between black or white. There’s no vertical scratch option though, which is maybe a bit of an oversight.
By the way, to remove an effect just swipe left on it.
Light gives us various film burn effects: light leaks and light blooms. Again, this is all editable. Then we have distortions and Chroma, which allows us to add chromatic aberrations that you get from old cinema lenses. Finally, VHS gives a ruined old video tape look
And that’s pretty much it. Overall, I like this app. It’s fun and quick to use. I don’t think the app is as bad as people have been saying. That said, considering the price, it’s not the most powerful tool out there. And without a film halation effect, or authentic film stock looks that match known film stocks, it cannot be said to be a complete tool for emulating the film look.
In my opinion, they could spend less effort on animating the user interface and more on making an app that is good value. But it is a genuine competitor for Darkroom. Perhaps they might think about bringing the price down below what Darkroom asks.
Best App for Color Grading on iPhone or iPad
My favourite app out of the 4 I’ve tried here is VideoLUT. The amount of control you get for the cost is fantastic. I mean, it’s interesting to note that the 2 apps with the most features are by far the cheapest. They don’t look as pretty but they have the potential to make your videos and photos look prettier.
My choice is VideoLUT because it goes that extra step. There’s so many options, as well as film halation and true film stock emulations. And I can now offer my members on Patreon the app for free on both devices. Just signup and send me a PM and I will send you a code which allows you to get the app from the Apple app store at no cost.
Smartphone Videography – Beginner to Advanced
NEW: EXPLORING the FILM LOOK companion guide to download.
If you want to know more about smartphone filmmaking, my book Smartphone Videography – Beginners to Advanced is now available to download for my members on Patreon. The book is 170 pages long and covers essential smartphone filmmaking topics:
Things like how to get the perfect exposure, when to use manual control, which codecs to use, HDR, how to use frame rates, lenses, shot types, stabilisation and much more.
Members can also access all 5 episodes of our smartphone shot Silent Eye series, with accompanying screenplays and making of podcasts. There’s other materials too and I will be adding more in the future.
If you want to join me there, follow this link.