How to Edit Video on your iPhone : LumaFusion for Beginners
In this article. I’ll show you how to edit video using your iPhone. Even if you’ve never done any kind of video editing before, this tutorial will guide you through the basics, so you can get started editing on your smartphone – no previous experience needed.
I’ll be using an iPhone 12 Pro Max, which is one of the best smartphones with which to shoot and edit video. One great advantage about such a big phone is the screen size. A bigger screen makes it easier to see what you’re doing.
Smartphones are such powerful filmmaking tools because unlike regular cameras, you can also edit your video clips on them. Nowadays, they’re basically mini laptops in your pocket, minus the keyboard. We can even add the keyboard and the mouse, if we want.
Let me show you how.
Setting Up
Of course, you can simply edit with the iPhone as it is. But, if you are going to do a lot of editing on your iPhone, it will make the task easier with a few extras.
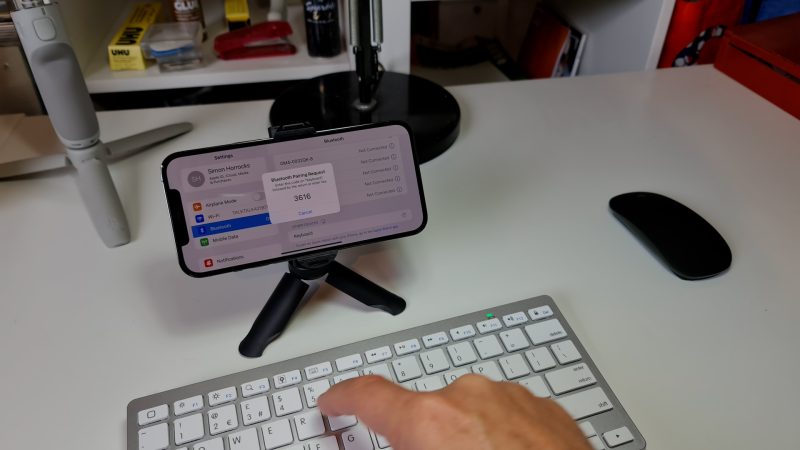
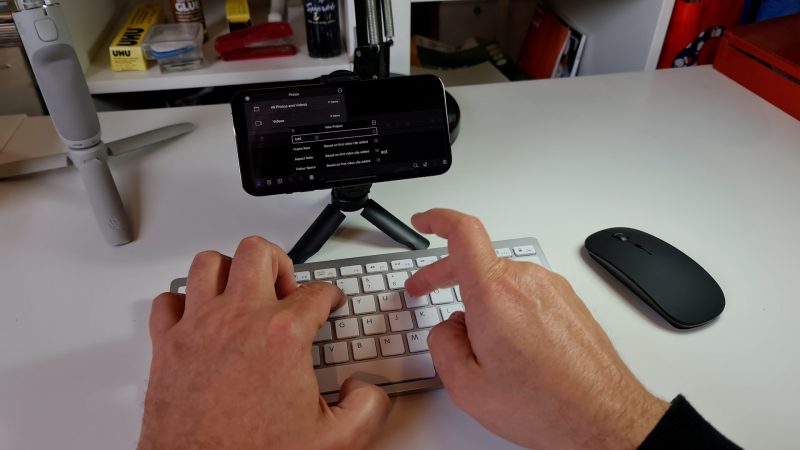
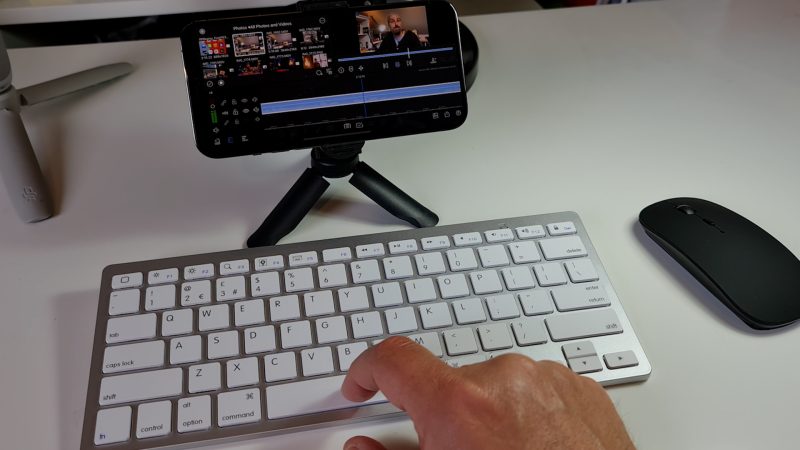
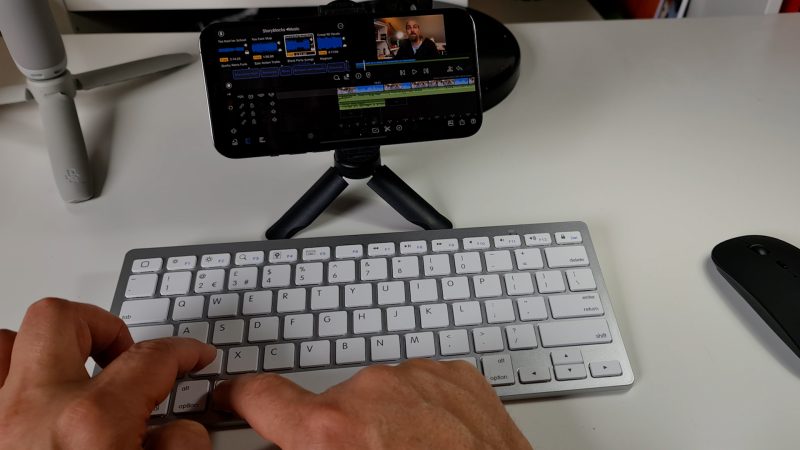
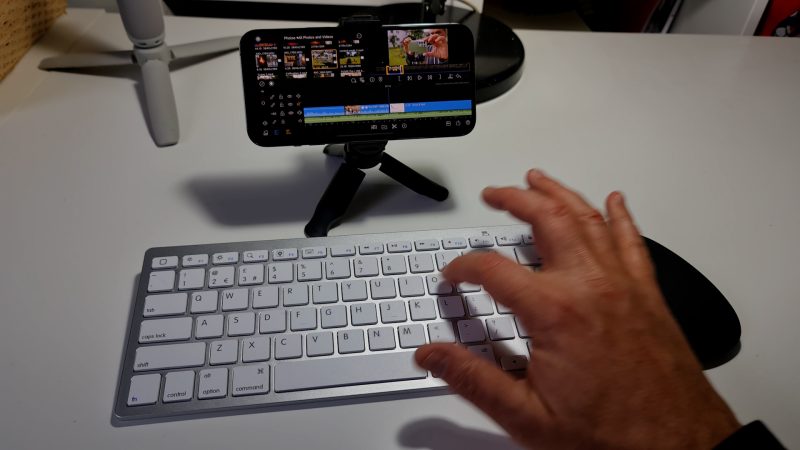
First, we can mount the iPhone to a mini tripod. I picked this one up on Aliexpress for almost nothing, like £5. It tips back, so you can angle the iPhone like a laptop screen.

Next I’m going to connect a bluetooth mouse and keyboard. They’re relatively inexpensive, like £30 for the two.
Bluetooth Connection
To connect the keyboard, make sure bluetooth is on, find the keyboard listed and tap to connect. There’s a code which you need to type into the keyboard to complete pairing.
To connect the mouse I found to be a bit more complicated. Theoretically, a bluetooth mouse should connect the same way, but my iPhone 12 Pro Max couldn’t find it this way. If your bluetooth mouse doesn’t appear, then try this:
Instead of bluetooth open Accessibility, then touch, enable AssistiveTouch, scroll down to devices, open that and hopefully you will find your mouse there. When it asks for a code, input 0000.
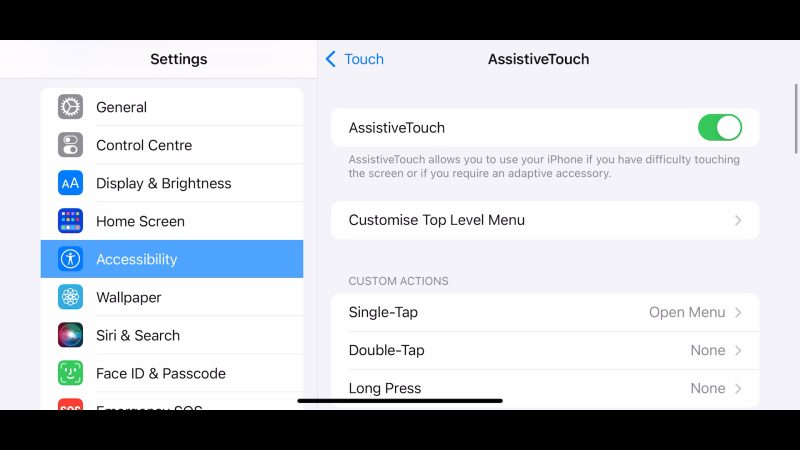
For a cursor, your mouse will control a grey dot or circle.
OK, now your iPhone is set up for editing video.
Video Editing Basics
Your iPhone comes with iMovie preinstalled so you can use that to edit, right away. However, I recommend using LumaFusion, which is only about a $30 lifetime purchase.
If you’ve never used any kind of editing software, the basic principles are pretty simple.
Media
To edit, first you need something to edit. Normally, that will be media comprised of video and audio files, but we can also use still photos. These files are then placed on a timeline to edit.
Timeline
The timeline is an interface that allows us to play our video and audio clips, so that when we press play those clips play in the exact order we want them to play in.
All but the most basic editing programs divide the timeline further into a number of available tracks.
Tracks
To edit a video, we combine a number of video and audio clips in this timeline. Depending on the project, this can be quite a simple task.
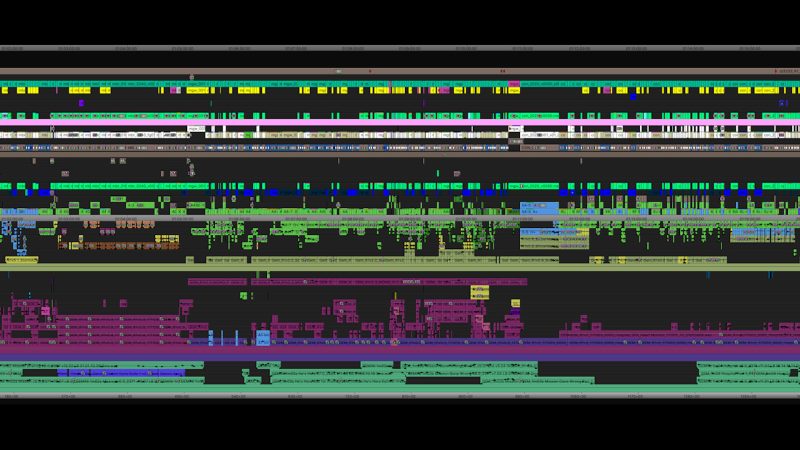
But some projects require complex timelines with thousands of clips and effects. And this is where the timeline tracks come in.
The tracks allow us to place more than one video or audio clip on the timeline, in the same position or overlapping. This makes editing video easier, as well as allowing more complex editing techniques.
Before we can edit a video, we need to start a new project.
Start a Project
To start a new project in LumaFusion, tap the plus sign button. This opens up new project settings. It’s probably a good idea to give your project a title.
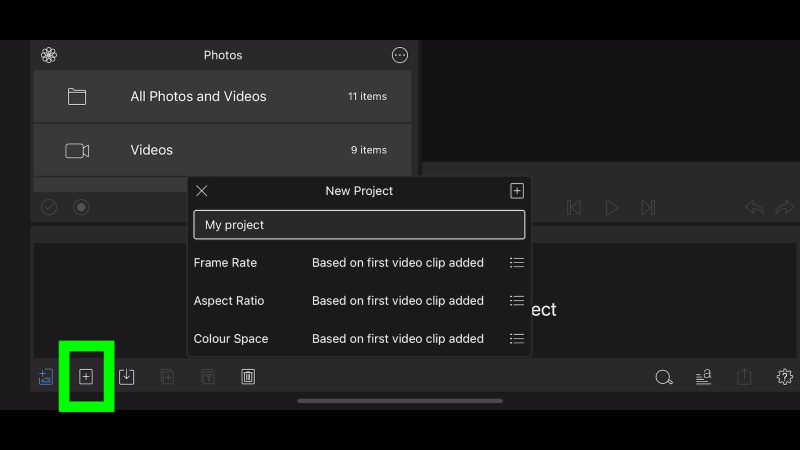
Titling your project is all part of being organised as an editor. Once you start editing lots of projects, each one with lots of files, not labelling projects well (and the media within the project) can cost you hours or days of lost time.
I’m going to call my project “Editing on an iPhone Tutorial”.
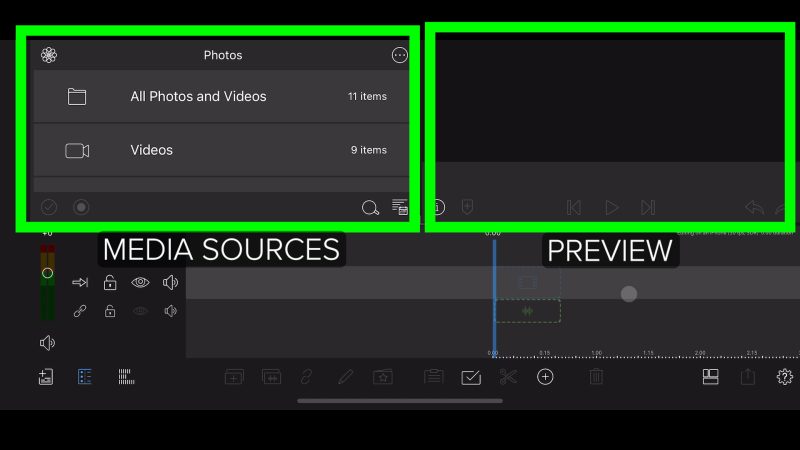
Tap the plus sign again to open the new project. The top half of the screen is your media sources on the left and the playback screen on the right. The bottom half of the screen is the timeline and timeline controls.
Let’s start with the simplest kind of edit, which is editing a 1 take vlog, with someone talking to the camera.
Simple Edit
If all we’re editing is a long clip of ourselves talking to camera, we can edit it with only 1 track of video and audio. I recorded a video clip with the same iPhone, using the native camera app.
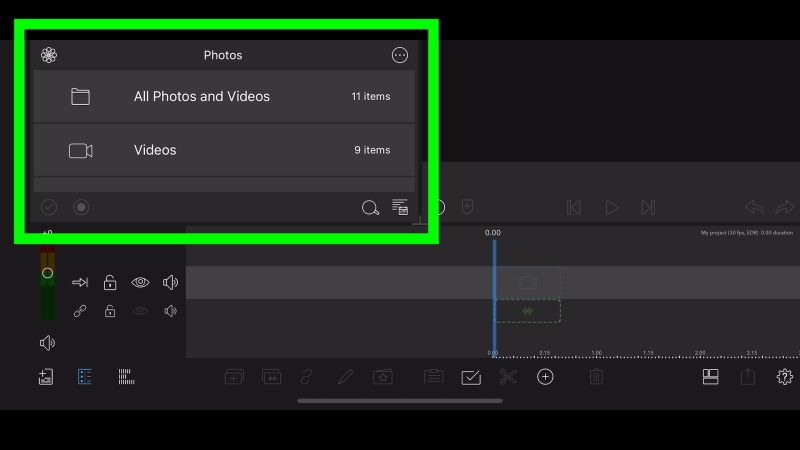
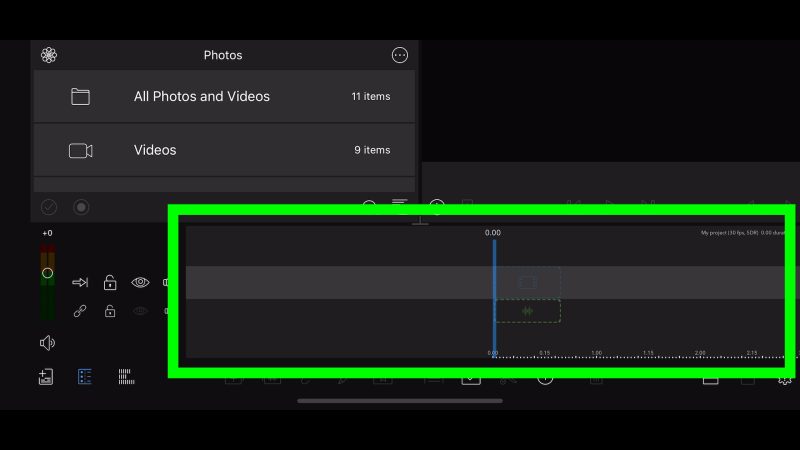
To find it in LumaFusion, I just tap on this icon in the corner of the screen. This icon will change to indicate which source we are looking at in the top left portion of the screen. At the moment, this flower shaped icon tells us we’re looking at the photos and videos stored on the phone.
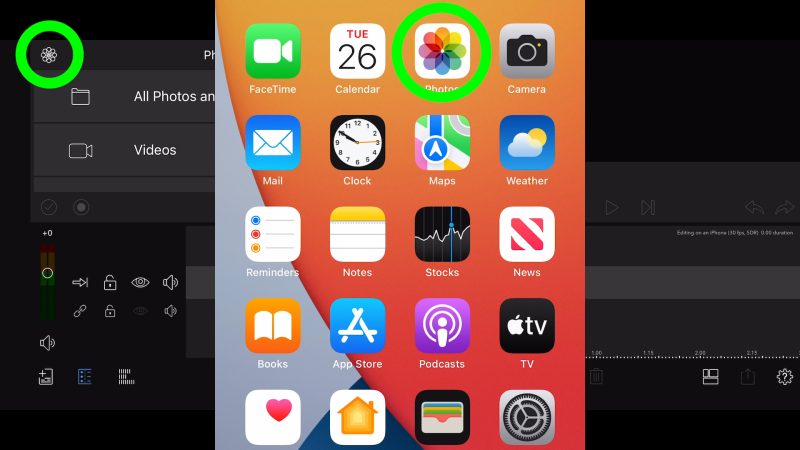
The icon is the same as the iPhone photos gallery symbol but without the colours. When the photos app icon is in the corner, anything in the photos gallery will be listed in the box top left. Find the clip and either drag it onto the timeline or double tap to send it to the timeline.
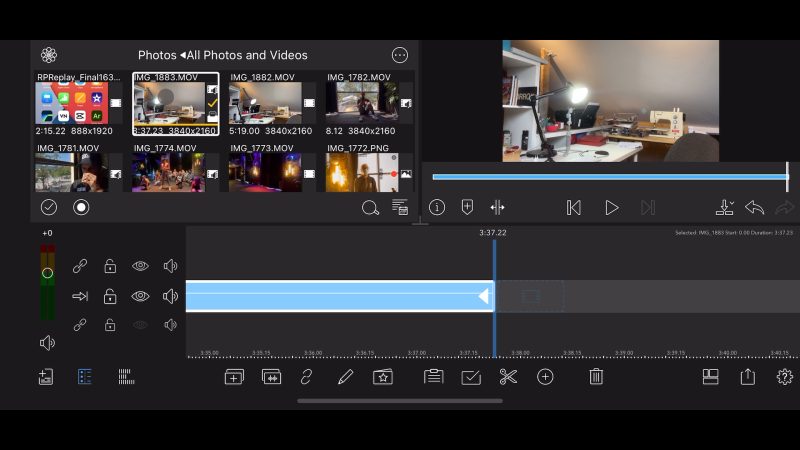
Now we have our first video clip on the timeline, which is this long horizontal blue line. At the end of the line is another blue line, this time vertical. This line is what’s known as the playhead.
Playhead
The playhead shows us where we are on the timeline. If we move or swipe or use the mouse we can slide the video clip backwards and forwards.
In the screen top right, you can see the video clip playing forwards and backwards as we move the clip. This shows us where we are in the video clip on the timeline.
When we are editing a vlog like this, usually all we want to do is cut out all the bad bits and leave the good bits. So we drag this clip back to the beginning, then play the video.
Playing
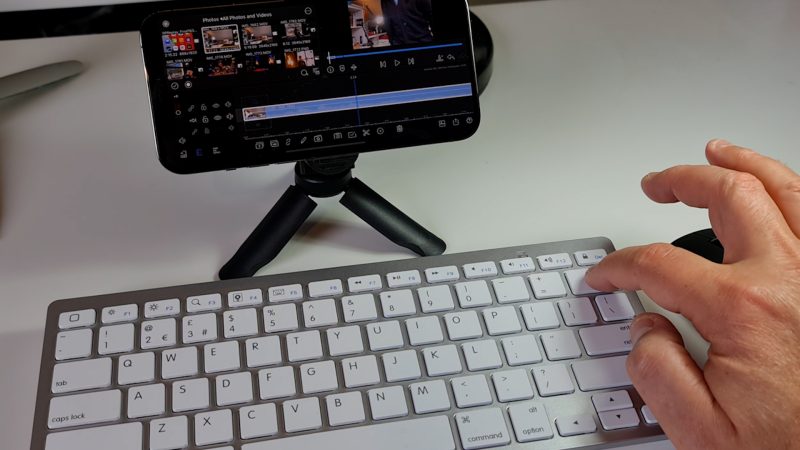
To play the clip, tap the play button, which is a triangle below the playback screen. We can tap the screen or use the mouse. If we have a keyboard connected, we can use the spacebar.
In pretty much all editing programs, the spacebar stops and starts playback. If you get into the habit of using it, it really speeds up editing.
Now we play the clip until we get to a part we want to keep. Then we need to cut the video before and after the good bit.
Cutting
To make a cut in the video clip, place the playhead at the position where you want to cut and tap on the scissors icon. A cut is made and now you have 2 clips of video on the timeline.
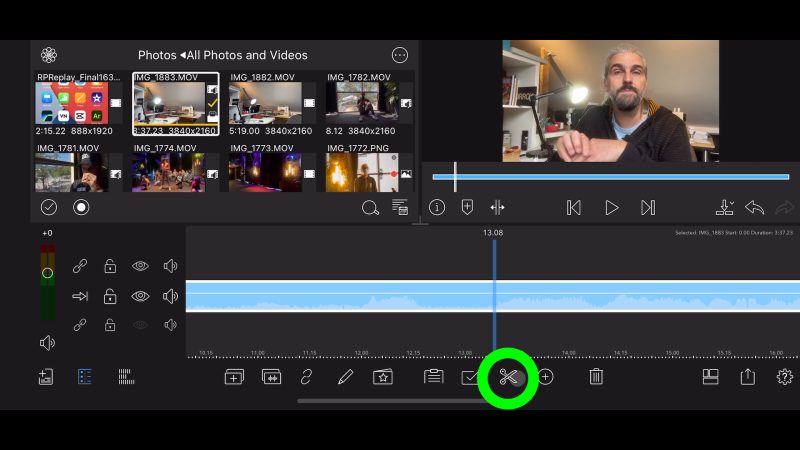
Next, find the end of the good part. Do the same again, position the playhead and make a cut. We want to keep the good bit on the timeline and remove the bad bit.
So click on the first clip to select it. Then click the trash can icon. If you have a keyboard, you can use the delete button.
Notice that the clip shuffles along automatically so that there is no empty space at the start of the timeline. This is how LumaFusion works and some other editing software like Final Cut Pro.
Now we just go through the whole clip, cutting and deleting the bad bits. Each time we delete a bad bit, everything ahead of it shuffles along automatically so there’s no gaps.
What we are left with is a sequence of me talking to the camera, the whole thing from one angle. That means these cuts that we’ve just made are what’s known as jump cuts.
Jump Cuts
Traditionally, when editors cut clips of film or video together, they would be between at least 2 angles. But these days, when cutting a vlog, we usually don’t have a second angle. You’ve probably seen this a lot if you watch vlogs on YouTube.
A jump cut can be a bit jarring. It doesn’t feel as smooth as cutting to a different angle. That said, they can be used in professional projects.
One trick we can use to smooth out the cut a little is to zoom in or out on the cuts. This makes them a little bit less jarring.
Change Size
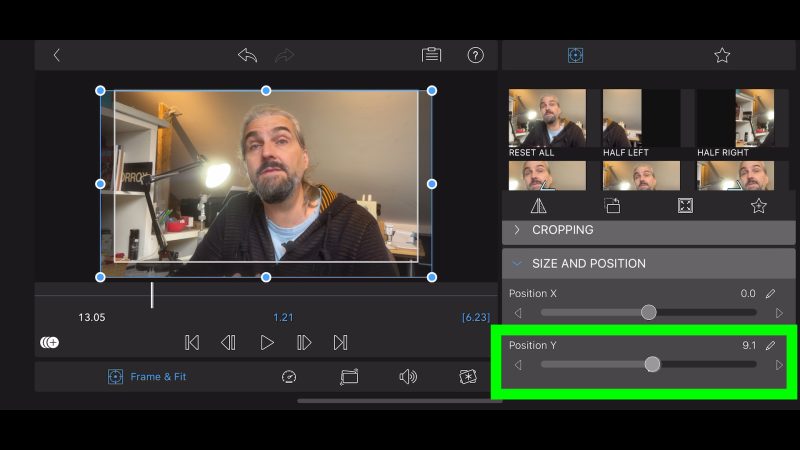
If I select the 2nd clip on the timeline, now tap on this pencil icon which opens up a whole new view. This is where we can edit all kinds of parameters, but just for this particular clip.
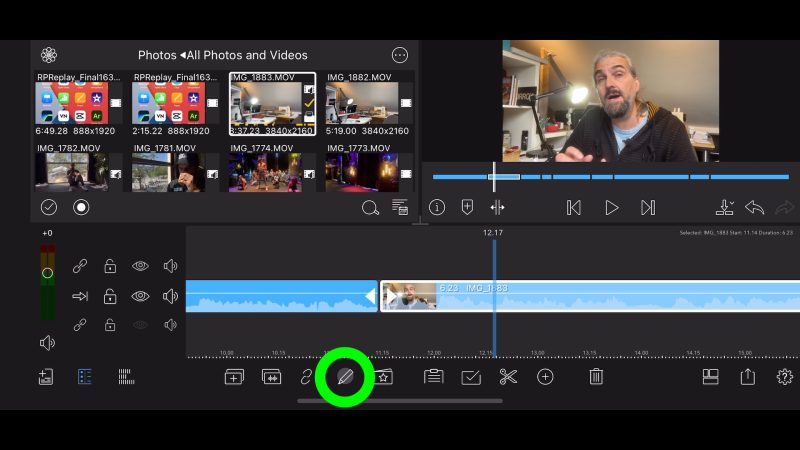
We want to select Frame & Fit. Then on the right we want to open up the Size & Position controls. Scroll down to where it says size and adjust it to about 110%, which I think is enough to make a subtle change. Again, we can use our keyboard here.

In the left screen, we can see how the image has expanded outside the frame of the viewable clip. By zooming in like this, we are cropping off the edges of the image. So now when we go from the clip before to this clip, it feels like a slightly different shot.
Change Position
But we’re not finished. A nice trick to make this work even better is to make sure the subject’s eyes are about the same level in each shot. Because when you zoom in, the eyes will now be higher unless we lower the position of the clip.
I usually lower the image so that the top is level with the top of the frame. Just adjust position Y so that those lines are level. The cut now uses the subject’s face as a point of focus, which looks more professional because it’s where the audience’s eyes are focused.
Finally, I just need to do the same to every other clip on the timeline and it will jump back and forth while I’m talking.
So you can see this is just about the simplest kind of editing. All we’re doing here is making cuts so we can throw out the unwanted parts of the clip. A lot of YouTubers will even go so far as to remove the breaths to increase the pace of the edit.
To take the next step when learning to edit video, we need to start using multiple tracks.
Tracks
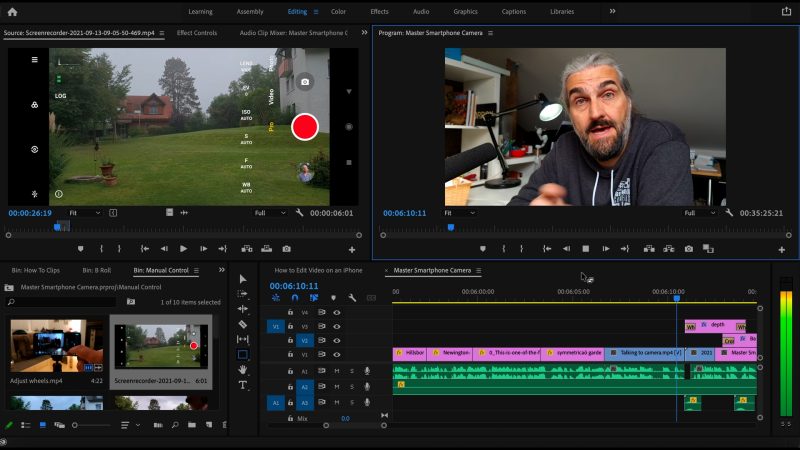
In LumaFusion, and most other editing platforms, there are multiple tracks that can be used. When I edit, I almost never just use one track. If I’m editing a YouTube video in Premiere, I will usually use about 4 or 5 video tracks and 3 audio tracks.
For example, what if I wanted to add some music to this vlog, to underscore what I’m saying? First, I need an audio file containing the music.
Music
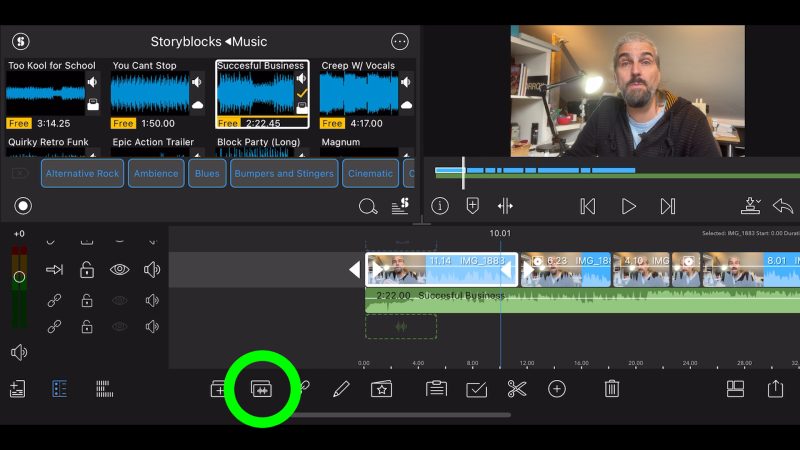
If we have a file of music that we want to use on the device, we can navigate to that file in LumaFusion using this area at the top left. For this tutorial, I’m going to use a track from StoryBlocks.
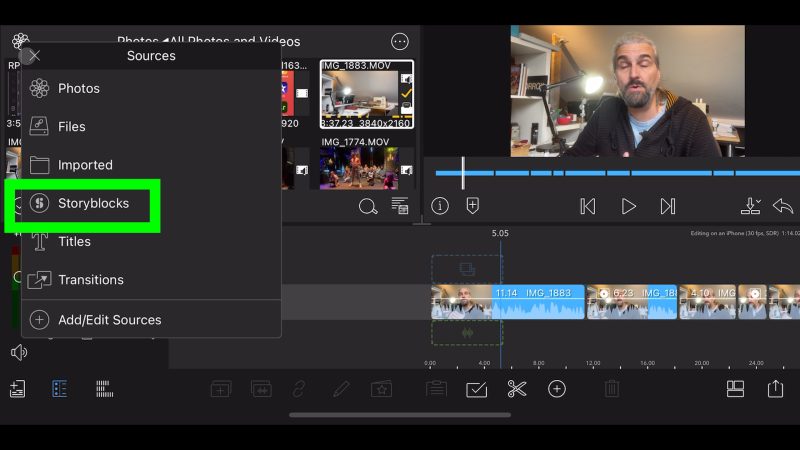
StoryBlocks is a separate company which provides a library of all kinds of stock video footage, music and sound effects. So we just scroll down to the folder labelled Music. Double tap, or use the mouse to open up a library of music files.
There’s a name for the track at the top. This blue shape below represents the audio level of the track, as it’s played. Too Kool for School is quite a thin line, so that means it’s not as loud as You Can’t Stop, which is a really fat line.
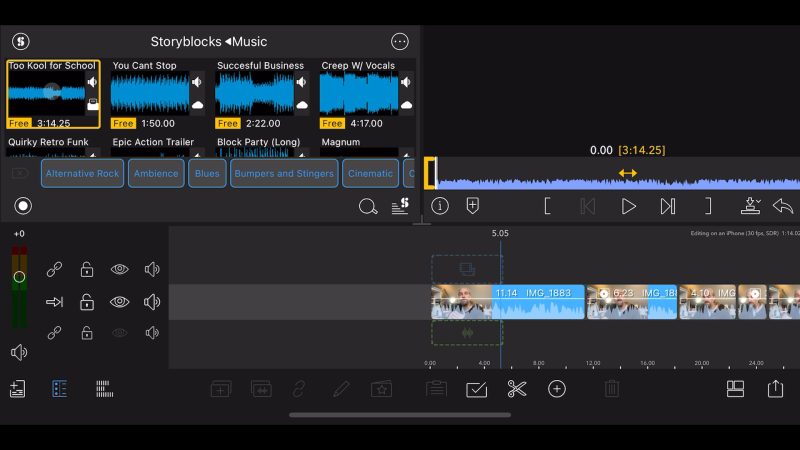
Like with video, double tap or drag the file onto the timeline. If you double tap (or use the mouse) the music will drop onto the timeline, onto the audio track starting at the point where you have positioned the playhead.
Editing is all about timing and where we position video and audio is very important. It’s central to the process of editing. Good editors are people who tend to love getting lost in this process of building an edit and then spending hours adjusting and perfecting things.
Note that StoryBlocks provides a number of free music tracks, labelled FREE. If you want to use the others, you need to pay a subscription.
These music files are not stored on your device. So when you first use one, it takes a moment to download. And now it’s stored on your device, for the next time you want to use it.
Right, we now have video and audio tracks and when we press play, they will play simultaneously.
Video & Audio
In LumaFusion, video tracks are blue and occupy the top half of the timeline. If we add another video clip it will be stacked on top. Audio tracks are green and occupy the bottom area of the timeline. If we add another audio track it will be stacked underneath.
There’s a difference in the way audio and video files play back. If we have multiple tracks of audio, they will all play mixed together. But if we have multiple tracks of video, only the video clip at the top of the stack is visible.
When I added the vlog clip, all we got was a blue video file. But there was audio playing, so where is that audio?
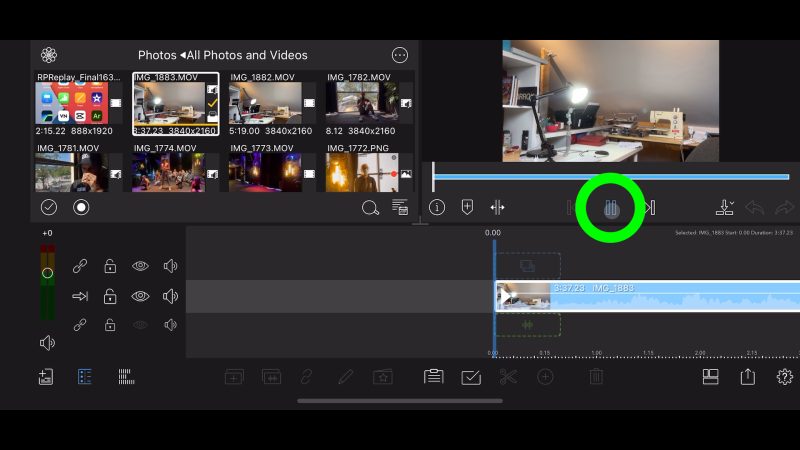
When you add a video clip which contains audio, LumaFusion does not add a separate audio track. Instead, it keeps the audio and video file together. You can see the audio level as a lighter blue colour in the bottom half of the video clip.
If for some reason you want the audio to have it’s own track, just tap the Detach Audio button. Now the audio is given its own track.
But for now I don’t want to separate them, so I will undo what I just did. To undo your last change, tap the left pointing arrow or if you have a keyboard you can use the traditional command+Z keys.
OK what if I want to now add some B roll to this vlog?
Stacking Video
We will probably want to add some close up shots to this vlog. When you have a main clip which is someone talking to camera, any extra shots you add on top of this are called “B roll” shots. Traditionally, the main clip would have been called the A roll, with the roll referring to a roll of film.
These days, the A roll has been dropped and we only talk about B roll.
If I wanted to cut to a B roll clip while I continue talking, I could separate the audio from the first clip, then make a cut in the main clip and drop the B roll clip into the cut.
But now the video to the right has shuffled along to make space and it’s out of sync with the separated audio. I could fix this and make it work, but it would take time and if I decided I wanted to change it later, it’s going to be tricky.
So this is one big reason why we have extra tracks to work with.
Instead of cutting the main clip, I simply place the B roll clip in the track above. Now when it reaches that clip, the software will cut to the clip above and it’s saved me all that fussing around. And if I want to adjust the B roll clip a little, it’s very easy.
Using tracks, I can just go through the timeline adding B roll clips very quickly. Now we have a nice vlog with close ups inserted.
But when we play it back there’s a problem: the music audio is way too loud and it’s drowning out my voice. To fix this we need to mix the audio.
Mixing Audio
Mixing audio is about adjusting the levels of multiple audio files to create a master audio track that is pleasing to the ear. Quite a common mistake, which I’ve done myself, is to have music playing under the spoken voice, but too loud.
Music is very powerful and adding it to video can dramatically increase the audience’s emotional response. For that reason, it can be very tempting to have it playing very loudly. Just ask Christopher Nolan.
But if your audience is trying to hear someone speaking, loud music can start to get quickly irritating. There’s no real rule for how loud it should be. But if you have a long passage of speaking, more than 5 seconds, I would suggest you have the music very low or no music at all.
So let’s turn this music down. Tap on the music on the timeline to select it. Now tap the pencil button to edit the file settings. The volume of any audio track is controlled by it’s gain level.
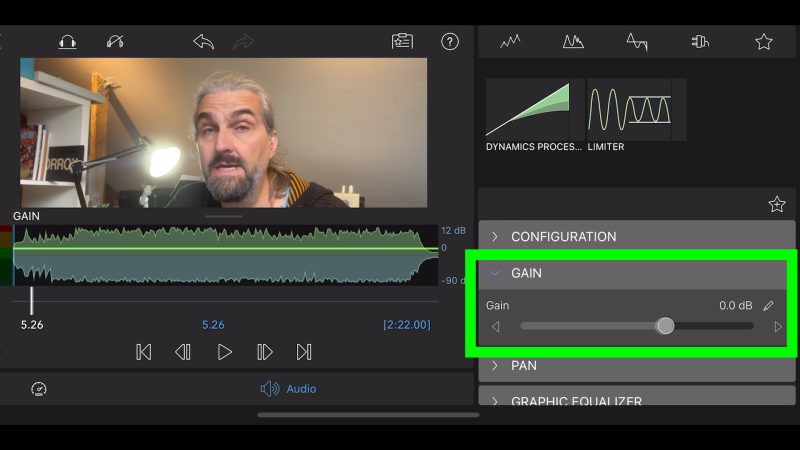
Look to the right here and find the gain slider. Let’s bring it down by -25 decibels. By the way, decibels is the official name for measuring audio loudness. It’s often written as dB.
OK the music is at a much better level now, sitting comfortably under my voice.
In professional video work, especially factual TV, music and spoken voice is often mixed using a technique called Audio Ducking.
Audio Ducking
Audio Ducking is where we temporarily lower or “duck” the volume level of one audio track as soon as a second audio track begins. This audio level is then returned to its previous level as soon as the second clip ends.
Practically speaking, this is used to lower the level of music audio when someone starts speaking, then boost it again when they stop.
LumaFusion has a handy little automatic audio ducking feature. Here’s how to use it.
Auto Audio Ducking
Get back to the timeline and tap to select the file containing the spoken voice audio. Because it’s combined with the video, in this case, I can just tap the video clip then the pencil button to edit.
At the bottom of the screen we need to select audio settings by tapping the little speaker icon. On the right, open the Configuration settings. Where it says Ducking we can choose between setting it to None, Auto or Master.
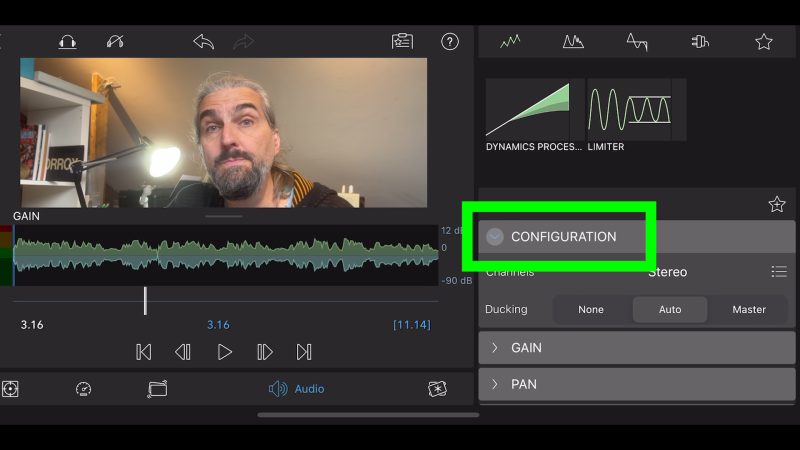
We want to change this to Master. This means LumaFusion will now treat this audio as the most important and any other audio clips playing at the same time, and which are set to Auto, will be ducked when this audio is playing.
Go back to the timeline, click on the music file to select, tap the pencil button, go to Ducking again and make sure the music is set to auto. It’s set to auto by default, so once we set the master audio, that should be enough.
Now when we play the video, as soon as the master clip starts, LumaFusion automatically fades the music down by a set number of decibels. You can adjust how many decibels by tapping the project settings button, select Ducking and scroll down to Duck volume.
By default it is set to -20 dB, which is the amount the volume will change. If the music is too loud still, rather than changing this, it might be better to adjust the volume of the music as a whole. If you set ducking to say -25 or -30, it might be too big a change and it won’t sound as smooth.
Audio ducking is often used when a video transitions from between speaking and a montage sequence.
Montage
When we have lots of short clips of video and we edit them all together, one after the other, this is known in filmmaking terms as a “montage”. A montage is used across all kinds of filmmaking. Narrative fiction, documentaries, factual TV, sports shows, YouTube and so on.
The purpose of a montage is to create a dynamic video experience where time is compressed to allow more information to be shown in a shorter space of time.
Usually, a montage does not include an actor or person speaking. Although, sometimes a voice over narration might be used.
Montage in a Movie
In a movie, we might use a montage as a transitional section of the film. Like, if we were to make a movie about a person washed up on a desert island, we might use a montage to show them building a shelter. In a 2 hour movie, we wouldn’t want to depict this happening in real time, even if the character managed to complete the task in less than 2 hours.
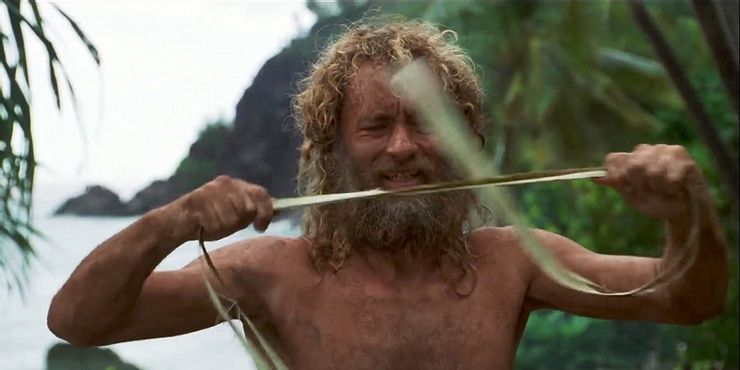
So we would have 2 choices. One option would be to simply cut from the moment the character decides to build a shelter to the shelter being finished. But it might be better for the story to show the effort required to build it.
And that’s where the montage comes in. Using a montage, we could show the effort in about 15 or 30 seconds.
Other Montage Uses
In other types of video, montages might be used to give an exciting snapshot of the video’s content. A sports show might start with a montage of the most dramatic moments, cut together. As well, a montage could be used to show the best parts of a location during a travel video.
Editing a montage is a lot of fun, because we can edit the clips to the music. Combining cinematic shots with music can really drive home the emotion you want the audience to feel. And evoking emotion in your videos is key to engaging your audience and keeping them watching.
So let’s add a montage to this vlog.
Editing a Montage
So far, we’ve only added whole files to the timeline. But when we are adding lots of clips, we don’t want to keep adding the whole clip each time. Rather, we just want the relevant part.
When editing, much of our time is spent viewing clips, finding the good bits and then placing them on the timeline with all the other good bits. Essentially, editing is a process of cutting away the bits we don’t want. If we do that before we place it on the timeline, it saves time.
The way to do this is use the preview window.
Preview Window
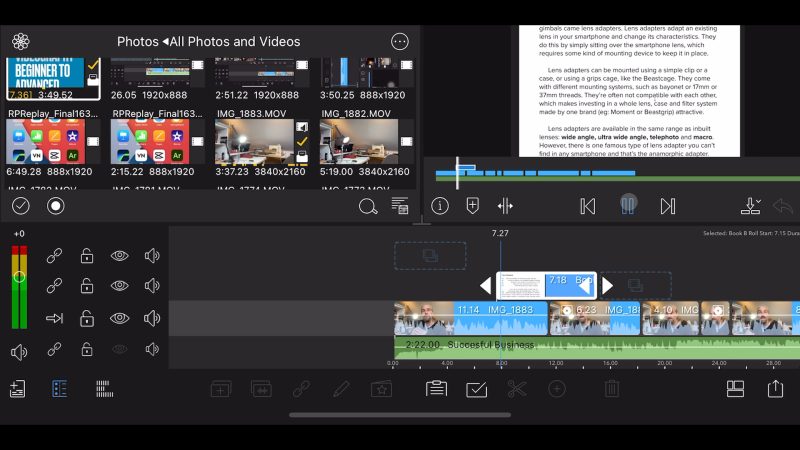
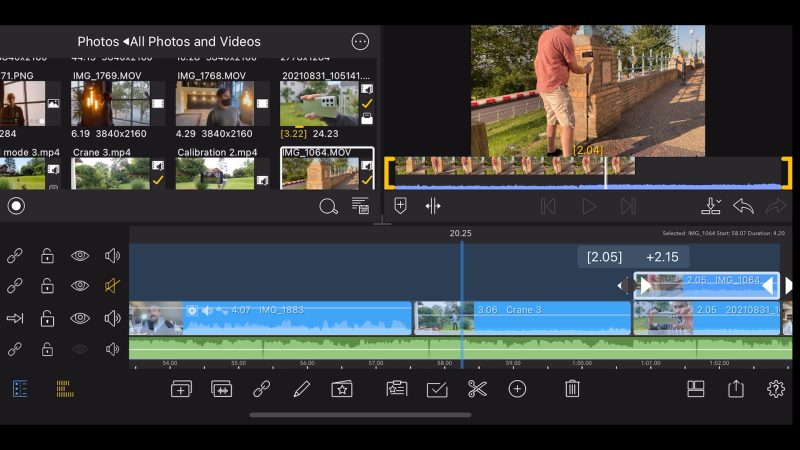
When you select a clip by tapping on it, that clip appears in the preview window. So if I tap on a video clip from our media sources top left, the preview of that clip appears top right. If I select a clip on the timeline, again a preview appears top right.
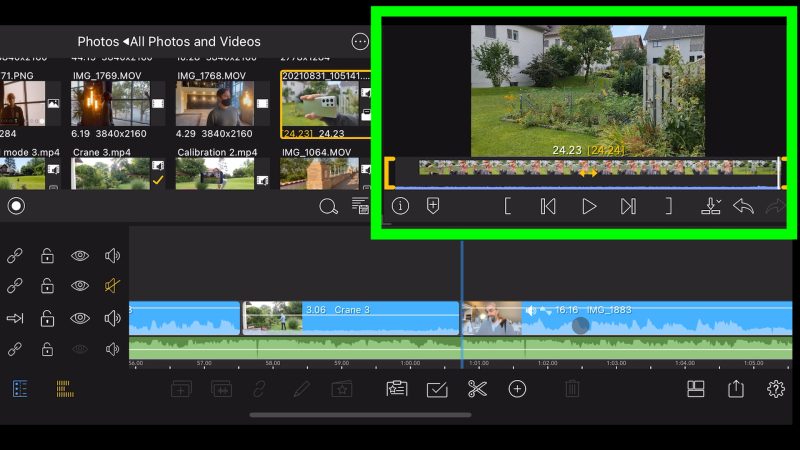
Choose a clip of B roll from the photos folder. Preview that clip and find a good start point. If I press I (which stands for “in”) on the keyboard, the yellow bracket on the left moves to that point. Next, find the end point and press O (which stands for “out”). The right yellow bracket moves to that point.
Now when I drag or send the clip to the timeline, it will only send the part between the 2 yellow brackets. And this is much easier to handle than using the whole clip.
When editing a montage, we should try to make the cuts follow the rhythm of the music.
Cutting to Music
So I need to fine tune the length of this clip to match the rhythm. Watch and listen and where you feel a cut should be, tap the spacebar to stop the video.
The clip is just a bit too long, so I need to trim off that end. I can either use the scissor tool and make a cut, then delete the unwanted bit. Or I can tap where the white arrow is and drag the end of the clip.
A trick I use to make a quick montage is to use this first clip as a measure for the next clips. Find the next clip, set in and out points, place it one the timeline. Now, drag it onto the track above the first montage clip.
Remember, we measured the first clip to fit the rhythm of the music. As we know, music usually has a consistent rhythm, so if all the clips in the montage match the first clip’s length, it should keep the montage in time with the music.
Drag the end of the top clip to match the length of the bottom clip, then move it to follow the bottom clip. Keep repeating this process until you reach the end of the montage. This will create a montage with music and video working together.
Now that we have our vlog, with B roll and a montage, we should add some titles.
Titles
We can add titles for all kinds of uses. A main title to tell the viewers what the video is, section titles, subtitles for different languages or if you want people to be able to follow the video without audio. In this video and my other videos, I will frequently use titles to help me illustrate the information I’m trying to get across.
Adding titles in LumaFusion is easy. Tap that library sources button in the top left corner and choose titles from the menu. There’s a few templates for preset titles, but I’m just going to use the basic one.
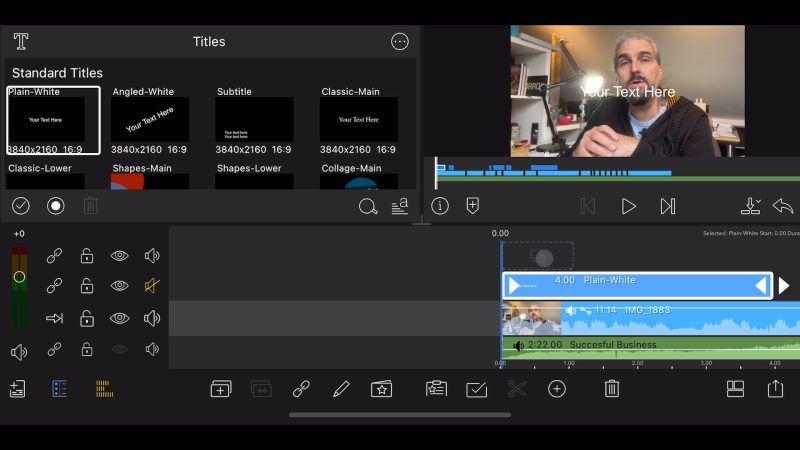
Drag the title down and place it on the track above the video. We can see in the preview window we now have a title. With the title selected on the timeline, tap the pencil edit button.
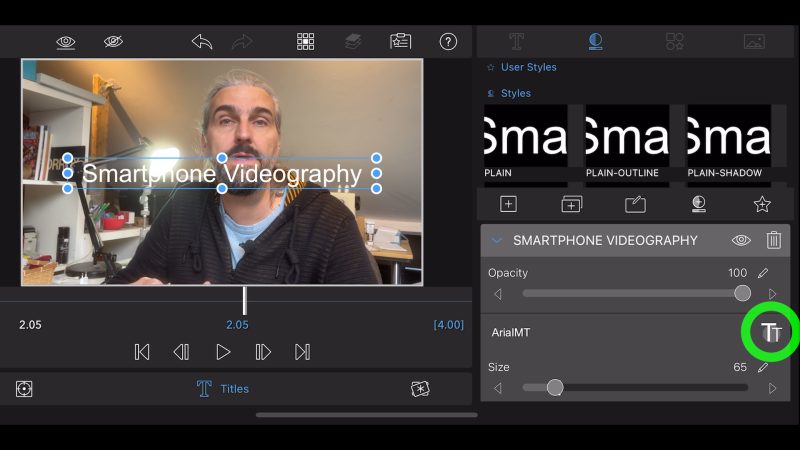
To change the words of the title, tap the button on the right with a pencil and a screen. Just start typing to enter a new title and then tap done. To change the font tap the button with the 2 Ts.
Changing Font Bug Fix
Now I discovered a little bug here, since the iOS 15 update. Once you open this window you can’t get out of it. Tapping cancel doesn’t work.
Tap a font to select it and then turn the phone, so LumaFusion is in portrait mode. Then swipe down from the top of the screen. Hopefully they’ll fix that soon.
I think the title doesn’t quite stand out enough, so let’s add a background.
Text Background
Tap the button with a plus sign on the left of that row of buttons. Choose shape. Change the colour to something darker to contrast with the white text. I’m just going to use black.

The text has disappeared, that’s because we need to put the text on top of the shape. Close the shape settings with the little arrow and drag the shape above the text, using the 3 little lines on the right. This is a bit counterintuitive because putting the shape on top actually places it beneath the text in the frame.
Open the shape settings again, and use the circles on the shape box in the preview window to resize the box. I’m going to make it into a stripe across the frame. And I’ll just bring the opacity down so we can see through the box.
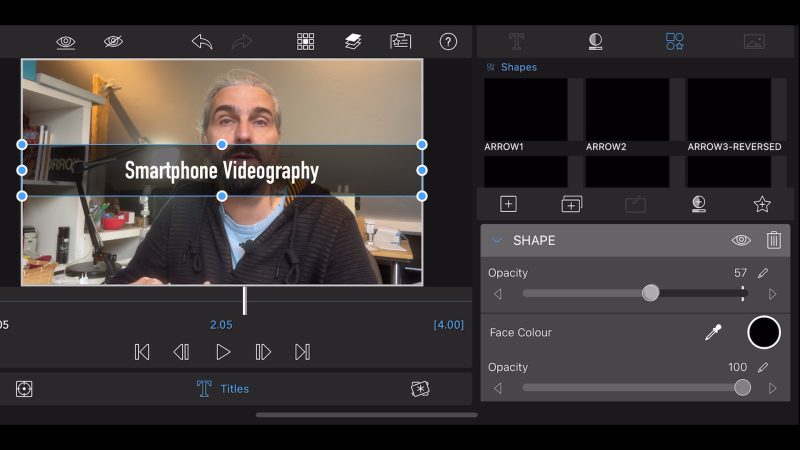
The box helps to make the text stand out but reducing the opacity makes it a bit more subtle.
The final stage of editing is to export your movie.
Exporting a Video
When we export our edit, the program combines everything we have created into one video file with audio attached.
In LumaFusion, the button on the bottom right of the screen with an arrow pointing up is our export button. Tap that to open up the export options. We want the top option: Movie.
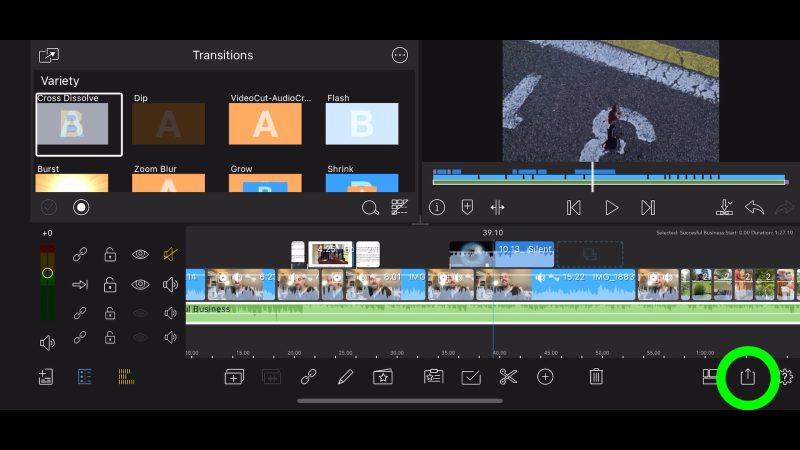
I just want to save this to my iPhone’s photos gallery, but we also have the option to export directly to YouTube, Vimeo or use other sharing options.
Now we get a set of export settings which is based on the project settings. Usually we can leave all these as they are, but one we might want to change is Video Quality.
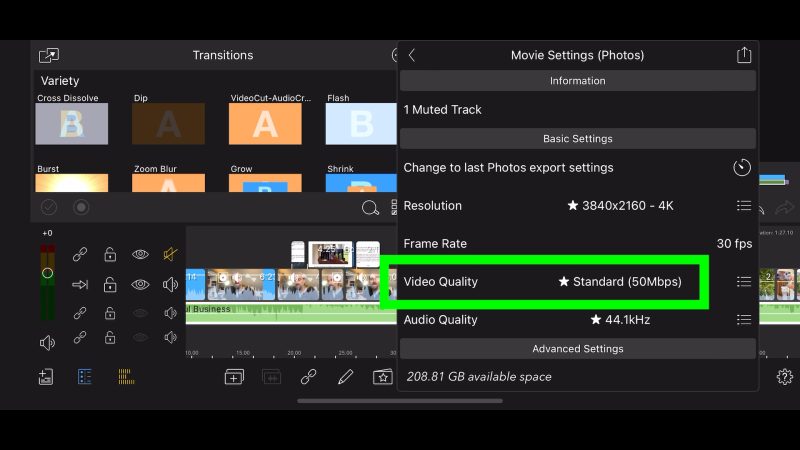
Video Quality is the bitrate setting we want to give our final video. A higher bitrate will give us a better quality video but a larger file. If you scroll down to the bottom, it gives you an estimate of how big the file will be, with the current settings.
If we change Video Quality, we can see the estimated File Size also changes. What we are setting here is how much LumaFusion compresses the video as it exports it. It’s a good idea to choose a higher quality, but bear in mind you can’t add quality here.
Most times we would choose between Standard and Quality. Below, we can choose the codec. H.264 is the more common codec while h.265 is the updated version, which reduces the size of the video file. Be aware, some platforms don’t support H.265.
But most do and I nearly always use h.265 these days.
Now press the button with the upward pointing arrow and LumaFusion begins exporting. It will take some time, depending on the length of the video. Once it’s finished, you should find it in your iPhone’s photo gallery.
Smartphone Videography – Beginner to Advanced
If you want to know more about smartphone filmmaking, my book Smartphone Videography – Beginners to Advanced is now available to download for my members on Patreon. The book is 170 pages long and covers essential smartphone filmmaking topics:
Things like how to get the perfect exposure, when to use manual control, which codecs to use, HDR, how to use frame rates, lenses, shot types, stabilisation and much more.
Members can also access all 5 episodes of our smartphone shot Silent Eye series, with accompanying screenplays and making of podcasts. There’s other materials too and I will be adding more in the future.
If you want to join me there, follow this link.