How to Create the FILM LOOK with a Smartphone . FiLMiC Pro Tutorial . McPro24fps : Tutorial
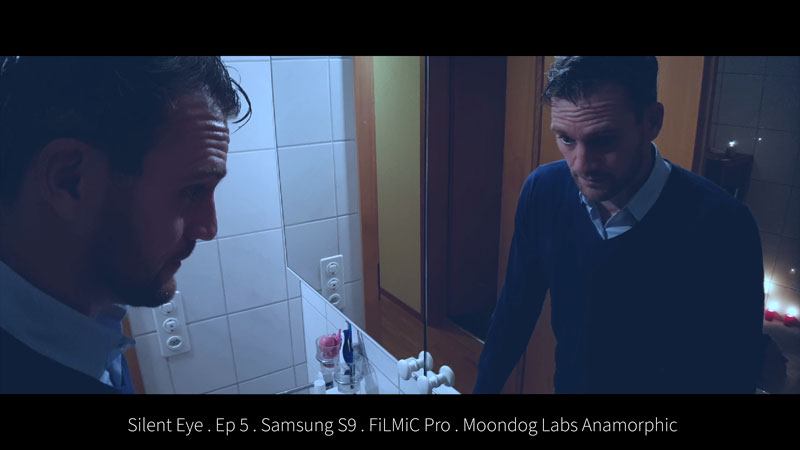
Our sci-fi TV series we shot using smartphones, called Silent Eye, has had over a million views on Amazon Prime, being recommended to viewers alongside shows made on huge budgets. Part of our success was using settings via camera app FiLMiC Pro to create what is known as the “film look”.
So, how did we do it?
People love films and people love the look of film. It’s a look that has been tried and tested over the 100 years or more since cinema was invented.
In the past, it used to be quite a task to reproduce the look of film, without using any actual film. But as digital cameras have improved, year after year, it’s getting easier and easier.
And with great apps like FiLMiC Pro and McPro24fps, we can certainly achieve a film look using our smartphones. In this article, I will also talk about using some Sandmarc ND PL filters to help when conditions are too bright.
First, I think it’s a good idea to understand the principles behind the film look.
What is the Film Look?
Film has a dream-like quality to it that video doesn’t, unless you use certain settings and colour enhancements. So, when we try to create the film look using a smartphone, we attempt to emulate the key characteristics of film but using a digital medium.
However, these days most cinema and TV is shot in some kind of widescreen format.
Another characteristic of film is that it’s mostly shot and projected at 24fps. Then there’s the 180 degree rule, which dictates that your shutter speed should be close to 1/48.
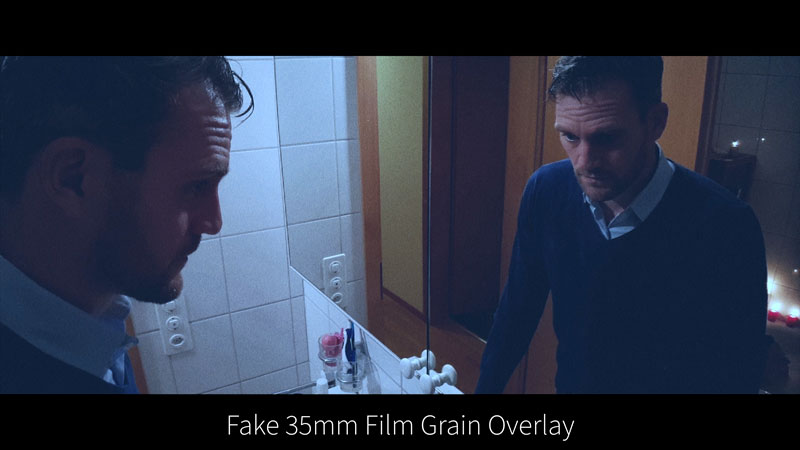
Instead of digital noise, film gets grainy when pushed to compensate for low light levels.
How about a shallow depth of field? While this isn’t a property of film itself, most movies we know and love are shot using a variety of focal lengths. So some shots will have everything in focus, while others will have a blurry background and bokeh.
And while digital cameras and screens can produce 100% black and 100% white, film has noticeably less contrast than digital video. Blacks are a little bit faded and whites more off-white.
How to Create the Film Look with FiLMiC Pro
First thing is to set your frame rate to 24fps. So open up camera settings and tap frame rate, now tap 24.
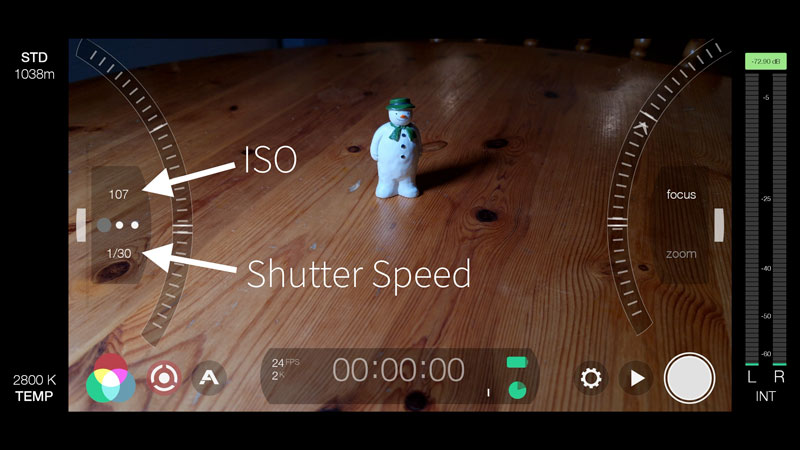
To make sure your shutter speed stays at 1/48, you can set it and lock it. Open up the manual exposure controls by tapping the button bottom left – like a circle inside a broken circle. Now you have shutter speed on the left at the bottom and ISO left at the top.
Drag that wheel up and down until shutter speed says 1/48. Tap it to lock it and it turns red. Now when you drag the wheel up and down it only changes the ISO setting.
We want to keep the shutter speed at 1/48 because this creates a nice motion blur in the image. Faster shutter speeds reduce motion blur and make the image look more harsh on the eye.
Therefore, the only way you can now set exposure is by adjusting the ISO. So what do we do if it’s too bright and we can’t lower ISO any further? Then our only option is to reduce the light hitting the sensor and most people use an ND filter.
Film Look using a Smartphone: Sandmarc ND Filters
An ND filter blocks some of the light, like putting sunglasses on your camera. This allows you to reduce the light hitting the sensor without pushing shutter speed too high.
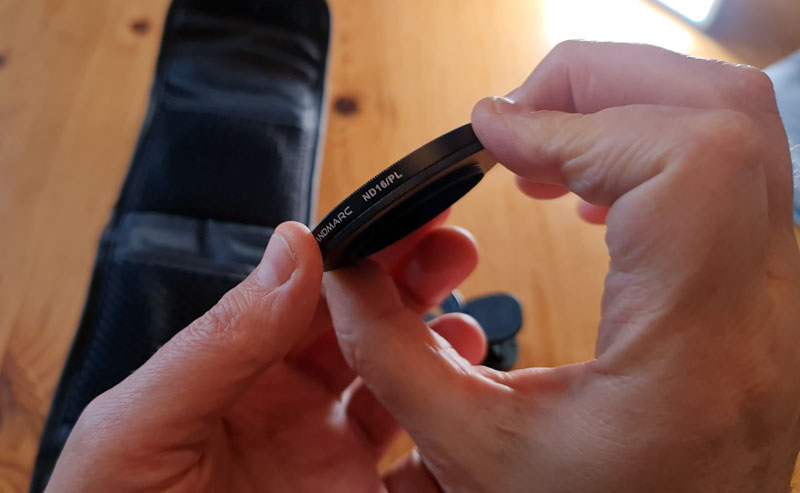
Sandmarc sent some ND PL camera filters to try out. They come with a clip, so they can be used with most smartphones, iPhone or Android. These are really nicely made. Even the clip, it’s covered in rubber and feels pretty sturdy, too.
This kit comes with 3 strengths of ND filter and a PL (or polarising) filter attached. So, I need to choose the one which will allow me to reduce the light without going so dark that I need to boost the ISO.
Find out more about using ND & PL filters here.
Resolution & Bitrate
When you come to colour your film, you really want as much information in the clip to work with as possible. So filming in 4K, for example, even if you intend to master at 1080p. Also, the highest bitrate your devices can manage, in this case Filmic Extreme.
8-bit or 10-bit?
Some smartphones can now shoot in 10-bit colour depth using FiLMiC Pro or McPro24fps. Again, 10-bit gives you more information to work with when colouring your clips.
Having said that Silent Eye was shot in 2K, using FiLMiC Quality bitrate and in 8-bit colour. So it’s not absolutely essential.
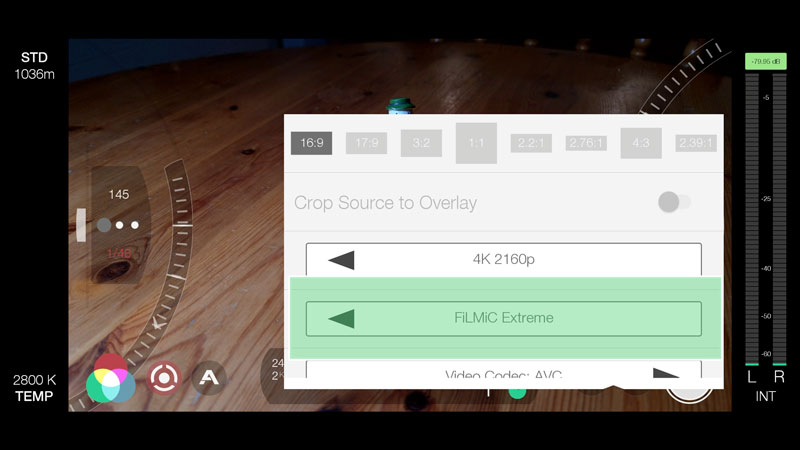
Aspect Ratio
The standard aspect ratio is 16×9. That’s the default. But you might want to choose a more widescreen option.
Tap the cog icon to open up the settings menu. Tap Resolution and now you can choose a different aspect ratio. Now, if you toggle on Crop Source to Overlay, then FiLMiC Pro will output your video at that ratio.
Sharpening & Noise Reduction
Smartphones use strong digital sharpening which makes the video they produce look less like film. Generally speaking, film has a soft look and this is achieved through various methods. Film itself, as it’s made of celluloid and chemical crystals, simply doesn’t have the razor sharp quality of an image created using electric sensors.
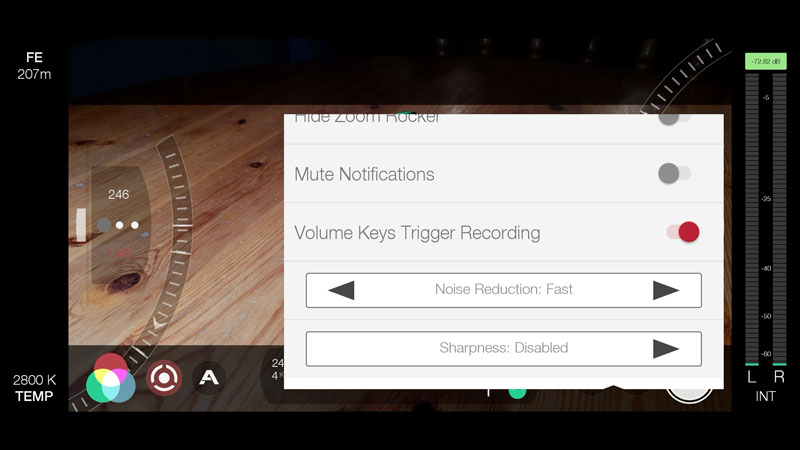
I believe this is only possible in Android devices. But in the settings screen, tap device and scroll to the bottom of the list. There (in Android devices) you will find 2 settings, for Noise Reduction and Sharpness.
Just disable sharpness here. Personally, I have noise reduction on fast. Some people prefer to switch this off and use noise reduction in their editing software. But I find my Samsung devices have good noise reduction capabilities so I use it.
How to Create the Film Look with McPro24fps
Like with FiLMiC Pro, we need to set frame rate and shutter speed. In McPro24fps frame rate is located by tapping the Video Recording Settings. Frame rate and resolution are combined, rather than appearing as separate settings.
The top setting is Resolution and FPS (frames per second). In McPro24fps you also get to choose if you want to shoot using the GPU or without.
If you shoot without GPU, more processing power can be used by your device to capture the video. This also opens up other options in respect to shooting Log Video as well shutting off certain options.
McPro24fps is like a puzzle, sometimes. If you use this you can’t use that. If you enable one setting, then you can’t use some other setting. That’s why there’s a bit more of a learning curve.
So we can switch through the available frame rates here. Tap to select 24fps. But we’re not finished until we select a resolution as well.
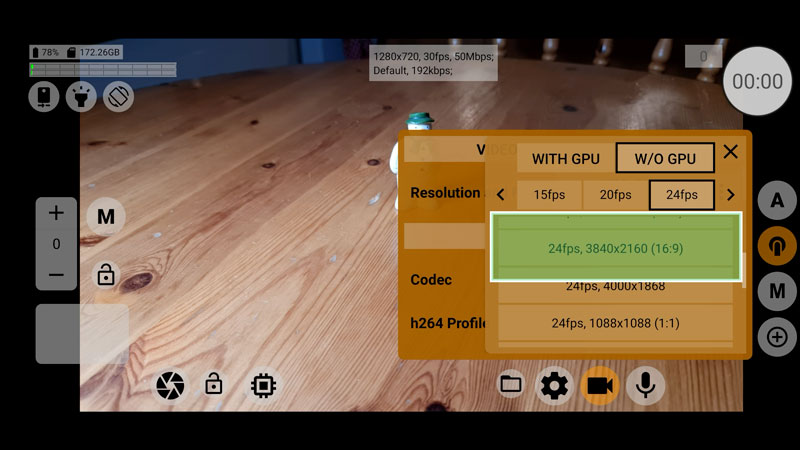
McPro24fps: Choosing Resolution
Scroll down the list of options until you find the desired resolution. I will choose 3840 x 2160, which is 4K resolution at a 16×9 aspect ratio. McPro24fps doesn’t have the range of ratios available in FiLMiC Pro, but you can actually shoot using the full sensor.
With my Note20 Ultra, I can choose up to 4000×3000 pixels, which gives me a 4:3 ratio. McPro24fps assumes that if you want a widescreen ratio you will crop the video yourself with your editing software. There’s no disadvantage to doing this. In fact, this actually enables you to reframe your image when editing.
Safe Area Guide
If you want to use a safe area guide, then click the cog settings icon next to the camera icon. Scroll down to where you find the safe area control. Now you can switch through various options, such as the same 2.76:1 70mm widescreen ratio we saw in FiLMiC Pro.
It doesn’t output the video in this ratio. But it shows you how much of the frame will be cropped if you want to crop to this ratio later. So, this will help you get your framing right when shooting.
Once you tap the resolution McPro24fps sets your camera to 24fps and whatever res you chose.
Scroll down a bit and choose your bitrate. If you aren’t worried about file sizes, then choose the highest setting before the red settings. Settings in red can be chosen but might be unreliable.
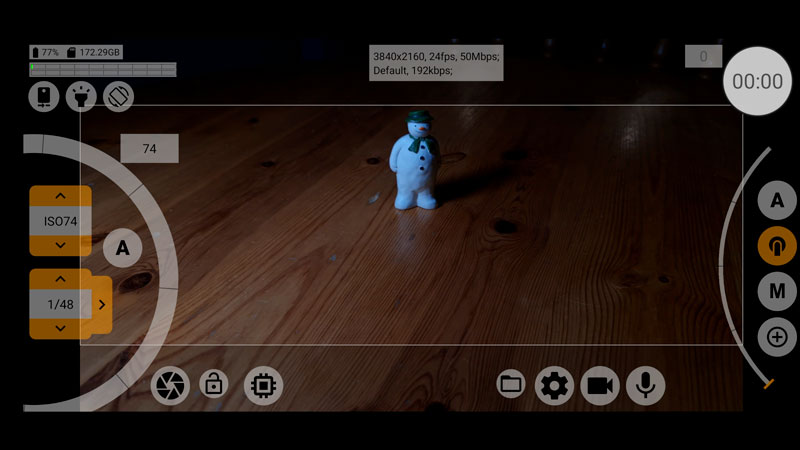
Shutter Speed & ISO
McPro24fps is pretty similar to FiLMiC Pro in this respect. But by default, the app is set to auto exposure. So tap this M button to switch to manual. Now tap the up and down shutter speed arrows to set it to 1/48.
The control wheel here only controls the ISO. But you can also set that using the up and down arrows. The wheel is for fine adjustment, while the arrows make bigger steps.
More Film Look Settings for McPro24fps
If you keep the Video Recording Settings menu open, you can find more options.
If I switch to the h.265 codec, my Note20 Ultra is able to shoot in 10-bit colour. Which will give me more to work with later when grading. Of course, you will also get bigger files and the h.265 codec is not yet as versatile as the old h.264 codec.
If you are shooting in 10-bit, then it’s a good idea to scroll down and toggle on “Remove HDR metadata”. This metadata alters the image, usually to improve the look. But when using an app like FiLMiC or McPro24fps this metadata can cause problems.
This is a clip where I kept the metadata and, once I place it into LumaFusion the colour is completely wrong.
Noise Reduction & Sharpness
So keep scrolling down this same menu. Now you will find those noise reduction and sharpness controls. Again, I use the same as I use in FiLMiC Pro – fast noise reduction and sharpness off.
More Film Look on a Smartphone Tips
As I said previously in this video, in general film has a soft look. This is created by setting your shutter speed to give you a nice motion blur. You know, blur equals softness.
Also, you can switch off sharpness in Android devices. But apart from that, how else can we create a soft image?
One of the most common ways is to use a shallow depth of field. For example, you can use a DoF adapter, like the one from Ulanzi.
A possible downside is that this reduces a lot of light hitting the sensor. So while that’s an advantage in bright conditions, it’s a serious drawback when shooting in low light.
Another way to soften the image is to use a diffusion filter. I use these that I bought from Tiffen. These are used by professional cinematographers to soften the edges between the dark and light areas. So, they reduce contrast, which creates a softer image and is more flattering when shooting close ups of people’s faces.
They need to be used with care, because if you overdo it they can look horrible. If you do it right, then it’s beautiful.
Colour Grading the Film Look on a Smartphone
So, while I don’t believe you can remove sharpness when shooting on an iPhone, you can add a little softness in a video editor.
I edited all 5 episodes of Silent Eye using Adobe Premiere Pro and one of the settings in Lumetri Colour is sharpness. So if you slide this to the negative, maybe about 10 or 20 points, the image softens and looks more like film.
Another thing I mentioned earlier is less contrast. So I generally push the gain in the shadows about 10-20 points. This makes the blacks less black and more like film. You can also pull down the highlights a little.
When it comes to choosing a colour for your film look, there’s no real rule. It depends on the mood you want to create.
If you want your image to look warm and romantic, then you’ll want more reds and less blues. If you want your image to feel cold and intimidating, then you’ll want less reds and more blues. Horror films and gory films often use yellow and green, because it’s kinda nauseating.
Just don’t overdo it. If you push the colours too much, it looks too unnatural and takes people out of the film.
Silent Eye
If you want to find out more about how we made the Silent Eye series, we have set up a Patreon page where you will get exclusive access to the full resolution versions of each episode. I’ve also recorded 5 “making of” podcasts where I go through the challenges we faced shooting each episode.
In the future, I will be adding all the behind the scenes photos and videos. Plus I will go into more detail about how we got the episodes onto Amazon Prime, how many views we got and other analytics, plus how much money we made from being on Amazon Prime.
And if there’s demand for more detailed tutorials and so on, I will include those. If you just want to dip in, watch the episode and listen to the podcasts, it’s about $5 all in. Then simply cancel your subscription before the next month.
Click here to Watch Silent Eye on Patreon
Eager to learn more?
Join our weekly newsletter featuring inspiring stories, no-budget filmmaking tips and comprehensive equipment reviews to help you turn your film projects into reality!