Moza Mini MX Setup & Tutorial
The Moza Mini MX is a new foldable gimbal from Gudsen, a company which makes a range of high-tech camera stabilisers & accessories. In this article, I’ll go through the setup of the gimbal, from opening the box to getting started shooting smooth video and a run-through of the Moza Genie app functions and features.
The Moza Mini MX is a foldable gimbal with 3 axis points. So what we’re hoping for from this gimbal is that it’s convenient and lightweight, but still sturdy enough to carry most smartphones. And perhaps (for bonus points) attach a filter or a small lens to the smartphone too.
The competitors for this gimbal are devices such as DJI OM 3 and 4, Zhiyun Smooth Q2, or the Hohem iSteady X. So how does the Mini MX compare? First, let’s see what’s in the box…
What’s in the Box?
First, the gimbal itself. There’s a tripod included at no extra cost. A storage pouch which looks identical to the DJI version. Wrist strap, charge cable and a basic manual.
The gimbal has a few stickers to let you know what you should and shouldn’t do. Direction to mount the phone, a QR code to get you quickly to the Moza Genie app and so on.
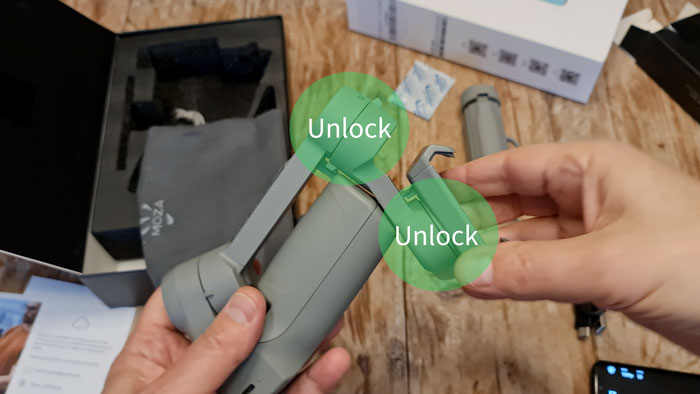
Unlock the Gimbal
The Moza Mini MX is like the Hohem iSteady X in that you must unlock it before use. It unlocks in 2 different places, essentially you are unlocking the motors. As well, the handle flips down in 2 clicks: first position, second position.
Handle Design
My first impression is that this gimbal looks and feels very much like the DJI OM gimbals. While it’s plastic, it’s solid, fits nicely in the hand.
Moza have gone for a little bit of a quirky design here, with the tripod attaching halfway up the handle. It sort of makes sense, because it makes it a little more compact.
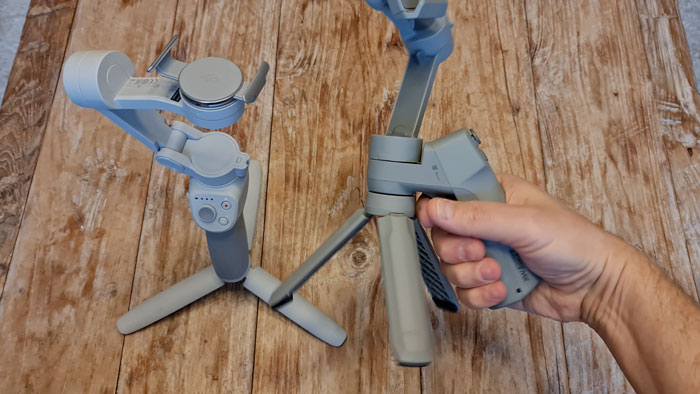
Problem is, when you hold the gimbal with the tripod attached, your finger is a bit cramped. Especially if you have fat fingers like me. It’s not terrible, just slightly uncomfortable.
Also, because the tripod is halfway up, you don’t get to use it as a handle extension. See, this is DJI’s OM 4 and when you fold up the tripod you get this extra length which can be useful for certain shots.
Moza Genie App
To use the gimbal with the Moza Genie app, obviously you will need to install that first. You can search for it or use the QR code on the arm. Note, I’m using the Android version of the Genie app. The iOS version will look a bit different.
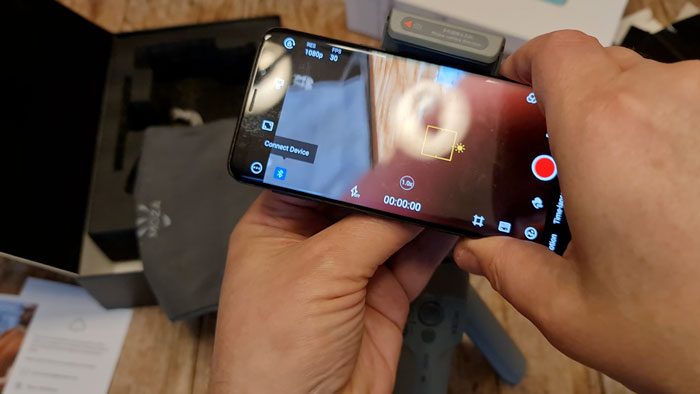
Once installed, make sure bluetooth is enabled. Now, to connect your smartphone to the gimbal, you need to switch on the gimbal. But Moza says to mount the smartphone to the gimbal before powering on, so let’s do that first.
Mounting Your Smartphone
This is similar to the DJI Osmo Mobile 3, with a spring-loaded clamp. This sticker tells you which way to mount the phone. This is a removable sticker, but maybe it’s a good idea to keep it on.
My S9 slips in easily. And I also tried my much bigger and heavier Note20 Ultra and it fits no problem.
First, try to get the phone balanced moving it left and right. You can also move the clamp up and down. It doesn’t have to be perfect but the gimbal is less likely to have problems if you get it centred as near as possible.
Record / Power Button
Press and hold the power button to power up and down the gimbal. When you power up, the light below the button goes on. This is also the battery level indicator.
Once powered up, tap this button to start recording video and again to stop. In photo mode, this will take a picture instead.
Double tapping this button will switch between video and photo. And triple tapping the button will switch from landscape to portrait.
Right, now back to the app.
Activate Your Device
After installing and connecting my smartphone, the app tells you you need to activate the gimbal. This is something that other gimbal makers do as well. And with the Moza Mini MX, this didn’t go too well for me.
So it asks for your email and gives you 60 seconds to input a code they send you via email. So I tapped send code. The time started ticking. No email. I sent another code. Again no email within the 60 seconds. I tried again. Same.
OK, so now I decided to wait for a few minutes. Now the emails start coming, so I’ve got 3 emails with different codes. I tried these codes, but none of them worked before the 60 seconds ran out. I asked for another code.
Long story short, eventually the code arrived before the 60 seconds time limit. Ahhhh…
Do we really need a 60 second time limit? I feel like I’m having to hack into a $90 gimbal I actually paid for. Gudsen, either give us like 30 minutes or I want Tom Cruise flying down a zip wire to input my code just as the clock ticks to zero…
Modes
Most gimbals have basic modes which can be changed so the gimbal works slightly differently. So the Moza Mini MX has 3 basic modes: Pan Follow, Pan & Tilt and FPV.
One advantage this gimbal has over the DJI Osmo Mobile 3 and 4 is the ease with which you can change modes. All you have to do is tap the + and – buttons, otherwise used for the zoom.

To zoom with them you tap and hold. But to use them to change modes, just tap and don’t hold. In the Genie app, you can see the mode you are currently in here, bottom left of the screen. Note that right by that mode indicator you will find the gimbal battery and smartphone battery indicator.
Pan Follow means when you move the gimbal, the phone will only follow your pan movement. So, if I twist the gimbal right to left and also tilt down, for example, the gimbal will only follow the pan movement.
In Pan & Tilt mode, the gimbal will follow both your pan & tilt movements. However, the gimbal will try to keep your smartphone level. So it won’t follow any roll movements.
In FPV mode, the gimbal follows all movements, including roll movements.
Zoom Buttons
If you tap and hold either of the zoom buttons, the camera zooms in and out. But if you double tap the zoom button, it will perform an automatic zoom. Double tap again to stop.
Joystick
The joystick controls pan and tilt, as normal. Compared to other gimbals, this feels a bit cheap to me. This is not a nice smooth operation. I can feel the plastic rubbing inside.
Compared to the DJI OM 3 & 4, this is not as nice to use. Plus, the Osmo Mobile models have a touch sensitive joystick, so if you touch it lightly it moves slower. Push it all the way, it speeds up. On this gimbal, it’s on or off.
Trigger
The trigger has several roles in the use of the gimbal and there’s essentially 2 ways to use it: the “pull and hold” and the “pull and release”.
1 pull and release activates face tracking. 2 quick pulls and release re-centres the phone. 3 quick pulls and release switches from rear to front camera and back again.
1 pull and hold puts the gimbal in non follow mode. It doesn’t follow any of your movements. 2 pulls and hold puts it in sport mode. Now the gimbal reacts quicker to your movements.
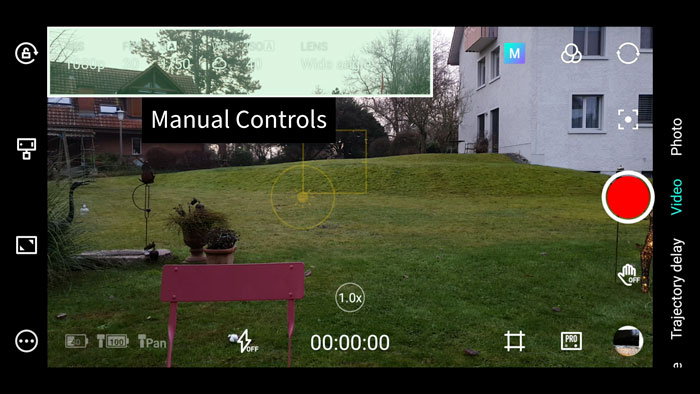
Auto and Pro Mode
The Moza Genie app can operate in 2 ways. The easiest is with everything in automatic. In the bottom right you will see a box with the word AUTO in it. Tap this to switch to Pro mode.
In Pro Mode you can adjust shutter speed, white balance, ISO and switch lenses.
You also get separate focus and exposure reticles. A yellow square for focus and a circle for exposure. If you tap and hold these on the screen, you can lock them.
Face Tracking
To enter face tracking mode, simply tap the trigger one time. It seems to work pretty well, keeping track of my face, even when I was moving quickly.
Once it lost track, however, it just gave up. Whereas with DJI’s Mimo app, the face tracking keeps searching even after losing track. And, when I tested it, it found my face again and restarted the track.
Other than that, I found it works well. You can also set tracking by tapping the tracking icon on the right (square with a circle in the middle). Now draw across the object you wish to track and it should keep a lock on it.
Gesture Control
Tap the gesture control button and you can start and stop recording by making a gesture. There 2 different gestures, one for start and one for stop. This seemed to work well and the app had no problem picking up my gesture.
Magic Mode
This M in a blue box at the top is for the Magic Mode function. This is very similar to the Story Mode in the DJI Mimo app. When you tap it, it will ask if you want to download the presets.
Once downloaded, choose a preset, then you will be given a series of tasks to complete your mission. Should you accept it, at the end you will have a little video made up of some quick edits put to some music provided.
So the app does the editing for you. Plus there are some camera movements programmed in. There’s instructions for each shot to give you a hint as to what you should do with the gimbal. Plus, it lets you know how long each shot needs to last.
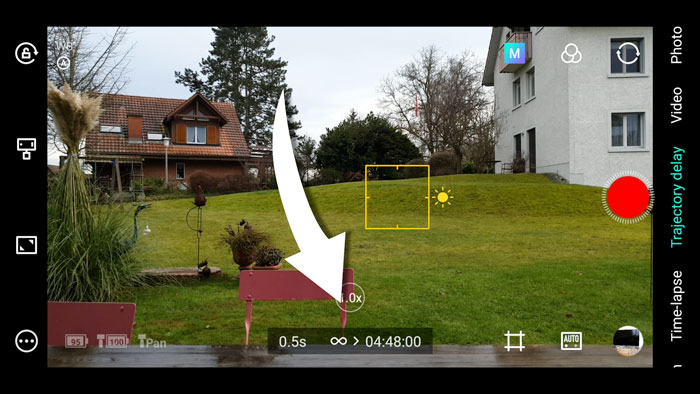
Trajectory Delay
Trajectory Delay mode is basically time-lapse but with programable features. Swipe to select this mode. Now you will see at the bottom in the middle a new setting appears. Tap this to open up the options.
Interval time, Shooting time and Track. Interval time determines how long a gap you want between frames, from half a second all the way up to 60 seconds. You have to swipe to get the full range.
At half a second a still image is captured every half a second. At 60 seconds, a still frame is captured every minute. The last setting would be a pretty dramatic time-lapse, as 1 second of video would represent 30 minutes in real time (if you play back at 30 frames per second).
Shooting time sets how long you want your smartphone and gimbal to keep shooting in total. If you want to do something else while the time-lapse is being captured, set a limit. You can choose from 1 minute to 5 hours.
The track setting allows you to program one or more camera movements. So, for example, if you want the camera to pan left and then up as the time-lapse is captured. You need to add path points
Once you have your settings how you want them, tap launch from the Track menu. Your phone should now start capturing still frames. You will see a counter circling the record button, marking the time between each shot.
At the bottom, you can now see the time remaining and the duration of the video captured.
When doing any timelapse, it’s a good idea to lock the exposure settings. And white balance and focus as well, if you can. Then you will get a nice smooth time-lapse. Otherwise, the time-lapse comes out with the exposure constantly adjusting for each frame.
Eager to learn more?
Join our weekly newsletter featuring inspiring stories, no-budget filmmaking tips and comprehensive equipment reviews to help you turn your film projects into reality!
Very nice review. I still have not received my verification code and have reached out several times but to no avail! Seems to be a nice gimbal, bummer about the customer service. Quality Review.
thank you Tim! Wow that is crazy. Such a silly system really
Hello Simon, I just bought a mini mx2 and at first I saw Cinematic was an optiion but now I don’t see it. I have enabled the anti-shake and the only options I see available are: Auto,Continuous Video/picture and Macro but no Cinematic. Do you have any suggestiions? Much Appreciated! Thanks
where is the setting to set where video is stored either on phone or sd card my phone is full and I am unable to set where the video is stored and it will not allow me to record with the moza genie app until I set storage please help