DJI Osmo Mobile 3 – Smartphone Gimbal How To Guide
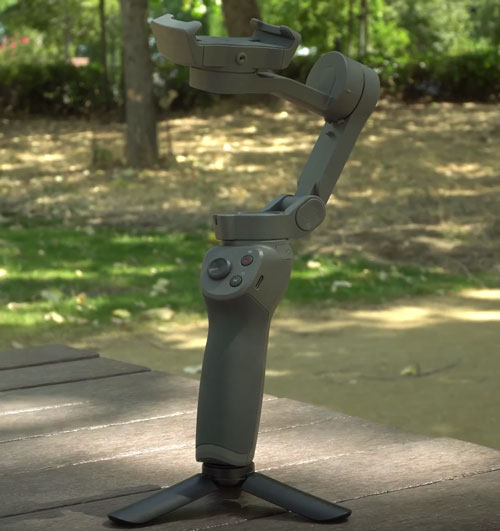
This is a guide to cover the operation of DJI’s Osmo Mobile 3 Gimbal, from the minute you lift it from the box. The Osmo Mobile 3 is DJI’s latest update to their very popular Osmo Mobile gimbal series. The Osmo Mobile 3 has been designed to be smaller, more lightweight and foldable.
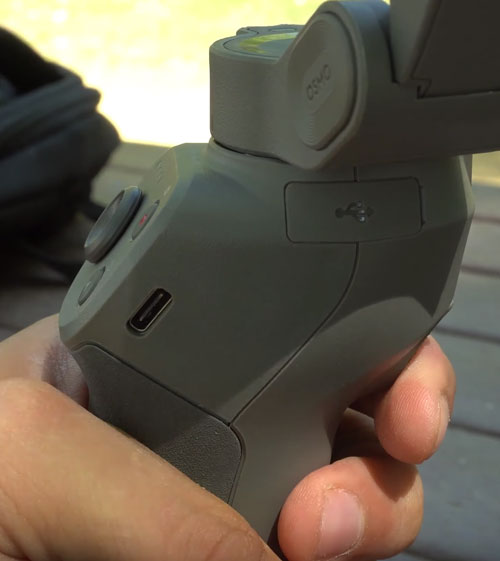
Unlike the Osmo Mobile 2, the new version only has top and bottom clamp grips. This means your headphone socket is free if you want to add a microphone.
The Osmo Mobile 3 also has a detachable tripod base. So you can use this to film with the gimbal as a mini tripod, or simply use it as a stand while the gimbal is not in use.
Mount your Smartphone
When mounting your smartphone, always make sure the gimbal is turned off. There’s two options when it comes to mounting your smartphone to the gimbal: folded or unfolded.
On the DJI website they suggest you mount your smartphone while the gimbal is unfolded.

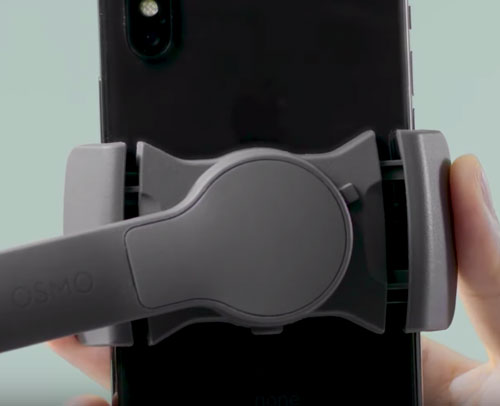
With the Osmo Mobile 3 unfolded and standing on the tripod legs, make sure the DJI logo faces towards you. Now, make sure your smartphone camera is on the left. But then flip the phone so the camera faces away from you.
It might help to remember that the camera of your smartphone should be on the same side as the D in the DJI logo.
So far, so simple.
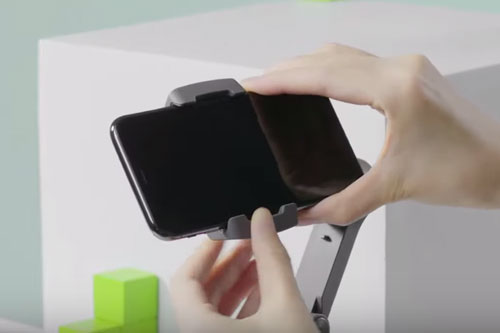
Alternatively, you can mount your smartphone while the gimbal is still folded. Like so:
This can actually be a little easier and you can hold the gimbal in one hand and mount the phone with the other.
Balancing Your Smartphone
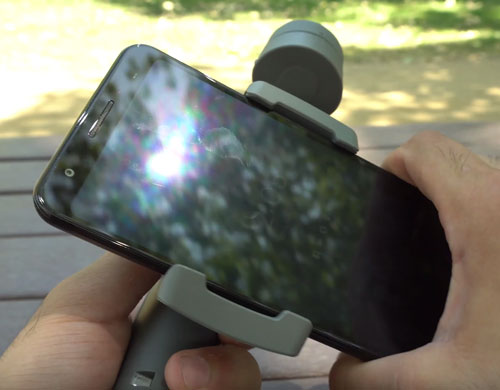
With previous models of DJI gimbal, You had to adjust the length of the gimbal arm to balance the phone in the gimbal. Now, without the end clamp, you only need to shift the device left and right until the weight is central.
The Osmo Mobile 3 can also be balanced in vertical position, to really fine-tune your phone’s position in the gimbal. Having your smartphone perfectly balanced will cause less stress (and wear) on the gimbal’s motors.
Turn the phone so it rests in the gimbal vertically. If the phone falls to one side, then adjust the position of the clamp left to right.
Power Up the Gimbal
Press and hold the power button (M) and now you are ready to use your gimbal. For basic stabilization, you can simply start filming now and your smartphone will be kept steady.
For more advanced use, however, there are further features to discover. These generally require you to connect your smartphone to the gimbal, using the DJI Mimo app.
Connect Your Smartphone to the Gimbal
To connect your smartphone to the DJI Osmo Mobile 3 bluetooth must be enabled on your smartphone. Press the M button on the control panel until the LEDs turn solid green.
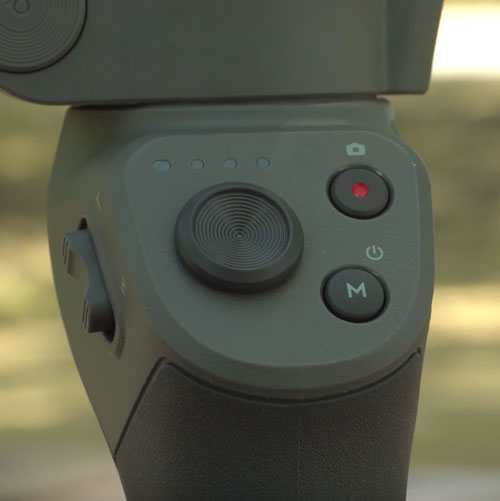
In the image above, the LEDs can be seen above the joystick.
You will need to install the DJI Mimo App (Apple or Android) onto your smartphone first.
Open the Mimo App and tap the camera icon in the top left corner of the smartphone screen. Now find Osmo Mobile 3 listed in the next screen and tap connect. If you have not done so already, you will need to complete account registration and device activation.
Activate Recording
Once you have your smartphone connected, you can now use the record button (red) to activate recording without touching your smartphone.
Switch Vertical to Horizontal and Back Again
To switch from vertical to horizontal mode (or the reverse) without touching the phone, double tap the M button.
You can also simply move the phone with your hand and it will click from one position to the other.
Triple tapping the M button positions the phone so you can unmount it easier.
Trigger Functions
At the front of the handle is a trigger. Holding this trigger down will lock the position of the phone. So, when you move your hand around, the phone will remain facing in the same direction.
Double tap the trigger to recenter your smartphone
Triple tap the trigger to switch from front to rear camera. Currently, you cannot do this whilst recording.
Double tap and holding the trigger will activate sport mode. When in sport mode, the gimbal will respond faster to your movements. Release trigger to stop sport mode.
Joystick
The joystick allows you to adjust the position of the phone without touching the phone. You can use the joystick while recording to create smooth pans and tilts.
Side Slider
The slider at the side of the gimbal handle allows you to zoom in and out.
Gesture Control
Gesture Control allows you to signal to your smartphone to take a picture or start recording by a simple gesture.
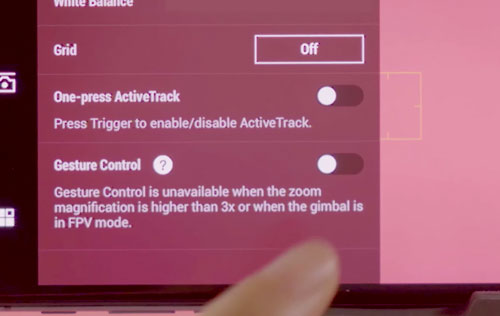
With the app on, tap the 3 dots in the bottom left corner of the screen. Now switch on Gesture Control.
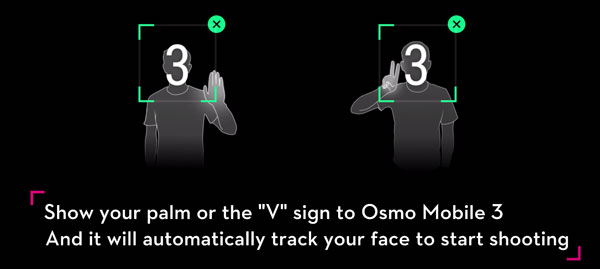
With Gesture Control on, make sure you are in frame. Now gesture with the palm of your hand or make a V sign. After a few seconds the camera will take a picture. The gimbal will track your face to keep you positioned in the picture.
Note: make sure your gimbal is not in FVP mode. While in FVP mode your gimbal cannot use Gesture Control.
When in video mode, using gesture control starts the video recording. When in photo mode, a palm or V gesture takes a picture.
Active Track
To use Active Track, place the Mimo app into Active Track mode. Now, aim at the object you wish the camera to lock onto. Click the trigger once to lock on to that object. A green box appears around the object.
Now, when the camera moves, the gimbal will attempt to keep the object in frame.
![]()
Story Mode
Story Mode allows you to quickly create videos for social media stories. When you select story mode (top right pink/purple button), the DJI Mimo app will bring up a series of templates to choose from. Each template creates a particular style for your finished video.
Now, start record. You are given a count in and the video effect begins.
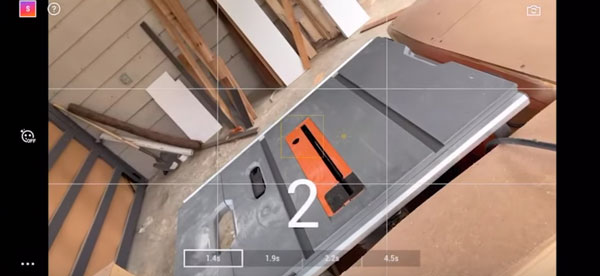
At the bottom of the screen, you can see 4 boxes containing the lengths of the shots it will ask you to shoot. In this case, there are 4 shots to be captured. Go through each shot and at the end the app will cut together a final video based on those shots.
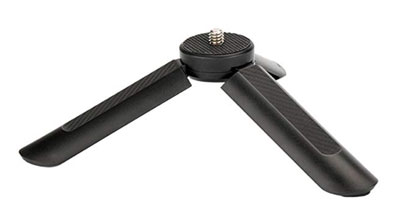
Mini Tripod
Have a mini tripod to attach to the base of the gimbal is really recommended. However, if you didn’t purchase one already, a low cost alternative can be found on Amazon.
So those are the main features. There are many other features available, via the DJI Mimo app. So if you want to dive in and explore more you can find everything listed in this official PDF user manual.
Find the DJI Osmo Mobile 3 on Amazon
Read more: DJI Osmo Mobile 3 vs Zhiyun Smooth Q2.
Check out our guide to the DJI OM 4: SETUP & TUTORIAL.
NEW: DJI Mimo App Tutorial – Every Setting Explained
Eager to learn more?
Join our weekly newsletter featuring inspiring stories, no-budget filmmaking tips and comprehensive equipment reviews to help you turn your film projects into reality!
How do you use auto-calibration?
can i use this gimble with the native camera program of the cellphone or must i use the MIMO app?
You can certainly use the gimbal without the DJI app, but there are some functions you need the app for