How to Get the Film Look: FiLMiC Pro Tutorial
I’m going to tell you how to achieve what has become known as the “film look” by filmmakers. I will be using FiLMiC Pro as my tool to create a cinematic film look with my smartphone. I’ll also clear up a few misunderstandings about exposure settings and what is or isn’t essential to create professional-looking video.
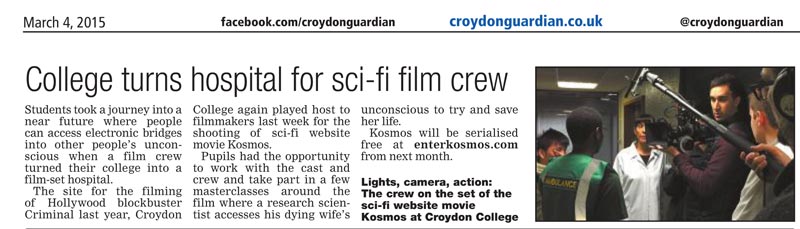
One of the reasons I started using my smartphone to shoot an Amazon Prime TV series is the speed factor. Before I shot Silent Eye on Samsung smartphones, I shot a web series called Kosmos, with a 3 person camera crew and a Blackmagic Pocket Cinema Camera. While for Silent Eye I carry the kit around in one bag, for Kosmos we needed a truck.
This is how I do it…
In the last 2 years I’ve shot 5 short films (episodes) using Samsung smartphones and FiLMiC Pro. Before that, I shot a feature film using a second hand £600 consumer camcorder, with no crew. The film screened at film festivals alongside films which cost $millions and premiered on the biggest cinema screen in Europe.
With experience, I learned there’s no one way to create a film look. It’s all about what you want your video to look like, which is a creative choice. So let’s look at some of the techniques I use to get the most from consumer cameras.
What is the “Film Look”?
During the last 20 years or so, digital video has become a more and more convenient way to shoot films. The problem is, while we still call it a “film”, film is no longer part of the process. Meanwhile, most filmmakers insist physical film has certain qualities lacking in digital video which they want to keep.
While it’s pretty much impossible to replicate film exactly, the aim is to get as near as possible. In the early days of digital video, there was a clear difference in quality. But in recent years, digital video has closed the gap on film to the point where most films and TV shows are now shot on high end digital cameras.
But why would we want to make digital video look like film, anyway?
For about 100 years, all cinema was made entirely using physical film. Or (using a technical description) “a strip of transparent plastic film base coated on one side with a gelatin emulsion containing microscopically small light-sensitive silver halide crystals.” Meanwhile, digital video is an “electronic representation of moving visual images in the form of encoded digital data.”
Filmmakers like Christoper Nolan and Quentin Tarantino insist the film look cannot be replicated digitally and one should not even try. Their love of film stems partly from a romantic idea of what cinema is, including the idea the best place to watch cinema is in a cinema. They will also insist film is simply better quality than video.
Film vs Digital: Compression
One major difference between analogue (like film, or vinyl for music) and digital media is a thing called compression. Digital media files need to be small enough to be usable. This is achieved by removing information (compression).
Removed information shows up in things like banding of the image. Rather than smooth light-to-dark gradation, you get visible blocks of sudden change.
Film vs Digital: Crystals vs Pixels
While digital video is composed of a grid of pixels, film is made from randomly shaped crystals of chemicals. Both pixels and crystals can can become more visible if the exposure is pushed up. This is called “noise” in digital video, while in film it’s called “grain”.
Both noise and grain can be a problem, or they can even be desirable. In fact, both grain and noise can give your image some texture. Again, it’s a creative choice and depends on what you want and how you look to achieve it.
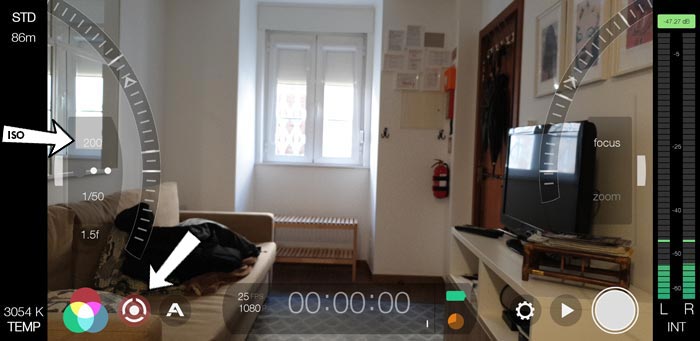
Setting ISO in FiLMiC Pro
To help your video look more like film, it’s best to keep video noise to a minimum. To do this with FiLMiC Pro you need to set ISO at 100 or less.
- Open FiLMiC Pro
- Open Manual Controls
- Move Exposure Wheel to set the desired Shutter Speed
- Click on the Shutter Speed to lock it (it goes red)
- Now move the wheel to set the ISO.
You’ll notice I set and lock the shutter speed first. This is because the shutter speed needs to be at 1/48th or 1/50th to mimic the film look. See below for more about shutter speed.
24 Frames Per Second
After experimentation with various frame rates, film eventually settled on 24 frames to be exposed (or projected) every second. Therefore, to imitate the look of film we need to set our frame rate to 24fps. The irony is, when film decided to use 24fps as a standard frame rate, it had nothing to do with the way it looked.
The “film look” was created by sound
In fact, the main reason 24fps was chosen was down to the introduction of sound in the 1920s. A standard filming/projection speed was required for audio to be recorded and then played back, so voices didn’t sound wrong. The makers of the ground-breaking movie The Jazz Singer then opted for 90 feet of film per minute, which translated to 24fps.
The Jazz Singer is credited as the first feature-length motion picture with not only a synchronised recorded music score but also lip-synchronous singing and speech. The funny thing is, not only did it change movies from the 1920s onwards, but that decision led to digital filmmakers setting their cameras to 24fps, 100 years later.
Yes, our film look derives from the introduction of synced audio into movies in 1927.
So what, right? Well, the reason I point this out is to remind ourselves that the look of film is in part defined by practical decisions. But even if a different speed had been chosen for sound, the frame rate would have been not far from 24fps anyway.
I use 25fps
As I’ve spoken about before, I use 25fps because I’m filming in Europe where we have 50hz electricity supply. If I switch to 24fps, some artificial lights create a strobing effect. And because I no longer have to worry about a physical projector at the end of the process, 25fps is fine and visually very similar to 24fps.
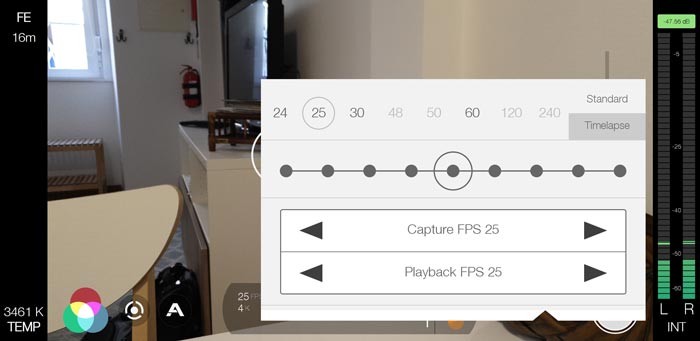
How to set Frame Rate in FiLMiC Pro
To set frame rate using FiLMiC Pro you need to open the settings menu and tap the frame rate button. You will now get a screen where you can set the frame rate.
1/48th Shutter Speed
Because of the way film camera shutters were designed, 24fps film had a shutter speed of 1/48th. In other words, the shutter is open for 1/48th of a second, 24 times per second.
Why is shutter speed so important for the film look?
Shutter speed controls the amount of motion blur we see in the frame. It also controls the amount of light allowed through the shutter per frame. But if we want to mimic the amount of motion blur we see in film, we need to keep our shutter speed at 1/48th.
If you are shooting at 25fps, then you would choose a shutter speed of 1/50th.
30fps and 1/60th
If you are filming in the United States, your electric supply will be 60hz. So to avoid strobing you’d have to film at 30fps. However, choosing a 1/60th shutter speed means you start to lose a little of that film look motion blur. And with less motion blur, your video starts to look less like film and more like video.
We are talking about small changes, so perhaps it’s worth testing for yourself. But, as a basic principle, the faster your shutter speed is over 24-25fps, the less motion blur there will be.
Too bright?
If you set ISO to it’s lowest settings and shutter speed to 1/48th or 1/50th but the image is overexposed, what do you do? Unless you can find a way to reduce the light somehow, your only other option is to add an ND filter. Placing a ND filter over the lens is like wearing sunglasses, it reduces the light passing through the lens and hitting the sensor.
Why is motion blur important to the film look?
Motion Blur
Motion blur is when the image or parts of the image move across the frame and create a blur. You’ve probably seen this in your photos when someone moves and a part of their body is blurred. Remember, each frame of a video is motionless, like a photo. So, when something moves while the shutter is open a blur is created.
Now, while in a photo this is generally undesirable, in a film or video the effect is to smooth out the image so it’s easier on the eye. If you try shooting video with higher shutter speeds, the edges of objects start to look clearer, but harsher.
It just so happens that when filmmakers chose 24fps and 1/48th shutter speed, they created still frames with a certain level of motion blur. Over years, we grew to love this look and associated it with the magic of cinema.
Setting Shutter Speed in FiLMiC Pro
- Open FiLMiC Pro
- Open Manual Controls
- Move Exposure Wheel to set the desired Shutter Speed
- Click on the Shutter Speed to lock it (it goes red)
White Balance
To make sure your shot is as close to a correct colour as possible, using the white balance tool in FiLMiC Pro. Importantly, make sure to have the white balance locked during the shot.
Read more: How to set White Balance in FiLMiC Pro.
Log or Flat Colour Profile
The Log setting on FiLMiC Pro is designed to give you a greater dynamic range and unsaturated colours. This then gives you more options when grading your film in an editing program, like Adobe Premiere Pro or DaVinci Resolve.
However, I don’t use Log or Flat colour profiles, because I don’t believe this is worth the extra time involved when using a smartphone. Like I said, this is just how I do it. Others will insist FiLMiC’s Log setting will give you a more cinematic look. So, the best thing is to try it and see if it works for you and the look you want.
Nothing to do with film…
There are other elements which are sometimes suggested as essential for the film look, including a shallow depth of field, LUTs and a widescreen ratio. Thing is, none of these things have anything to do with film itself. Yes, they do alter the look of the video, but they don’t necessarily make it look any more like film.
A shallow depth of field is desirable in some shots, but not in others. LUTs change the look of video, but depend to a degree on the colour you start with. I’ve seen films many films in cinemas projected at a 4×3 ratio. Although most films in a 4×3 ratio were shot in the first half of the last century, there are still well-known filmmakers who choose to use it, as a creative choice.
Work to be done in post too
So that’s how I set up to shoot with FiLMiC Pro to get a film look. However, that’s not the end of the story as I adjust the colour and tones in Adobe Premiere Pro and After Effects. I will cover this in a future post, so stay tuned if you’re interested.
Eager to learn more?
Join our weekly newsletter featuring inspiring stories, no-budget filmmaking tips and comprehensive equipment reviews to help you turn your film projects into reality!