How to Make Instagram Reels with an iPhone
The corporation known as Meta is worried about the massive success of TikTok. When Mark Zuckerberg recently announced that people were spending less time on Facebook because they were watching short vertical video clips, shares in his company “instantly” crashed.
Reels are Instagram’s way of doing what the massively popular video sharing platform TikTok does: it allows you to share short videos which are displayed vertically. At the moment, the maximum length of an Instagram Reel video is 60 seconds.
Like TikTok videos, the best Instagram reels are engaging and bingable. In other words, people watching want to watch another video immediately after.
Instagram reels can be created entirely within the Instagram app but you could also use 3rd party apps as well, to give yourself more creative options.
Step 1: Install Instagram
If you don’t have it already then install instagram from the app store. You will have to give all the usual permissions. Here’s one issue I encountered, which might happen to you as well if you are just installing the app for the first time.
When I first opened the app the Reels option didn’t appear. In settings it allowed me to toggle on save Reels to the device, but no Reels button at the bottom. When I swiped right, no Reels option.
So, I shut down my iPhone and restarted and then when I reopened Instagram, the Reels option appeared.
Step 2: Find Reels
There’s 3 ways to access the Reels area on Instagram.
- Tap the reels button at the bottom (middle). A random Reel will start playing. If you want to record a reel from here, tap the camera button (top right) to access the recording screen.
- Second way is to swipe right on the screen to go directly to the record screen.
- Third way is to tap the button at the top with the plus sign and choose reel.
Step 3: Select Duration
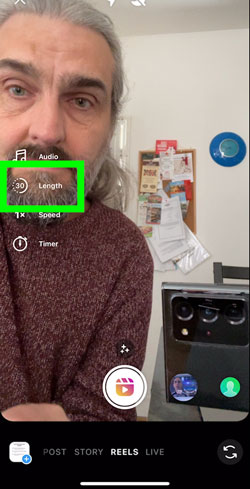
On the left we have various options. The 2nd button down selects the duration of the video. If you select 60 seconds, the video will come out at 60 seconds or less depending how long you record for. So there’s no real need to choose a shorter length.
Step 4: Record video
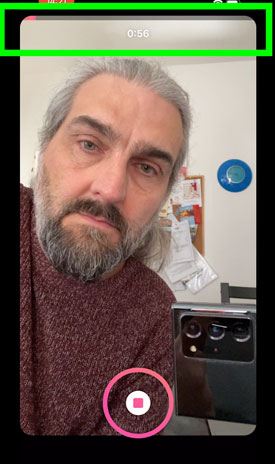
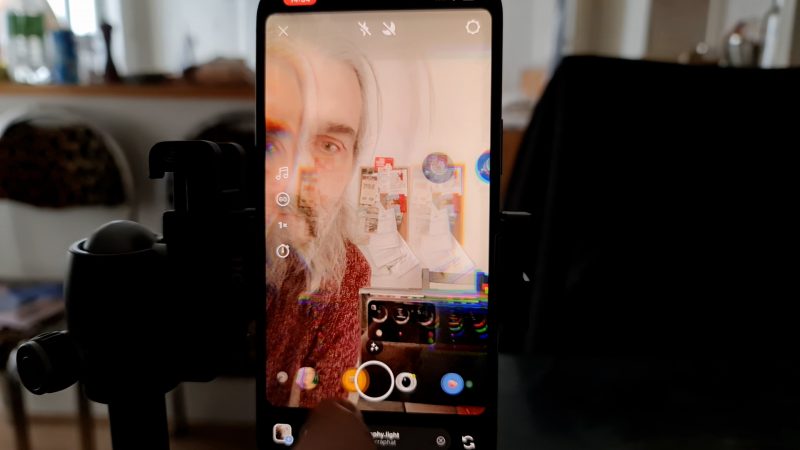
To record video you need to press and hold the record button. At the top you will see time remaining of your 60 seconds ticking down and a bar moving across to show how much video you have recorded.
Once you let go, the recording stops. Or rather, it pauses. Because if you now press and hold again, this new shot will be added to the previous shot. Again the counter ticks down some more and the bar moves along a bit more. Release the record button to pause again.
The button on the right allows you to preview what we’ve recorded so far.
Edit Clips
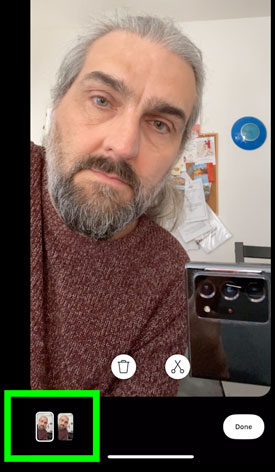
The button on the left allows you to edit the clips. You will find a little thumbnail here for each clip you just recorded. Tap the trash can to delete that particular clip or click the scissors to edit that clip.
Align Tool
Once you have recorded one or more clips, you will see a new tool appear and the video duration button disappears.
Tap the align tool and you’ll see a seethrough version of the final image of the last thing you recorded.
This helps you cut seamlessly from one clip to the next. Align yourself with the previous image and record another clip, but maybe add a prop this time (hat, glove, wine glass and so on). When your two clips play together, the prop item will magically pop into frame.
Add Music
The music notes button allows you to add music from a selection of popular tracks. You can also search for a track at the top.
Change speed
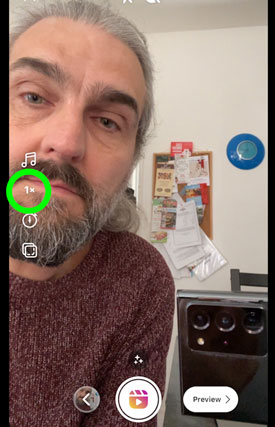
This button allows you to change the speed of the video you are recording. So you can record slow motion or speeded up video.
The .3x and the .5x will produce slow motion, while 1x is normal speed and all the others come out speeded up 2x, 3x or 4x faster.
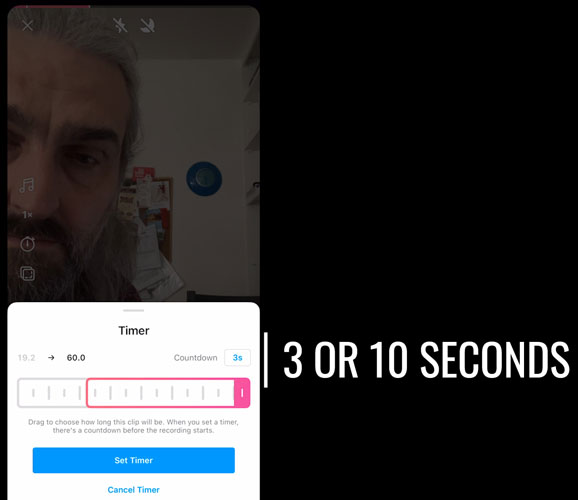
Timer
The final button here allows you to set a timer before your iPhone starts recording. So if you’re filming yourself doing something where you need to be away from the camera, like dancing or something, the timer gives you some seconds to get into position.
The timer is also useful if you want to record a clip without having to hold down the record button constantly. Hit record. After the countdown finishes, Instagram starts recording. When you want to stop recording, hit the record button again.
Pre-recorded Video
You can use pre-recorded video in a Reel. Just tap the square button with the little blue and white plus in the corner. This allows you to bring in any video from your iPhone photos gallery.
Effects
Tap the effects button or swipe along the bottom to add various different effects. Note, you can only swipe to see effects, but only before you record the first clip.
Flash
At the top you will see a flash button. You can switch between off, on or auto. If this is switched on, when you use the rear camera and you hold down Record, the flash will turn on while you’re recording.
However, when you use the front or selfie camera, of course there is no front facing flash. So what it does is add a kind of flash effect, brightening the image.
Preview
Once you are happy with your Reel, tap preview. You can now add all the usual Instagram stuff like text, stickers, more effects and so on.
As well, you can download the finished video onto your iPhone. So this is useful if you want to use the same video for TikTok, YouTube shorts, or some other vertical video platform.

And finally click Next at the bottom. The first time you do this Instagram will ask you if you want to allow Facebook to show the Reel to people outside of your friends and followers. If you’re looking to grow your audience, then it makes sense to allow that.
If you leave the “share to feed” enabled here, the Reel will be shared to your regular instagram feed. If you do this, bear in mind the video will be cropped a little differently. So be careful not to crop anything important like text.
Add a cover
If you want to change or add your own image as a cover or thumbnail for the Reel, you can do that by tapping Cover. Swipe long to choose a frame from the Reel, or tap the + button to add an image from your iPhone photo gallery.
Creating Reels using Other Apps
3rd party editing apps like CapCut, VlogNow or LumaFusion allow you much greater precision when cutting your Reel together. So a lot of people use those to edit and then import them into Instagram using the add video button I showed you.
Smartphone Video – Beginner to Advanced
If you want to know more about smartphone filmmaking, my book Smartphone Videography – Beginners to Advanced is now available to download for members on Patreon. The book is 170 pages long and covers essential smartphone filmmaking topics:
Things like how to get the perfect exposure, when to use manual control, which codecs to use, HDR, how to use frame rates, lenses, shot types, stabilisation and much more. There’s also my Exploring the Film Look Guide as well as Smartphone Colour Grading.
Members can also access all 5 episodes of our smartphone shot Silent Eye series, with accompanying screenplays and making of podcasts. There’s other materials too and I will be adding more in the future.
If you want to join me there, follow this link.
Simon Horrocks
Simon Horrocks is a screenwriter & filmmaker. His debut feature THIRD CONTACT was shot on a consumer camcorder and premiered at the BFI IMAX in 2013. His shot-on-smartphones sci-fi series SILENT EYE featured on Amazon Prime. He now runs a popular Patreon page which offers online courses for beginners, customised tips and more: www.patreon.com/SilentEye


Hi,
Thank you so much for providing this fabulous information regarding the reels to make via iPhone such a cool explained