How To Take Long Exposure Photos with an iPhone
Let me show you how you can create long exposure photos with your iPhone.
One way to do this is by taking a live photo. If you open up your iPhone camera, you will see this kind of dotted circle. If it has a line through it, that means Live Photo is off.
Just tap the circle to switch it on and off.
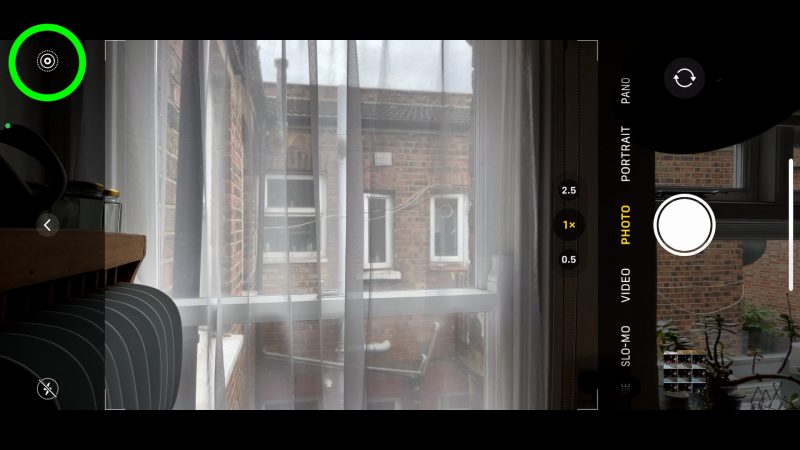
So what is Live Photo? A Live Photo is essentially a very short video clip, rather than the regular one frame still photo. And this will give you a number of options later on.
So here’s how to take a long exposure photo
Open your iPhone camera and make sure Live Photo is switched on. The best use of a long exposure photo is when there is some movement within the frame. That movement will then become blurred in the final picture.
Often this effect is used for taking photos of waterfalls, water splashing and crashing around rocks on the coast, the lights of moving cars at night. Those are the obvious ones. But of course you are only limited by your imagination here.

I would say movement in one direction will make a clearer, more dynamic photo than if the movement is in many directions. If movement is going left, right, up and down, the blur will be quite messy.
That’s not necessarily a bad thing. But it’s certainly worth bearing that in mind when choosing your frame.
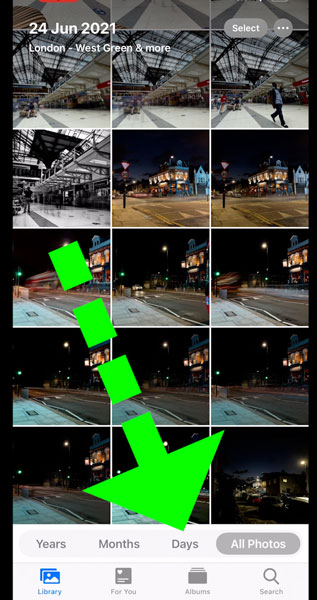
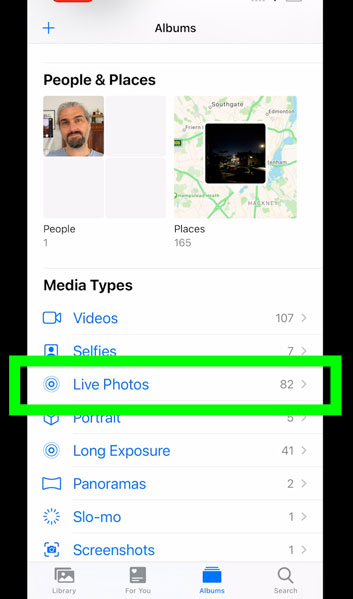
Once you have taken your photo, open the iPhone photo gallery. You will find an album called Live photos. So open that and choose the photo you just took.
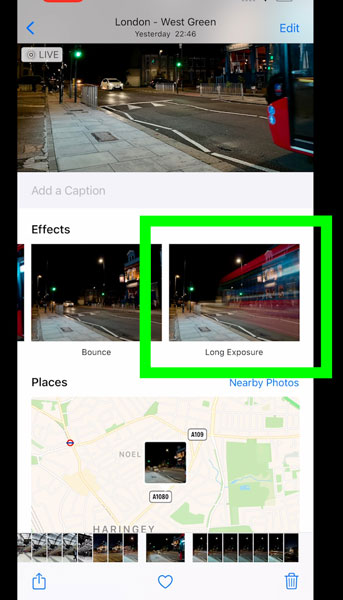
Swipe up to reveal the 4 different effects you can apply. The last effect is the long exposure effect.
As soon as you tap on that, your iPhone will use all the frames in that video clip to create a long exposure effect.
Eager to learn more?
Join our weekly newsletter featuring inspiring stories, no-budget filmmaking tips and comprehensive equipment reviews to help you turn your film projects into reality!