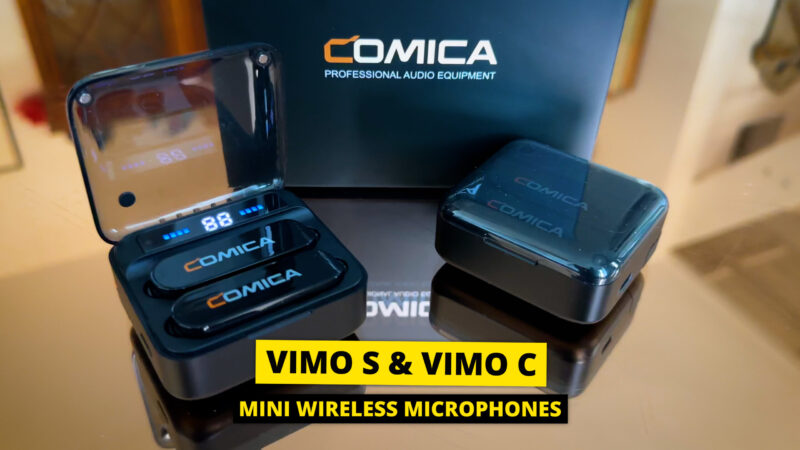
Comica Vimo S & Vimo C Wireless Microphone System for Smartphones – Review & Tutorial
Audio specialists Comica recently got in touch and said “hey Simon we love your videos would you be interested in looking at our new wireless mics?” I said “Sure thing. But can you send me sets for Android and iPhone? Because I want to test them on both.” And they did so I can test them out and see how they sound on both Android and iPhone.
Smartphones come with pretty amazing mics already inbuilt into the phone. Especially the top range flagship devices. But if you want to record yourself or others speaking, you usually need to add an external mic somehow.
Unless you stand very close to the mic, the distance between the mic and the person speaking means you usually don’t get the best audio.
Which Comica Vimo is for You?
Generally speaking, the Comica Vimo S is for Smartphones and Comica Vimo C for Cameras and Computers, as well as smartphones.
However, the Comica Vimo S-MI has a lightning connection of iPhones while the Comica Vimo S-UC has a USB-C connection.
All 3 of these sets are wireless mic systems using 2.4G which is basically like WiFi. Many low-cost and digital wireless microphone systems operate in the 2.4 GHz band, which allows for worldwide licence-free operation and relatively small antennas.
If you just need one or two wireless channels then a 2.4 GHz system is fine.
These systems work by having 1 or 2 transmitters connected wirelessly to a receiver.
All 3 systems come with 2 transmitters and 1 receiver so you can mic up 2 speakers at once. The transmitter is also the microphone, which you need to clip to your clothing. For the best results, clip them as close to your mouth as possible.
Let’s look at the Comica Vimo S systems first.
Comica Vimo S Review & Tutorial
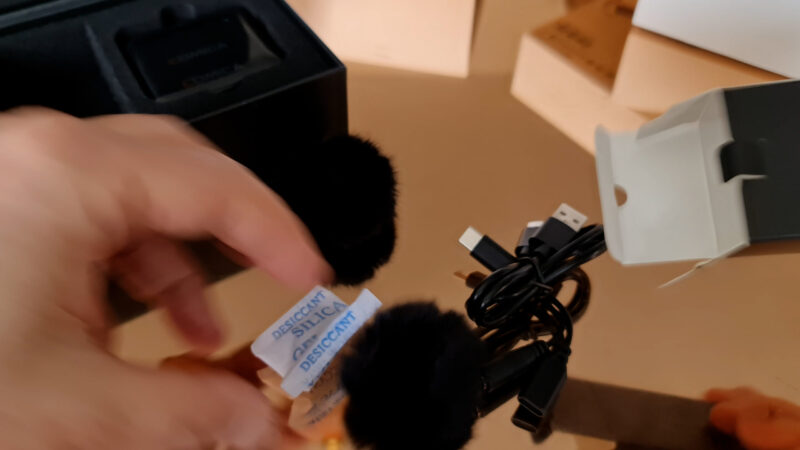
Opening the box I found it’s all nicely packaged. There’s a little box here with cables and wind protectors. And then there’s the case which contains the 2 transmitters and receiver, which is also a charging case.
When you flip open the box, it lights up. The geek in me loves that. I use the Rode Wireless GO 2 system and for some reason they don’t have a charging case, let alone one that lights up when you open it.
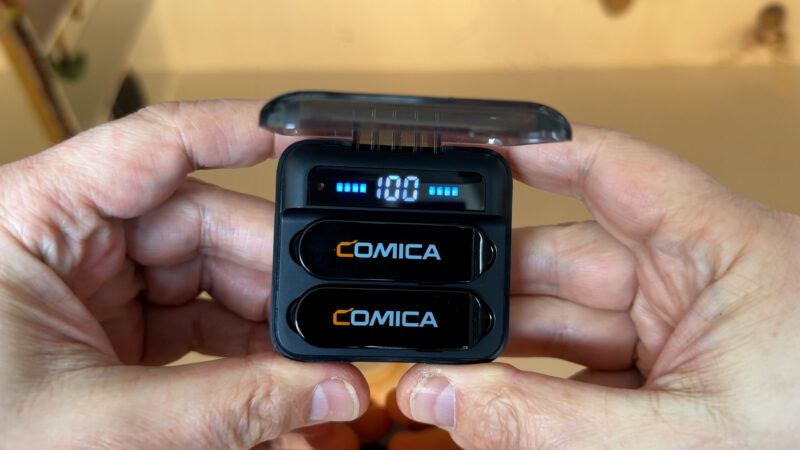
The number is the charging case battery level and the bars either side are the battery levels of the 2 transmitters. I really like that you immediately know how much power is left. So there’s 4 batteries here: 1 in each transmitter, 1 in the receiver and 1 in the case.
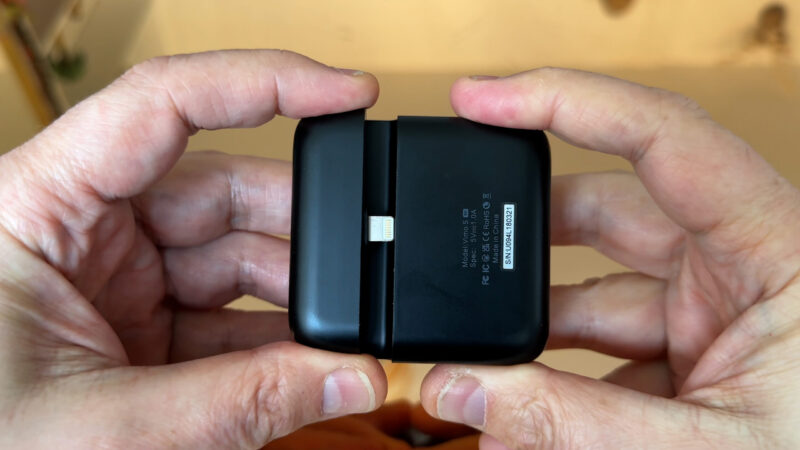
So where is the receiver? We just flip over the box and slide it out from the bottom of the case. This then slots into the bottom of your smartphone.
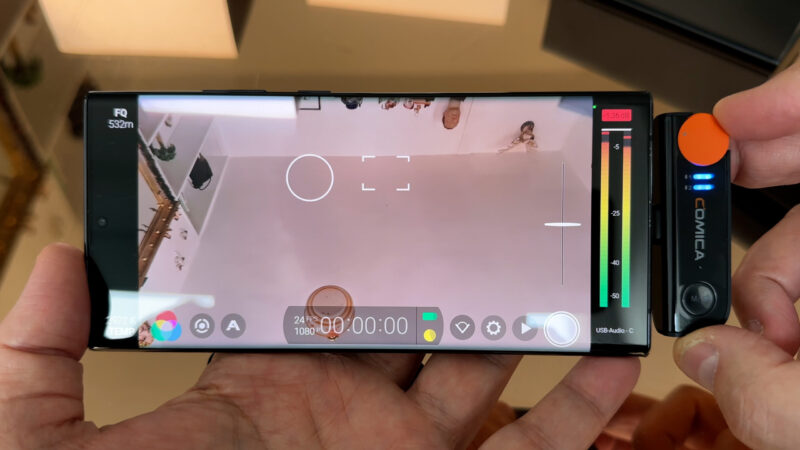
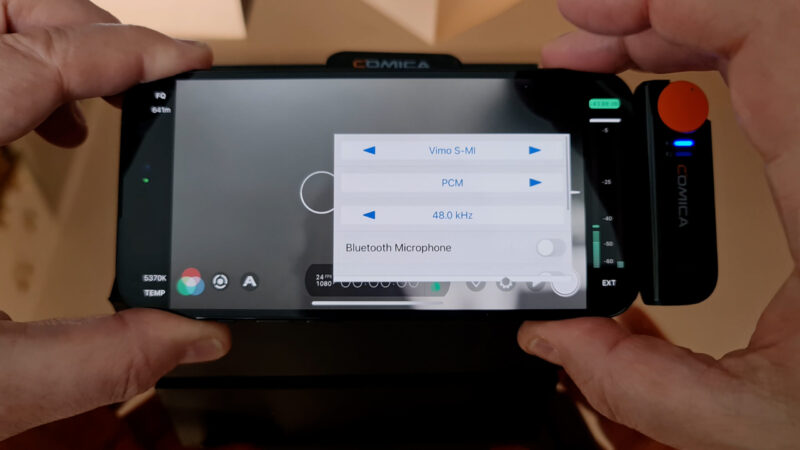
I was using a Samsung Note20 Ultra and when I switched into Pro Video mode I could see the audio level bars. As well I could see which mic it’s using. So you can see it is now using the USB mic and we’re getting a level in the left channel.
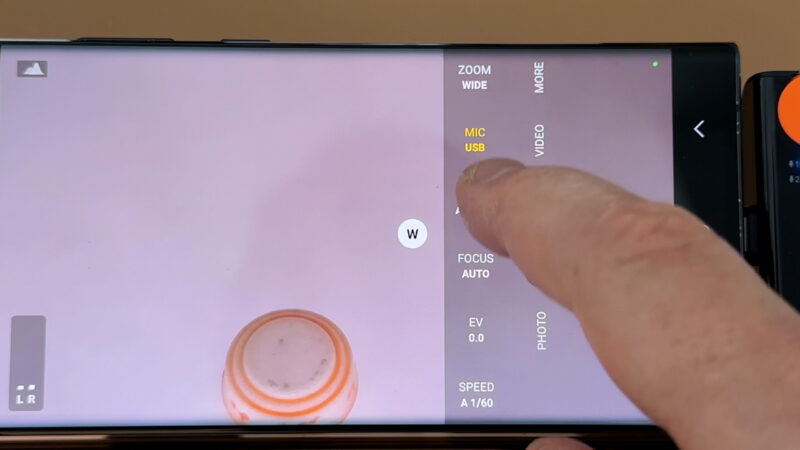
If we’re using 1 mic and we want to record on both channels, all we do is switch to mono on the receiver. When the light is blue on the receiver that means we are recording mono.
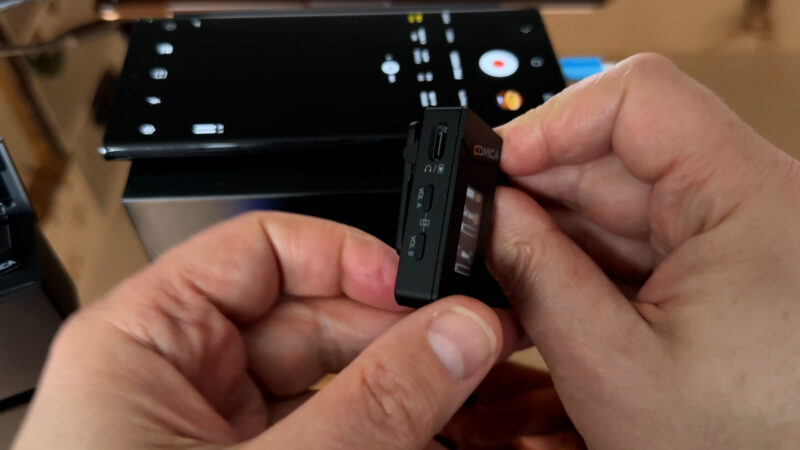
Comica Vimo S Transmitter
The transmitter has a mic at one end, so make sure that end is near the speaker’s mouth. It also has a button at the side with 3 functions:
- Short press to mute the mic.
- If for some reason the transmitter and receiver become disconnected, long press to pair again.
- When they’re paired, long press to enable the denoiser.
The light here indicates the following information:
- Blinks blue slowly when unpaired
- Blinks blue rapidly when pairing
- Blue when paired
- Green when denoise is on
- Red when the mic is muted
Comica Vimo S Receiver
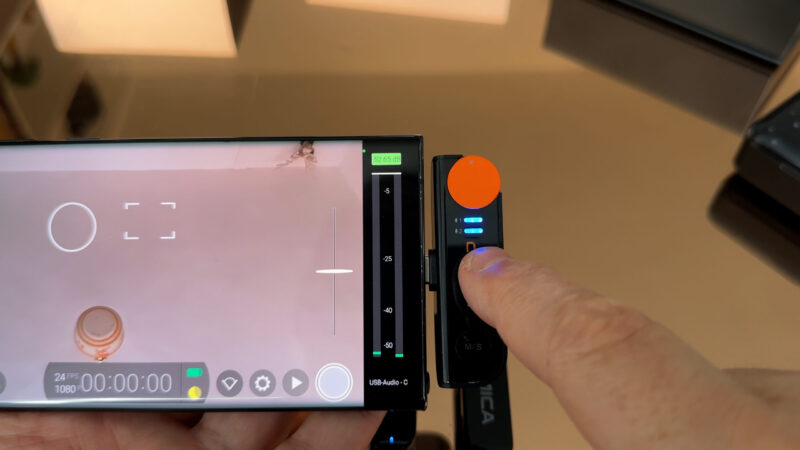
On the receiver there is an orange volume control knob. There’s a + and – sign to show you which way is up. One thing to note, at least regarding my Samsung (and I’ve found this with other Androids too) is that there’s some audio levelling going on and so this volume control doesn’t seem to do anything.
In FiLMiC Pro Legacy I can disable Voice Processing. So I played around with it and found it didn’t go over 0 db, even with the receiver turned up to max. If the audio goes over 0db that’s when you get clipping – or that distorted sound.
Anyway, I expect you will get different results depending on the device you use and the software you use.
The two indicator lights here show connectivity with the transmitters 1 and 2. Each channel will blink blue when unpaired and then steady blue when paired.
Press the button on the side of the charger case to reveal the power level without opening the case.
How to Use Comica Vimo S with a MacBook Air
I was able to connect the Comica Vimo S to my MacBook Air.
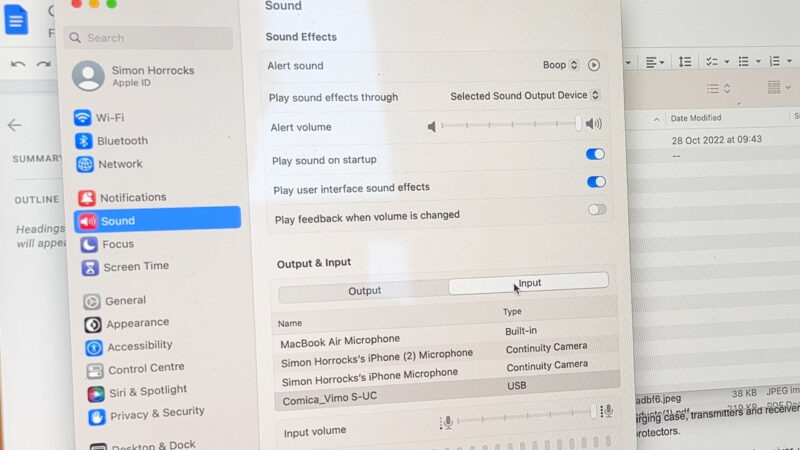
Plug the receiver into one of the USB C ports. You might have to give permission if it’s the first time using the device.
Open up sound on your MacBook Air, then click the input tab. You should see the Comica mic is detected and you can then switch to it. The way to test if the audio is actually coming from the Comica mic and not the laptop’s mic is to tap lightly on the mic itself. Only the mic you tap will pick this up.
So that means we can easily use this mic for video conferencing, live streaming and stuff like that.
Note that the Comica Vimo S transmitters and receivers take about 2 hours to charge and last for about 5 hours.
Comica Vimo S (lightning)
The iPhone version works the same as the Android version, just plug in the receiver. Then remove 1 or both transmitters from the charger case and they will automatically connect. The camera app or any other app which uses your iPhone’s mic should now automatically use the Comica Vimo S mic.
iPhone’s don’t have a pro mode, so I opened Filmic Pro to see that the Vimo mic was being used. Here you can turn off voice processing and auto gain and then just use the orange volume control knob to set volume.
Comica Vimo C Review & Tutorial
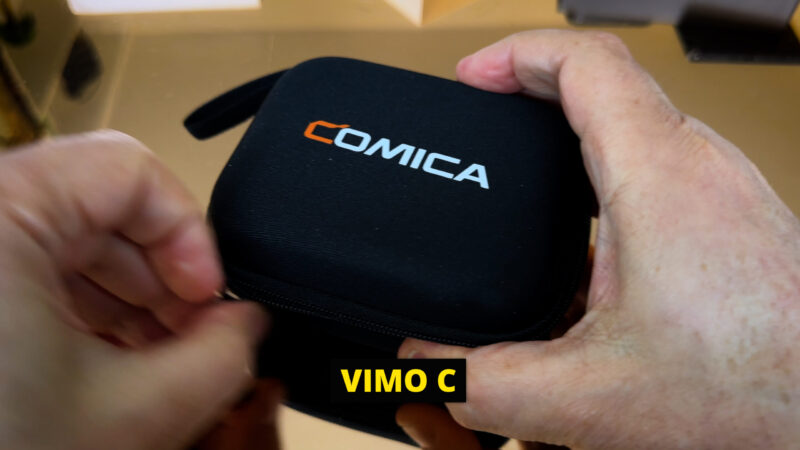
The Comica Vimo C comes in a small pouch. Inside, there’s the charging case, transmitters and receiver. Plus in the pocket here you will find some cables and the wind protectors.
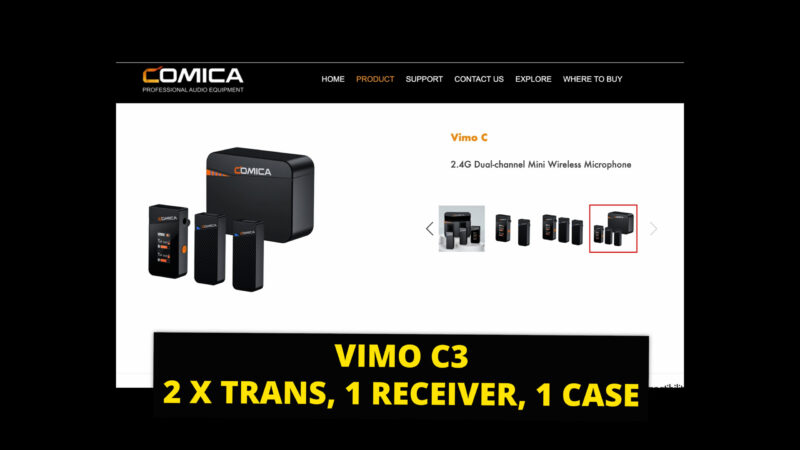
3 options for Comica Vimo C: C1, C2 and C3.
The Comica Vimo C1 is just a transmitter and receiver, while the Comica Vimo C2 is 2 transmitters and a receiver. I was sent the Comica Vimo C3 kit, which has 2 transmitters, a receiver and a battery case.
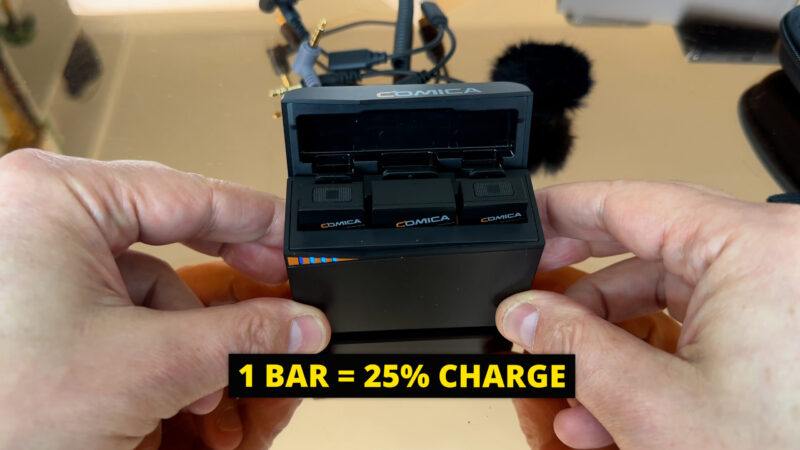
Flip open the case and the battery level indicator here will tell you how much power is left in the case. Each bar indicates 25% worth of power.
The transmitters and receiver are held in the case magnetically. Take one or two transmitters and the receiver out of the case and it automatically powers on and connects. Very simple, very efficient. You can see that we have A and B transmitters and this is showing that A is connected.
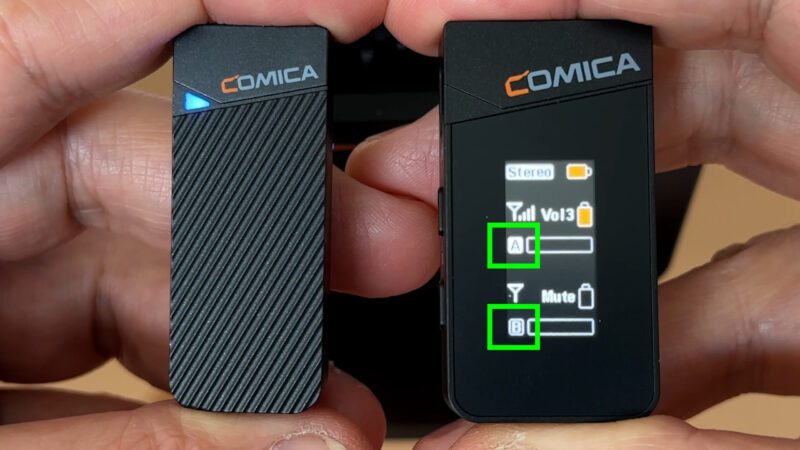
There’s a battery level indicator for the transmitter, a level meter and a connection strength meter.
How to Connect Comica Vimo C to Camera or Computer
These are the cables that are included in the pouch:
We have 1 x 3.5mm TRS-TRRS Audio Cable and 1 x 3.5mm TRS-TRS Audio Cable. There’s also an adapter which splits into USB and 3.5mm TRS output, which allows you to monitor the audio at the same time as power the receiver.
And then there’s the good old USB A to USB C connector. Thing is, to connect this set up to a smartphone you need an adapter from 3.5mm TRS to USB C for Android or to lightning for iPhone.
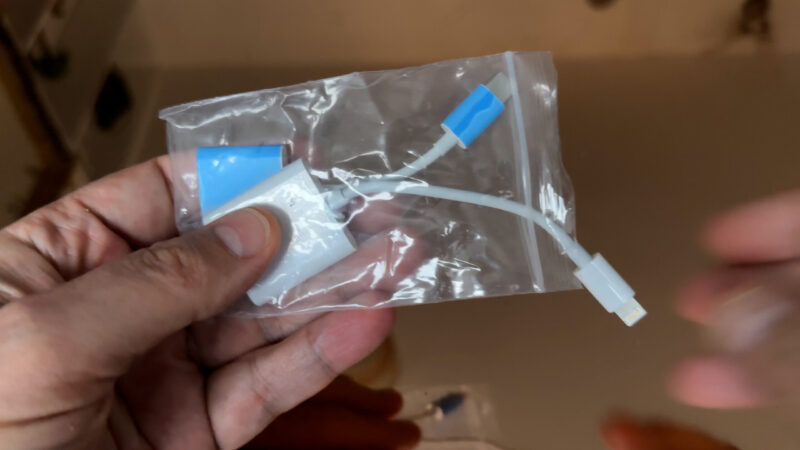
Anyway, I actually have these adapters (one for USB C and one for lightning) which were included in a SmallRig smartphone filmmaking kit and I found they do work, but there is a snag.
I connected the receiver to the adapter via the 3.5mm TRS to TRRS cable. That’s the one with the three black lines in the plug. TRS only has two. And that connected to my Samsung via USB C.
I was also able to connect to my iPhone 14 Pro via the adapter connected to the 3.5mm TRS to TRRS cable. In FiLMiC Pro Legacy.I opened audio controls and saw that the iPhone is using what it calls the “headset microphone”, but obviously this is not a headset.
Again there is a snag which means you can only get mono using either adapter.
Transmitter Controls
Let’s look at the transmitter and controls. Again, the mic is inbuilt into the top so make sure that’s facing the speaker’s mouth.

We have 1 light which is the status Indicator which indicates the following information.
- This will blink blue when unpaired
- Unblinking blue when paired
- Green when denoise is enabled
- Red when the transmitter is muted
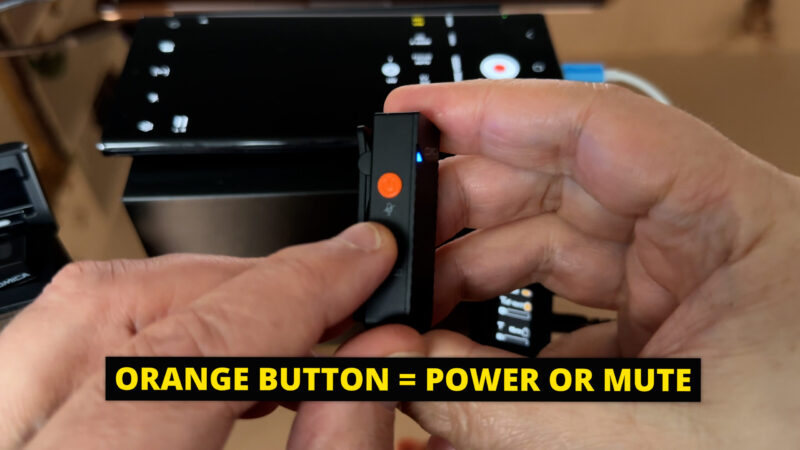
The orange button is the Power on or Muting button. Long press to power on and off. Short press to mute the transmitter. If you do that you will see it register as muted on the receiver mini screen.
The button below the orange button is the denoise and pairing button. Short press to enable denoise. Long press to pair with the receiver if for some reason they have become disconnected.
At the bottom we have the 2 charging contacts either side of the USB-C charging port.
Receiver Controls
First we have the 3.5mm TRS audio out and this is where you need to connect the TRS cable which then connects to your smartphone, camera or computer via an adapter if need be.
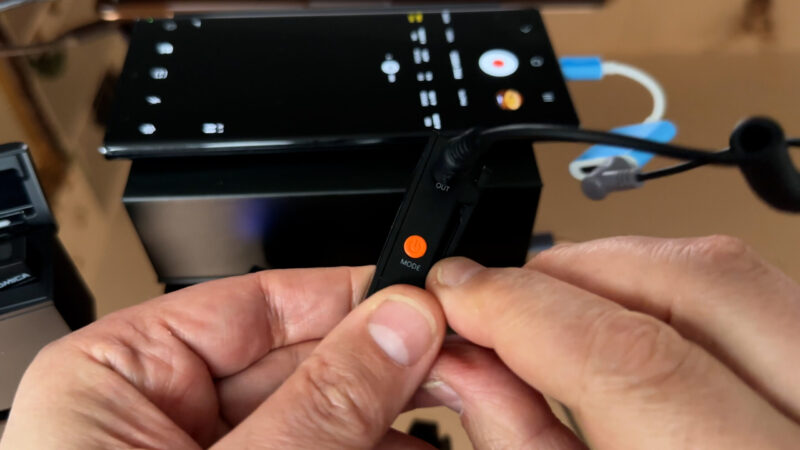
Below that we have the orange power button, which also switches modes. So to power on and off just long press. Short press to switch between 3 different modes.
- Mono
- Stereo
- Safety
The Snag
Now, the problem with using an adapter is that you cannot get stereo from the Comica Vimo C. The only way to get stereo is to connect to a device using one of the 3.5mm cables. Therefore, a phone with USB C or an iPhone with lightning is not going to get stereo audio from this setup and you will not be able to use the safety channel feature, either.
However, if your device has a 3.5mm audio input then you can use that and get stereo audio from the Vimo C. So if you want stereo audio on your USB C or lightning port device, then use the Vimo S setup.
So, for those using the Comica Vimo C setup with audio jack to audio jack, here’s what each function does.
How to Use Comica Vimo C Modes
In Mono mode, whether you have 1 or 2 transmitters connected, everything will be recorded in mono onto both tracks of audio.
In Stereo mode, transmitter A will record onto one channel and transmitter B will record onto the other channel. So this is great for recording 2 speakers if you want to be able to adjust the level of the audio in post, or treat each voice with different effects. Once you have the voices separated out it means you can work on them separately later.
In Safety mode, audio is split into 2 channels. But rather than separating the audio from the transmitters, 1 channel will be at normal level while the 2nd channel will be recorded at -6db. So this is probably best used when you’re using only 1 transmitter.
On the other side of the receiver we have the USB C charging and monitoring port. So you can connect this to charge you can connect USB C headphones here to monitor the audio.
Or you can use the adapter which comes with the set which allows you to charge with the USB C and simultaneously monitor the audio with regular 3.5mm jack headphones. For example, you might have a power pack connected, which means you can keep using the unit if it’s running out of battery.
Below, we have 2 buttons.
Short press to adjust the audio level coming from each transmitter.
Long press to turn the display upside down. So if you have this clipped somewhere and it’s upside down so you can’t read it, like your belt for example, you can switch it. That’s quite a nice touch, isn’t it?
Finally, the case has a USB C charging port at the bottom.
A transmitter, receiver or case takes about 2 hours to charge. The transmitter and receiver batteries last for about 8 hours and obviously the charging case gives you even longer.
Videography – Beginner to Advanced
If you want to know more about filmmaking, my book Smartphone Videography – Beginners to Advanced is now available to download for members on Patreon. The book is 170 pages long and covers essential smartphone filmmaking topics:
Things like how to get the perfect exposure, when to use manual control, which codecs to use, HDR, how to use frame rates, lenses, shot types, stabilisation and much more. There’s also my Exploring the Film Look Guide as well as Smartphone Colour Grading.
Members can also access my regular filmmaking podcast, as well all 5 episodes of our smartphone-shot Silent Eye series, with accompanying screenplays and making of podcasts. There’s other materials too and I will be adding more in the future.
If you want to join me there follow this link.

I appreciate the thorough write-up! I am interested in the Vimo S, but I don’t know if I should choose UC or MI. I have an iPhone that has a lightning port, but I also have an iPad that has a USB-C port. I want to use the receiver on both my iPhone and iPad. Which version of Vimo S + dongle setup do you recommend?
I guess get either one and then a lighting to USB C adapter? – I don’t know which is going to work out best