DJI Osmo Mobile 6 BEST Full Guide & Tutorial
The DJI Osmo Mobile 6 is a great little gimbal for vlogging, travel and lifestyle content. In this article, I’m going to talk about how to get the most cinematic video using this device.
Is the Osmo Mobile 6 better than the DJI OM 5? The 6 gimbal now has a focus / zoom wheel and there’s also a mode button and mode indicator. That’s 2 big improvements, in my opinion. So I would say yes, it is an improvement.
Setting Up
When you first get the gimbal, you need to install the Mimo app if you haven’t already. You will need the app to activate your gimbal before use.
If you can’t find the app in the normal places, you can download it directly from the DJI download page.
If you install the app this way, you may need to configure your phone’s security to allow the app to be installed. And that’s totally up to you whether you think this is a good idea or not. If you are using an Android device, I believe you can no longer install the Mimo app from the Google Play Store.

For the Apple version, you can still find it in the normal app store.
Calibration
It’s always a good idea to calibrate your gimbal before using it. If you use auto calibration and you find your phone still isn’t level, you can adjust this manually in the Mimo app.
Mimo Quick Guide
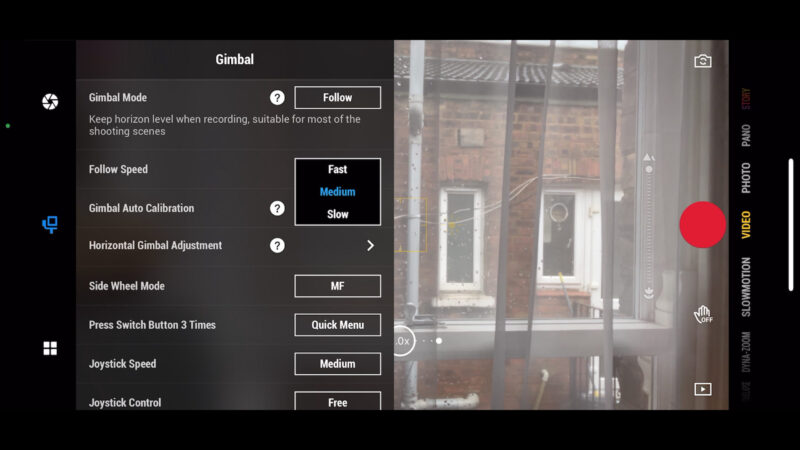
If you’re out filming and you can’t remember what a particular button does or how to activate a certain feature, there’s a quick way to remind yourself. Open the settings in the Mimo app by tapping the 3 dots in the bottom left corner, go to the General settings and then go to Gimbal Functions overview.
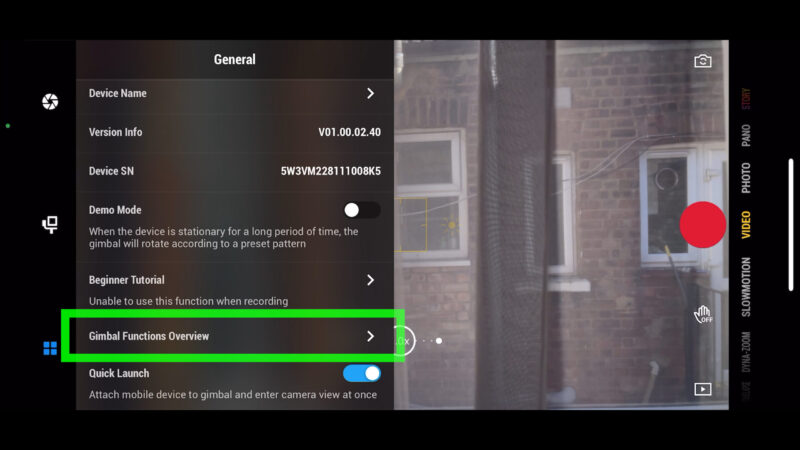
Here you will find 3 screens which tell you what each button does and the meaning of all the lights and indicators.
Mimo Quick Start
A new feature of the Osmo Mobile 6 gimbal is a Quick Start feature which is supposed to automatically start the Mimo app as soon as you mount the phone to the gimbal. So this feature only works with more recent models of iPhone.
In fact, it doesn’t go directly to Mimo. Instead, it sends a notification and then you tap the notification to open the app. I think that does make it slightly easier, especially if you have lots of apps to scroll through.
Now, the fact it sends you a notification is really important. Because I just wasted many hours trying to work out why this feature wasn’t working. Probably more hours than I will ever save using this feature.
So first, make sure your iPhone isn’t in do not disturb mode, like mine was. In this mode you won’t get any notifications from any apps, including Mimo.
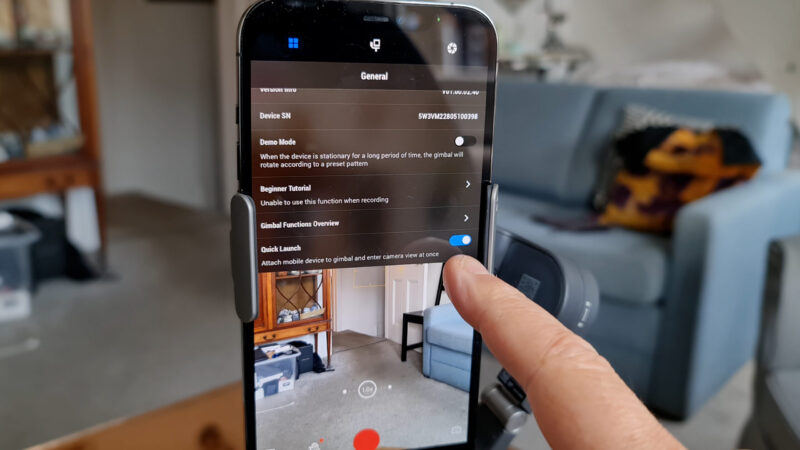
Next, go into Mimo settings, select the general tab, scroll down and toggle on Quick Launch.
In your iPhone settings you also need to enable a few settings.
Open settings for your iPhone. Go to the DJI Mimo app and tap that. Tap Notifications and allow notifications. Make sure Location and Precise Location are enabled for the app.
And now when you place the iPhone onto the Osmo Mobile 6 you should get this notification. Tap and off you go.
Extendable Handle
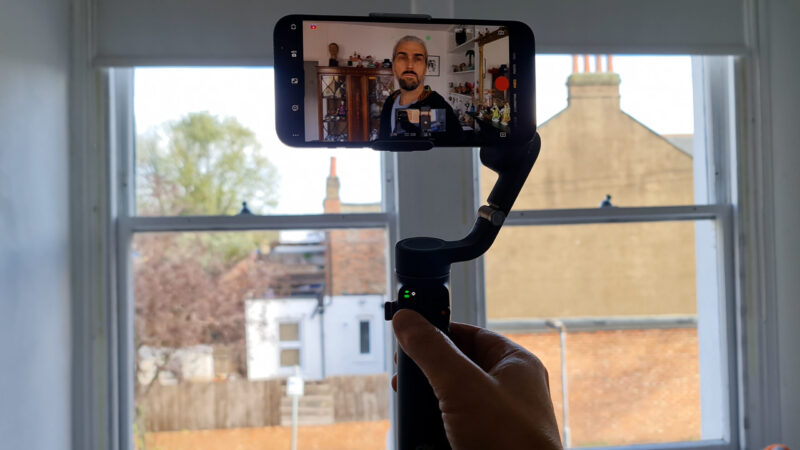
The Osmo Mobile 6 has an extendable handle which allows you to take images of yourself more easily. You can also use it to get a greater variety of angles and shots.
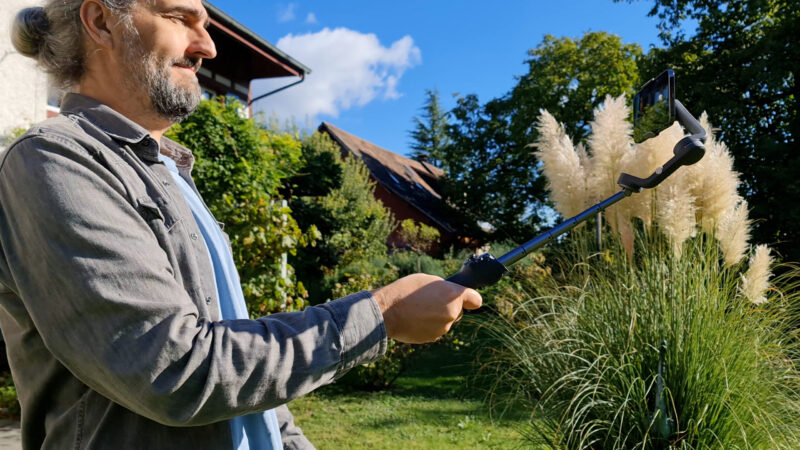
To make your videos more cinematic, and more engaging, it’s always good to have lots of different types of shots. A high angle looking down, a low angle looking up, crane shots, drone style shots and so on.
This extendable handle helps you get these kinds of shots and I’ll explain how later in this article.
Another tip: the DJI Osmo Mobile 6 has quite limited tilt movement and this can make it hard to angle your phone towards yourself or a subject. To fix this problem you can adjust the angle of the head of the stick.
If you pull it out a little way you can angle the phone camera towards yourself. And you can of course extend this all the way as well.
As well, if you place the gimbal on a flat surface using the legs, and maybe you want to track yourself here using active track, you will find the pan motor is at an angle. I think it’s a good idea to just raise the pan motor a little and make it level with the ground. It’s just a small thing, but you might find you get smoother results.
Re-centre your gimbal
One thing I use all the time on the Osmo Mobile gimbals is to recentre the gimbal with a double tap on the trigger. While you’re filming, switching modes and trying different shots, the gimbal will end up at weird angles. So just double tap the trigger and off you go. I pretty much have to use this after every shot.
DJI Osmo Mobile 6 – Using Modes
The DJI Osmo Mobile 6 has 4 basic modes, but there’s also a couple of secret modes. To access those you need to know the special moves.
Follow Mode
Follow mode keeps the horizon level, but it follows your pan and tilt movements. The Osmo Mobile 6 actually has a pretty limited tilt movement. But what the gimbal does is allow you to make a downward movement with your arm while keeping your phone stable.
One shot you can use is to sweep down a tall building for example and come to rest on a subject. It could be a person or it could be something else interesting.
But Follow Mode is a good all-purpose mode which allows you to capture a wide range of shots.
Tilt Locked
Tilt Locked mode locks the tilt axis of the gimbal so that the camera will stay at the same tilt angle while you pan around. Because the Osmo Mobile 6 has a limited tilt axis, you don’t have to move too much before you reach that limit and the camera starts to tilt even though it’s locked.
Really, tilt locked on the OM 6 is just to remove small movements from your hand as you’re filming a subject. For example, you can try a walking-tracking shot, or circling around the subject can be a really cool cinematic shot. And with the tilt axis locked, small wobbles will be removed.
FPV Mode
FPV stands for First Person View. This mode follows your movement on all 3 axes – roll, tilt and pan. Basically, it’s like Follow mode but when you roll your wrist the camera rolls with you.
Switch to this mode if you want to be a bit more creative with your camera movements. A pull out or a push in shot can look really cool if you rotate the camera at the same time.
The advantage of the FPV mode is that you can combine the rotation movement with other movements. You can create pretty complex movements with your shots, you’re only limited by your imagination really.
One option is to shoot freestyle. Just experiment, moving freely and then select the best bits from the clip when you come to edit.
SpinShot
The final mode is SpinShot and this mode allows you to rotate the camera further and more smoothly than using the FPV mode.
Select spinshot using the mode button, start recording, then use the control stick to rotate your camera. The motor will rotate the camera more evenly than you can doing this shot by hand in FPV mode. As well, you can rotate further.
Again, push in or pull out as you are filming for cool B roll shots.
Motivating camera movement
One of the signs of an amateur video is an over use of a side-to-side shot. What you might call a “pan shot”. It’s very tempting when filming just to sweep from left to right or right to left to capture the whole scene.
And I’ve seen videos that are just made up of these side-to-side shots, one after the other and it really doesn’t look good.
One way to avoid this bad habit is to start thinking about motivating your camera movements. I’ve actually made a whole lesson for members on Patreon about this, but I’ll just give you a quick explainer.
How to Motivate Camera Movements
Motivating your camera movement will make a huge difference to your videos. It’s often the difference between pro and non-pro videos. One way to motivate your camera movement is to follow a subject.
Instead of just moving the camera side-to-side, for example, you could follow a subject. It could be a car, a pet, a human subject or really anything that’s moving.
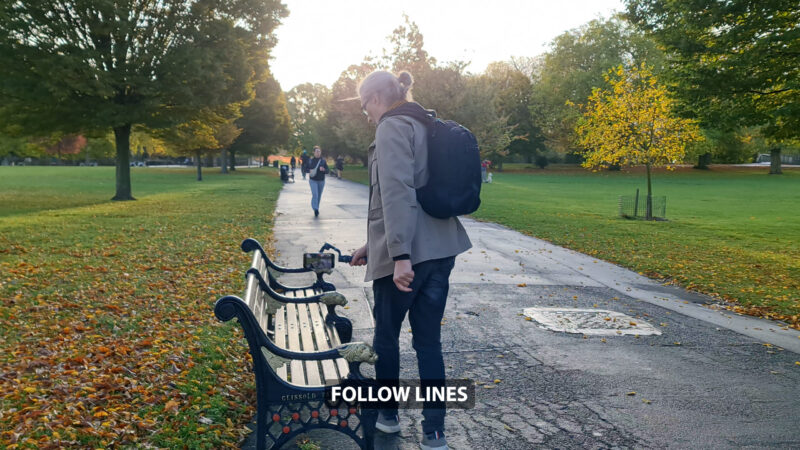
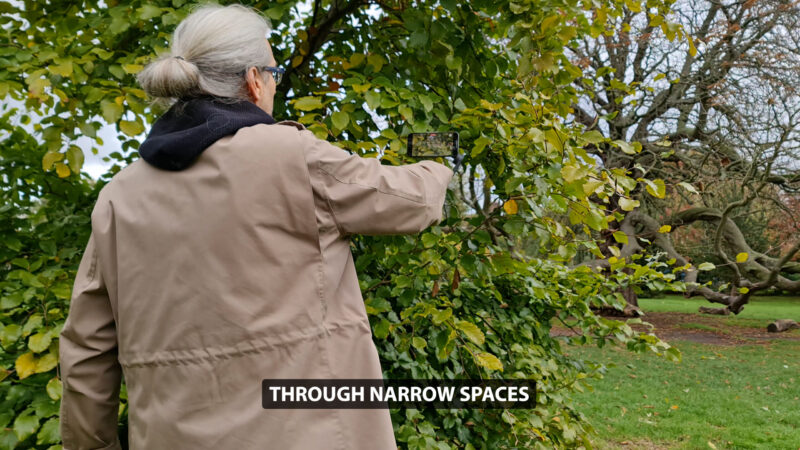
Another way to motivate a movement is to follow the lines in the frame. A tall building invites you to sweep down or up along the lines of the building. Look for frames within frames and move through them. Moving through archways, windows or other frames within the environment can create really cool looking shots.
The extension stick allows you to move your camera through narrow spaces that other cameras couldn’t fit through. When you shoot this kind of shot, I would suggest shooting at 60fps and slowing the shot down to 30 or 24fps.
The real challenge of this shot is to stop the phone moving up and down. We really want to try to keep the movement as straight as possible and reduce up and down movements. If we shoot at 60fps and move faster through the space, we should find that up and down movement is less noticeable, once we slow the shot down in the edit.
When you are motivating your camera movements, try to think of the emotion the movement is intended to create in the audience. A slow motion tracking shot gives a dreamy effect, a sweep up to the top of a high building creates a sense of spectacle and awe, flying low along the ground creates a sense of exhilaration.

Now for those secret hidden modes I told you about.
Lock Mode
Lock mode basically stops the gimbal following any of your movements. To enter lock mode, just hold down the trigger.
When would we use lock mode? It’s not a mode I use very often but if you want the camera to stay facing the same direction continuously, then use lock mode. Maybe you want the direction of the camera movement to change, but you want the camera to stay facing the same way. For example, if you want to move forward in a straight line and you want the camera to be completely still, except for this forward motion.
GO Mode
To enter GO mode, double tap the trigger and hold. In this mode the gimbal motors become more responsive to your movements. Again, it’s not a mode I would use very often.
To get this kind of shot I would just remove the phone from the gimbal and shoot handheld.
Filming Solo – Active Track
One of the main strengths of this gimbal is its solo filming features. The extendable handle, Active Track 5.0, it’s small and light so you can carry it around easily.
If you are filming yourself, and you want the camera to track your movement, you can mount the gimbal to a regular tripod. This is a pretty lightweight tripod while also having a good height.
Switch gesture control on in the mimo app and make sure it’s set to follow you as well. Make the gesture and now your smartphone will film you walking around, or moving around while you talk to the camera.
Active Track – Adjust Position
When you switch to the selfie camera, the Mimo app automatically starts tracking you. By default, the app places you in the middle of the frame. But you can adjust this position using the control stick.
I found that sometimes Active Track causes problems when you are filming yourself walking. Because it tries to keep you in the same position sometimes it starts wobbling as you move and it doesn’t look good. For that reason, I don’t usually use the tracking when I’m filming myself walking.
Jittery Footage?
If you find that your footage comes out a bit jittery when you play it back, this could be an issue with dropped frames. I’ve made a whole lesson about this for members on Patreon, but I’ll just talk about it quickly here.
Sometimes with 3rd party apps, the footage recorded is less reliable. Especially if your device’s processor is being pushed to the limit. I have found this happens more often with the Android version of the Mimo app – sometimes frames are dropped.
You can tell if you have dropped frames by opening the video clip in QuickTime and inspecting the frame rate recorded. You might have recorded at 30fps it says some strange number like 27.08. In which case, this video isn’t going to play smoothly. One solution to this is to shoot with the native app of your device and save the gimbal app for special shots you can only get with the app.
Here’s some more hidden Osmo Mobile 6 features you might not know about.
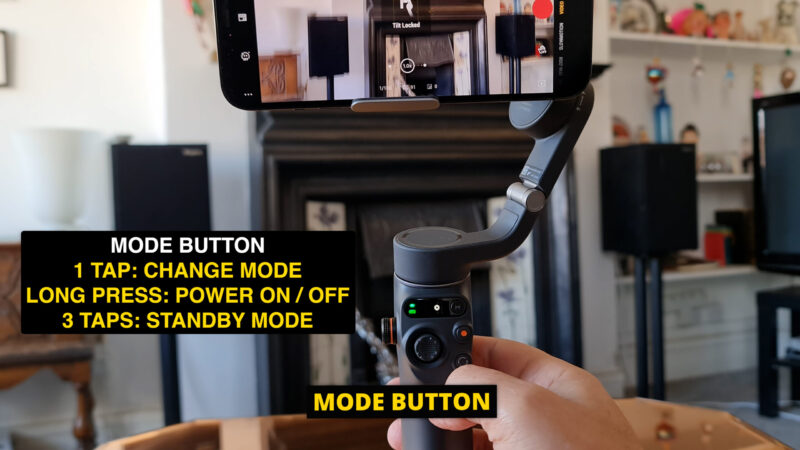
M Button
The M button switches modes, with short taps. Long press to power the gimbal on and off.
Tap the M button 3 times to put the gimbal in standby. The motors will power off. To return, just tap any button to wake it up again.
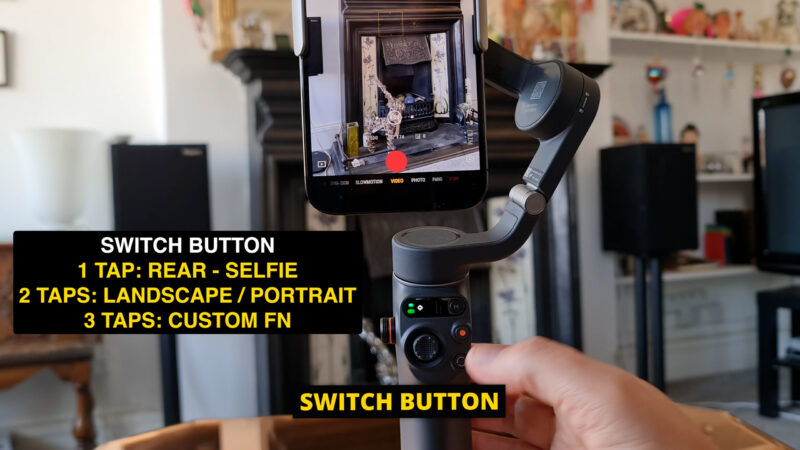
Switch Button
The button with the 2 curved arrows is the switch button.
- Press once to switch between the front and rear camera.
- Press twice to switch between landscape and portrait orientation (you can also simply twist the smartphone with your hand).
- Press 3 times to either access the quick menu in the app, or switch between photo and video. You need to go onto settings in Mimo to choose what 3 taps does.
Zoom Shot Tip
Now we have this zoom / focus wheel we can zoom in really easily and the gimbal should take most of the shake out of the shot. If you are zooming in and you find you get a very pixelated video, more pixelated than you are expecting, this might be down to the way third party apps work on phones.
If you use the native app in most phones, you can switch between ultrawide, wide and tele lenses while you are recording. The Mimo app can also change lenses while recording, but not when shooting at 4K @ 60fps (tested with iPhone). So, if you’re shooting 4K @ 60fps it will just digitally zoom in on whichever camera you started with.
If you start recording with the main camera, when you zoom in with the wheel it just keeps using the main sensor. But if you start with the ultrawide and zoom in you might find you get really horrible pixelation. Therefore, you might want to switch to a tele lens first before hitting record.
Focus Wheel
Just press in the wheel to switch between zoom and focus. In the Mimo app, top right you will see a lens symbol with letters ZM or MF, which tells you whether you are in zoom or manual focus mode.
This allows you to make nice, smooth focus pulls while you are recording. A nice focus pull shot can really add a pro look to your videos.
Ease In, Ease Out
When you are filming, you might find the action of the gimbal is quite loose. When you move it takes a while to catch up with you and when you stop it takes a second to slowly come to its final position.
If you are moving to frame a subject, and you stop on the subject, the gimbal will probably keep going and won’t end on the correct frame. Try to stop slightly before and then let the gimbal slowly ease into the final frame.
You can also change the sensitivity of the motors in the settings to stop the motors drifting so much.
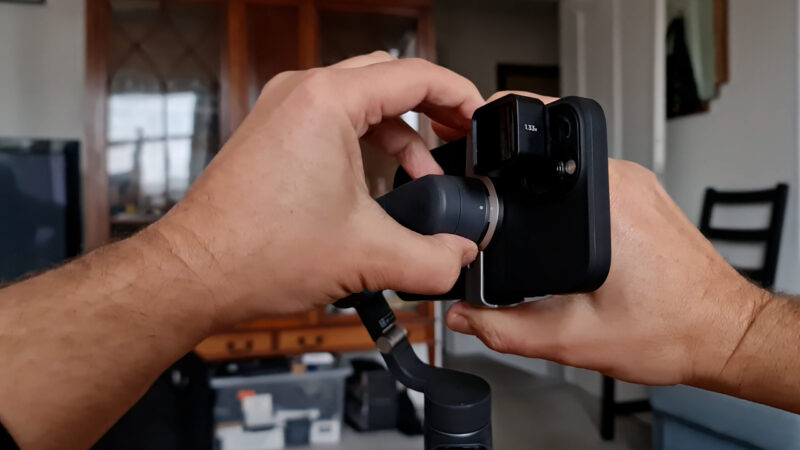
Adding lenses / filters / cases
One question I’m asked a lot is, “can the Osmo Mobile 6 handle a smartphone with extras? Can we add a case, filters, lenses and so on?”
The DJI Osmo Mobile 6 is a small gimbal and it’s not designed to carry big camera rigs. In fact, DJI doesn’t even recommend you use a case, let alone anything else.
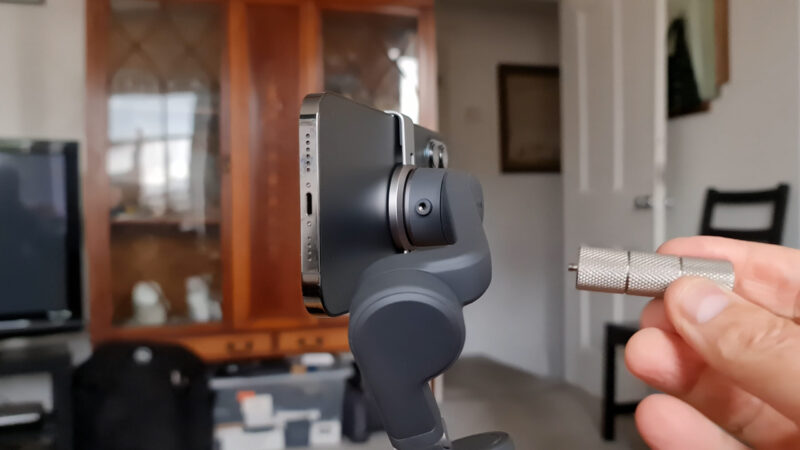
However, the DJI Osmo Mobile 6 still has the mounting port for counterweights, on the side of the roll motor. This has been a feature of all the Osmo Mobile gimbals since the 3rd version. If you have a lens mounted to your phone and there’s too much weight on that side, you can add a counterweight to this side.
These are ones I bought from Ulanzi, but I think DJI still makes their own.
So let’s try adding some extras. I’m using an iPhone 12 Pro Max, so it’s already heavy.
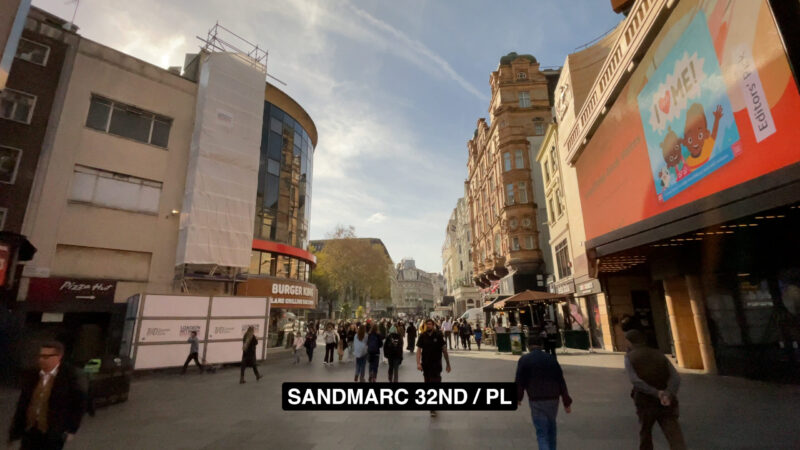
Sandmarc ND PL Filters
This is a clip-on ND and polarising filter by Sandmarc. When I placed it on, the DJI Osmo Mobile 6 seemed to handle it fine. I could move the gimbal around without any problem.
If you are filming in daylight, you might find your shutter speed is too fast and the video looks less smooth. But if you add an ND filter, you can slow down the shutter speed. Even if you don’t control the shutter manually, adding an ND filter will still slow the shutter speed.
I like these Sandmarc ND filters. They add a warmth to the image and the polarising element makes the colours richer. So it’s almost like adding a LUT or a preset colour look to your video.
The only downside of these clip-on filters is that light can leak in the side and cause flares. So let’s look at an alternative, by PolarPro.
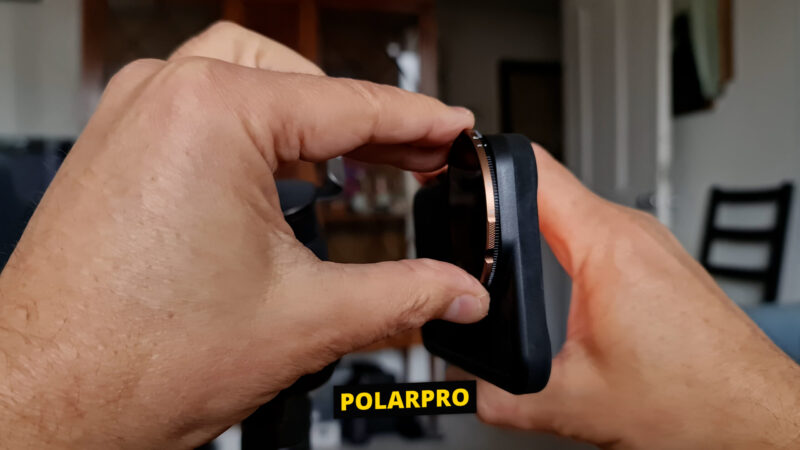
PolarPro Case / Filter
This is a case and filter by PolarPro. It doesn’t add too much weight and the Osmo Mobile 6 clamp fits around it, no problem.
Instead of mounting the phone with the gimbal powered on, as you would normally with the Osmo Mobile 6, I decided to use the old method. With it powered off, mount the phone and extras and now move the phone around in the clamp to balance it.
So I found this setup also worked fine and the motors of the gimbal were able to handle the extra weight.
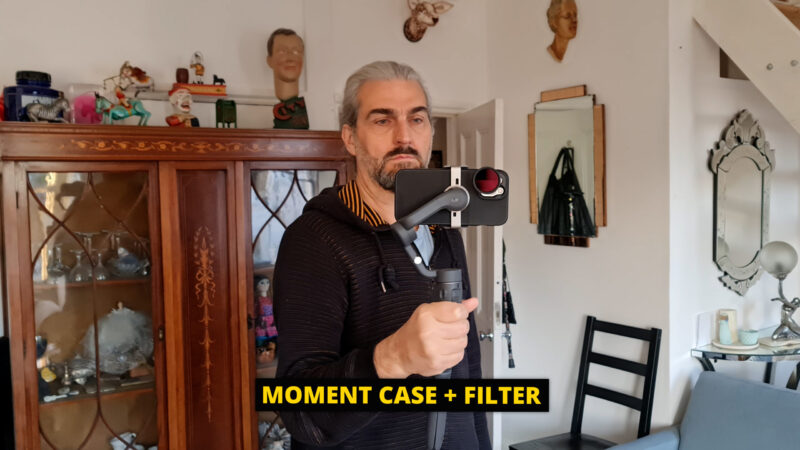
Moment Case / Filter
This is a case by Moment, with a filter mount and a ND32 filter. Again, I found the gimbal handled the extra weight just as well as with the PolarPro.
Moment Case / Anamorphic
This is with the Moment anamorphic. Again I balanced it before powering on. Remember that you can also adjust the clamp vertically. You can move it up and down here.
I managed to balance it and so far I haven’t needed counterweights. The good thing about the DJI Osmo Mobile 6 clamp is, because it’s arched, it seems to avoid pressing down on the side button of the phone.
Again, the DJI Osmo Mobile 6 was able to handle the anamorphic. In fact, I started to feel like the motion was a bit smoother with the extra weight. As we know, the heavier the camera, the less it’s going to shake or jitter around.
I was also able to perform focus pulls with the wheel and anamorphic.
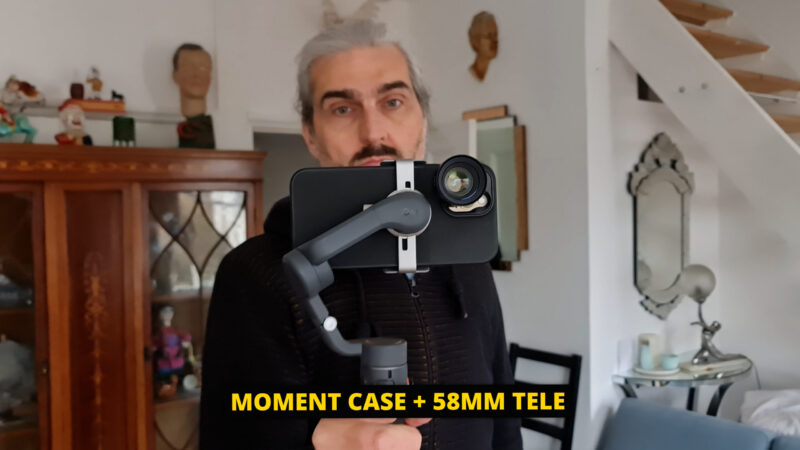
Moment Case / 58mm Tele
Finally, I tried the heavier Moment 58mm Tele and actually the gimbal seemed to be fine with it. Again, I was able to perform focus pulls. I could even zoom in a little. Obviously, with a conversion lens you can’t switch lenses.
The only issue is that the 58mm tele obstructs the gimbal if you turn the handle on the roll axis too far.
So that gives you an idea of what you can add to your smartphone. If you wanted to add more, I think you would need to use counterweights. Like I say, DJI doesn’t officially recommend you do this.
My guess is it will place a little more strain on the motors, especially with the 58mm. This means your gimbal battery might run down faster, the motors themselves might wear out a little quicker.
Add a Mic / Light
If you want to add a mic or a light to your Osmo Mobile gimbal, you will need some kind of mounting device. And this is a pretty cool one from SmallRig. It has 2 arms with cold shoe mounts and sits between the handle and the mini tripod legs.
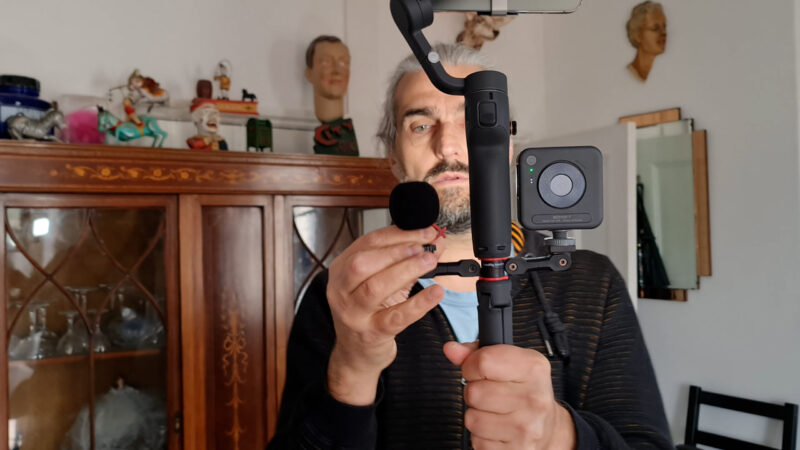
I bought this one from AliExpress but you can also get them from Amazon under a different branding. So this is a light and a mic also by SmallRig.
Videography – Beginner to Advanced
If you want to know more about filmmaking, my book Smartphone Videography – Beginners to Advanced is now available to download for members on Patreon. The book is 170 pages long and covers essential smartphone filmmaking topics:
Things like how to get the perfect exposure, when to use manual control, which codecs to use, HDR, how to use frame rates, lenses, shot types, stabilisation and much more. There’s also my Exploring the Film Look Guide as well as Smartphone Colour Grading.
Members can also access my regular filmmaking podcast, as well all 5 episodes of our smartphone-shot Silent Eye series, with accompanying screenplays and making of podcasts. There’s other materials too and I will be adding more in the future.
If you want to join me there follow this link.

how TF do you disable those irritating popups every time you change mode?
Simon,
Thanks for the useful information. The documentation provided by DJI is woefully lacking! You may have discovered this, but I didn’t see it in your article: Setting your phone to 4K without also setting the MIMO app to 4K (if using the app) will result in the video being shot in 1080. I discovered this quite by accident when, during a shoot, I shot some 4K clips handheld, and other clips using the OSMO and MIMO app. The clips shot in the iPhone’s native app were all in 4K. The MIMO shots were all in HD. I also discovered that when my iPhone settings were for 4K 60 fps (High Efficiency), the native app produced much more detailed video. This was mostly solved by switching on Dolby Vision in the MIMO app.
Thanks again for taking the time to produce this helpful article!
Mike
Hi,
Is it possible to use the OM6 to create drawing tutorial videos looking down on a desk?
First gimbal I have owned so very new to all this.
Cheers
Chris