Master your Smartphone Camera : Videography Beginner to Advanced
In this article, I will tell you how to shoot more professional video with your smartphone.
There are quirks about smartphones that often trip up filmmakers used to using cameras with manual controls. But if you learn how to work around them, you can shoot beautiful, cinematic and professional level video.
In fact, you can go from being a beginner to being a filmmaker in one simple step. Here’s how…
How a Beginner does it
A complete beginner will take their smartphone out, open the camera app, then maybe feel a bit lost. This is why beginners often shoot video with what I call a “roving camera”.
We might be on a trip somewhere and want to capture some memories of the location. But as beginners, we’re not thinking like a filmmaker, so we just try to film everything in one shot. Either by roving around or by shooting everything with a wide angle.
However, if we watch a movie or a TV show and look closely at the shots used, we’ll find the camera is quite still most of the time. As well, more close ups are used than wide shots. Essentially, the complete opposite of what a beginner often does.
Mindful of the Edit
The biggest difference between a professional and a beginner is that a professional will be shooting with editing in mind.
So the first thing you need to do to become a filmmaker (before you think about any settings like shutter speed or frame rates), is to start thinking about how your shots will edit together.
Big thanks to all the next members who joined my Patreon last month. Because of your support I was able to spend time putting this book together.
Exposure Tip
Most smartphone cameras are designed with the average consumer in mind, not really filmmakers. For that reason, they tend towards overexposing the frame. And an overexposed frame means ugly, washed out white areas where information is forever lost.
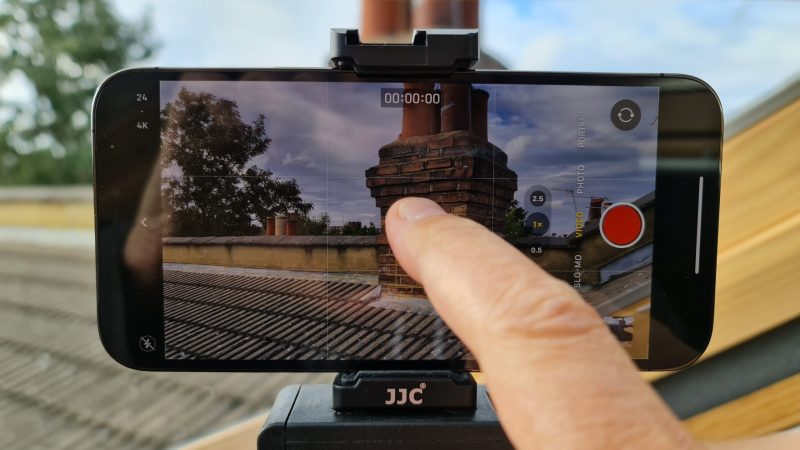
If there are overexposed areas in the frame, we can easily improve our videos or photos simply by pulling down the exposure. This is easy to do on most smartphones, iPhone or Android.
Just touch the screen and slide your finger to set exposure darker or brighter. Hold down to lock that new setting while you shoot the video.
Now, when you stop recording the video your exposure setting will be reset. Which can be annoying if we intend to shoot several takes.
One way to get round this reset is to pause recording instead of stopping. This means you will get a bunch of shots in one clip but at least you don’t have to keep resetting your exposure for every shot. Unfortunately, the iPhone’s native camera doesn’t come with a pause record option.
OK, now you can take the next step and think about how you’re going to frame your shots.
Framing
When you’re making a video, everything that you put in the frame says something.
Framing a shot is mostly about balance.
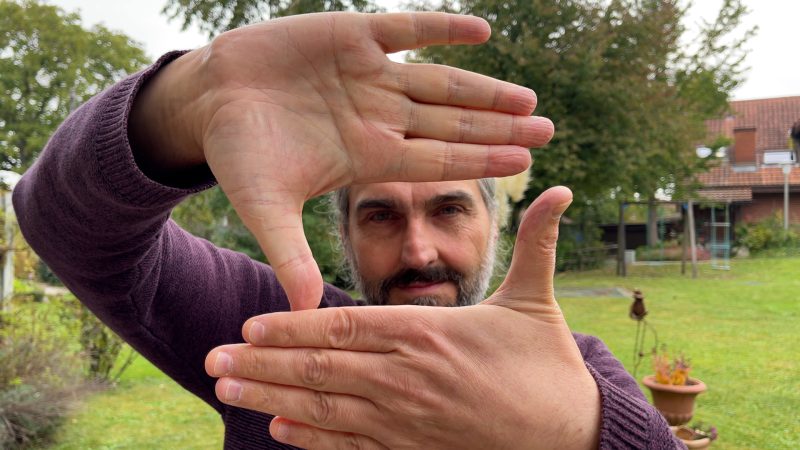
You may have seen the cliche of the film director holding his hands together to create a frame. Director’s and DoPs do this when they are looking for a way to balance the elements within the frame to tell a story.
There are literally infinite ways we can use framing. Unfortunately, this also makes it harder to work out how to frame a shot. To make things easier, there are a few guidelines we can follow to help us narrow things down a bit.
Rule of Thirds
Most smartphones have a setting which allows you to turn on a “Rule of Thirds” grid in the camera app.
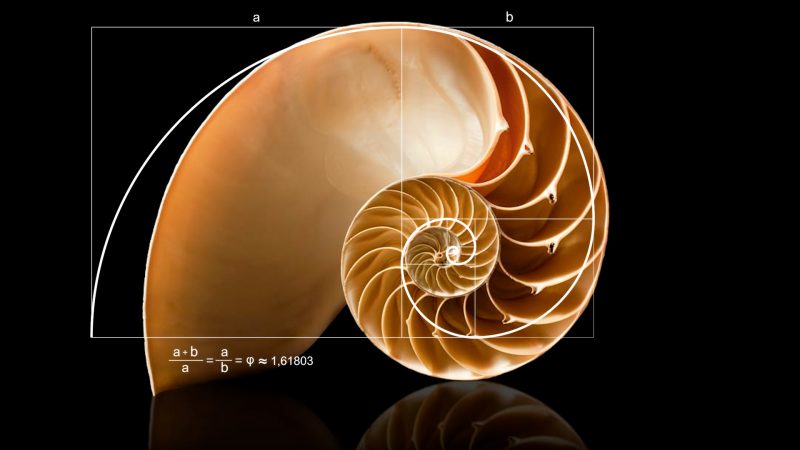
The Rule of Thirds is a simplification of the Golden Ratio.
Artists and mathematicians saw the golden ratio in nature and applied it to their work. It seems our minds are hardwired to subconsciously recognize this ratio. Images that conform to it are said to look more beautiful than those that don’t.
Rule of Thirds in Practice
Actually, it’s quite simple to use. Just place objects of interest at the intersections of the grid lines.
Put your horizon on the top or bottom horizontal line. Put people (or vertical objects) on the left or right vertical line. Frame your shot so their eyes are on or close to the top horizontal line.
If you put objects in the centre of the frame, they dominate it. Centered objects force us to look at them, rather than contemplate the whole scene. Like when you’re shooting a portrait.
Objects at the side of the frame invite us to look past them. They’re less dominant than a centrally placed object and therefore seem less important.

Using the grid just helps you prioritise which objects in the frame you want to be the most important. And of course it helps you make more beautiful images and hold the viewer’s attention longer.
Balance
Balance is related to the symmetry of the contents within the frame. This might be as simple as placing 2 subjects with one each side of the frame, symmetrically.

The first one is more likely to make us feel comfortable and relaxed, while the second is more likely to make us feel like something is off.
When I think of symmetry in filmmaking, two famous filmmakers come to mind: Stanley Kubrick and Wes Anderson. Both these filmmakers use many shots where the contents of the frame are around some kind of balanced symmetry.
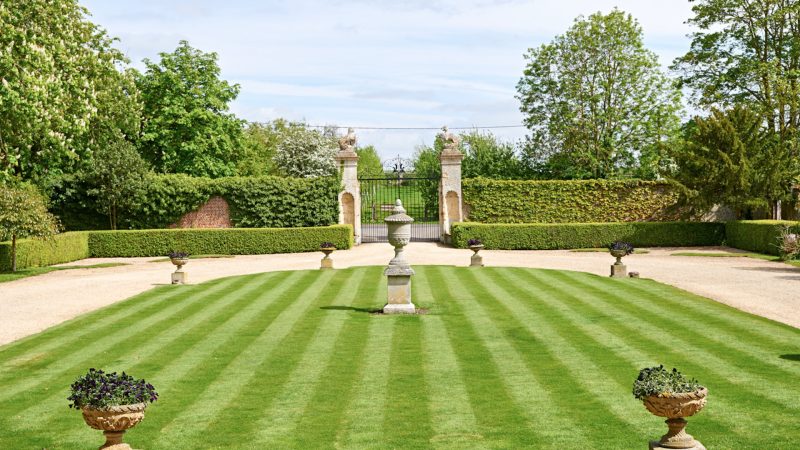
Framing a shot with perfect symmetry can evoke a sense of order and power. That’s why the gardens of the wealthy were (and still are) often arranged to look perfectly symmetrical. Apart from being pleasing to the eye, gardens are arranged this way to let visitors know how wealthy and powerful the owners are.
Depth
The third element to think about when framing a shot is depth. The depth of an image is about foreground, midground and background.
Placing objects in the foreground makes the frame look more 3 dimensional.
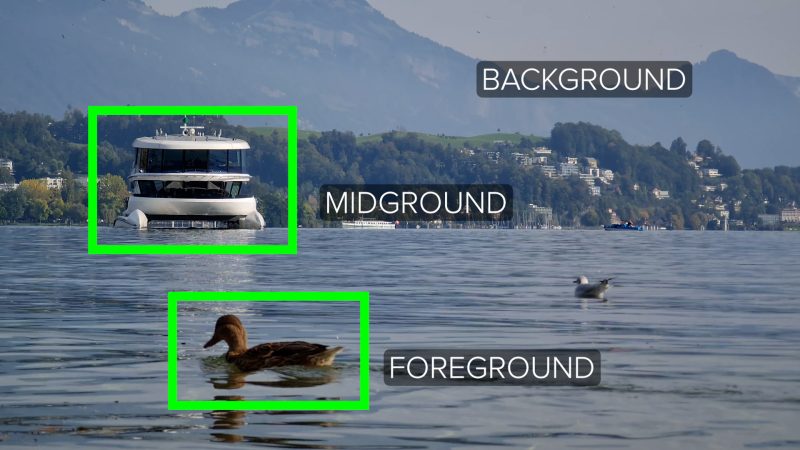
A sense of depth in a frame is also created by the depth of field of the lens used, which refers to how much is in focus at the same time. A lens with a wide depth of field creates a frame where most objects are in focus. Or, if something is out of focus, then it’s only slightly blurry.
On the other hand, a lens with a shallow depth of field creates a frame where only a small part of the frame is in focus. For example, only the subject is in focus while the background and foreground are completely out of focus.
Smartphones usually come with lenses which have a wide depth of field, which means creating a sense of depth through focus is a bit more of a challenge.
Now, there’s another thing beginners don’t do that experienced filmmakers do, and that’s record multiple takes.
Multiple Takes
A beginner will get one shot of something they find interesting and then move on. But professionals usually get at least 2 takes of every shot.
There’s a couple of reasons you want more than one take. One is for safety, because digital video can be deleted by accident or become corrupted for some reason. If you only have one take of an important shot and you lose it…
But the main reason for shooting take after take of the same shot is to perfect it.
Depending on the complexity of the shot, it can take time to get everything to click as you hoped. There might be an issue with sound, like a plane flying overhead. Maybe the performance or the camera movement isn’t as good as it could be.
Having multiple takes gives you more to work with when editing. On the other hand, too many takes can be overwhelming. But it all depends on the project and the time you have to invest in extra takes and extra time hunting through those takes later.
Right, let’s look at how to expose a frame using a smartphone.
Exposure
Should we always lock exposure? It’s often best to, but I recommend that you don’t completely rule out using auto exposure.
In fact, when recording my vlogs I use Samsung Note 20 Ultra in Pro Mode but with exposure and focus set to auto.
Before I talk more about exposure, it’s good to understand the terminology related to setting exposure. For example, what we mean by underexposure and overexposure.

Overexposure
A frame is overexposed when there is too much light hitting the sensor. This will lead to some or all of the image going completely white. When filming with a smartphone, any area of the image that is completely white usually has zero image information.
This means the information that could have been captured by the sensor if it was correctly exposed just isn’t there. So, no grading magic later on will save you.
Here’s another exposure-related term. When we talk about these white areas, we often refer to them as “blown out highlights”.
The opposite problem to overexposure is underexposure.
Underexposure
A frame is underexposed when there is not enough light hitting the sensor. This will lead to some or all of the image going completely black.
However, when filming with a smartphone any area of the image that is completely black doesn’t necessarily mean the information is lost, like it is with white areas.
In my experience, areas that appear black when filming do retain some small amount of information that can be recovered when grading the image later.
For that reason, I generally lean towards underexposing a smartphone shot video if it means I can save some areas from getting blown out.
Under & Overexposed
Depending on the light and the dynamic range of the sensor, a frame can be both under and overexposed at the same time. For example, if you have very bright highlights and dark shadows, you can have both blown out highlights and totally underexposed dark shadows.
This results in a frame with very high contrast.
High Contrast
When we talk about something having high contrast it means there’s lots of dark areas and lots of bright areas, but less subtle shades (or tones) in between. Therefore, images with high contrast appear to contain less finer details, which gives them the look of a lower resolution image.
For example, you could shoot a video clip in 4K but the clip has so much contrast it has the same amount of image detail as a 1080p (FHD) video. This demonstrates that simply hitting the 4K button on your camera app doesn’t necessarily lead to high quality looking video.
It’s not just the sensor or the grading software causing a highly contrasting image. It actually starts with the light conditions when capturing the shot.
As beginners, we usually understand that it’s possible for there to be too little light for filming purposes. But we may not realise there can also be too much light.
Whether we set our camera to shoot 4K or 1080p, the dynamic range of our camera’s sensor will have a big effect on how well it performs in different light conditions.
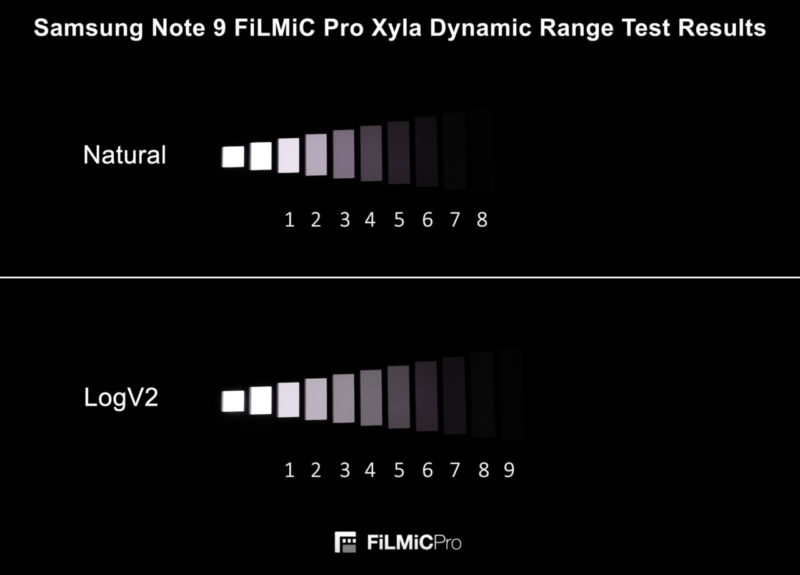
Dynamic Range
A sensor’s dynamic range dictates how well it can deal with different levels of light in the same frame. You’ll notice this in bright daylight where the bright areas are much brighter than the shadowy areas of the image (high contrast).
Although they’re getting better, smartphone camera sensors generally have less dynamic range than devices with bigger sensors, like mirrorless or DSLR cameras.
In most smartphones, the main sensor has the best dynamic range and is therefore most able to cope with low and high levels of light.
This is something to think about if you are filming yourself with the front facing selfie camera. It’s not your best camera. For that reason, when I’m filming myself, I will always try to use the main camera.
Whatever camera you use, to get more professional looking video you need to understand when and how to control exposure.
Controlling Exposure
Most smartphones give you the option to lock exposure in the native camera app. Just to be clear, when I say “native camera app”, I’m talking about the app which comes with your phone as opposed to a 3rd party app like FiLMiC Pro.
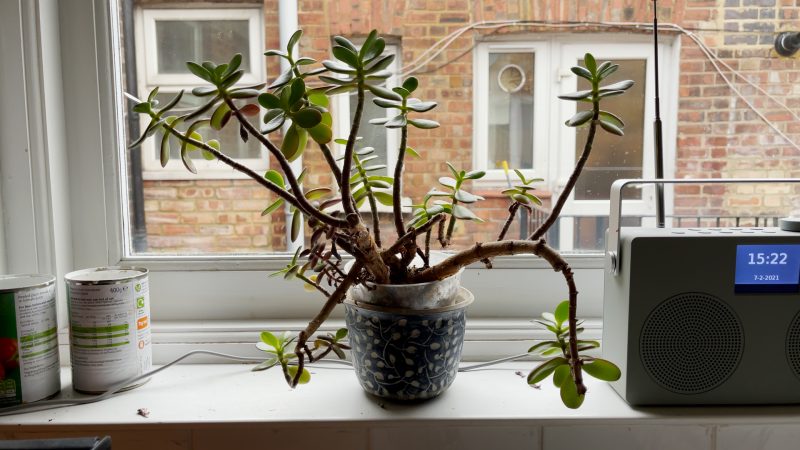
With both Samsung phones and iPhones, touch the screen and a circle or square appears. Wherever you place this circle or square, the exposure and focus will be set based on what you tap on (I think most other native camera apps work the same way, too).

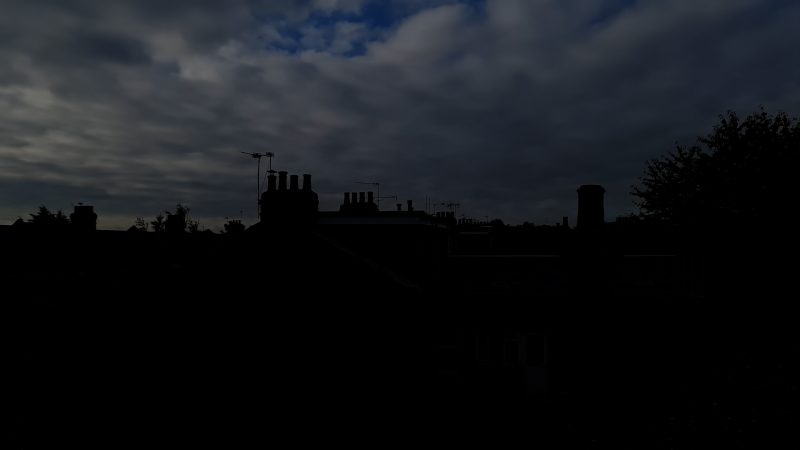
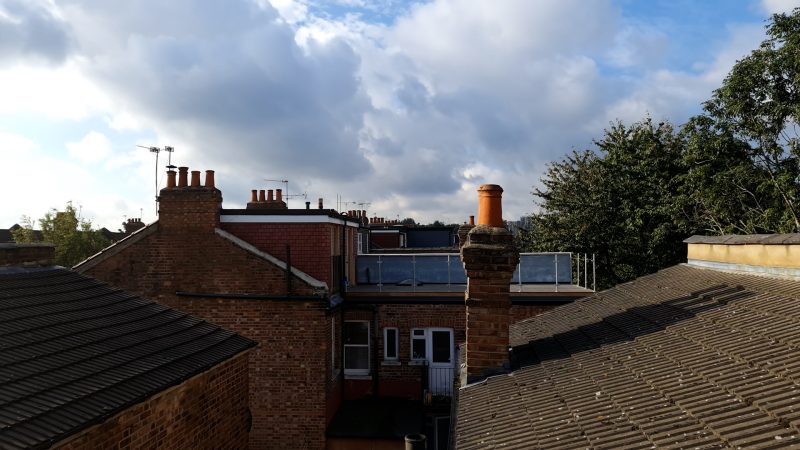
In this example, if I tap on the sky, the camera will set focus and exposure on the sky. But what does that do to the rest of the image? Below the skyline, everything goes very dark.
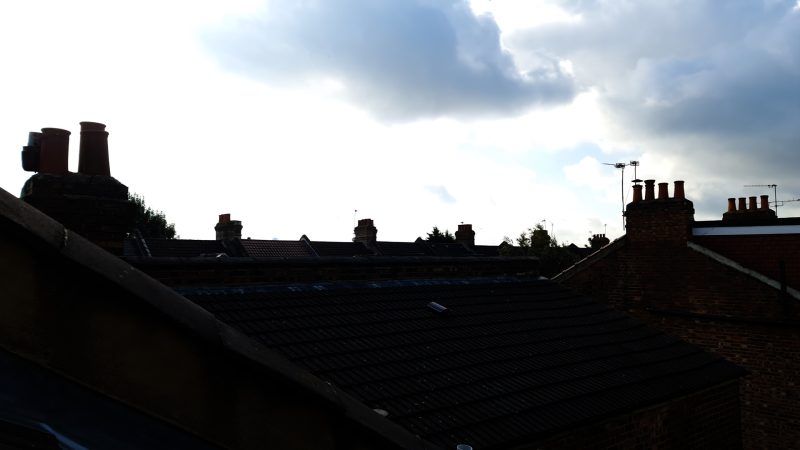
On the other hand, when I tap below the skyline, the landscape is now much better exposed, but the sky starts to blow out. Then we lose the information in the white areas.
So, you can see that setting exposure is a balancing act. Our job as a videographer is to decide on the best balance. However, when we leave the camera to use auto exposure, we’re letting it make that decision for us.
Balancing Exposure 1
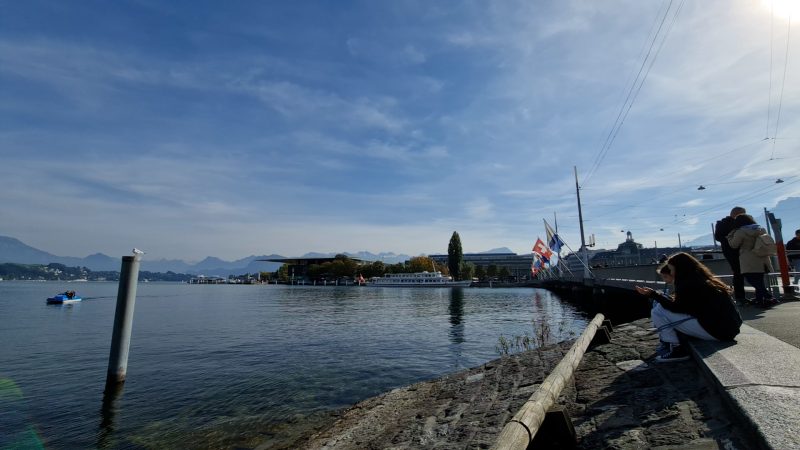
When we set exposure, we need to decide what’s most important for the frame we’re composing. If you want the audience to enjoy a beautiful sky, then set exposure on the sky. If the landscape is more important, then expose for that.
But if we’re exposing for the sky, I would suggest we make that the dominant element in the frame. We could then put the skyline on the bottom line of the rule of thirds grid and leave the landscape in silhouette.
On the other hand, if we expose for the landscape, then it makes sense to place the skyline on the top line of the grid.
This is a simple example of how we use framing and exposure together. The framing choices we make inform exposure choices, as well as other choices.
Balancing Exposure 2
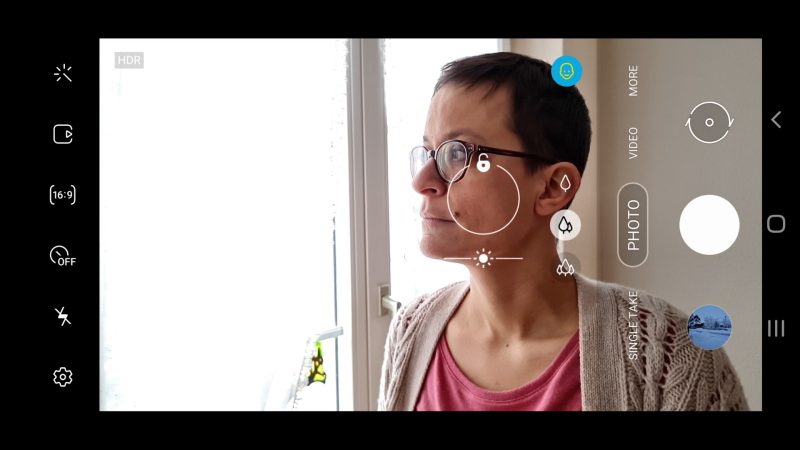
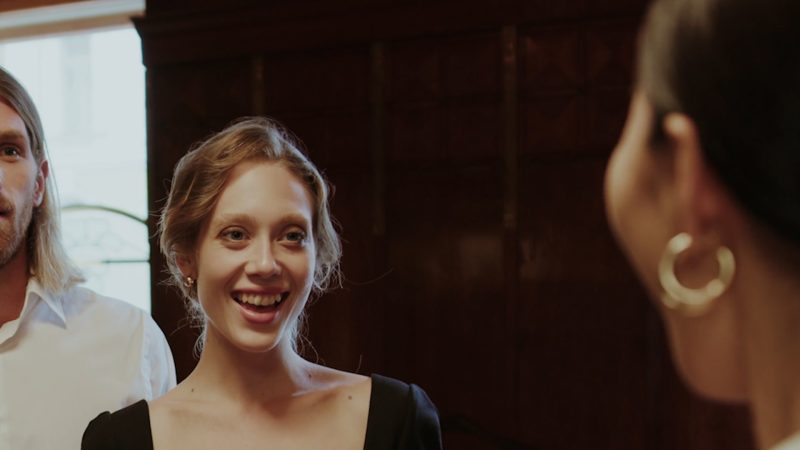
When we’re filming a person, exposure becomes a bit more tricky. That’s because exposing a face correctly is so important.
If the lighting is too bright or too harsh it can look unflattering. Alternatively, if the light is too dark, the audience will feel uncomfortable if they can’t see the subject’s face clearly.
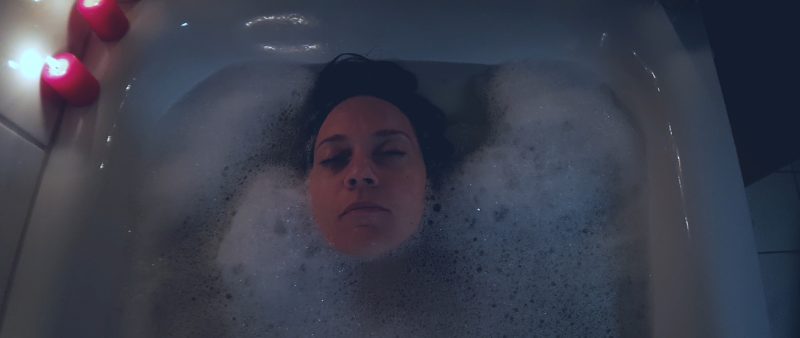
As well, having a darkly-lit face can imply the person is sinister in some way. In movies, when we want to imply a person has dark thoughts, we often use a darkly-lit or silhouetted face.
So, unless you are using dark lighting for dramatic purposes, you will want a nice even light on the subject’s face.
Now, if you have a background which is too bright, when you set exposure correctly on the face, the background can blow out. On the other hand, your whole frame will look nicer if you have a less-bright background.
This can be as simple as turning to face the opposite direction.

Exposing a Moving Shot
So far we’ve only looked at exposure when our camera is fixed at one angle. But when shooting professional-looking video, we don’t want to be limited to fixed angles. Especially when shooting with a smartphone, as they’re so easy to move around.
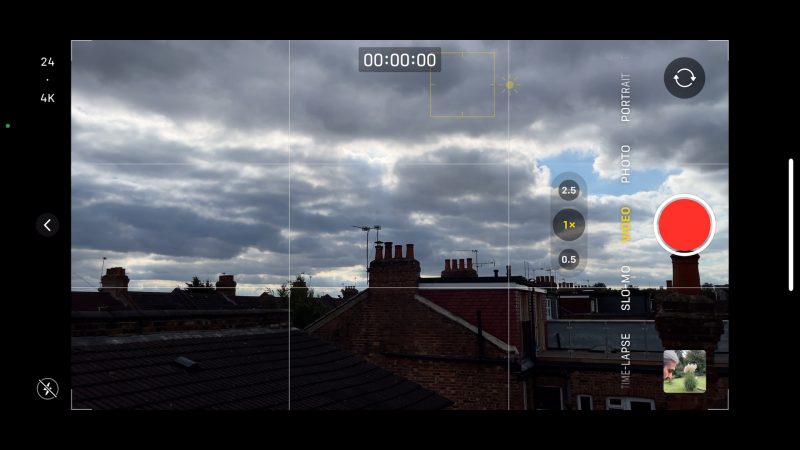
Thing is, exposing a shot when we’re moving the camera is a little bit more complicated. If the camera moves from a light area to a dark area or vice versa, the exposure will adjust. This often looks a bit messy and unprofessional.
When we pan the camera to a window we can see the exposure adjust because the windows are obviously much brighter than other parts of the room.
To fix this problem, we need to think about locking exposure.
Locking Exposure
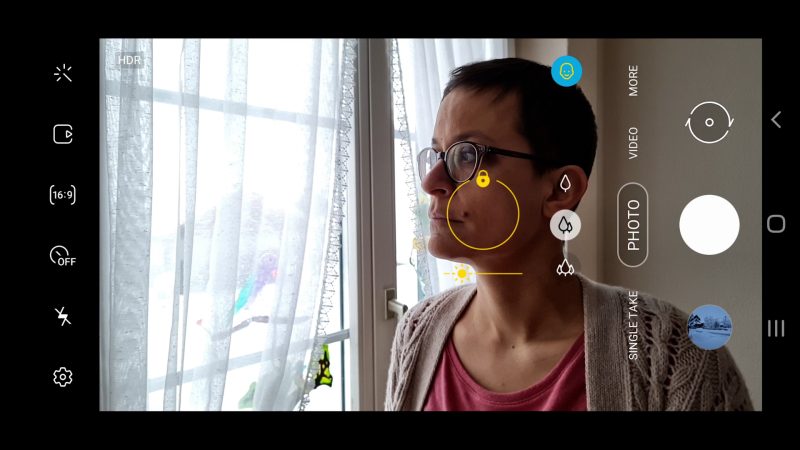
To lock exposure using an iPhone or a Samsung (and I’m guessing other Android phones too), tap on the screen and hold.
On the iPhone, the square reticle makes a kind of flashing motion. You also get a message at the top of the screen: AE/AF Lock. So that means Auto Exposure and Auto Focus are now locked.
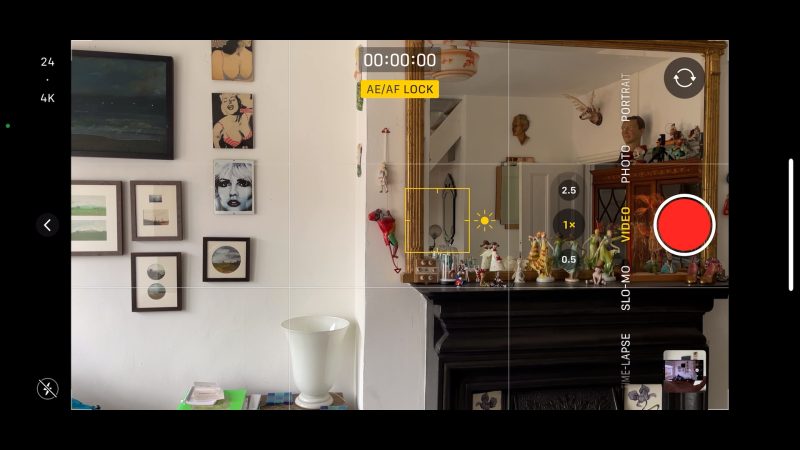
On a Samsung, it’s the same. Just tap and hold until the white circle turns yellow. You also get a padlock symbol.
In theory, when we move the camera the locked exposure and focus will not adjust during the shot. If we pan round to a window, the camera doesn’t adjust to expose the window correctly. This locked exposure shot looks less messy, but the downside is that the windows are now blown out.
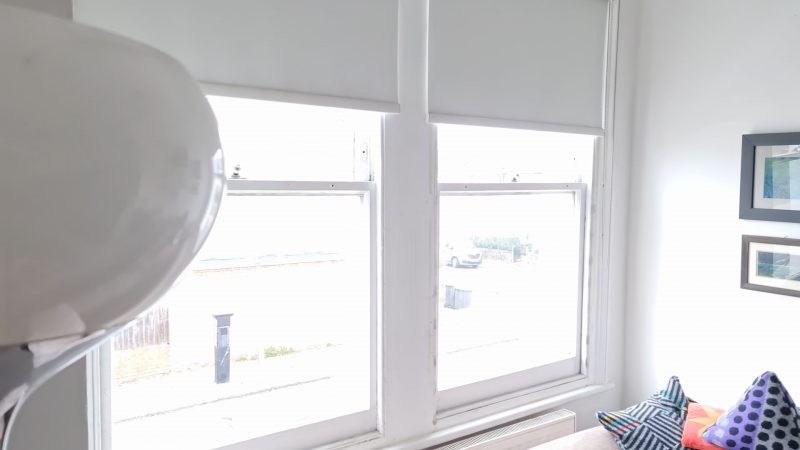
Having blown out windows is not the end of the world. You will see this in professionally-shot movies all the time.
Especially lower budget documentaries, where they don’t have the funds or the opportunity to worry about blown out windows. As well, when we watch live footage from a documentary, we usually expect some roughness in the cinematography.
However, we can improve this situation by adjusting what’s called the exposure compensation value, or EV.
Exposure Compensation
Tap the screen to bring up the exposure and focus reticle and you will see a sun icon. This is a slider which can be moved to adjust this thing called “exposure compensation”.
Exposure compensation is an adjustment to the auto exposure setting set by your camera. Normally, your smartphone camera will look at the frame and decide on an exposure level. But if you think the camera is overexposing the image, adjust it down. Vice versa for an underexposed image.
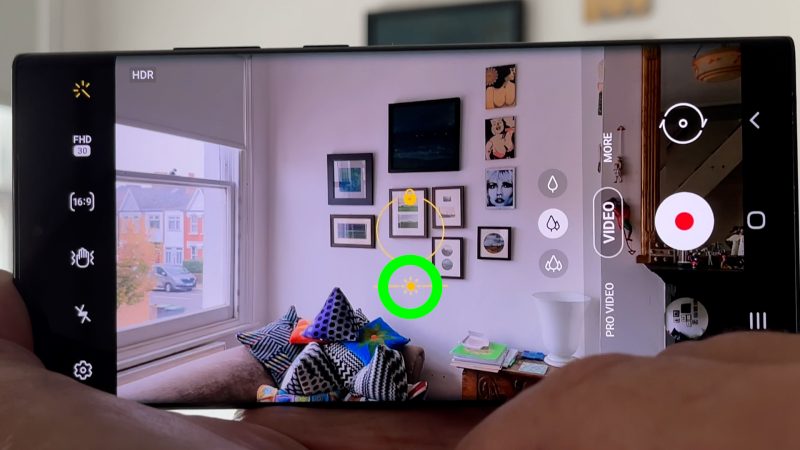
If we drag this sun symbol up and down (or sideways depending on your device), you will see the screen get lighter and darker. The camera is still setting exposure, but adjusting that exposure depending on where you move this slider.
Note that when you move the exposure compensation slider on the Samsung camera app and then tap record, exposure and focus lock. Whereas in the iPhone, it does not.
After locking exposure and then adjusting the exposure compensation down a little bit, when I pan to the window, it’s not so blown out.
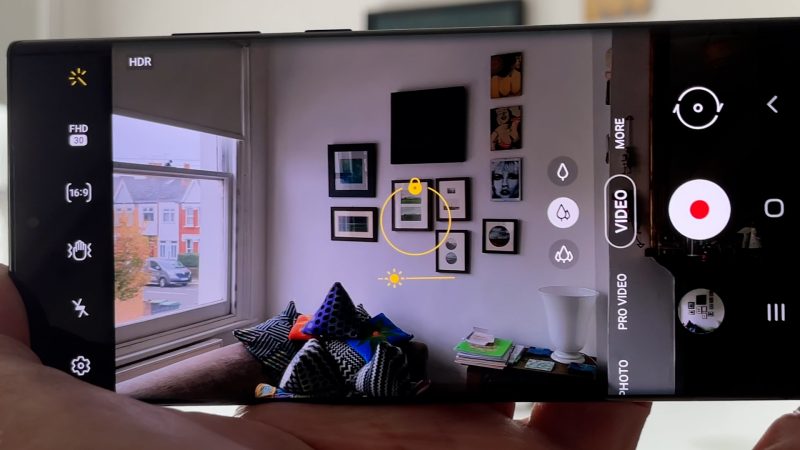
Neither version of this shot is wrong or right. This is a creative choice where we as videographers balance one element against another. We might decide we can sacrifice a bit of brightness inside to make the windows less blown out.
The next step in mastering your smartphone camera is to think about using manual control.
Manual Control
If you have an iPhone you can use a 3rd party app like FiLMiC Pro. If you have an Android like a Samsung, you can use Video Pro mode. But there’s also a downside to using manual controls. So let’s quickly go over the pros and cons.
In a smartphone, there are basically 2 settings that control exposure: shutter speed and ISO.
Shutter Speed
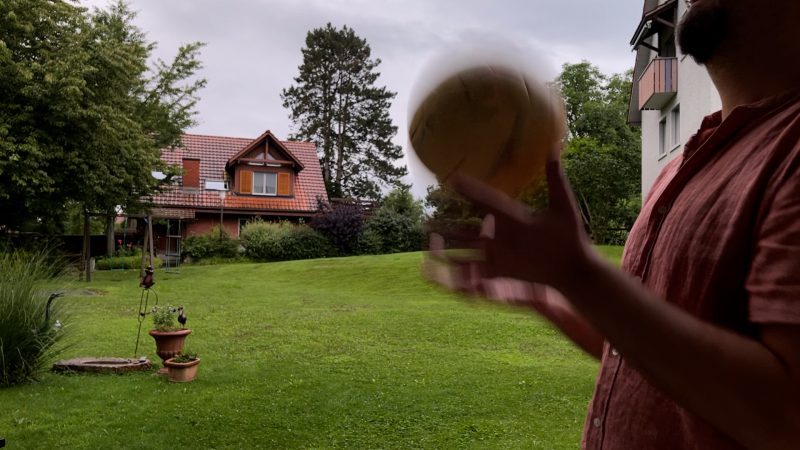
If our shutter speed is too high, the video becomes less smooth. That’s because fast shutter speed reduces the amount of motion blur in the frame. Motion blur helps to smooth out camera movement, or things moving in the frame.
Simply put:
- Fast shutter speed reduces exposure but results in less smooth video.
- Slow shutter speed increases exposure and adds motion blur.

ISO
If our ISO is too high, there is more digital noise in the image. You will notice this in the shadows or in night time shots. On the whole, digital noise is seen as something we don’t want which degrades the quality of our video.
Simply put:
- High ISO increases exposure but also increases digital noise.
- Low ISO decreases exposure but also decreases digital noise.
Balancing Pros & Cons
So you can see that once again, our job as smartphone videographers is to balance the pros and cons of each setting. How much motion blur do we require as minimum? How much digital noise is too much?
There’s no rule here, it’s simply down to our own judgement. And once more, it’s all down to the dynamic range of our camera sensor.
When there’s too much light, we worry about blown out areas of the image or a shutter speed that’s too fast and the video looks unnaturally sharp and juddering when we pan.
On the other hand, when there’s not enough light, our shutter speed is slow and our pan shots are nice and smooth, but now we worry about the digital noise created by having to push up the ISO.
OK, we’ve talked about framing and we’ve talked a lot about exposure. Let’s talk about another really important element when shooting smartphone video and that is focus.
My new book – Smartphone Videography Beginners to Advanced – is now available for my members on Patreon. It’s over 170 pages and helpy you go from complete novice to more advanced. It’s full of tips and knowledge to help you get the best looking video from your smartphone. Get it here.
Focus
Using our native camera app we can set focus and lock focus. Again, we will be using the yellow square or the white circle (depending on the device), which controls focus as well as exposure.
To set focus in our smartphone’s native camera, tap on the screen on the subject you want to be in focus. Your smartphone should work out how far away the subject is and adjust focus to that distance.
Just be aware, setting focus by tapping a screen this way is not 100% reliable. It might take a few taps to find the right spot. With a small screen, it’s also easy to believe your subject is in focus and then later you find you’ve focused on the background.
With the exposure and focus combined, what do we do if we want to set exposure differently to focus? I might tap on my subject to get the focus, but then find the background is overexposed.
In that case, lock exposure and focus on the subject and then use the exposure compensation slider to adjust the exposure down. Now the background is exposed better and the subject is still in focus.

So that’s how to set and lock focus. But can we also use autofocus when we’re getting a shot?
Autofocus
If we shoot using unlocked autofocus, it means the focus will constantly adjust and readjust during a shot. But is that a bad thing?
In some cases, yes. And actually a lot depends on your device and how nicely it changes focus.
Expensive flagship devices like my Samsung Note 20, the latest iPhones like this iPhone 12 Pro Max, the Samsung S21 Ultra – they all change focus pretty smoothly.
On the other hand, lower budget devices like this Xiaomi 11T struggle to find focus and when they do they don’t adjust focus smoothly.
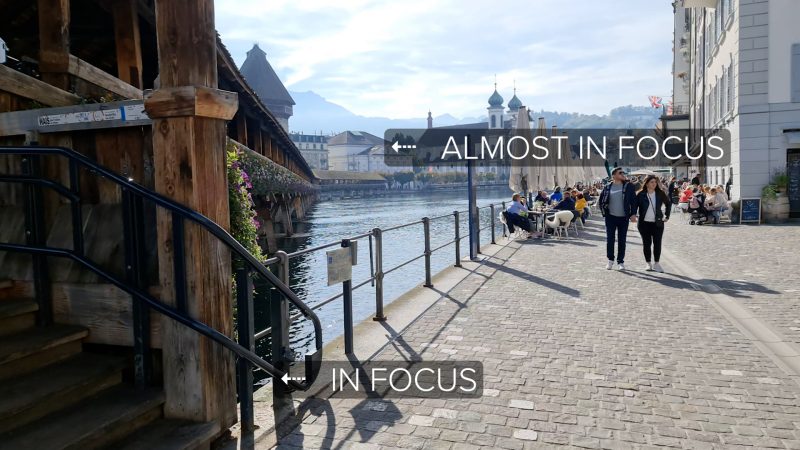
Professionals move focus during a shot all the time in movies and TV shows. It’s known as a rack focus or a focus pull. The difference is there’s usually a crew member employed with the specific skill of focus pulling, making sure it’s done professionally.
That said, I’ve found these automatic focus pulls are usable. I recommend playing around with this to see if it’s usable for your projects. Start filming, then move the camera a little and let the autofocus move from foreground object to background or vice versa.
Another use for autofocus is when we’re filming ourselves solo.
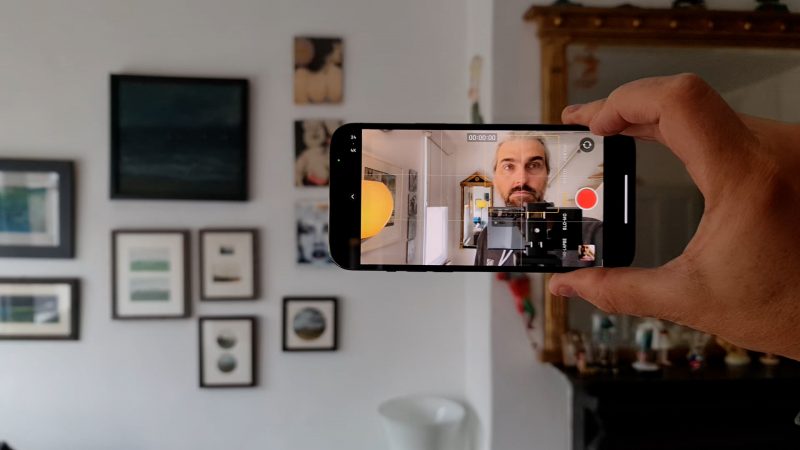
Solo Filming Autofocus
When I’m filming myself talking to the camera, I use my Samsung Note 20 Ultra in Pro Video mode, but with everything in auto. I’ve found that the Note 20 has excellent face-detection autofocus. As soon as it recognises a face, it locks on and sets focus.
The only issue I have is if there are faces in the background and it focuses on them instead.
With this setup it means I can use the main camera, start recording and then run around into position. I don’t have to worry about getting focus right, the autofocus will do the job. It also means I can move around in frame and the camera will keep me in focus.
And because the camera is static, I don’t have to worry about changes in exposure too much.
Another way to control focus in your smartphone is to set it manually.
Manual Focus
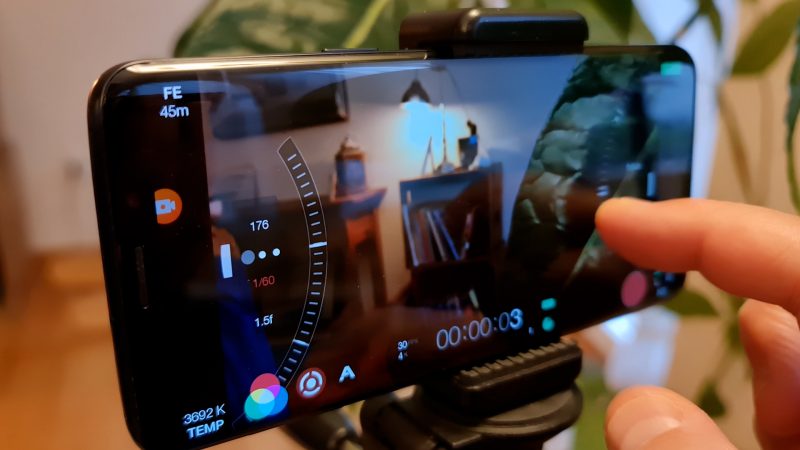
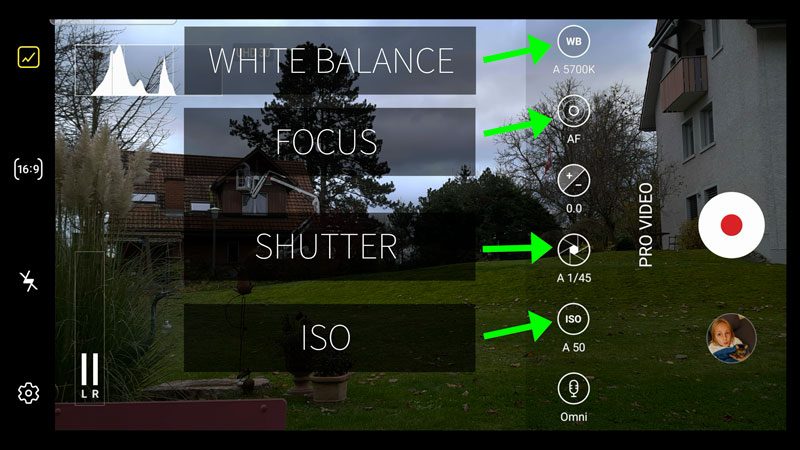
If you have an Android with some kind of Pro Video mode, you’ll be able to set focus manually there. If you have an iPhone, you’ll need a 3rd party app like FiLMiC Pro.
For example, in FiLMiC Pro, swipe up and down on a control slider to set focus. In Samsung’s Video Pro mode, again swipe up and down to set focus.
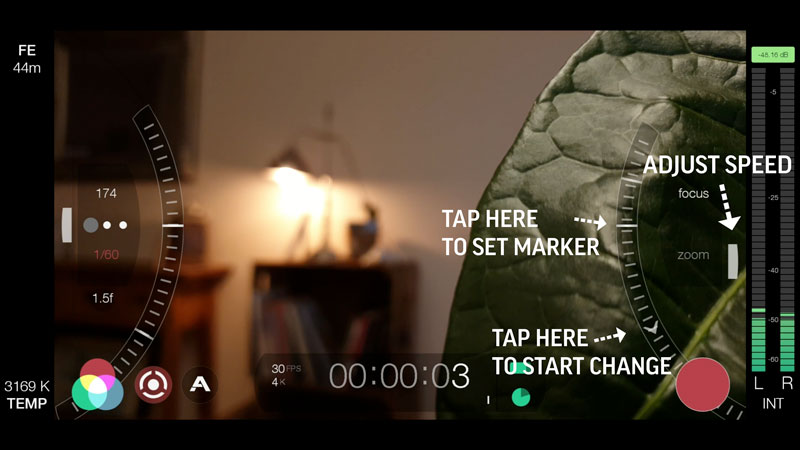
FiLMiC Pro (and other apps) have extra focus features, for example FiLMiC Pro allows you to automate a focus pull. You can also switch on focus peaking, which helps you set focus correctly.
In Samsung’s Pro Video mode, focus peaking appears as soon as you start setting focus manually.
Using manual focus is great if your subject is not moving during the shot. But if you want the focal distance to change, then you will need to perform a focus pull manually or use autofocus. Again, it’s about weighing up the pros and cons of each method and deciding what’s going to work best in each situation.
But whether we use manual or autofocus, it’s good to know and understand some basic shot types.
Shot Types
Filmmaking uses all kinds of shots and angles as ingredients to be mixed together when editing. These types of shots sometimes need different equipment to achieve. A wide angle lens for a wide shot, or a smartphone gimbal for a tracking shot, for example.
There are 3 core shot types around which all shots are based or rooted. And they are wide angle, medium and close up.
Wide Angle
A wide angle shot is pretty self-explanatory: it gives you a wide view of the scene. It makes sense that we would often use a wide angle lens for a wide angle shot, but it’s not always the case.
Using a wide angle lens simply means you don’t have to be as distant from the scene to get a wide view, which makes it easier to get the shot. You can use a telephoto to shoot a wide angle, but you would have to stand further away to get the shot.
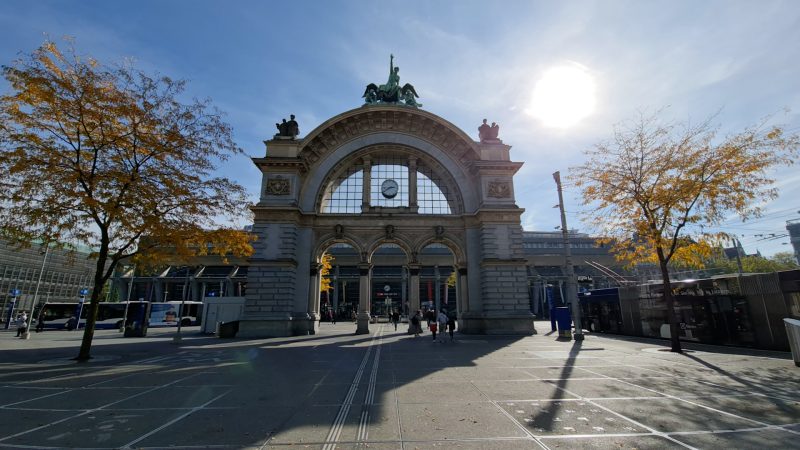
Wide angles are used for all kinds of reasons. One common use of the wide angle shot is as an establishing shot. An establishing shot sets the scene to give your audience an idea of where the scene is taking place.
Medium
A medium shot brings us closer to the subject, but still wide enough to show other elements in the scene. It allows us to feel closer to the subject but without the intensity of a close up.
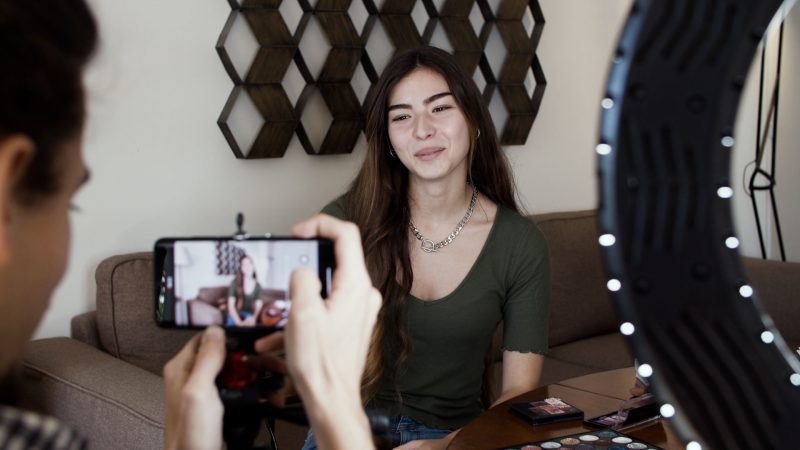
Vloggers often use a medium or medium-close up and avoid a true close up, because it’s too intense for a vlog. A vlog is usually quite informal and too much intimacy would be off-putting.
The same goes for hosts presenting a TV show. The director of the show will usually keep the camera no closer than a medium close up, unless something emotional is happening. If a guest is in tears, for example, a TV director will often tell his camera crew to zoom in.
Remember, humans are used to being a certain distance from each other and your camera is now your audience’s eyes. When we meet new people, we keep a respectful distance. We need to be close enough to communicate and read each other’s expressions, but not too close that we invade their body space.
Close Up
Like I say, a close up is generally reserved for more intense, intimate framing. Well, if we are filming a human subject, that is. Otherwise, a close up is useful for showing important information that might be missed with a wider shot.
I use close ups for tech reviews because I want to show the piece of kit in more detail. In a fiction movie, I would use a close up to show an action of a character that’s important to the plot. Maybe a character secretly glances at his phone while he’s focusing on something else.
Another reason to use a close up is to minimise distractions. Put simply, if you want to make sure the audience’s attention is focused on one thing only, shoot a close up.

Shooting close ups with smartphones can be a bit more difficult than with other cameras. That’s because pretty much all smartphones’ main cameras use a wide angle lens. To shoot a close up with a wide angle lens, you have to get really close, which can be a bit off-putting for the subject.
If your smartphone has a telephoto lens, and it’s not too dark, then you can use that.
But that brings us to another aspect of your smartphone camera – the lenses.
Lenses
Pretty much every smartphone currently on the market comes with at least 2 cameras. A rear-facing camera and a front-facing camera.
The big advantage of the front facing camera is that you can see yourself. So it’s easier to get the lighting, framing and focus right. The disadvantage is that this camera usually produces video quite a bit lower in quality than the main rear camera.
More recently, there are phones which have high quality selfie cameras. Such as the Samsung S21 Ultra, which has a 40MP selfie camera.
Apart from the selfie camera, these days there’s usually 1 or 2 extra rear facing cameras. Most expensive, flagship devices come with a telephoto and an ultrawide option. Even lower budget phones now come with at least 1 extra rear camera, which is usually an ultra wide camera.
The cameras we can expect to find in smartphones are: wide angle, ultra wide angle, telephoto and macro. When should we use each one?
Wide angle
On smartphones the main camera is nearly always a wide angle lens. With a regular camera, a commonly used stock lens usually has a narrower field of view. So that’s one major characteristic that makes smartphones different from a DSLR or mirrorless camera.
A wide angle lens is useful for showing a lot of the view in front of the camera. But is also useful for vlogging as you don’t have to stand so far from the camera. With a telephoto lens, you need to be quite a distance from the camera to frame a nice medium close up shot.

A wide angle lens is better than a telephoto when it comes to handheld filming, because a tele lens will exaggerate your hand shake more.
In smartphones, this lens is usually combined with the best quality camera, best in low light and shallower depth of field, so that’s another reason to use it.
Ultra Wide
An ultra wide lens is even better for getting more of the view in frame. An ultra wide angle lens usually creates distinctive distortions to the image. Any straight lines will come out curved.
Some smartphones allow you to switch on a feature to correct this, if you would prefer not to use it.
An ultra wide is also even better for masking bumps and hand shakes.
On the down side, the ultra wide camera of our smartphones usually doesn’t have as good a performance in low light situations and you might find you get lots of extra digital noise.
Telephoto
A telephoto lens not only gets you closer to the subject but it also narrows the field of view. Telephoto and wide lenses actually have different characteristics, so it’s not like zooming on a photo, for example.
If we frame a subject identically with a wide angle and a telephoto the image will still look different. What you will notice is that the background is narrower. It also changes the shape of a subject’s face.

But a telephoto is great for getting a close up shot without having to get nearer the subject. The downside is that, like with the ultra wide camera, telephoto cameras in smartphones perform more poorly in low light conditions.
Macro
Macro lenses are used solely for getting extremely close, microscopic close ups. Mostly demonstrated by filming insects crawling on flower petals. I would say they’re used more in photography than video work, but if you need to show some tiny details use a macro.

Macro lenses only have a very short focal length, so anything beyond a few centimeters will be out of focus.
Some smartphones have a separate button to switch to the macro lens while others switch automatically once you are close enough.
How to Choose Frame Rate
In the past, we only had one option when it came to video frame rate on our smartphones and that was 30 frames per second of video. Or 30fps.
Why 30fps? Probably because this is the standard frame rate for TV in America.
These days, smartphones usually give us more than one frame rate option. For example, my iPhone 12 Pro Max offers me 24fps, 30fps and 60fps. In camera settings, I can also toggle on PAL (which is a European TV frame rate standard) frame rates (which actually just adds a 25fps option).
When we consider frame rate, there’s 2 things to consider. The frame rate we record at and the frame rate we play back at. If we get this wrong, we can end up with jerky, juddering video when editing, and in the final video too.
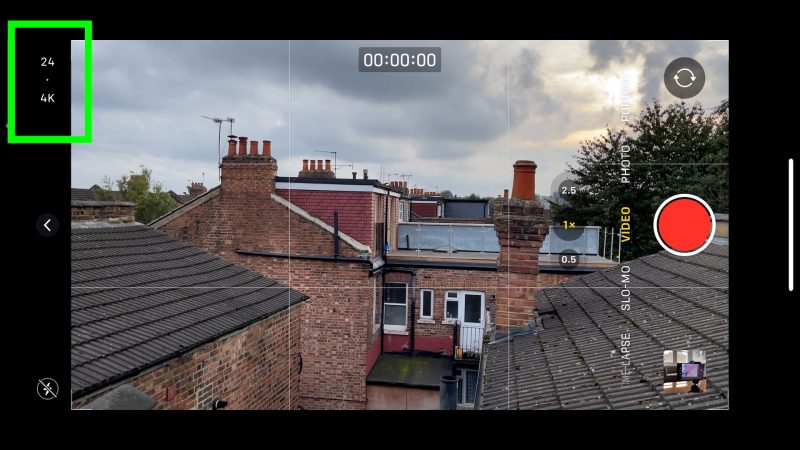
24fps
Established about 100 years ago, 24fps is the standard for movies shown in theatres. This frame rate came from a compromise between a smooth-looking motion and the practicality of moving 35mm film stock through a camera or projector without it breaking. Not to mention the cost of buying, processing and delivering rolls of film.
Therefore, when we shoot at 24fps our video will look a bit more like film. Especially if we also manage to keep the shutter speed to something similar to the speed film cameras use.
30fps
As I mentioned before, 30fps is the standard TV frame rate in America (and other countries). Shooting and playing back video at 30fps looks a little more digital than 24fps. When we view video at a higher playback frame rate it looks smoother.
You can also use 30fps to create a subtle slow motion effect if you record at 30fps and play it back at 24fps, for example. Simply place it on your editing timeline and reduce the speed to 80%.
60fps
If you record and play back video at 60fps it looks twice as smooth as 30fps video. To my eyes, video produced this way is reminiscent of a video game.
Lovers of the old fashioned film look don’t like this digital smoothness at all. Whereas others who see 24fps as something stuck in the past prefer the extra smoothness and clarity. That said, the 60fps playback lovers are still very much in the minority.
One big reason for not playing back video at 60fps is that it also creates files twice the size as 30fps video. So, in a sense, we’re making that same compromise filmmakers made 100 years ago.
In fact, 60fps is used mostly for creating a slow motion effect. Playback at 30fps (50%) or 24fps (40%) for that true cinematic slow mo look.
Smartphones can shoot higher frame rates, like 120fps or 240fps. Some can “shoot” absurdly high frame rates, although they use digital processes to achieve this.
Smartphone Videography – Beginner to Advanced
My new book, Smartphone Videography – Beginner to Advanced, starts at the very beginning. So if you are completely new to shooting video (on a smartphone or with other cameras), this book will help you make that step to shooting professional looking video.
I cover exposure, framing, how to get the best quality, HDR, shooting in Log, colour grading, stabilisation, video compression, getting the film look, lighting, audio and more.
The book is now available exclusively for my members on Patreon. It costs $5 to join (cancel whenever you want). Members also get access to 5 smartphone-shot episodes of Silent Eye, 5 making of podcasts for each episode, 5 screenplays, planning documents and all kinds of other smartphone filmmaking material.
See you there!