Insta360 One X2 – Full Guide
This is the article where you learn everything you need to know about your Insta360 ONE X2 action camera.
NEW: my Review & Tutorial for the Insta360 X3
The Insta360 One X2 records 360° images. If you’ve ever watched a 360° video on YouTube with your smartphone, you will know exactly what I mean. While you’re watching, you can move your phone around to look in different directions.
But the Insta360 One X2 has a whole load more tricks up its sleeve.
The Insta360 One X2 can be used to create a wide range of shots that are either difficult or impossible to achieve with a regular camera. However, you might find the device a bit daunting when you’re just starting out. Or maybe you’ve had this camera for a while and haven’t yet got fully to grips with it.
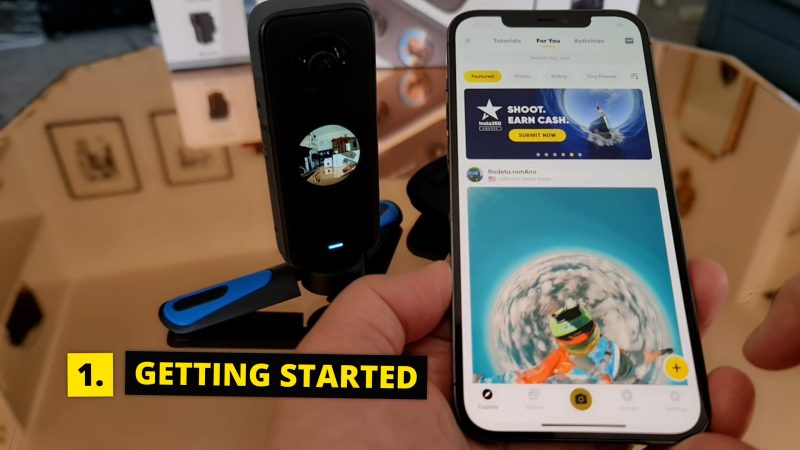
Either way, this article is for you. I’m going to start with getting set up and the basics of shooting video, before I move onto more advanced techniques.
I’ve also got a variety of extras commonly used with this camera, so I’ll be looking at how to use those as well.
Insta360 App
The Insta360 app is pretty essential for using the camera. There’s various settings controls, including ISO and shutter speed, as well as editing software. So you will want to install that if you haven’t already.
Be Careful of Lenses
If you’ve just bought this camera, one of the first things you need to do is remove the protective coverings from the lenses.
Now be aware that these lenses can get scratched quite easily. As you can see, they have this dome covering the actual camera lens which sticks out and if you just drop the camera down on the table, eventually this dome is going to get covered in scratches.
For that reason, it’s a good idea to rest the camera on a soft surface. There’s a soft case which comes in the box, so you can use that. You might also want to consider getting this lens cap accessory.
Insert memory card
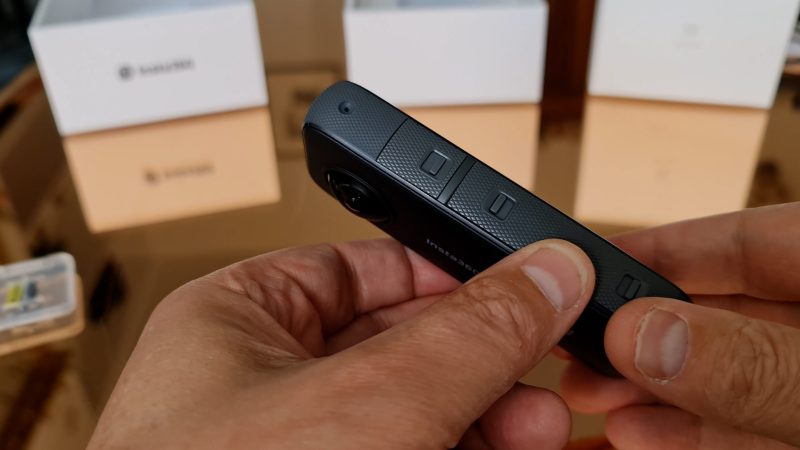
On one side you have 3 catches which slide open.
The top one opens the USB C charging port, so you will probably want to get the camera charged fully before you start using it the first time. The other two open up the battery compartment.
Before we can start using the camera, we will need to install a memory card. I have an Insta360 branded micro SD card. Now, if you haven’t yet bought a micro SD card, it’s worth considering the speed of the card. A cheaper card may be too slow and result in problems in terms of video quality.
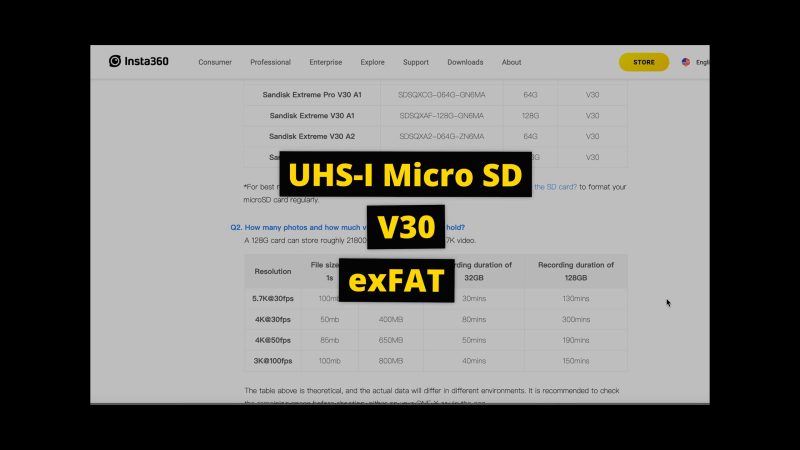
Insta360 recommends that you use UHS-I Micro SD cards with a V30 or above speed class and exFAT format. So I don’t advise cutting costs on the memory card. By the way, you can install a card with storage space of up to 1TB.
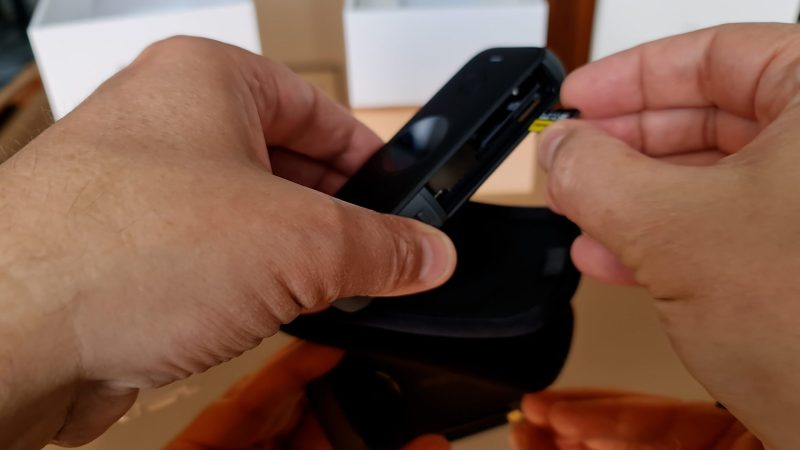
To install a memory card, take the battery out and slip it into the micro SD slot. There’s a little graphic of a micro SD card inside which shows you which way around it goes.
Some people recommend that you format your SD card when you first install it.
How to Format SD Card
- Swipe down on the screen
- Swipe left, tap the cog
- Scroll down the menu to SD card and tap
- Now tap format
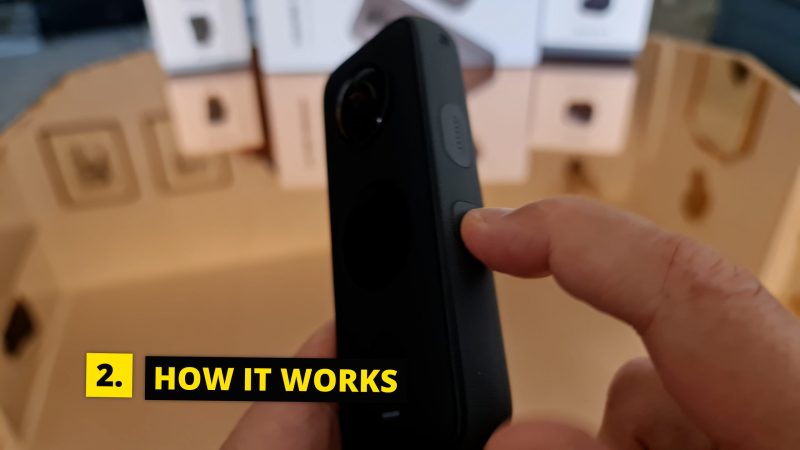
How it Works
To power on the camera, short-press the button on the side once.
After a few seconds, the mini touchscreen shows the camera’s view. Except it doesn’t show the whole view because, in fact, the Insta360 One X2 is looking at everything all at once.
To power off, long-press the side button.
 Understanding the 360° View
 Understanding the 360° View
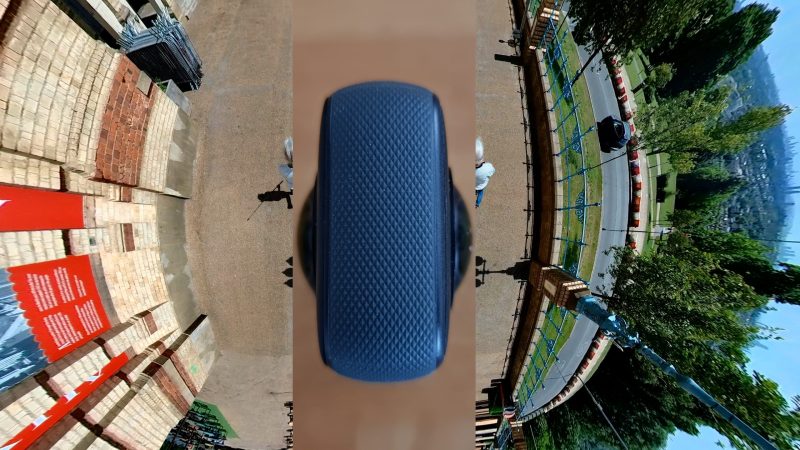
The Insta360 One X2 isn’t really a camera – it’s actually 2 cameras. Insta360 calls these cameras the “inner” and “outer” cameras. The inner camera is on the same side as the mini touch screen, while the outer camera is on the opposite side.
Each camera has a 180° field of view which, when combined by being stitched together, gives us the whole 360° view.
Invisible Selfie Stick
While we can use this device holding it in our hands like we would an ordinary camera, to utilise the full power of the 360° video, we usually place it on a rod or selfie stick. I have two made by Insta360: the Power Selfie Stick and the Extended Edition Selfie Stick (new version).
When the images from the two cameras are stitched together the selfie stick becomes invisible.
Insta360 One X2 Operation
We can capture photos and videos using the device as a standalone camera or we can use a smartphone with the Insta360 app as a remote. Using the app we get a bigger preview, we can edit videos, and as well we can access settings, tutorials and more.
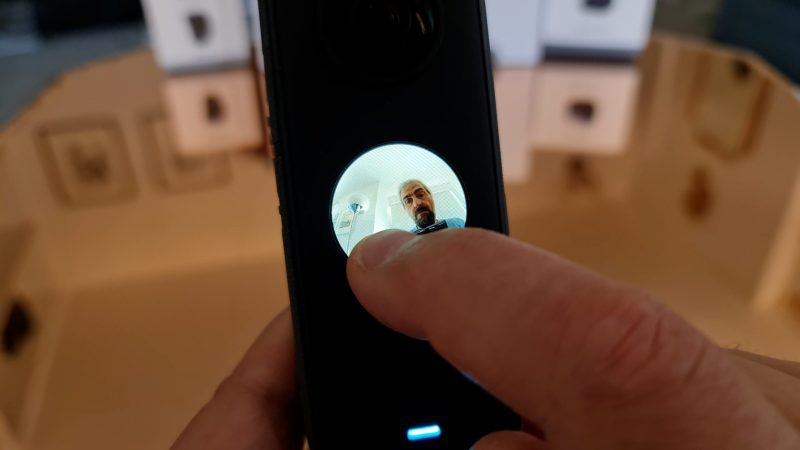
What we see in the mini screen is just a small part of the camera’s 360° view. We can swipe on the screen to move that view, left or right or up or down.
If we are recording 360° video, changing this view won’t make any difference to the final video. Remember, the One X2 will capture everything around it and then later we can choose the view.
Reframing & Keyframes
 Reframing & Keyframes
We’re able to change the view during the shot using keyframes, which is one of the great features of this device.
Using keyframes, we’re able to give the impression that we have our own personal camera operator following us around, capturing dynamic movements. And of course the Insta360 One X2 also specialises in the well-known Tiny World effect.
Record & Playback
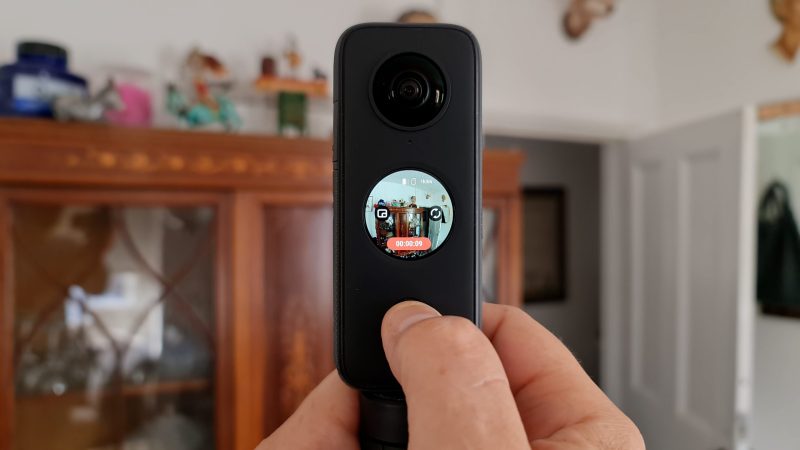
To record a video just press the shutter/record button on the front. The record timer starts counting. To stop recording, press the record button again.
The Insta360 One X2 can also be used when it’s powered off: Press the record button, the One X2 powers on and either takes a photo or records video, depending on the mode it was set to when you last powered off.
Then, after taking a photo or after you stop recording, the Insta360 One X2 powers off again, by itself.
The video or photo we just captured is now saved on that micro SD card we installed earlier.
Viewing Media
To playback a video (or view photos), just swipe right from the left of the screen to open up the gallery.
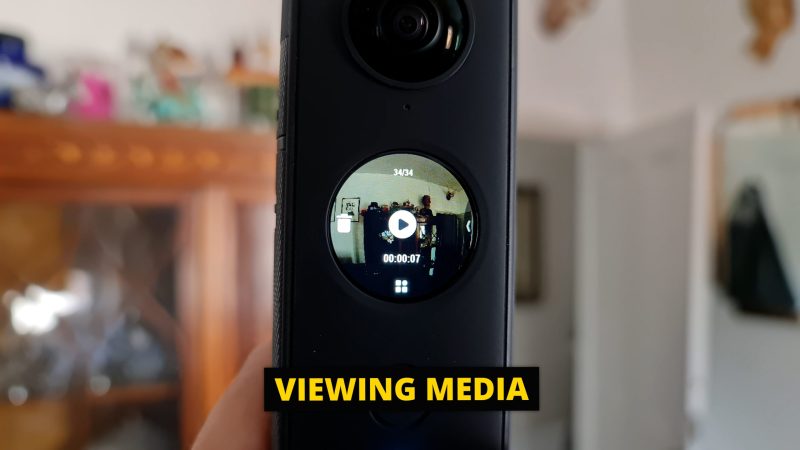
Tap the button in the middle of the screen to play the video. And if we want to see a different view, we can swipe around on the screen while it’s playing.
If we want to use this video, we need to transfer it from the One X2 to some other device: a smartphone, a tablet like an iPad, a laptop or a desktop computer. Then we need to use either the Insta360 app, the Insta360 Studio software for desktop or simply connect the device directly to your computer with a cable.
Insta360 App
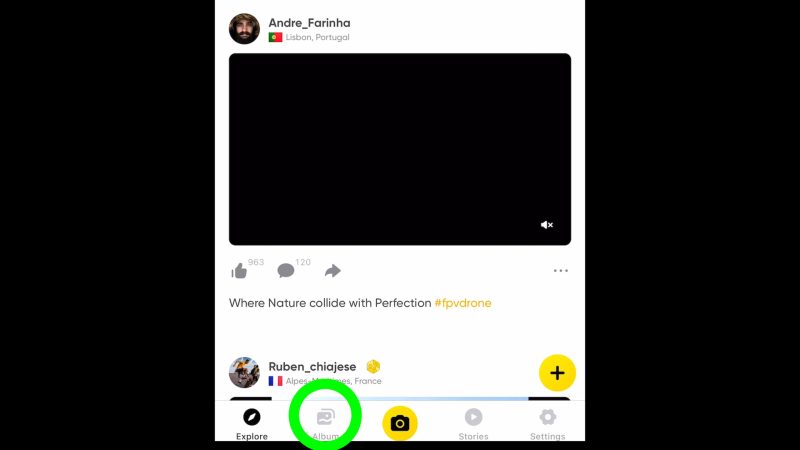
Open the app and connect to the One X2 via bluetooth. Make sure both wifi and bluetooth are enabled. If this is the first time connecting the app it will ask you to activate the camera first.
Once connected, tap the album button. The app will now access the video files from the camera or from the phone if you have downloaded them. If you play a video, you’re actually streaming it via bluetooth from the X2’s memory.
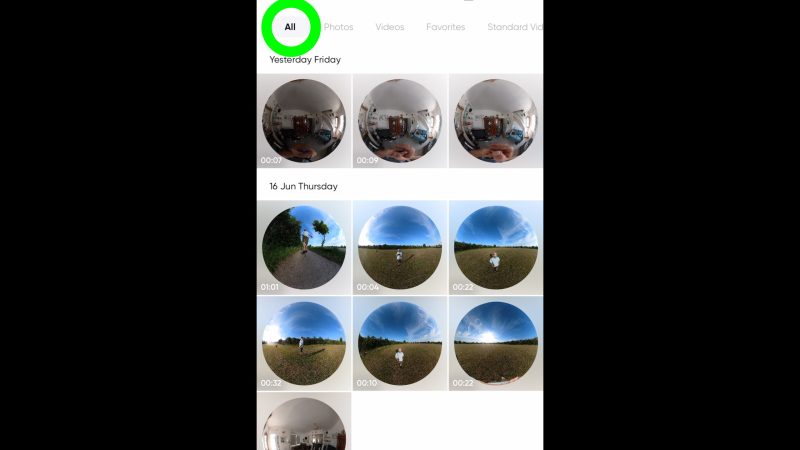
You can see where the video files are by using this dropdown menu in the top left corner. “All” shows you videos on your phone and on the camera. Select “local” to see videos stored on your phone or “camera” for videos there.
Using the app, you can move files from the One X2 to your phone, as well as for editing clips. When editing clips, you can either edit them while they’re still on the camera or on your phone. But it’s probably best to move them to your phone for a better editing experience.
Insta360 Studio
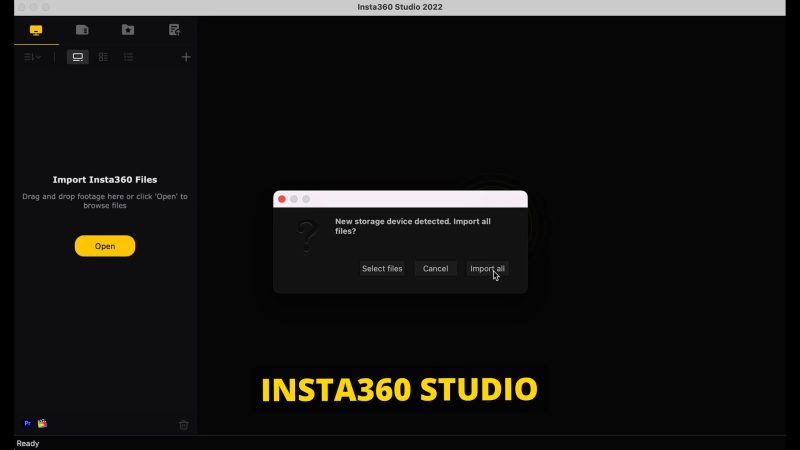
The Insta360 Studio software is free to download for Mac or PC. To access your videos, connect the camera to your computer using the USB C port. Open the program and it should automatically detect a connected Insta360 One X2.
You can choose to select certain files or simply import everything on the device.
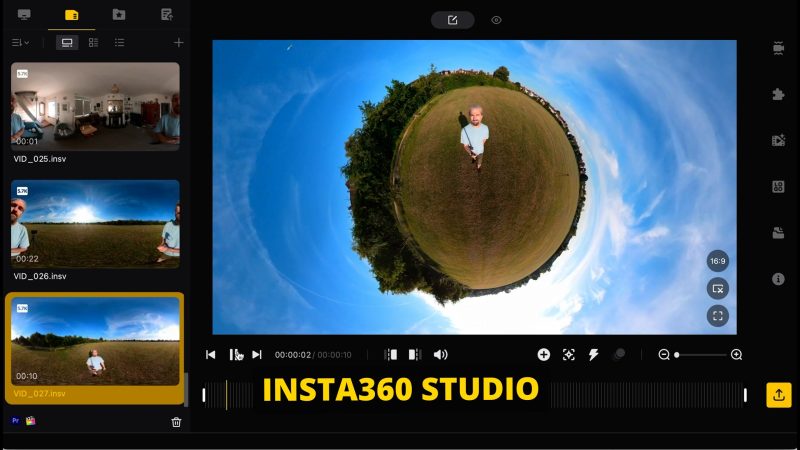
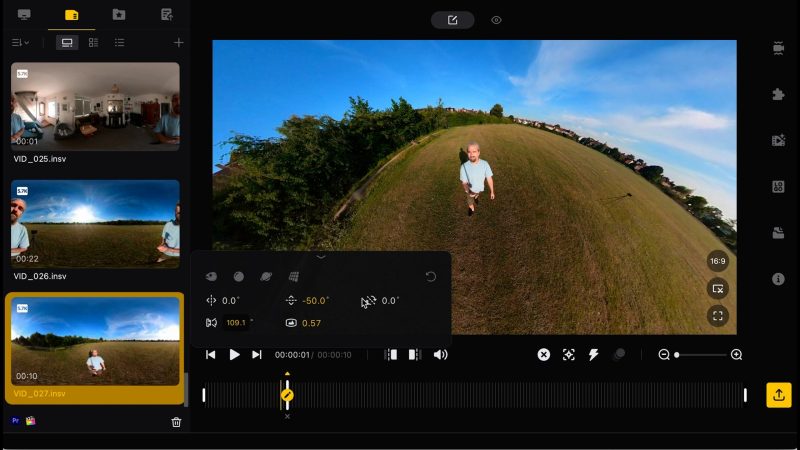
This software allows you to easily reframe and zoom in and out of these 360° videos. And you can program in these movements very easily by adding keyframes.
Again, you can edit files on your computer or while they’re still on the Insta360 One X2.
One major difference between editing on this and the Insta360 app is that the Studio software can export in higher quality. You can even export in ProRes. If you’ve watched Insta360 One X2 videos on YouTube, you might have seen some poor quality images with fuzzy, pixelated shadows. But using the Studio software, you should be able to do better.
Recording 360° Video
If you are new to 360° cameras, you need to start thinking differently about how video is captured. Normally when we’re shooting video, we think a lot about where we’re going to aim our camera. But when we’re shooting 360° video, we can pretty much forget about aiming and framing completely.
The only frame we need to think about is changing our frame of mind, because a 360° video has no frame.
Instead, we need to think about where the camera is located. You can think of your 360° camera almost like a drone. Or think of it as if it’s another you. Imagine if you could clone yourself and get your other self to hold the camera.
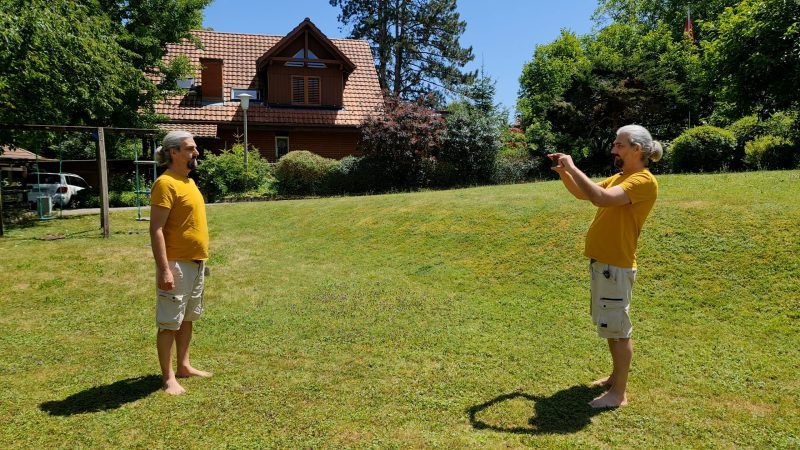
Most of the time we’re going to mount the Insta360 One X2 to a selfie stick. Then we’re going to extend the stick and use it to position this other us.
Let’s say I want my other me to stand a few meters away and start filming. Later, once I download this video onto my phone, I’m now the camera operator, standing where I placed the camera earlier. And only now do I start to think about framing.

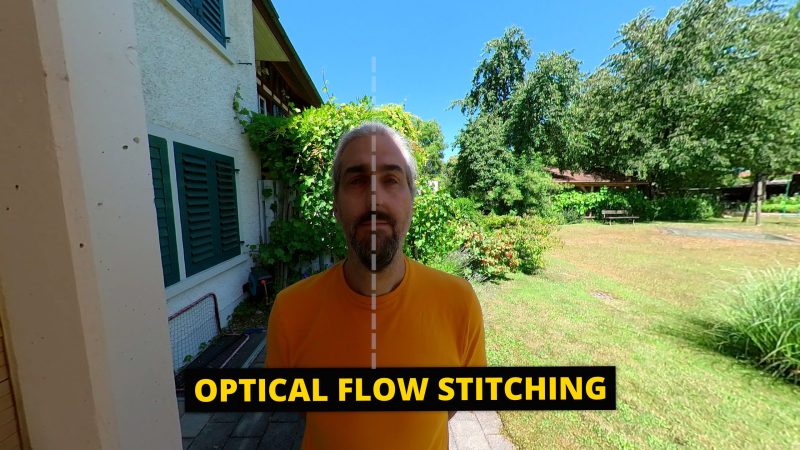
That said, the closer a subject is to the camera, the more obvious the stitch line becomes. If you want to avoid the stitch line appearing across someone’s face, for example, make sure one of the cameras is pointing at them.
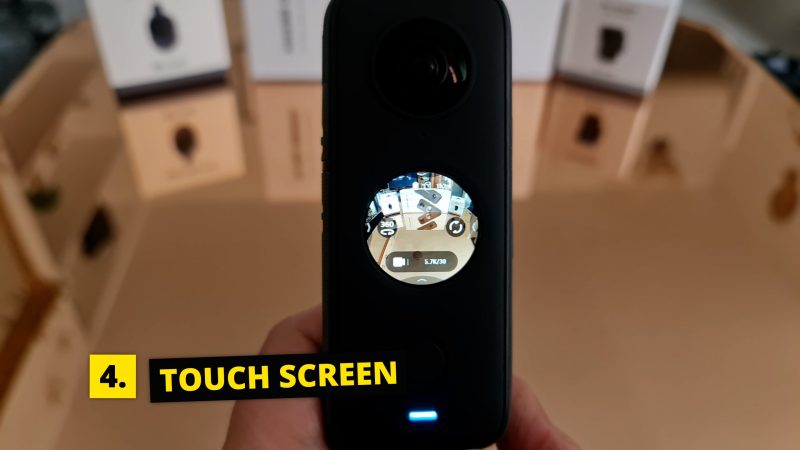
Insta360 One X2 Touch Screen
When you power on the One X2, you will see various icons and information dotted around. After a few seconds, it disappears leaving you with a clear screen. To get that information back, just tap the screen.
The information you see here depends on the mode the camera is in. Right now, it’s in video mode.
Swiping from each side of the screen opens various settings menus, as well as the gallery.
One X2 Best Video Settings
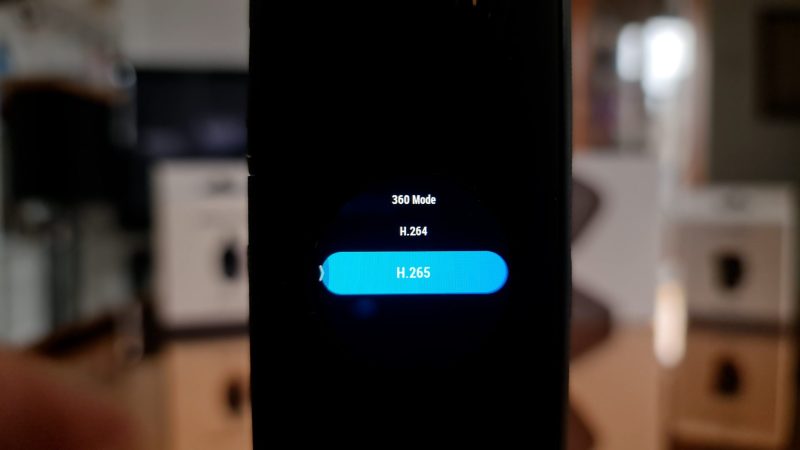
Swipe down on the screen, swipe left, tap the cog, scroll down the menu to Video Encoding and tap. Select 360 Mode and select h.265. Then do the same for Steady Cam Mode. The h.265 codec is more advanced and will create smaller files than the h.264 codec.
Back at the main screen, at the bottom, 5.7K is the resolution and frames per second is 30. You can’t go any higher than that and it’s really recommended to keep it at 5.7K for shooting regular video.
However, if we switch to 4K, this now opens up a 50fps option. And if we switch to 3K we now get a 100fps option. Shooting at higher frame rates allows us to slow the video down later to create a slow motion effect.

Main Settings
Tap the camera icon and then swipe up and down to switch between photo and video capture. Both video and photo modes have a sub menu with various different options. Things like burst mode and timelapse, bullet time and so on. But I will go into those settings later.
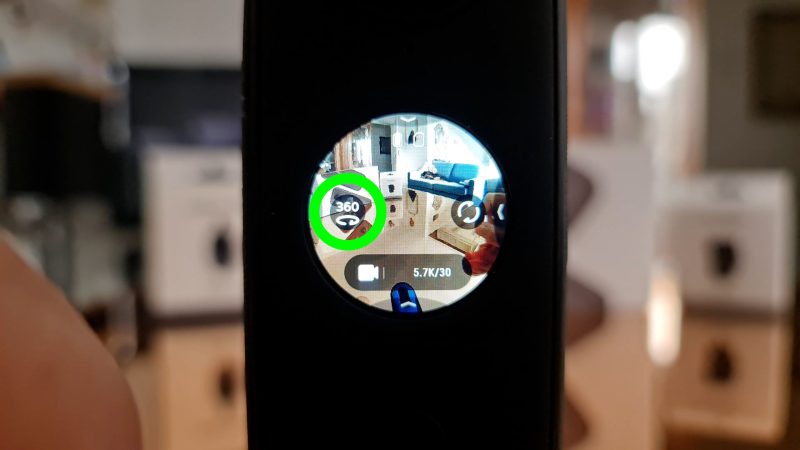
On the main screen, tapping where it says 360 will switch between using both cameras and using one camera. Insta360 calls these the lens modes.
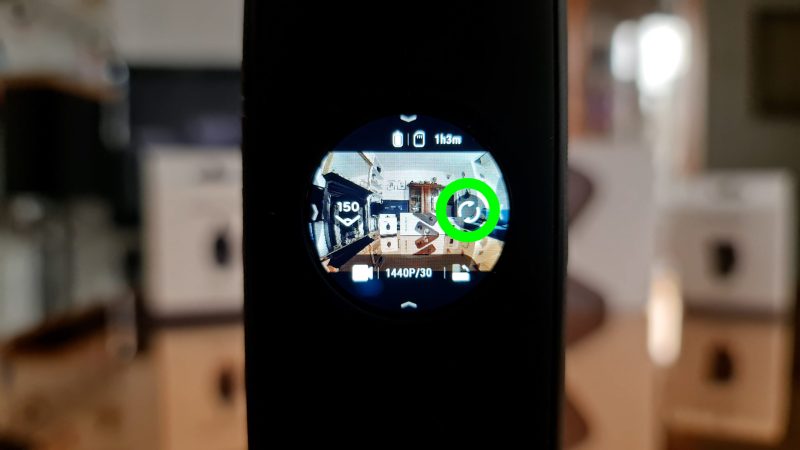
If it says 150 then it’s only capturing images from one camera. This is called Steady Cam Mode.
If it says 360 then it shoots using both cameras and this is called 360 Mode.
Tap the circular arrow button to switch between the inner and outer cameras. Remember, if you’re in 360 mode, it will always record from both cameras, regardless of which camera you select.
Like with video, a photo taken in 360 mode allows you to see the whole 360° view later, except this time it’s just one still frame. You can then grab several different regular frames from that 360 image.
360 Mode
Here’s another tip for filming in 360 mode. When we’re thinking about positioning the camera, of course we can just stick it in one place and start filming.
For example, we could mount it onto a tripod and it will film everything around it. Or we can mount it to a selfie stick and hold it above ourselves as we walk along. You’ve probably seen this position used for filming those tiny world videos.
But you can create even more impressive shots if you move the One X2 during the shot. Using a drone, we can fly a camera all over the place. And it’s a good idea to think of the One X2 like a drone, except instead of propellers lifting it into the air it has a pole.

So, as we’re walking along, we can fly the One X2 around. We can fly around ourselves, down to the ground, up into the air, over objects and so on.
Remember the selfie stick will be removed from the final video (although you can still see the shadow of the stick). Now, when we come to edit the video, we can add further framing movement on top of the positional movement. As well, there’s also powerful object tracking features, but that’s coming up later.
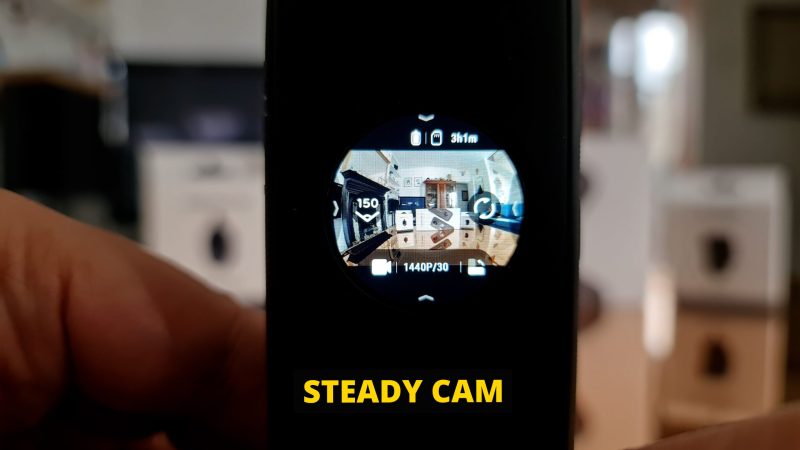
Steady Cam Mode
Steady Cam Mode turns the Insta360 One X2 into a more traditional action camera with a very wide angle lens. When you switch to this mode, you’ll notice that you now have a maximum resolution of 1440p. You now get black bars and a button here allows you to switch between horizontal or vertical framing.
As well, when you open resolution and frame rate settings you can now choose 50fps as well as 30fps.
At the top you can switch between Basic and Pro. I recommend using Pro mode for more editing options later, such as reframing and adding barrel rolls. As well, Pro mode enables FlowState stabilisation and horizon lock.
Become a Member on Patreon and download the Insta360 One X2 Cheat Sheet to speed up your workflow. Learn videography skills from a professional as well!
Other Video Modes
Whichever mode the Insta360 One X2 is set to, tap the camera icon to open up and then swipe to select other options.
HDR stands for High Dynamic Range. When I tried using HDR mode for 360 video, the camera started glitching but stopped when I switched to Steady Cam mode. In fact, Insta360 recommends not to use HDR for video. As well when set to HDR you are limited to 25 or 24fps.
The HDR process involves taking 3 images simultaneously at different exposures and then combining them. So, if you do shoot 360 video in HDR mode, it’s recommended to have the One X2 on a tripod in a fixed position. If the camera isn’t moving, it’s better able to cope with the HDR processing.
Timelapse shoots frames with longer intervals creating a speeded up video. To set the interval time between frames, swipe left and now scroll down to the bottom setting. Here you can set the time between frames from 0.5 seconds to 120 seconds.
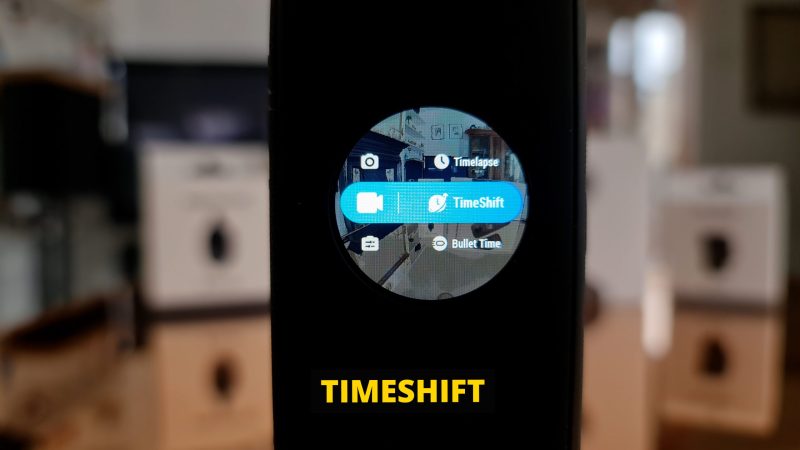
TimeShift creates a video where you can switch – or shift – between timelapse and regular speed video. This allows you to slow the video at key moments, which you can choose when editing the video.
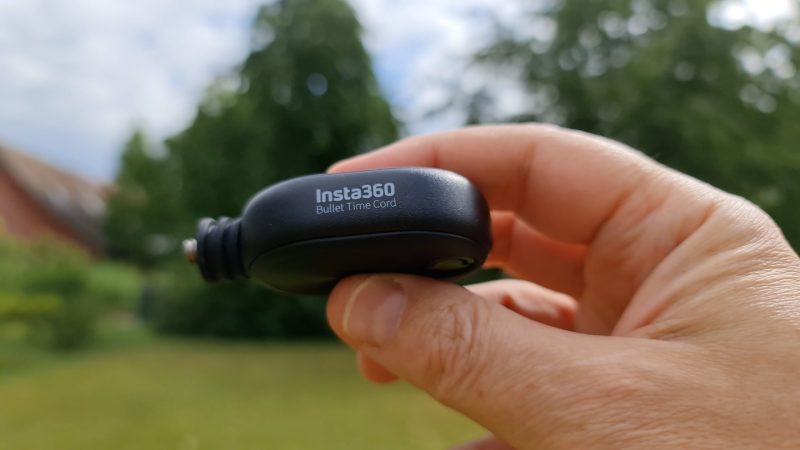
Bullet time basically shoots video at 3K and 100fps which is then slowed down to create a slow motion effect. There’s an accessory you can purchase from Insta360 called the Bullet Time Cord.
Attach the One X2 to a cord and swing it around while recording 100fps video. Something to play around with and get creative.
Advanced Video Settings
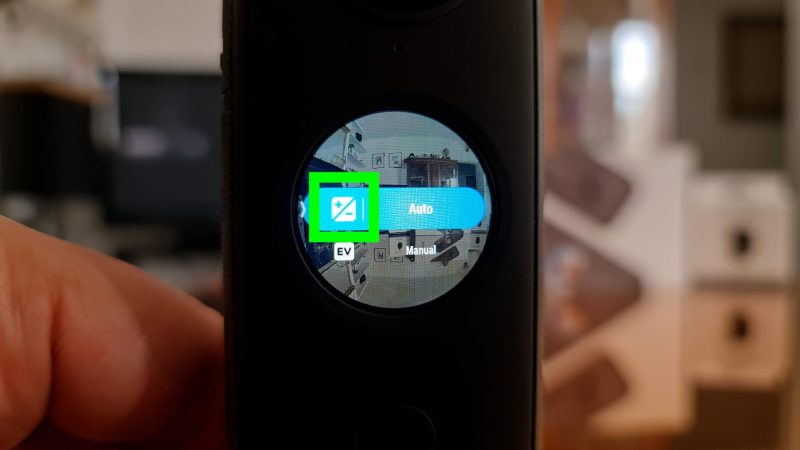
In standard video mode, if we swipe left we can access various settings.
At the top we have a box with a + and – sign which is for exposure controls. By default this is set to auto. But if we switch to manual, we get the shutter speed and ISO controls below.
If you set these manually, exposure won’t change during the shot. This can look more professional, but it does make it harder to shoot video. When you move the camera around, you might find some areas are too dark or too bright.
Manual Exposure
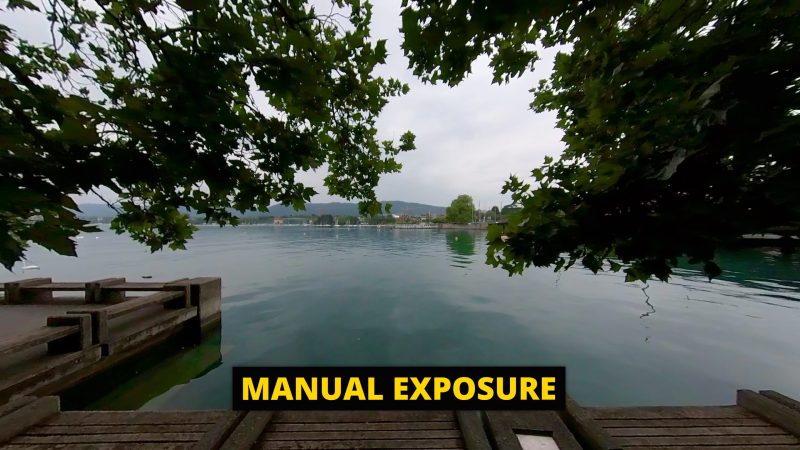
In this example, I wanted to capture a shot with the leaves of the tree in the foreground. But, using auto exposure, the lake in the background was overexposed.

Using manual exposure, I was able to correctly expose the background and the shot is much better.
To set manual exposure, set ISO as low as possible before setting shutter speed. If shutter speed is as slow as possible and it’s still underexposed, then increase ISO.
Exposure value
Below that is a button called EV which stands for Exposure Value. This leaves the exposure in auto but allows you to adjust up and down. So if you think the auto exposure is coming out too bright, you can set a negative value here.
White Balance
Next we can set white balance manually. For reference, 5000k is the equivalent of clear daylight. Again, if you set this manually, it won’t change during the shot which also looks more professional. On the downside, you need to make sure this is set correctly for every shot, which takes a bit more time.
Color Profile
Finally we have the colour profile setting. There’s standard, there’s log for more options when colour grading and there’s vivid, which gives the image a bit more vibrancy in terms of saturation and contrast, but you might find it’s too much.
Most of the time, I use the standard setting and this gives me some room to play around with colours when editing.
Isolated
Isolated Exposure is an exposure option for 360 mode.
This feature can automatically adjust the exposure of the two lenses separately when there are large light variations between the lenses
Shutter Priority
If you select shutter priority, you can set shutter speed manually and the camera will automatically set the ISO. You might use this if you want to make sure you have a slow shutter speed. You have to be careful using this mode because if your shutter speed is too slow your video or photo might end up overexposed.
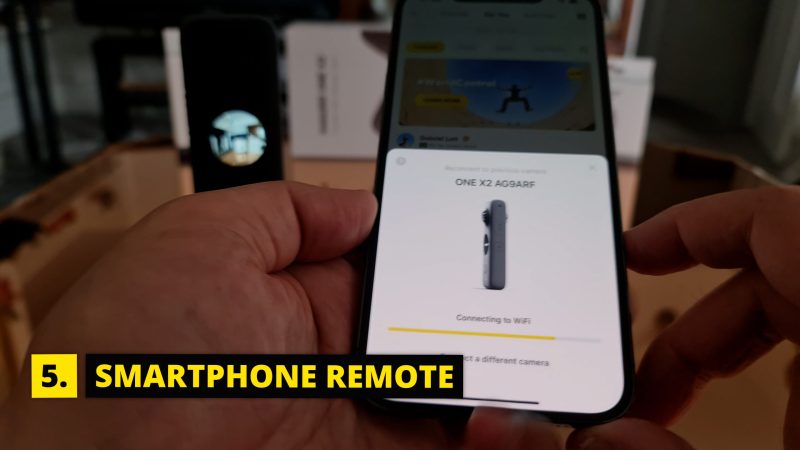
Using Insta360 App as Remote
You can connect the One X2 to your smartphone and use the Insta360 app as a remote.
To connect your smartphone to the app you need to enable wifi, bluetooth and location services.
Tap the camera icon in the middle. Now you can monitor the video coming from the camera, swipe around to see a different view, change settings and modes.
One mode that’s only possible using the app is the Fly Through effect.
Fly Through Shot
The the Fly Through button (looks like a paper plane) allows you to shoot 2 shots and then stitch them together. And this enables you to create a shot that looks like a drone flying through an object like a window or maybe under a chair.

Tap the paper plane, tap record and now move the camera through the object, tap the paper plane icon again to pause the recording, This will be the stitching point.
Now move to the other side, place the camera in roughly the same position where you paused, tap the paper plane to unpause it and continue moving.
Open the clip in the gallery and it will stitch the 2 shots together and play them to you. Then you need to export the final video, as normal.
Editing 360 Video
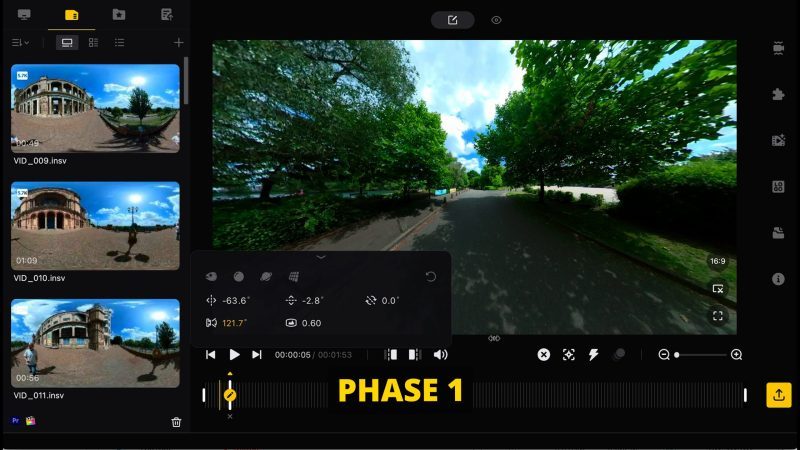
When editing video from a 360 camera (or even cameras like the Insta360 GO 2 which isn’t a 360 camera) there are 2 phases of editing.
Phase 1 is where we edit a single clip of video, reframing, zooming in and out, adding keyframes and so on. We then export that video from the Insta360 app or from Insta360 Studio.
Phase 2 is where we take the clip we just edited and add it to a number of other clips to create a sequence.
In this article, I’m mostly going to talk about phase 1, because phase 2 is really just regular editing. Once you have gone through phase 1, you will have a video clip that you can play and edit like any other video.
If we connect our Insta360 One X2 to a computer and open the folder containing all the media files we have captured, we can see that 360 videos do not appear as regular files. These files can only be read by the app or the studio software.
Insta360 App
Let’s look at how to reframe and edit 360 videos using the Insta360 App. First, how to download media from the camera onto your phone.
Download Media
There’s 2 ways to download media from the camera to our phone.
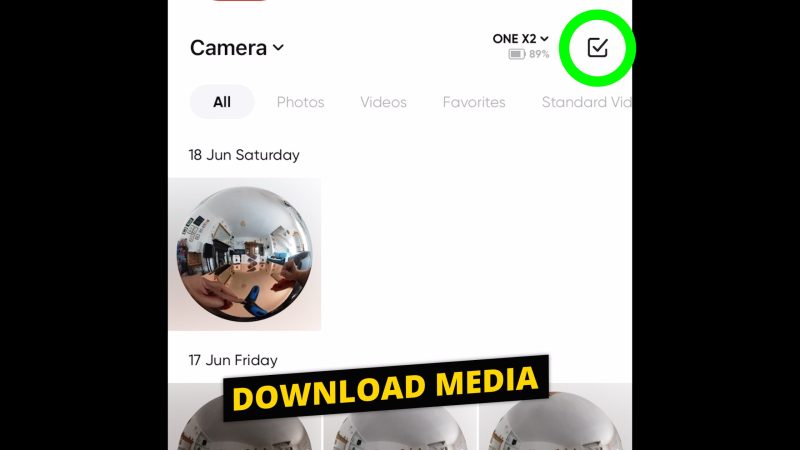
The first way is to tap the select button in the top right corner. Then select all the media you want to download. And now tap the download arrow at the bottom.
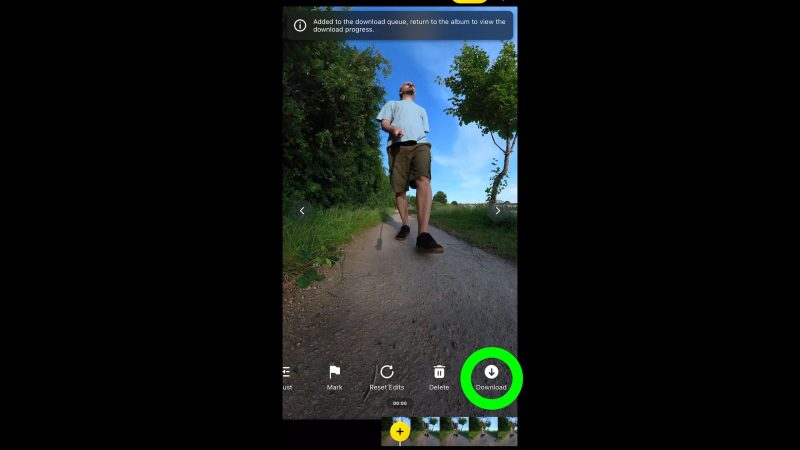
The second way is to open a video, swipe the menu at the bottom until you find the download button. Tap that to download.
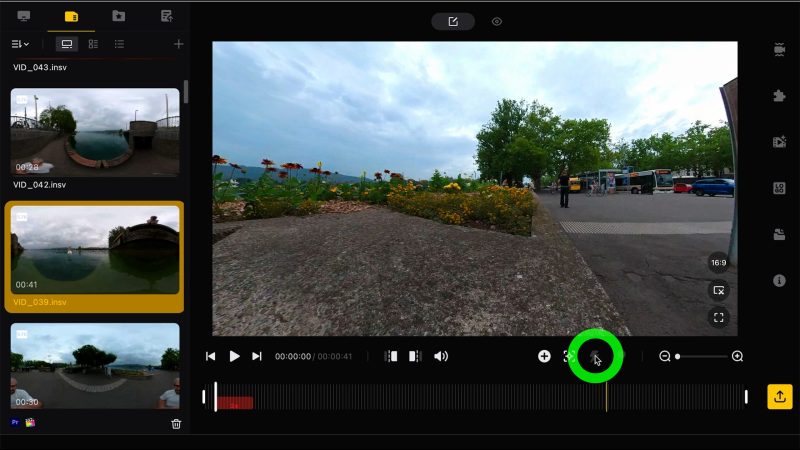
Insta360 App Overview
If we tap to open a 360 video file, we can now edit this file adding various adjustments, filters and effects, as well as one of the main tasks of editing 360 video which is reframing.
To play the clip, tap the screen.
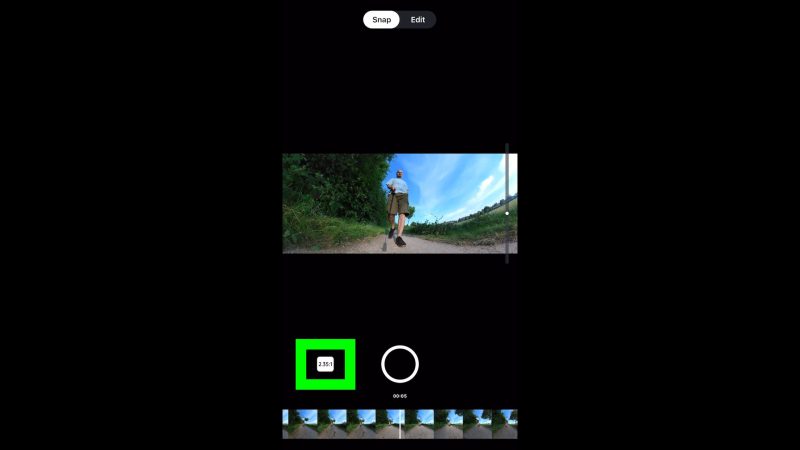
At the top we can switch between Snap and Edit.
Snap
If we switch to Snap, when we move our phone around it changes the view of the camera.
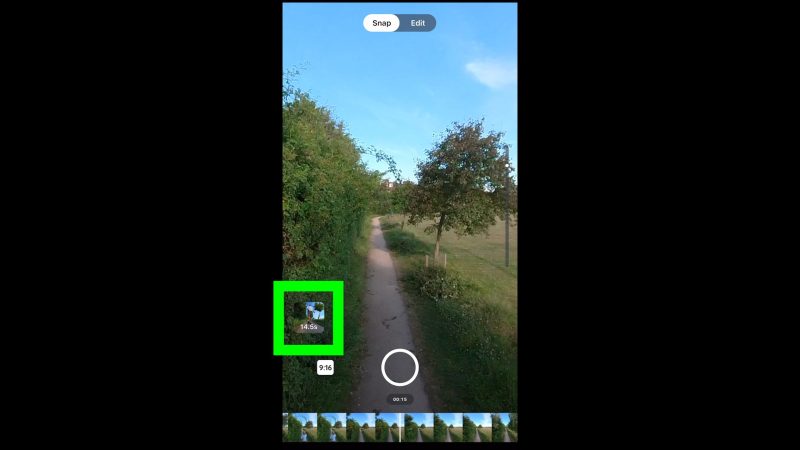
Tap the button in the bottom left of the screen to change the aspect ratio of the frame. Choices are standard 16:9, 1:1, that widescreen cinematic 2.35:1 and finally the vertical format, 9:16.
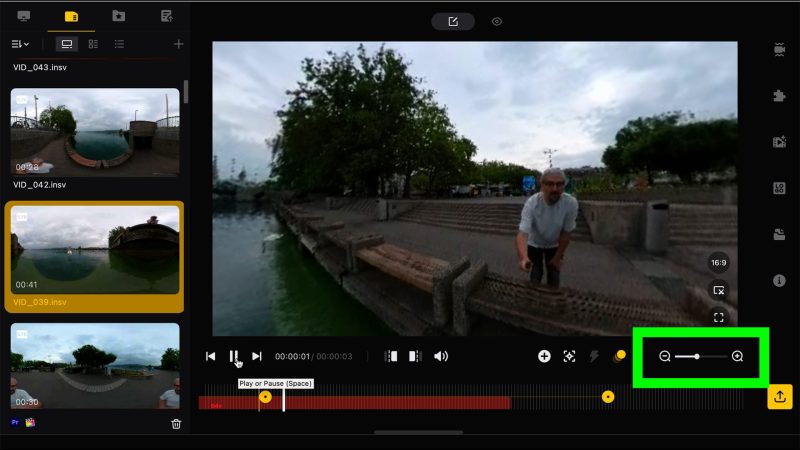
Swipe along the timeline at the bottom to move the playhead to where you want your clip to start. Tap the record button and the video will play.
Any movements of the phone will be recorded. Or you can swipe the screen to change the view instead. As well, you can use the slider to zoom in and out. You can see, it’s as if we’re back there filming with our smartphone, deciding which angle to capture.
Stop recording and a new clip will be created below the main video image. You can keep recording to capture various clips and they will be added below.
Tap export and tap “Export to phone album”. Each clip will be saved as an individual clip. If you tap Create a new story, the clips will be added to the app’s inbuilt video editor. When you return to the Snap window, those clips will be gone and you can grab more clips.
Edit
Switch back to Edit and we can go through the important features and functionality.
At the bottom we have the video timeline and the playhead marked by a white line and a yellow circle with a plus sign. The yellow circle is a button for adding keyframes.
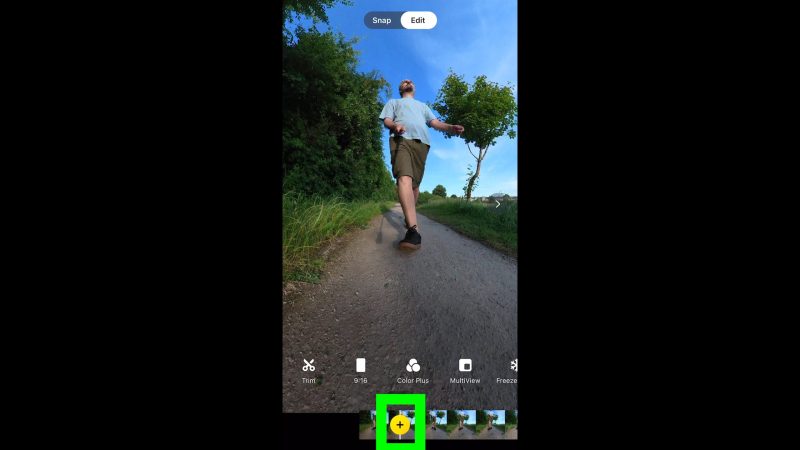
Adding Keyframes
Swipe to position the playhead. Tap the + button to add a keyframe. To delete a keyframe, tap the same button.
Once you have added a keyframe, keyframe options appear above the timeline.
Field of View
We can select Field of View settings, from narrow to the widest setting which is Tiny Planet. We can also create a custom field of view using 2 fingers.
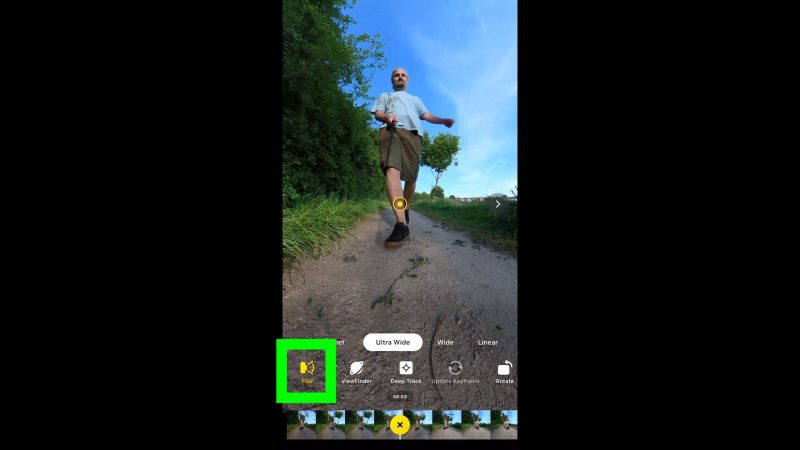
If we move along the timeline, add another keyframe and then change the field of view, when we play between the keyframes, the field of view will morph from the first setting to the second. So this allows us to zoom in and out during a shot.
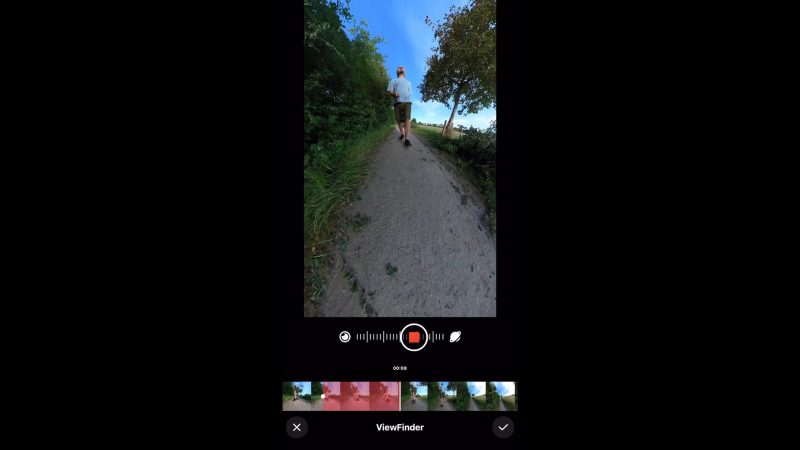
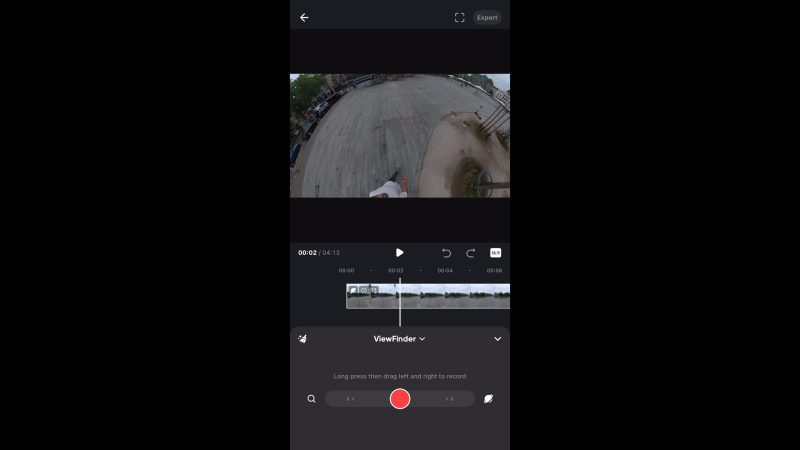
ViewFinder
If we select ViewFinder, we now get a zoom slider with a record button. The slider goes from close up to Tiny Planet. Moving the phone around changes the view.
If we press record, the video starts playing and we can record zoom and view changes moving the slider and the phone around, at the same time.
Remove your finger to stop recording. The movement is represented as a red area on the timeline. We can select this area and delete it by tapping the trash can.
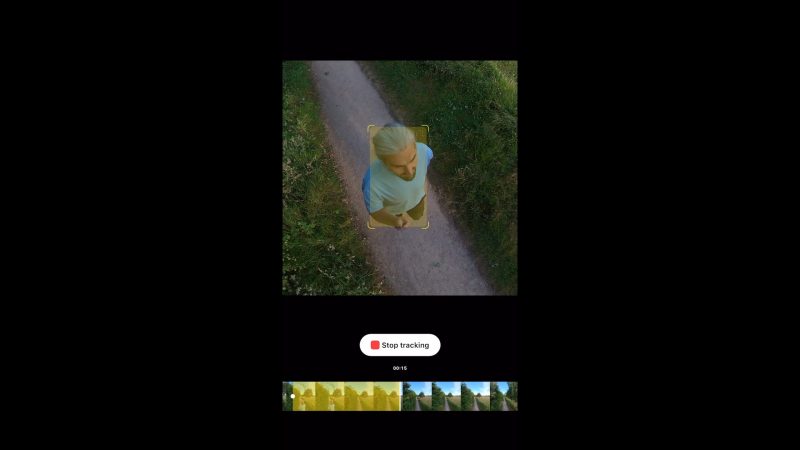
Deep Track
Deep Track allows you to track an object or person. Tap Deep Track and now draw with your finger over the object, in this case I’m tracking myself. Tap the button to start tracking.
A yellow area on the timeline marks the tracking data. Tap to stop tracking. You can tap the yellow area and tap the trash can to delete the tracking data. You can also change the field of view.
Update Keyframe
If you make an adjustment to the video, tap Update Keyframe to save that change.
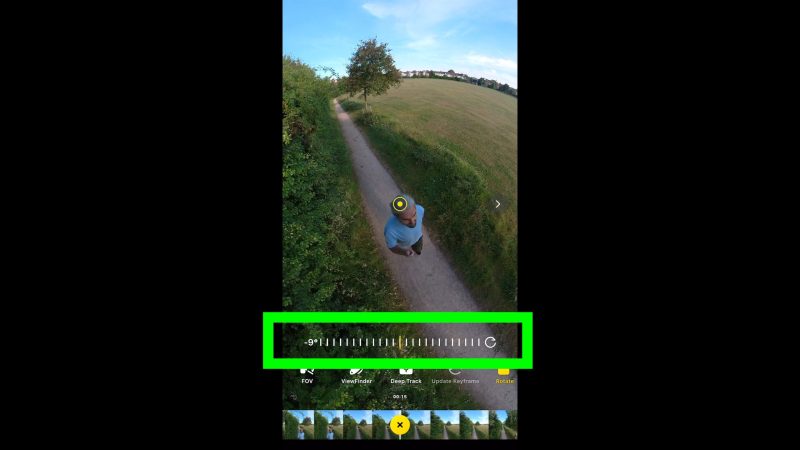
Rotate
Tap rotate to bring up a roll controller. Swipe left and right to set the roll angle of the camera.
We can use this feature to program a barrel roll into the video. You can simply place a Keyframe at the point where you want the barrel roll to end and change the rotation. Play from the beginning to see the barrel roll.
Or you can place a keyframe where you want the barrel roll to start and another where you want it to end. Those are just 2 options. But you can get as complex as you like here, adding a number of keyframes with different settings.
Snapshot
The final setting is Snapshot which simply saves the current frame as a still image.
Insta360 App Extra Features
Trim – slide the ends to trim off unwanted footage.
ColorPlus simply makes the video look a little bit more dynamic, more colourful, more contrast. This can be useful if you filmed during a cloudy day and everything looks a bit flat. But if you had a bright sunny day, adding ColorPlus might be too much.
MultiView allows you to set a picture within a picture, using different views. Tap the plus sign to set a start point, swipe the timeline, set an end point by tapping the tick. Now choose 1 of the 3 options.
The 3rd option uses the 2 cameras, 1 above and 1 below, and is recommended for shooting the front and back view from a car.
Freeze Frame
Freeze Frame allows you to add a super slow motion effect at the same time as a camera movement between 2 points. This is good for dramatic moments in a video, particularly any kind of action sport. Or maybe jumping into a pool. Just use your imagination.
Speed
Tap speed and tap a speed listed. You can go from 1/4 speed up to 64 times the normal speed. So that’s from slow motion up to a very fast timelapse type shot.
Swipe the timeline to select an area of the video where you want this speed to occur. Toggle on motion blur to give a distinctive look where anything speeding past creates a streak of blur.
So the other features here are pretty common to photo and video editing apps and are not really unique to the Insta360 app.
360 Video App Settings
First of all, if you tap the 3 dots in the top corner, you will find various options. It’s best to keep FlowState Stabilization on, otherwise your footage probably won’t look too smooth.
For reframing, make sure Direction Lock is off. With Direction Lock on, the camera will face in one direction for the whole clip, instead of following your movements. This is a bit like using Locked mode with a 3 axis gimbal.
With Identify Tracking Targets enabled, the app will search the video for objects to track. But you might find it easier just to do this manually, which is pretty easy. So I usually have this switched off.
Chromatic Calibration makes sure the colours match from both cameras. AquaVision 2.0 is for underwater footage. Switch this on to remove the blue hue you get underwater.
Under the accessories tab are buttons to enable settings for use with various accessories.
Auto Frame
The easiest way to reframe footage is to use Auto Frame. When you tap this button, the app analyses the clip to find the best bits and frames them in a certain way.
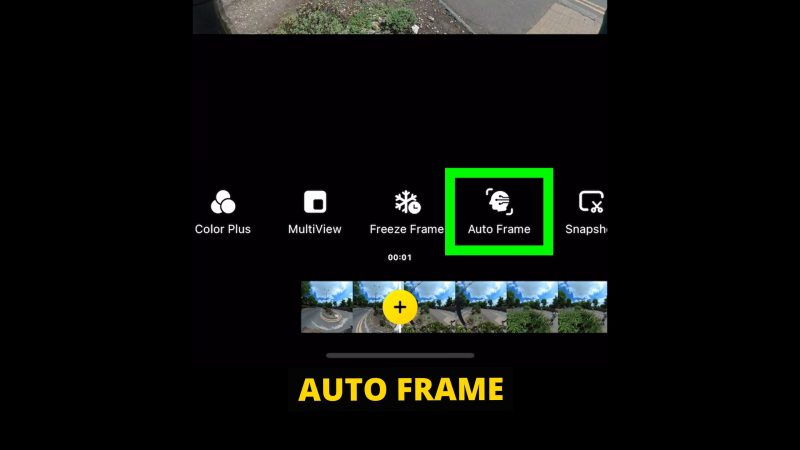
If you look closely, you will see different icons in the top left corner of each clip. These represent different types of shot. For example, an arrow means the camera will look forwards. A figure that looks like it’s running means the camera will try to track a person.
You can select one or more of these clips and tap save. Those clips will now be placed together on the timeline at the bottom with a white line indicating a cut between two clips.
Create a Story
The Insta360 app allows you to combine both phase 1 and phase 2 so that you can edit multiple clips on a timeline and reframe them at the same time. To do this, use the Create a Story feature.
Select the clips you want to use which are then placed on a timeline, one after the other. These clips can then be trimmed, order switched, as well as reframed. Music, titles and sound fx can also be added.
Tiny World Tip
I’ve found that when using the app, if you want to zoom out as far as possible, it can take a bit of playing around. Sometimes it’s hard to get it to zoom out fully.
When you zoom out using your fingers or the slider, it tells you the custom setting number. The maximum this can go to in the app should be 150. So if you find this setting is below 150 but you can’t make it go any higher, then try this little trick.

Just pinching, all I can go to is 130.
Switch to Snap, pull the slider down and switch back. Add a keyframe and now the custom setting is 150.
When you use the Studio editing software, you can zoom even further out – up to 179.
Insta360 Studio
If you connect your One X2 to your computer and open the Studio software, you should get a message asking if you want to import files from the device. Clicking Import All might be the simplest and quickest way to get started.
Otherwise, you can choose to drag and drop files manually.
On the left side we now have any imported files. Double click one to open it in the main window and get editing.
Using the wheel on your mouse, you can zoom in and out as well.
Keyframes
To add a keyframe, move the white playhead line to the point on the timeline where you want to place the keyframe. Click the add keyframe button.
Now the controls we get here are a bit different to those we get in the app.
We can manually set the pan, tilt and roll angle, manually set the Field of View (which goes all the way to 179) and also manually set the distortion control.
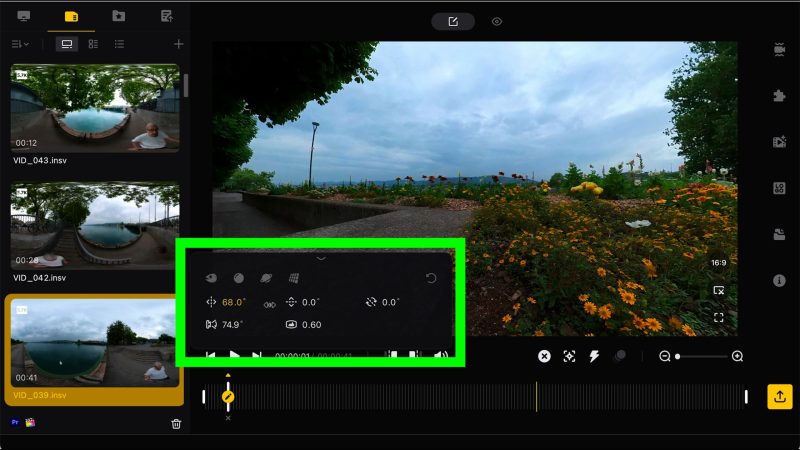
As well, we have these 4 preset buttons here at the top. There’s Default, then we have Crystal Ball, which is kind of self explanatory. There’s good old Tiny Planet and finally Natural, which basically look like a regular video, without that fisheye distortion.
If you play around with these settings you can create some really fun effects.
Another thing about Keyframes in this software compared to the app is that you can move them along the timeline. And this is really great for perfecting the movement exactly as you want it.
As well, if you have 2 keyframes, you will notice this yellow line between them. Click this line to bring up adjustments which change how Studio takes you from one keyframe to the next.
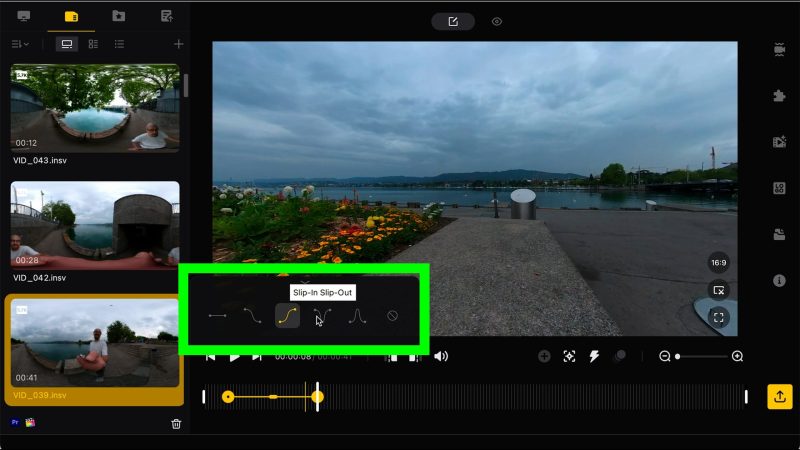
For example, the change can be fast and then ease slowly in to the final frame. Using these can make the movement more professional looking and less robotic.
To edit a keyframe, just click on it. To delete it, click on it and then click the x.
Deep Track
Click Deep Track, draw a box around the object you want to track. If you want to keep the object in the centre of the frame, check this box. Start the track.
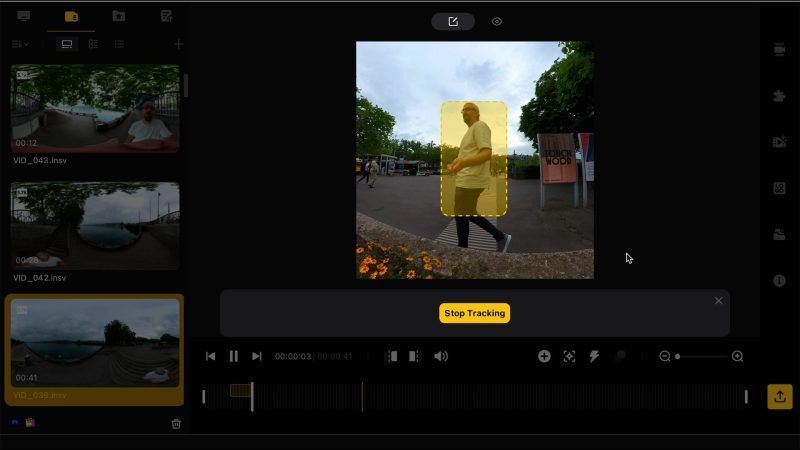
Keep tracking until you’re finished. Now you will have a yellow section on the timeline. Click on it to change the Field of View and Distortion settings. Or click the trash can to delete the track.
Note that you can’t place a keyframe in an area where you have tracking information.
Time Shift
Click TimeShift to add speed changes. Place the play head where you want to start the change, click the Time Shift button, now move your mouse to the end of the section you want to affect and click. Use the slider to set the speed, from 1/4 to 64x same as the app.
This red section represents the area affected by the speed change. You can click and drag the ends of this red section. Again, this makes perfecting your shot much easier than with the app.
The Timeline zoom controls here allow you to expand or contract the timeline. So this is another useful tool for fine tuning your edits. If you zoom in you will be able to make more precise adjustments.
So that’s pretty much all you need to know about Insta360 Studio. The settings controls at the side are mostly the same stuff as in the app, which I’ve already covered.
But if we click the i button, we can see that this video has a bitrate of 100mbps. So this gives us a clue for our export settings.
Exporting Video
To export a video, click the big yellow button with an arrow. This opens up the export settings.
We can choose to export reframed video or 360 video. Choose 360 video if your video is intended to be viewed as a 360 video. For example, YouTube supports 360 video and this allows a viewer with a smartphone to move their phone around to see what they want to see as the video is playing.
Apart from that, choose Reframed Video.
So the important settings for the quality of your video are below. Bitrate is at 75mbps by default. We can slide it all the way to 200mbps, but as the original file is only 100mbps, there’s not much point in going higher.
Below that we can set our own resolution. There’s no easy menu to choose 1080p or 4K, so we need to input the pixel numbers ourselves. 16×9 @ 4K = 3840 x 2160, but you only need to put the first number in.
For encoding format we can choose the old h.264, the new h.265 (which is more efficient and creates smaller files) or ProRes, which is a professional editing codec by Apple. ProRes will give you the best quality files and they will be easier to edit with, but will be bigger in size.
To save having to input this stuff each time, we can save the settings as a preset. Let’s call this one 4K.
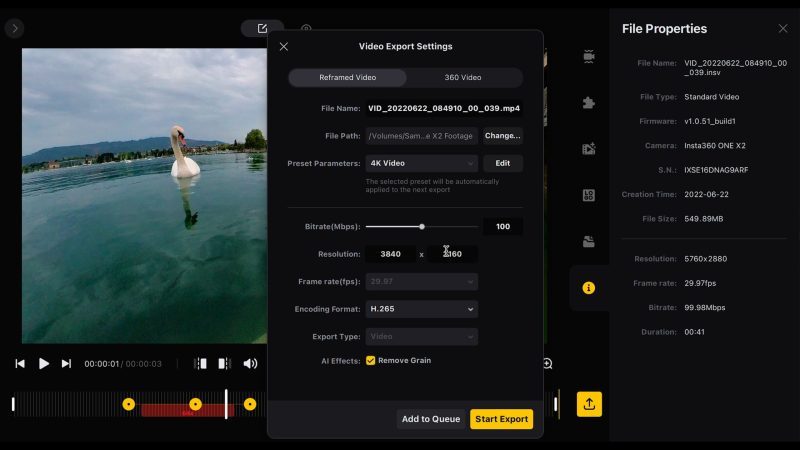
If your video is a bit noisy, check the remove grain box and now you can either export or Add to Queue. Use the Queue setting if you have multiple clips you are working on and you want to export them together.
So that pretty much covers how to use this camera and how to get the best quality video from it. Let’s quickly look at a few extra things you can do with the Insta360 app.
Extra Features
With your smartphone connected to the camera via the Insta360 app, tap the stories button at the bottom. There’s basically 3 features you can use here: Create a Story, Shot Lab and FlashCut.
Create a Story
Tap create a story, choose some clips, tap Create a Story at the bottom. Those clips are now placed onto a timeline for editing. I’m not going to say too much about this feature, because it’s basically just a video editor that works like many others.
However, if you include 360 clips that you have yet to reframe in that Phase 1 part of editing 360 video, you can actually do that within this editor. That means that, unlike in Insta360 Studio, you can reframe as well as edit clips together and add titles and music and so on.
To reframe, you can move your smartphone around and zoom in and out. This works very similar to what we’ve already gone over, so I think you can work this out.
Shot Lab
Contains a series of templates for creating certain effects. The app’s AI does most of the work for you. Again, I’m not going to go through each one. But just tap one that looks interesting, then tap Use This Theme.
Each one has a little video tutorial showing you what to do.
FlashCut
FlashCut is an AI powered editing feature. Select a bunch of clips and let the app create an edit for you. Obviously the results are kind of hit and miss.
There are various different templates and styles to choose from. Each one provides you with a track of music.
Because it’s so hit and miss, my advice is not to avoid using long clips. It’s better to go through and find your favourite parts, create new files from these clips and then load them into the AI editor. The app will then apply transitions and music, so it still saves you time. But you’re more likely to get a good video if you’ve only given it the best bits to choose from.
360 Audio
One last tip. The One X2 has 4 microphones, one on each side of the camera. So this should give you a whole 360 degrees of audio. Of course, the end result is stereo audio, but it’s worth noting that it’s recording audio from all sides.
Underwater Tip
When going underwater with your One X2, make sure you have the USB C port and the battery enclosure properly closed. If you see orange like this, it’s not properly closed and water can get inside your camera and ruin it.
If you take the battery out, you can see that there is a rubber seal around the battery door and that is to keep water out.
ReFrame Plugin
Troubleshooting
If the camera freezes for some reason while filming, to fix this remove the battery and put it back in.
Find Insta360 One X2.
Find One X2 Accessories.
Videography – Beginner to Advanced
If you want to know more about filmmaking, my book Smartphone Videography – Beginners to Advanced is now available to download for members on Patreon. The book is 170 pages long and covers essential smartphone filmmaking topics:
Things like how to get the perfect exposure, when to use manual control, which codecs to use, HDR, how to use frame rates, lenses, shot types, stabilisation and much more. There’s also my Exploring the Film Look Guide as well as Smartphone Colour Grading.
Members can also access my regular filmmaking podcast, as well all 5 episodes of our smartphone-shot Silent Eye series, with accompanying screenplays and making of podcasts. There’s other materials too and I will be adding more in the future.
If you want to join me there follow this link.

This is a very useful content for one x2 newbie like me. Thanks for that.