NEW Insta360 X3 – Review & Tutorial – X3 vs One X2
Insta360 have just released the new version of the One X2, shockingly named the X3. In fact, moving forward, they’ve decided to drop the “One” part of the name for simplicity sake. The new version is now simply the Insta360 X3.
In this article, I’m going to talk about what’s new. And then I’ll go over how to get started and look at various settings which will help you operate the X3 and get the best results.
First Impressions
Insta360 sent me one to try out, a few days before launch. On getting it out of the box, my first impression was that it’s noticeably bigger and heavier than the X2. Clearly, it now has a much bigger touchscreen.
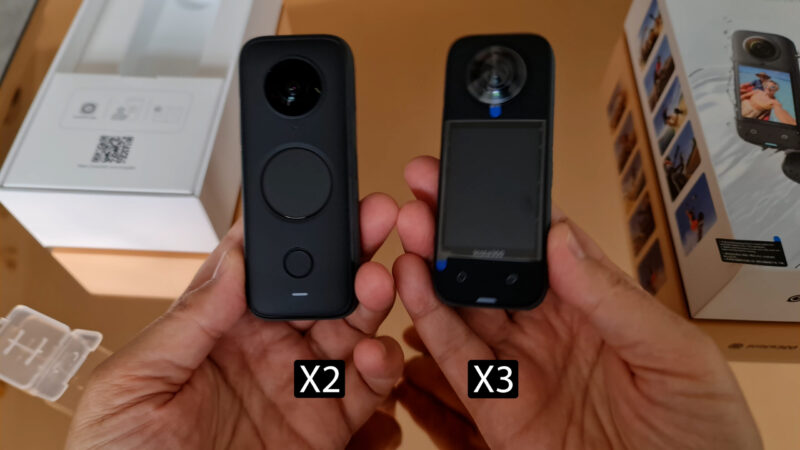
There’s also now 2 buttons under the screen at the front and an extra button on the side, by the power button.
What’s New? Insta360 X2 vs X3
Let’s look at everything that is new and improved about he Insta360 X3 compared to the Insta360 One X2.
2.29″ Touchscreen with Tempered Glass
Firstly, the most immediate change is the X3’s new 2.29” touchscreen, which is over twice as big and much less fiddly when changing settings.
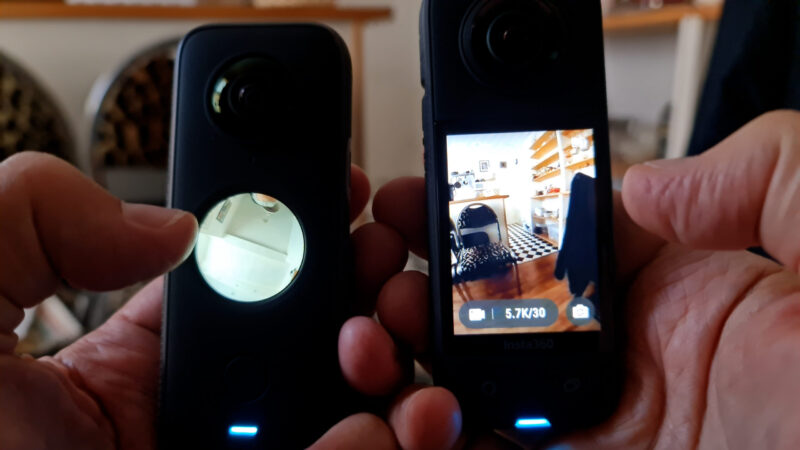
Combined with this bigger and bolder user interface the X3 is much more user friendly. This is almost like a smartphone screen, now. A very small smartphone screen, but still a big improvement on the little porthole on the previous versions.
As well, watching back footage is now possible without connecting to a second device. Yes, you could look at captured media in the previous version, but you couldn’t tell much about the shot other than confirming that you’d captured something.

Upgraded 1/2″ Sensor
So the X3 has a 1/2” camera sensor, which is slightly bigger than the X2’s 1/2.3”. So that’s 30.72 mm² compared to the X2’s 28.46 mm².
5.7K 360 Video with Active HDR
So the max resolution is the same, but we have the addition of algorithm style HDR. Active HDR is said to keep your video stabilized during the action while evening out the highlights and shadows for greater dynamic range.
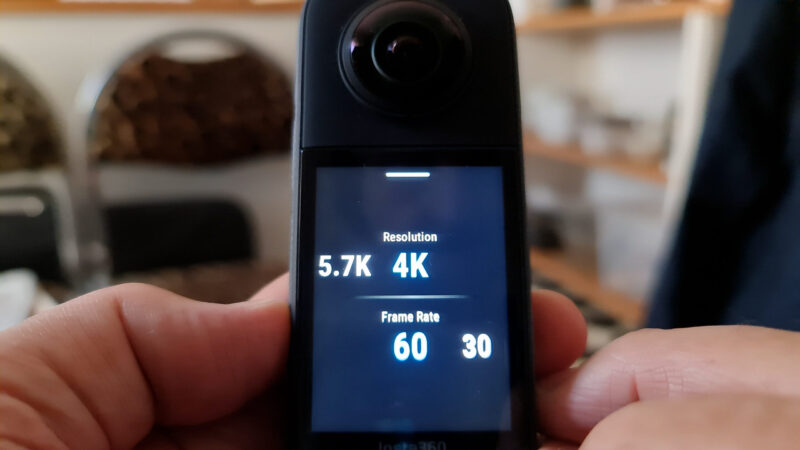
If you reduce the resolution to 4K you can now shoot 60fps in 360 mode, whereas the X2 was limited to 50fps.
Now, if you switch to Bullet Time, the X3 allows 4K @ 120fps and dropping to 3K even allows 180fps. Meanwhile the X2 Bullet Time was limited to 3K at 100fps.
72MP 360° Photo
You can now take 360 photos at a resolution of 72MP, whereas the X2 had a max of 18.4MP.
4K Single-Lens Mode
Switching to single lens mode, the X3 can shoot up to 4K resolution whereas the X2 Single Lens mode has a max of 1440p.
Me Mode
Insta360 has added a new mode which is called Me Mode. This mode allows you to film yourself, have an invisible selfie stick and skip the reframing process. With the X2, we can film ourselves but some work needs to be done in post – either in the Insta360 smartphone app or Studio software for desktop.

While this is a single camera mode, it actually uses both cameras. So switch to Single Camera mode and tap the 360-camera-on-a-selfie-stick icon, which is the Me Mode button. Now you will be limited to 1080p, but you can choose 60fps or 30fps.
8K Timelapse
The X3 allows you to shoot timelapses at an impressive 8K resolution, whereas the X2 is limited to the regular 5.7K for 360 timelapses.
Specialised Recording Modes
Insta360 has introduced some new recording modes for the X3.
Loop Recording
Switch to this mode and continually record video, but the X3 will only keep the last section of the video. You can choose to save up to the last 30 min. So this mode is designed to allow you to continuously record without filling the memory on your device.
This might be useful for a motorcycle dashcam, for example. Or any situation where you are waiting for something to happen, but you don’t know when it will happen. Leave the X3 recording, as soon as you have the moment captured, stop the recording to make sure you don’t lose it.
Pre-Record Recording
Another change is a pre-recording function. This isn’t available to my pre-launch X3, but I’m told it will save 15 or 30s of footage before you press the shutter button, so that again you won’t miss a key moment
Extra Buttons
The X3 has more buttons than the X2.
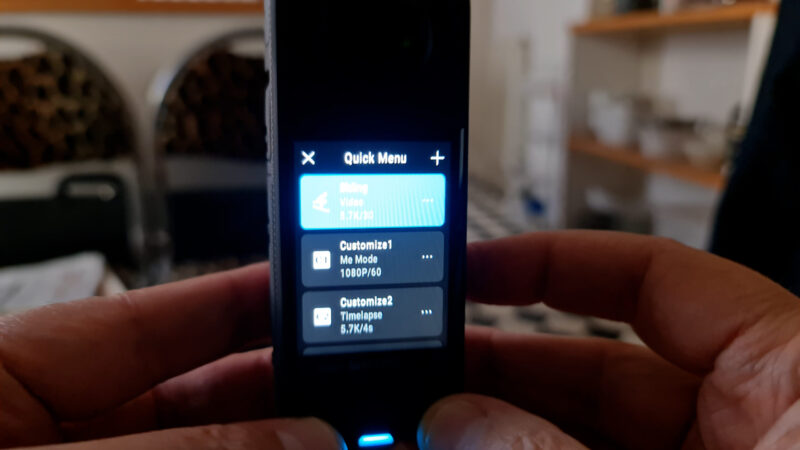
On the side we have a button with a big Q on it, which is the new Quick Menu button. Tap it to open up a bunch of preset settings. At the top there is a preset created by Insta360 called Skiing.
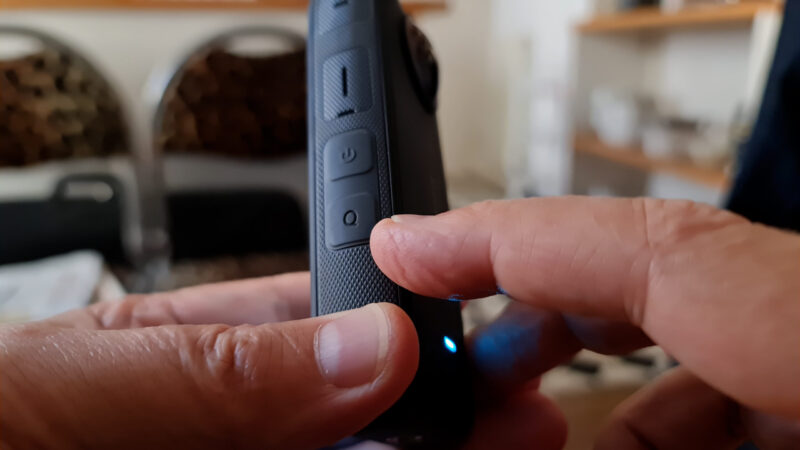
If you press the + button you can load in more presets from a list. There’s also customisable presets which you can create yourself and then save, which saves time having to reset the camera if you have a particular setup which you use a lot.
There’s also a lens mode button, below the screen on the right. If you are in 360 mode, pressing this switches to single lens mode. If you keep pressing it, it will cycle through single inner lens, single outer lens and 360 mode.
Improved USB C Port Cover
It’s just a small thing, but the X3 now has a cover with a hinge whereas the X2 had this little plastic connector. If you want to use the Insta360 Power Selfie-Stick, you have to remove the X2 USB C cover completely and then you have to put it somewhere and not lose it. With the X3, you can just flip up the cover – easy.
Getting Started
How to get started with your Insta360 X3.
Charging
Open the USB C cover and connect to a power source. I just use the same USB C power supply as I use for my MacBook Air and my Samsung. Before you start using a new X3, make sure to charge it first.
Memory Card
Before you start you will need to install a microSD card which will be used to store all the media you capture. Open the battery compartments, pull out the battery and slide in the microSD card.
Insta360 recommends that you use UHS-I Micro SD cards with a V30 or above speed class and exFAT format.
If you have a Insta360 MicroSD card, then it should be formatted already. But if you need to format your microSD card, then swipe down, tap the settings cog, then scroll down to “SD card” and tap format.
Now we’re ready to start using our Insta360 X3.
Power & Battery Saving
To power on, simply press the power button at the side. It’s the top button of the 2 side buttons.
The Insta360 X3 has 2 power saving methods.
1) after a set time with no activity it will turn the screen off.
2) if the camera remains inactive, the X3 will power off completely.
By default it’s set to 1 minute before sleeping and 3 minutes before powering off.
If the X3 goes to sleep, you can simply tap the power button once to wake it up again. You can also put the screen to sleep yourself by short-pressing the power button.
If it powers off you will have to power on again.
How to Change Power Saving Times
To change the times for Auto Sleep and Power Off, swipe down, tap the settings cog and scroll down to Auto Sleep. Auto Power Off is just below. Tap the one you want to change and choose the setting you want. The X3 will sleep, which just means turning off the screen, even while you are recording. But you can set it not to do that by selecting Don’t Sleep.
Touchscreen
The Insta360 X3 has a nice big touchscreen, at least compared to previous versions. The UI is also a bit different.
In the top left corner, we can see how much space we have left on our SD card. Top right is the remaining battery.
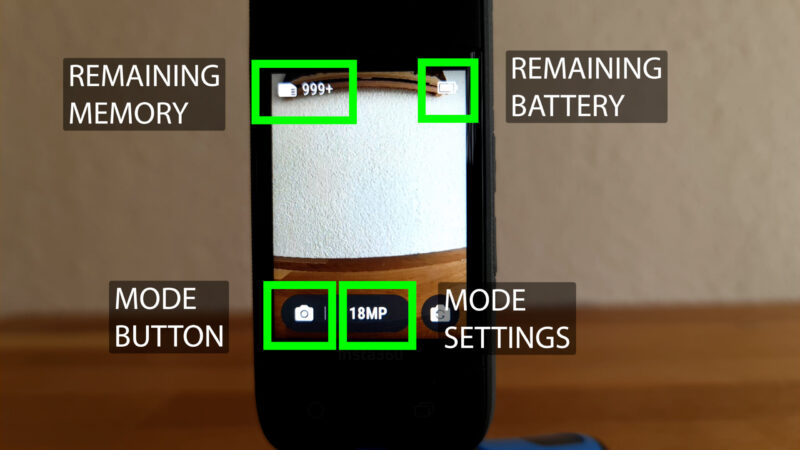
Bottom left is the mode, which at the moment is Photo. To the right of the mode is the mode setting – at the moment it is set to capture 18MP photos.
Bottom right is the button to switch the monitoring view between the 2 cameras.
Changing Modes
To change modes, tap the mode button, cycle through the available modes (either by swiping or tapping), and then either tap the selected mode or press the record button (below the screen).
Another way to change modes is simply to swipe in the middle of the screen and then tap to confirm.
Change Mode Settings
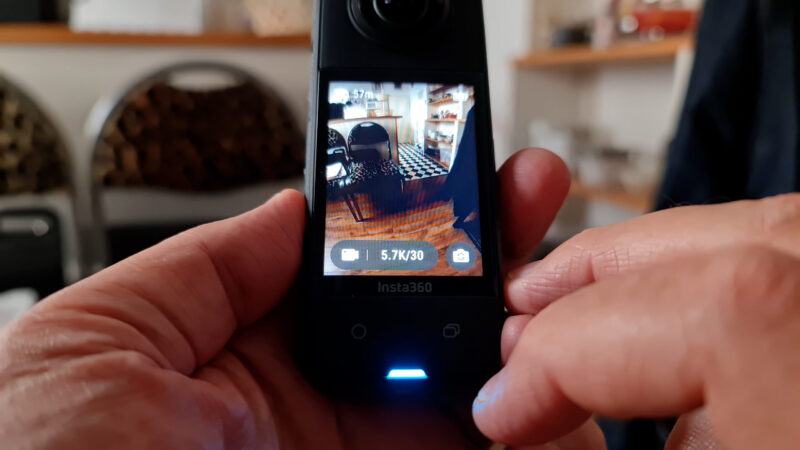
To change the settings of the selected mode, tap the information to the right of the mode button. For example, if I switch to video, you can see it says my current settings are 5.7K and 30fps.
To change that, tap those numbers and now swipe or tap to select new settings. Tap again to select.
Change Exposure Settings
To get more settings for that mode, swipe left from the edge of the screen. Now I can set exposure in different ways, I can set white balance and choose between 3 colour profiles: Vivid, LOG and Standard.
Whatever mode you are in, swipe down from the top to open up some more general options, including the settings cog.
To change the preview view, long press the touchscreen to switch to a different mode. Swipe to change the view and then tap the X to exit back to shooting mode.
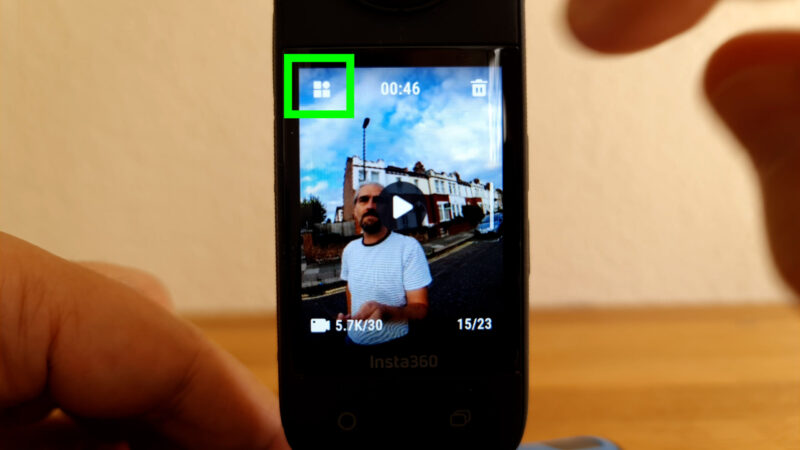
Finally, to view your media gallery, swipe right from the edge. With this nice big screen, you can get a pretty good view of what you’ve shot.
Tap the button top left to see your gallery in thumbnail mode. Now tap the top right button to allow you to select and then delete multiple files, which will be faster than deleting them 1 by 1.
360 or Single Lens
The way the Insta360 X cameras work is to shoot video from 2 cameras simultaneously and then stitch those 2 videos together to create one video with a 360 view.
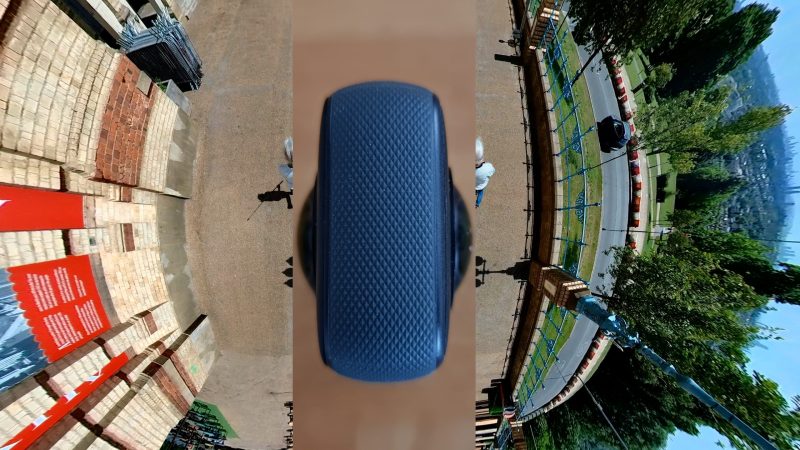
The Insta360 X3 allows you to shoot with both cameras, which is called 360 mode, or with one of the cameras, which is called Single Lens mode.
When you’re in the mode picking screen, at the top you can also select between 360 or Single Lense.
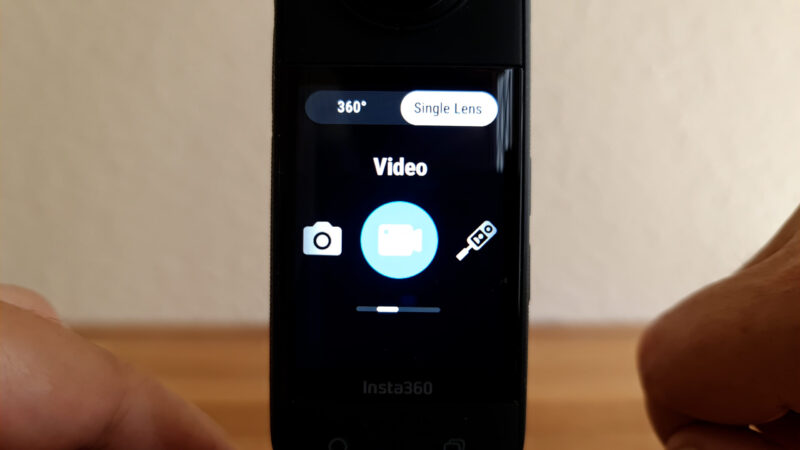
If you choose Single Lens, apart from the addition of Me Mode, there are fewer options available below.
Me Mode
While Me Mode is under the Single Lens tab, in fact it uses both cameras and stitches them together. But the video you get at the end is not a 360 video, it has a fixed point of view.
And as I mentioned earlier, you can also use the lens selector button, bottom right, to cycle through single lens and 360 modes.
Invisible Selfie Stick
While we can use this device holding it in our hands like we would an ordinary camera, to utilise the full power of the 360° video, we usually place it on a rod. Insta360 has sent me 3 different types to try.
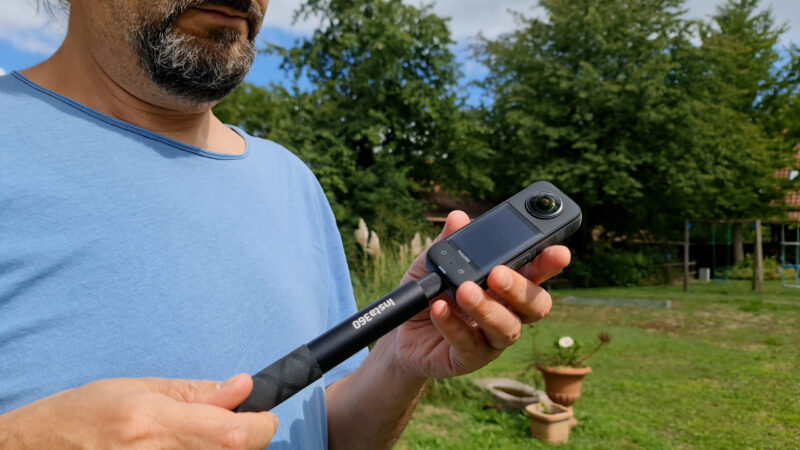
I have the standard selfie stick, which works just fine. I have the Power Selfie Stick, which allows you to start and stop recording using the record button on the handle of the stick.
Plus I have the Extended Edition selfie stick, which reaches up to 3 meters. This allows you to get real drone style shots. However, I did find that with the heavier X3 on the end and it’s extended to the full 3 meters, it’s a little harder to hold and a little bit more wobbly.
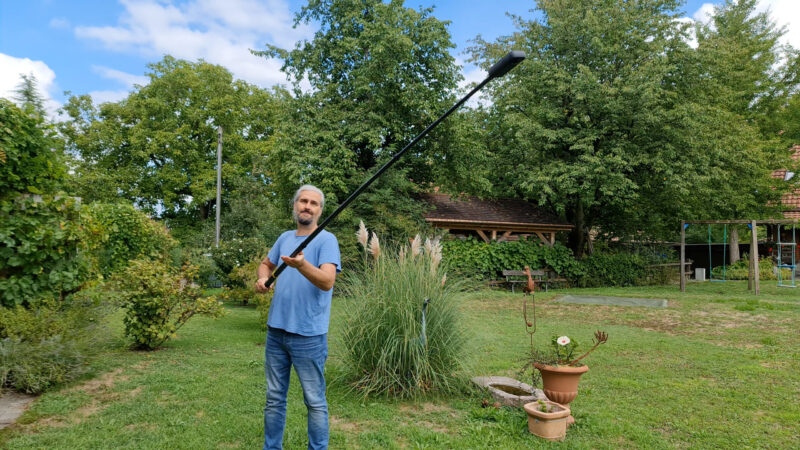
That said, I still got the shots ok.
Reframing and Keyframes
When we capture 360 media, we can simply use it as 360 media. Then we can upload to a platform like YouTube (which supports 360 video) and people can view it on 360 headsets or their smartphones, moving to change the viewing angle as they watch it.
Another way to use 360 media is to reframe it and then export it as a regular video. To do this, we can either use the Insta360 App for smartphones or Insta360 Studio for desktop. If you’re looking for the best quality video, then use Studio. For more editing on the go and tons of fun features, presets and more, use the app.
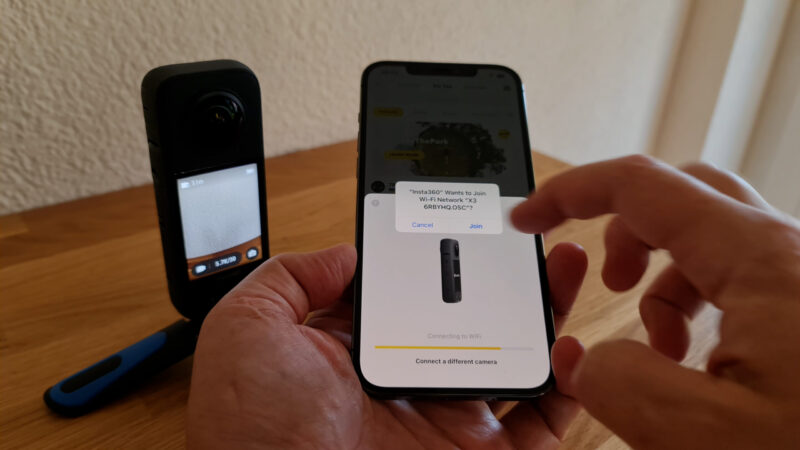
Insta360 App
Open the app and connect to the X3 via bluetooth. Make sure both wifi and bluetooth are enabled. If this is the first time connecting the app it will ask you to activate the camera first.
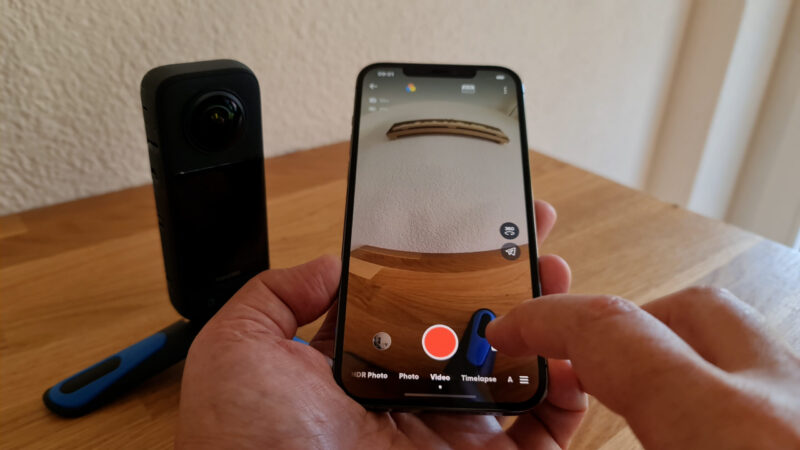
Once connected, tap the album button. The app will now access the video files from the camera or from the phone if you have downloaded them. If you play a video, you’re actually streaming it via bluetooth from the X3’s memory.
You can see where the video files are by using this dropdown menu in the top left corner. “All” shows you videos on your phone and on the camera. Select “local” to see videos stored on your phone or “camera” for videos there.
Using the app, you can move files from the Insta360 X3 to your phone, as well as for editing clips. When editing clips, you can either edit them while they’re still on the camera or on your phone. But it’s probably best to move them to your phone for a better experience.
The Insta360 app also works as a remote. You can start and stop recording, change settings on the camera, as well as access features like the Fly Through effect.
For more on how to use the Insta360 App check out my previous article on the X2.
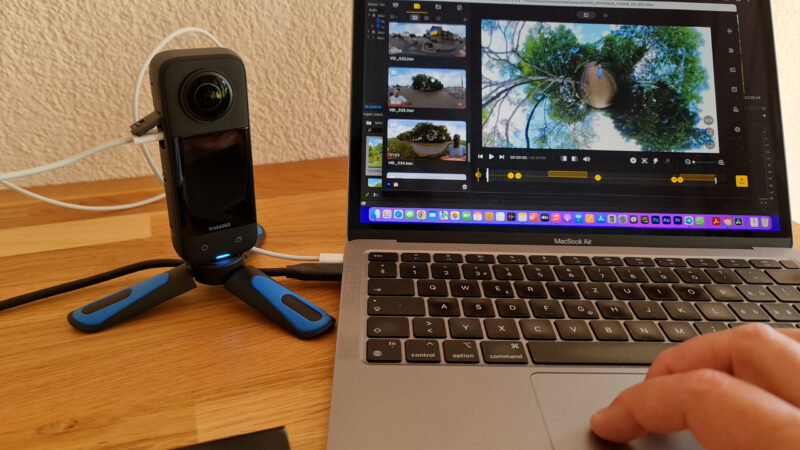
Insta360 Studio
To use Insta360 Studio, you need to download it from the Insta360 website and then install. To import media that you’ve recorded on your X3, first switch on the X3. Now make sure you have USB mode set to U-Disk Mode.
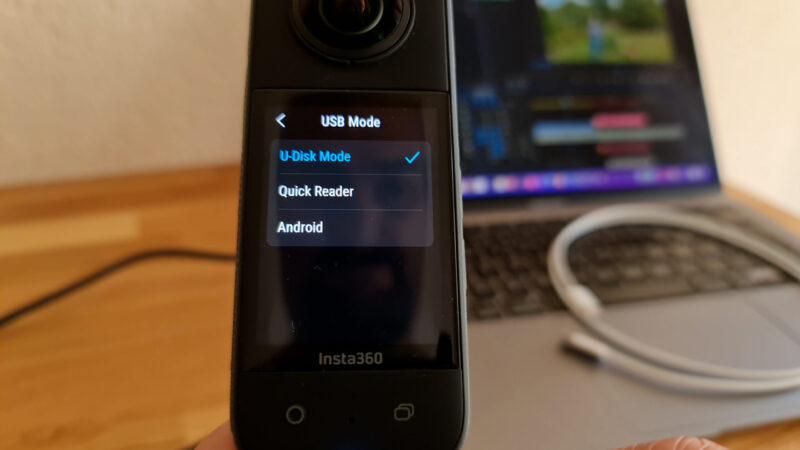
Swipe down from the top of the screen, tap the settings cog and where it says USB mode make sure it’s set to U-Disk Mode.
Return to the main screen and connect your Insta360 X3 to your computer using the USB C port at the side of the camera. It now switches into USB mode and you should see a new external drive appear on your computer.
Open Insta360 Studio and it should automatically detect your X3 and ask if you want to import all the media or select certain files. On the left you will now see the media on the X3 and you can double click there to open it.
Now you can play the video, use keyframes and other settings to create your final video. If you want to learn how to use Insta360 studio, check out my previous video about the X2, because it’s exactly the same.
Insta360 X3 Exposure Settings
Let’s look at some other Exposure Settings quickly.
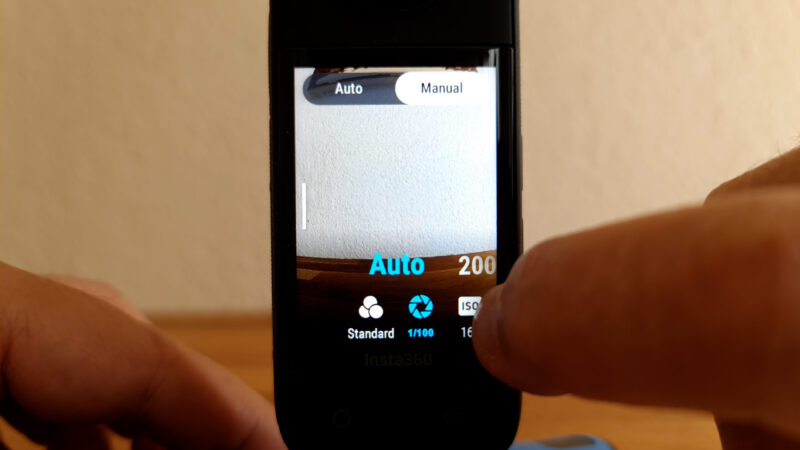
In either Photo or Video mode, swipe to get exposure settings. At the top, by default it will be in Auto mode. If you want to set exposure manually, switch to manual. This means you can now set shutter speed and ISO manually.
If you want to reduce noise in your video, make sure you set ISO as low as possible.
In this mode, you can also choose to set ISO manually and let the camera set shutter speed. This is good for letting the camera adjust exposure while making sure ISO stays at a minimum.
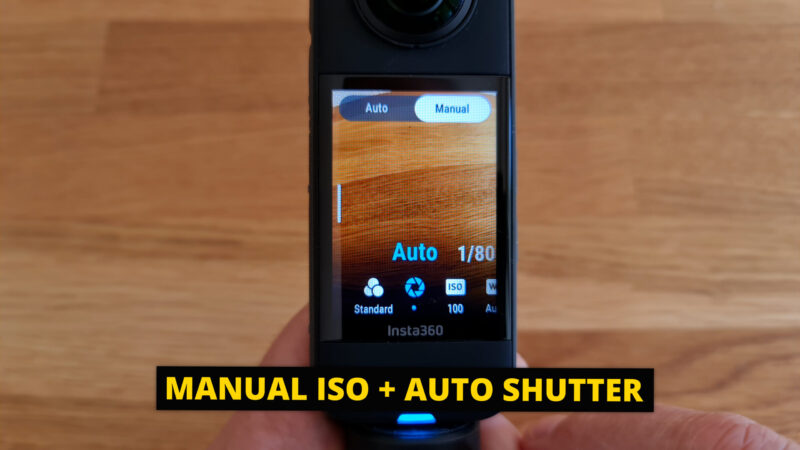
Sometimes, we might want to set both ISO and shutter speed so that the exposure does not adjust during the shot. As well, sometimes a shot will look better when we set exposure ourselves.
PureShot
In Photo mode, it is set to PureShot by default. PureShot uses AI to enhance the dynamic range of photos while reducing noise and preserving detail. But you can switch this to INSP – which is the 360 photo file extension name. Or you can choose INSP + RAW which gives you a RAW file as well. RAW is good for doing colour work later.
Isolated Exposure
One thing I didn’t mention in my X2 video was a setting called Isolated Exposure. If you switch this on, each camera will set exposure independently. This might be useful if you have one camera facing toward daylight and the other camera facing inside to a car or house interior.
Swipe to open exposure settings. Swipe until you get this little X3 icon and then swipe on Isolated Exposure. Note that when this is set you will probably get a line where the stitching is, from dark to light exposure, as now the cameras are set differently.

Now let’s go over some more general settings.
General Settings
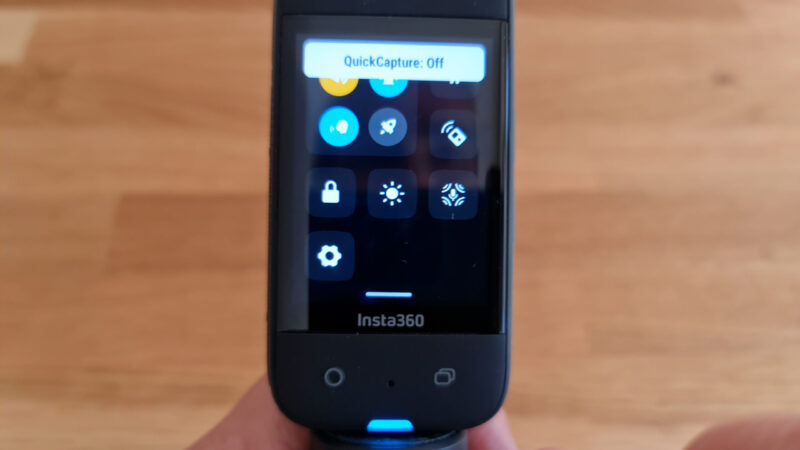
To access general settings, swipe down from the top. Now we have a series of buttons to toggle certain features on and off. If a button is blue or yellow, then it’s on. Buttons that are off are dark grey and white.
The yellow speaker button allows you to toggle on and off the prompt sounds. For example, when you start recording it makes a noise. If you would prefer your X3 to be silent, toggle this off.
The Indicator light is the light at the bottom of the X3. If you want to switch this off, you can do so here.
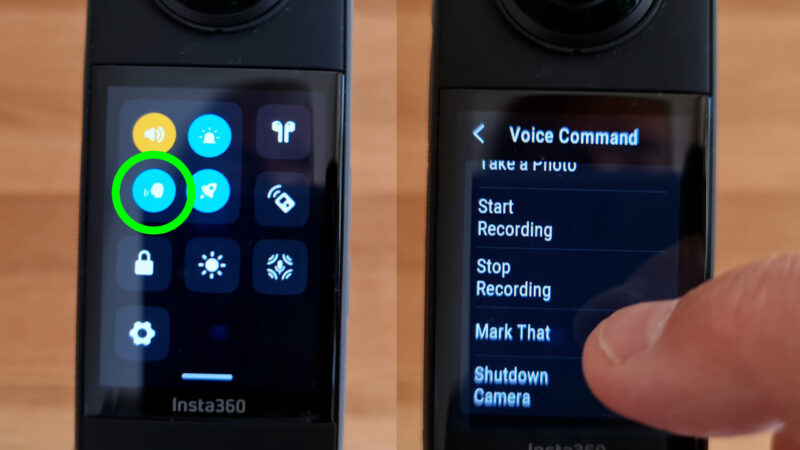
To enable Voice Command, tap the button with the head.
Next button toggles on and off quick capture. Quick Capture allows you to start recording without first having to switch on the camera. With the camera off, press the record button and the X3 will power on and then take a video. When you stop recording the X3 will then power down.
The padlock button will lock the touchscreen until you swipe up.
The light symbol is a brightness button, if you want to reduce the brightness of the touchscreen.
There’s a button for connecting Airpods and another for a bluetooth remote. Then we have Audio Settings, with 3 choices.
For more settings, tap the cog button.
Voice Control
Tap Voice Control to get 2 more options. In Language you can switch between English or Chinese.
Tap Voice Command to open up a list of voice commands. If you have Voice Control enabled (see above), you can use these phrases to control the X3 with your voice.
Anti-Flicker
If you have issues with artificial lights strobing, you can try using the anti-flicker settings. Depending on which country you are filming in, choose 50 or 60hz. For example, 50hz for Europe, 60hz for America.
Video Bitrate
The bitrate of a video is one of the things which controls the overall quality. Choosing high will give you better quality but larger file sizes.
Adjust Sharpness
A new setting added to the X3 is the sharpness setting. You can choose between 4 different levels of sharpness.
Sharpness in video terms is when the software applies a process to each frame called Edge Enhancement. This can make your videos look more crisp but it can also make them look harsh on the eye and more digital looking.
So you could choose to set this to low or medium and then if you find it’s not sharp enough, you can add sharpness later. But if you prefer the sharper look or you don’t want to have to add sharpness later, then choose a higher setting.
External Mic Gain
If you have an external mic attached, you can adjust the gain here.
Videography – Beginner to Advanced
If you want to know more about filmmaking, my book Smartphone Videography – Beginners to Advanced is now available to download for members on Patreon. The book is 170 pages long and covers essential smartphone filmmaking topics:
Things like how to get the perfect exposure, when to use manual control, which codecs to use, HDR, how to use frame rates, lenses, shot types, stabilisation and much more. There’s also my Exploring the Film Look Guide as well as Smartphone Colour Grading.
Members can also access my regular filmmaking podcast, as well all 5 episodes of our smartphone-shot Silent Eye series, with accompanying screenplays and making of podcasts. There’s other materials too and I will be adding more in the future.
If you want to join me there follow this link.

Thanks for the extensive written review. It provides a very good oversight, also compared to just ‘vid’ reviews. I was looking to see again the mounting of the little Rode mics (w/o adapter?) and if it also works with the Video Mic I (not only with the II). Have you tested that? Thanks
I haven’t tested any of the Insta360s with external mics. They have sent me various adapters, but I haven’t yet had time to give them a go
A znovu sa nehovorí ako všade že kameru bez telefónu nemožno používať. Android vyžaduje Kirin980 alebo snapdragon 888. Pre mňa tento stroj bol velké sklamanie. Očakával som proste flexibilitu a nie mašinu nefunkčnú bez tel. Všetko proste frčí na Apk.
You need a phone to activate the X3, apart from that you can reframe the footage with desktop / laptop computer. You don’t need a smartphone
Will it work on a tablet?