Xiaomi 12T Pro – Review & Tutorial
The new Xiaomi 12T Pro is a mid-range phone with a great main camera. This is the 3rd time Xiaomi has sent me one of their phones to test the cameras and I have to say, I’m pretty impressed with this one. Right away, using the main camera I found I was able to get a nice shallow depth of field without any cinematic mode style trickery.
The main camera uses Samsung’s HP1, 200mp sensor. In terms of size the sensor is 1/1.22” with a nice, big f/1.69 aperture. That makes the Phase Detection Autofocus (PDAF) important because the shallower the focus, the harder it is to keep your subject in focus. The sensor also comes with Optical Image Stabilization (OIS).
The 12T Pro also comes with Qualcomm’s Snapdragon 8+ Gen 1 chipset.
Xiaomi 12T Pro Main Camera
The Xiaomi 12T Pro comes with Xiaomi ProFocus which they say includes Motion tracking focus, Motion capture and Eye tracking focus.
I found the auto focus to be good for a mid range phone. While filming myself, it kept focus on my face well. The only issue I had was in a low light situation, where it took a bit longer to find me. But it still got me in focus in the end.

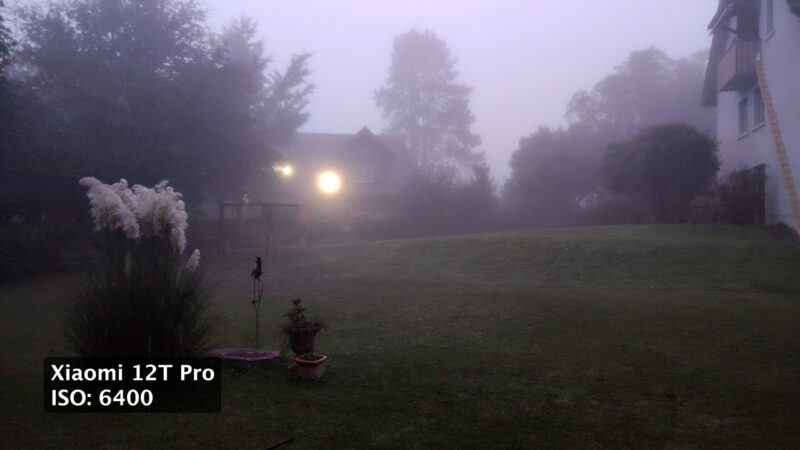
In low light, the main camera performs really well. There is noise, but it’s “nice” noise. In these shots the noise looks more like film grain than that horrible artefact-y noise you get normally.
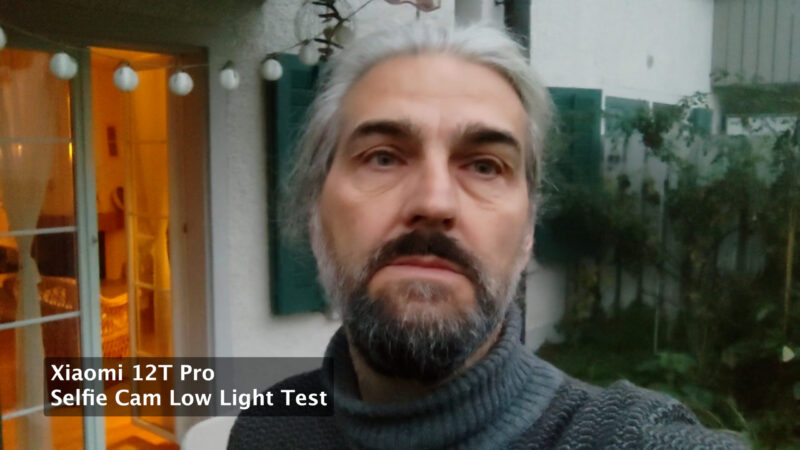
If I switch to the front selfie camera you can see what I mean. Now I’m getting that more ugly noise, which just looks low quality, even though this is a not-too-shabby 20mp camera. The performance in low light doesn’t match the main camera.
Xiaomi says that the “200MP imaging system is backed by groundbreaking hardware and Xiaomi’s own advanced AI algorithms.”
AI algorithms will be things like dynamic tone re-mapping which helps to add dynamic range to photos and videos. If it’s not done well, it can cause flickering and artefacts in your videos. But in the Xiaomi 12T Pro it seems to work pretty well, from what I can tell from 3 or 4 days of filming.
The good thing is that you can switch to Pro Mode and get full manual control. You will have less dynamic range but you will remove any dynamic tone mapping issues.
So while the main camera really does stand out, what about the other cameras?
Xiaomi 12T Pro Cameras
On the rear, the 12T Pro also has a Ultrawide and a Macro camera. But there really is quite a noticeable difference in the quality.
To access the ultrawide camera, we can tap this button here.
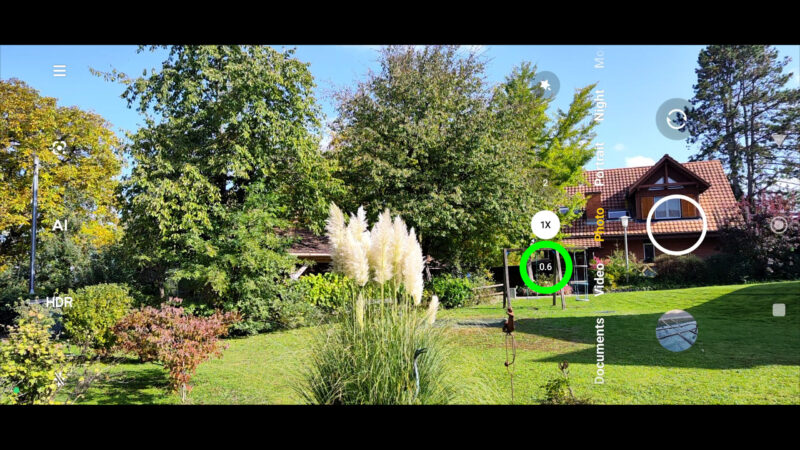
Thing is, there’s 3 lens selectors here, which might lead you to believe the Xiaomi 12T Pro has a telephoto. In fact, it doesn’t. So all the top button does is zoom in 2x on your main camera.
Xiaomi calls this an “in-sensor 2x zoom that can utilise the capabilities of the large sensor size”. In other words, this camera has 200 million pixels which gives us plenty of room to crop in.
If you press and hold on the 1x button, that brings up a zoom slider and some more zoom buttons. We can zoom in up to 6x in video mode and up to 10x in photo mode. And using those 200 million pixels, it does quite a good job.
To access the Macro camera, we need to tap the menu button in the top left corner. If you’re using it to shoot video, you’ll find you’re limited to 720p. The quality isn’t that great, but how often do you shoot macro video?
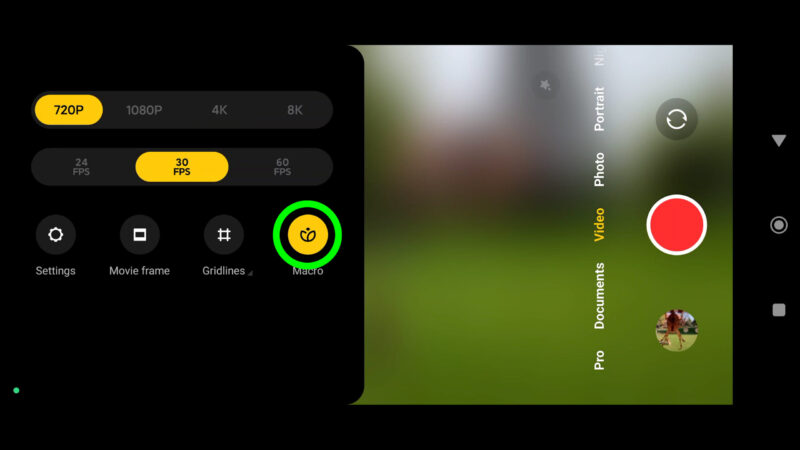
On the other hand, macro photos come out nice and sharp.
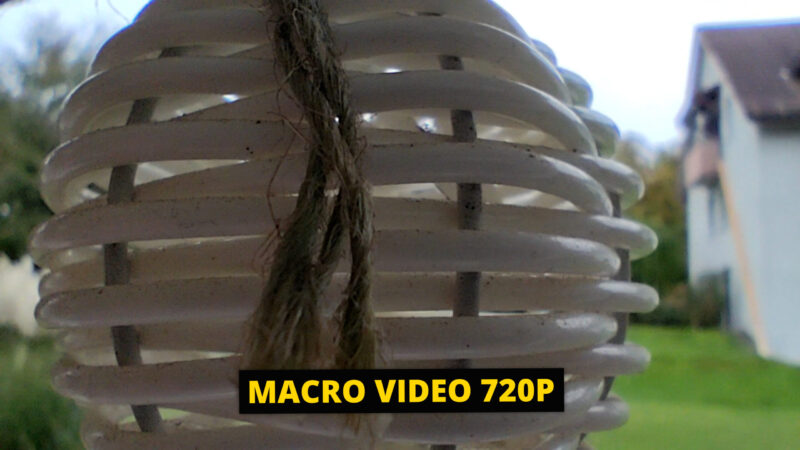
The Ultrawide camera sensor is only 8MP and I think it shows. The Macro sensor is only 2MP. From the results I got experimenting with these alternative lenses I think, for shooting video at least, I would stick to the main camera as much as possible.
Tip: If you do switch to the macro camera in video mode, you will need to reset the resolution and frame rate settings when you toggle it off again. Otherwise you’ll find yourself filming in 720p.
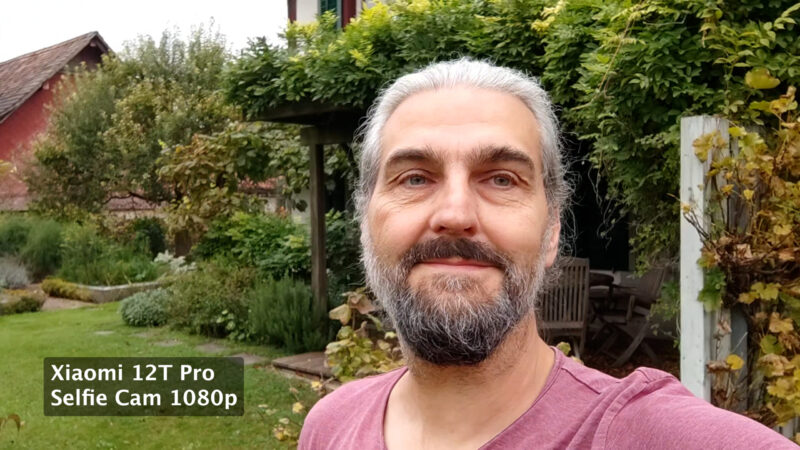
Finally, we have the selfie camera, which comes with a decent 20mp sensor. The max resolution for this camera is 1080p, but you can go up to 60fps. Again, there’s a definite drop off in quality compared to the main camera – less dynamic range and you lose the shallow depth of field.
Inbuilt Stabilisation
The main camera comes with OIS and again it works quite well. I suspect there’s some digital stabilisation going on as well, as you can see some slight artefacts created when you move the camera.
While this stabilisation is good, it doesn’t match the flagship devices like a top iPhone or a top Samsung. In regular video mode, you can’t switch off the stabilisation.
To switch it off, and get rid of those artefacts, you need to switch to Pro Mode, open settings and toggle it off.
Now, when I did this I’m pretty sure there’s still some stabilisation being applied, because when I moved the camera there was a tiny delay before the image on the screen catches up.
It seems that to completely switch off stabilisation you need to switch to 8K resolution.
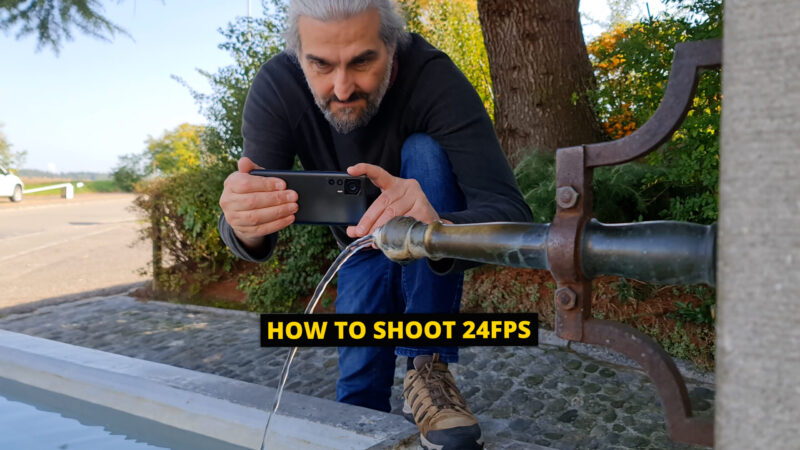
8K & 24fps
The only way to shoot 24fps with this device is to switch to 8K. In other resolutions, 24fps is greyed out and you can’t select it.
From using Xiaomi devices before, I found a workaround for shooting 24fps. In the device you can compress the 8K down to 4K after you have filmed it.
Currently, however, the 8K footage on this device seems to be a little buggy. For example, some shots didn’t come out smooth. And in Adobe Premiere I found one 8K shot that was supposed to be 24fps had come out at about 20fps. Which usually means the device is dropping frames and that usually happens when you demand too much of the processor.
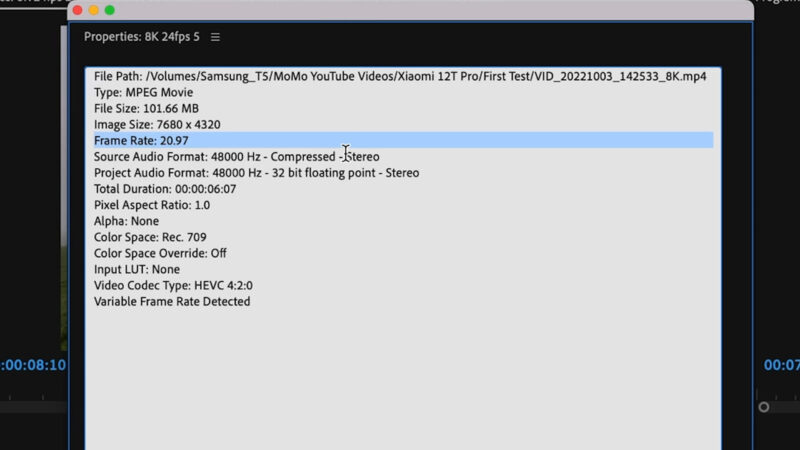
Thing is, this is supposed to be Qualcomm’s new beast of a processor so it should be able to shoot 8K without dropping frames. Hopefully this is just a glitch that can be fixed with an update.
Steady Video (Stab)
The 12T Pro has a super steady mode for video. Just tap this button here on the left.

Now you will get a noticeable delay as it uses digital stabilisation to smooth out your footage. When I switched it on and took a quick run, I found the resulting footage wasn’t too clean.
How to Shoot Cinematic Video with the Xiaomi 12T Pro
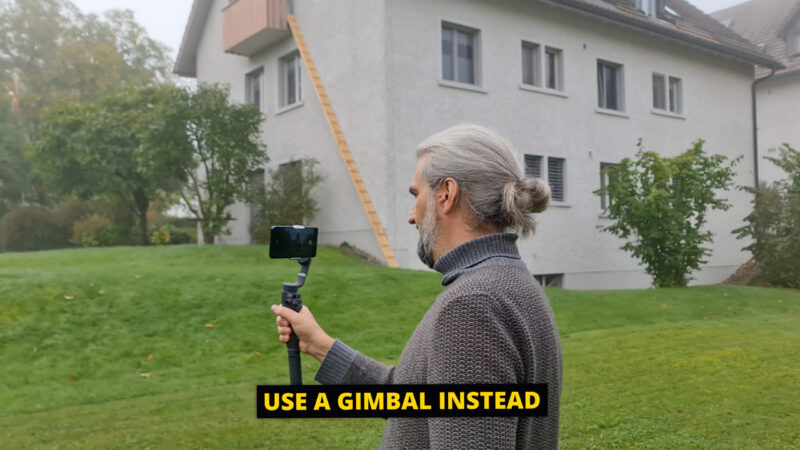
If you really want the best quality cinematic B roll, then I would recommend using a gimbal. This is the new DJI Osmo Mobile 6, which has a zoom / focus wheel. Switch it to focus mode and you can shoot really pro focus pulls using the wheel.
To shoot a focus pull you will need the Mimo app and if you have an Android, you need to go to the DJI download page on their website and download from there. And then you have to tell your phone that you think it’s safe to install.
The Android version of the Mimo app is more limited than for iPhones. So there’s no 60fps option on the main camera and there’s no manual controls.
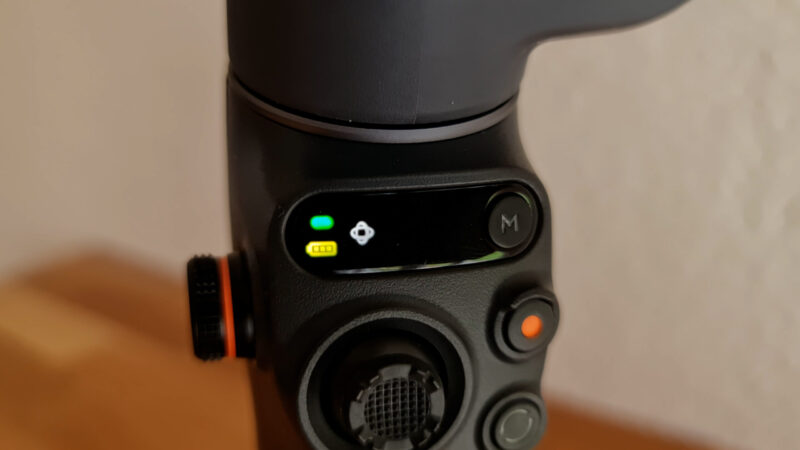
Unless you want to use the Mimo features, I recommend switching to the native Xiaomi camera app when using the gimbal. The Osmo Mobile 6 now has a mode button, so you don’t need the app to change modes or see which mode you’re in.
To get buttery smooth B roll, I switch to Pro Mode in the Xiaomi camera app and set it to 4K and 60fps. Then, go into settings and switch off image stabilisation.
When I edit this footage, I will slow it 50% so now I have really smooth video and without any artefacts created by inbuilt stabilisation.
How to Use Xiaomi ProCut
Xiaomi phones come with an AI editing feature. The idea of using AI for creative reasons is to speed up the process and let some artificial intelligence do some of the work for you. The question is, does it actually do a good job or would you be better off just doing it yourself?
I’m going to quickly show you how to use this feature and then you can try it yourself
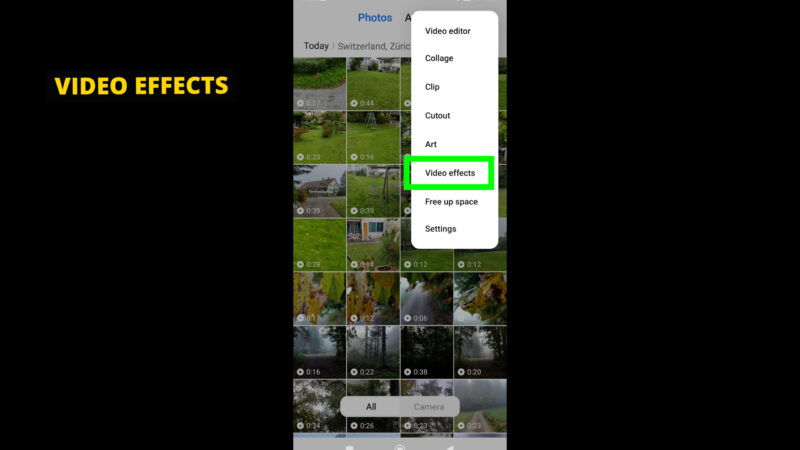
Open the gallery and tap the 3 dots top right to open a drop down menu. Tap video editor.

Now select all the clips you want the AI to edit for you. It seems it’s best to add quite a few clips, say about 10 or more. Otherwise, if it runs out of clips, it will just repeat the same clips.
Tap the tick top right. The app will import those files into the video editor.
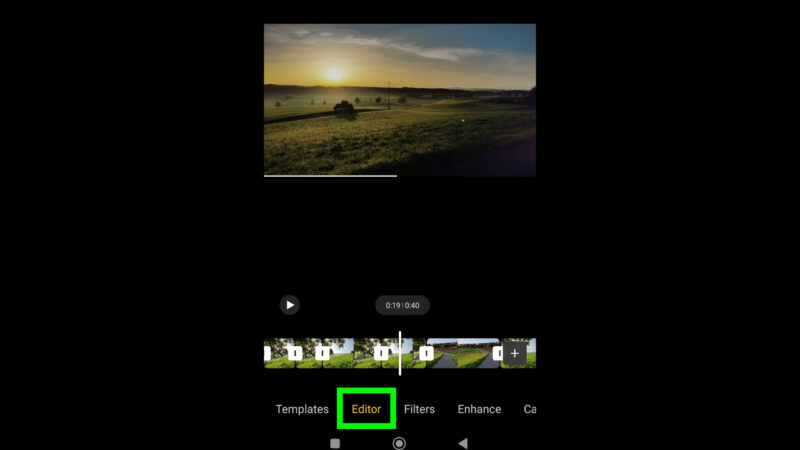
At the bottom you now have a bunch of templates to choose from. If it’s the first time, it will need to download the template first. I’m going to choose Daydream, because it fits my nature footage.
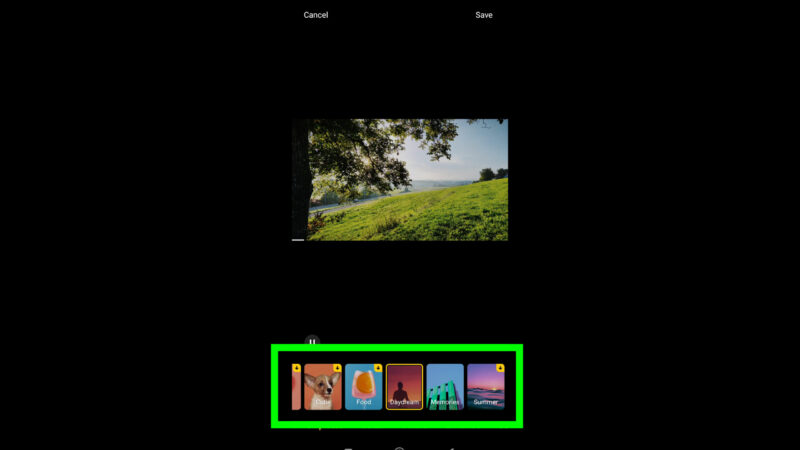
Now the AI edits the clips I selected to some music and adds some colour filter effects as well. To export, just tap save – which is top right.
If you’re not convinced with that particular template, you can try a different one. All you have to do is tap it and the AI will now cut a new sequence using the same clips. I’m going to try Memories.
You don’t have to accept what the AI gives you though. If you tap Editor at the bottom, you can now use the apps editor to adjust clips and do all the basic stuff you do with an editing app like VN or CapCut.
Xiaomi Video Effects
Also in this drop down menu you can find a feature called Video Effects. You can use this for adding various effects to your portrait videos. Basically, a video with a person in it.
Select the effect and choose a clip with a subject. Tap next and at the bottom you will find a bunch of effects. Swipe to choose an effect. Some of them will need downloading before first use.
Now play the video and press and hold an effect. The app will add this effect for as long as you hold down. In the timeline it shows where the effect has been placed. So you can keep adding this effect in different places, or add a different effect.
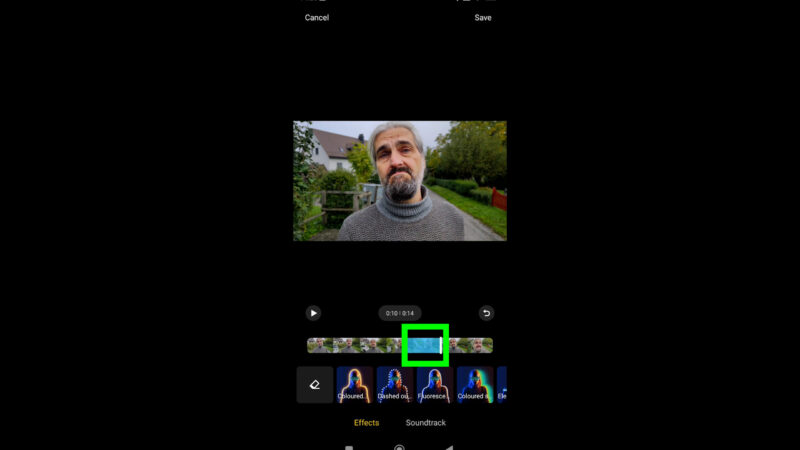
You can see the different effects as different colours on the timeline. So I can playback the clip and see how it looks. If I like it I can tap save top right. If I don’t I can tap the back button to remove them.
Videography – Beginner to Advanced
If you want to know more about filmmaking, my book Smartphone Videography – Beginners to Advanced is now available to download for members on Patreon. The book is 170 pages long and covers essential smartphone filmmaking topics:
Things like how to get the perfect exposure, when to use manual control, which codecs to use, HDR, how to use frame rates, lenses, shot types, stabilisation and much more. There’s also my Exploring the Film Look Guide as well as Smartphone Colour Grading.
Members can also access my regular filmmaking podcast, as well all 5 episodes of our smartphone-shot Silent Eye series, with accompanying screenplays and making of podcasts. There’s other materials too and I will be adding more in the future.
If you want to join me there follow this link.
