How to Focus Pull on a Smartphone – FiLMiC Pro / ProTake / McPro24fps Tutorial
How to perform a focus pull on your smartphone? In this article I’ll show you how, using 3 different Android apps: FiLMiC Pro, McPro24fps and ProTake. FiLMiC Pro and ProTake are also available for iPhone, so you can rack focus with those apps on iOS the same way.
In case you don’t know what a focus pull is, it’s when you move focus from one object to another during the shot. Normally, we set and lock focus and then start recording. But when we rack focus, we move the focus length as we’re shooting.
A focus pull is one of the most commonly used filmmaking techniques by professional filmmakers.
One of the big, big lessons you must learn as an aspiring filmmaker is that your job is to direct your audience to what you want them to look at. So you can do that with an edit. You can do that with a camera movement. You can do that with a frame within a frame.
Or, you can do that by moving or “racking” focus, as it’s known.
Now, we can pull focus by hand and do a good job. But these 3 apps allow you to automate the focus pull, which is generally smoother and more accurate. However, each app is slightly different in the way it works.
So let’s find out which of these apps creates the best focus pulls.
How to Pull Focus with FiLMiC Pro
Open FiLMiC Pro and bring out the exposure and focus wheels. To change focus, just drag with your finger up and down on the focus wheel.
Find the 2 points you want to move focus between and now practice moving between them a bit. You might want to switch the analytics tools on, here, for auto focus peaking.
- set the first point
- hit record & wait a couple of seconds to give yourself some edit room
- drag the wheel with your finger to the second point
- leave a few seconds edit room
- stop recording
OK, so that’s the non-automated way of doing it. It’s obviously easier to do this with the camera fixed on a tripod and not moving around.
How to Automate a Focus Pull with FiLMiC Pro
How do we automate this process in FiLMiC Pro?
- find and set your first focus point
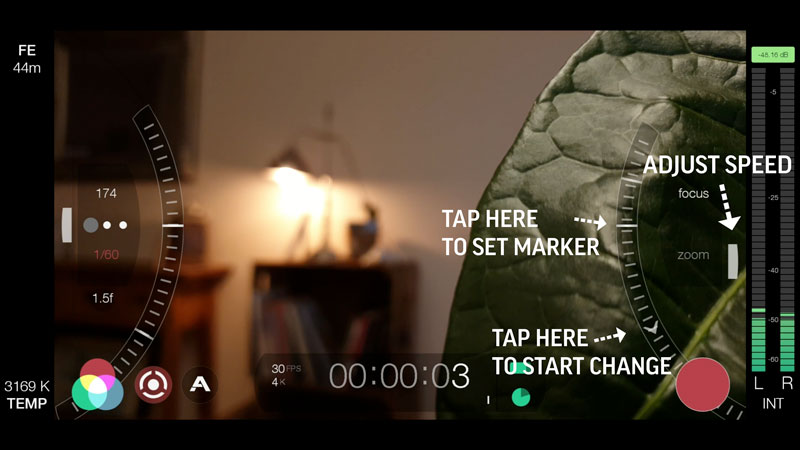
- tap that point on the focus wheel. You should see this little white line slide round the wheel. This means you have set the first point.
- find and set the 2nd focus point
- tap and hold until the 2nd little white line slides round. If there is enough gap between the two points, a small arrow will appear between them on the wheel
- Tap this arrow and FiLMiC Pro will rack focus for you, moving from the 1st point you set to the 2nd
Tap the arrow again and it will go back the other way.
If there’s less room between the 2 points, there won’t be an arrow. You’ll just see the two markers. To start the focus pull in this case, tap the marker line instead.
How to Adjust Focus Pull Speed in FiLMiC Pro
You can set the speed FiLMiC Pro pulls focus. The white controller on the right of the wheel controls the speed. Move it up and down to set speed from 1 to 10. 1 is the slowest, 10 the fastest.
Set the speed of the focus pull depending on your shot. What effect do you want the shot to have? The slower the focus pull, the more obvious it will be. And, of course, the greater distance between the objects, the more obvious it will be too.
How to Pull Focus with ProTake
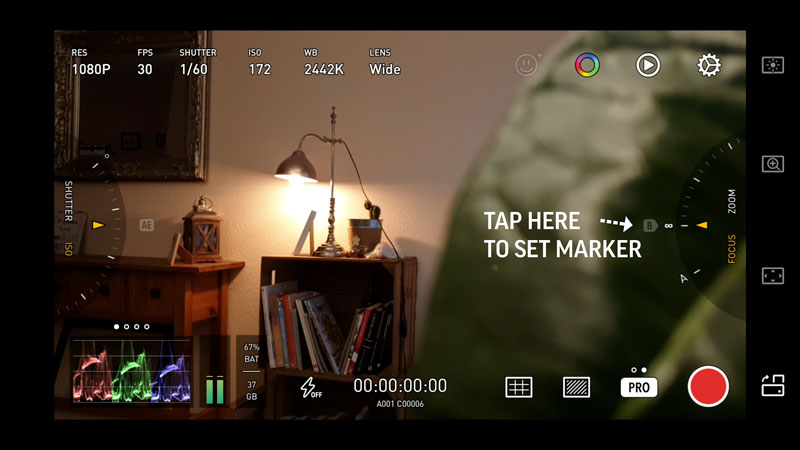
Open up ProTake and switch to Pro mode. Like FiLMiC pro, you have 2 control wheels, one for exposure and one for focus. Again, you can pull focus just moving the wheel with your finger, but the wheel is smaller so it’s not as easy to get it smooth and accurate this way.
You’ll see a little marker labelled “B”. It will be greyed out until you choose a focus point and tap it. Now, when you move the wheel, it changes to an “A to B” marker. So, the end point is B and the start point of your focus pull is wherever you move the wheel.
- find the end focus point
- tap B to set marker
- move the wheel to the starting focus point
- hit record and give yourself a couple of seconds
- tap the A to B marker and the focus slides smoothly to the B marker set earlier
As far as I know, there’s no way to change the speed of the focus pull on the ProTake app.
How to Pull Focus with McPro24fps
With McPro24fps, 2 arrow buttons set the focus pull running as well as mark the A and B point. You can switch focus peaking on in the settings menu, via the cog icon at the bottom of the screen.
McPro24fps is a bit different in that the range of focus (marked in orange) shrinks when you set a limit. Rather than marking the position along the wheel, it removes it the parts of the focus wheel you are not using. You see the arrow buttons turn orange when the limits are set and the orange portion of the wheel marks the distance between the 2 focus points.
- find your first focus point and now
- tap and hold on one of these arrow buttons. This will set the top or bottom limit of the focus movement.
- set the bottom limit (now the black focus line sits right at the bottom of the wheel)
- move focus to the second (top) position.
- long hold on the top marker
- hit record, wait 2 secs
- press whichever of these 2 arrows is going in the direction you want and the focus pulls takes place.
- wait 2 secs
- hit stop
Adjust Focus Pull Speed with McPro24fps
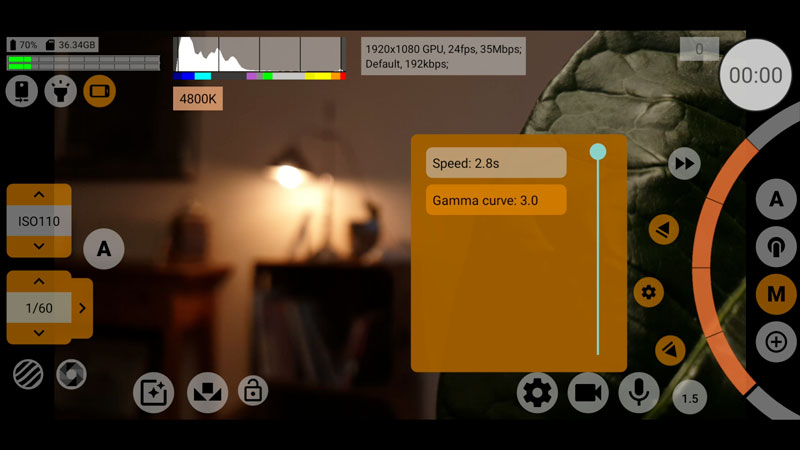
Like FiLMiC Pro, McPro24fps allows you to set the speed of the focus pull. Just tap the cog icon which sits between the 2 marker arrows and use the slider to adjust the time. McPro24fps also has another setting (gamma) which allows you to adjust how the focus pull arrives at its final position.
Basically, with this you adjust how it eases in. Rather than snapping to the last position, it slows down and then stops to add a little extra sweetness to the focus pull. I don’t know about you, but I can’t see too much difference wherever I set this gamma curve.
Add a Telephoto Lens
Most smartphones have a wide lens with a wide depth of field as their main camera. This can make it harder to create an impressive focus pull. Because the change between focus doesn’t show up as much as when you use a long lens.
As well, 3rd party apps often don’t have access to a telephoto lens even if the device has one. Which is the case with my Samsung Note 20 Ultra – no app can access the tele lens. Even Samsung’s own native Pro Video mode!
You see, everything within the depth of field is in focus. So when you adjust focus you are not really adjusting a single point. You’re moving a focus range. So, your focus pull will be more effective if this range is narrow – which is what you get from a tele lens.
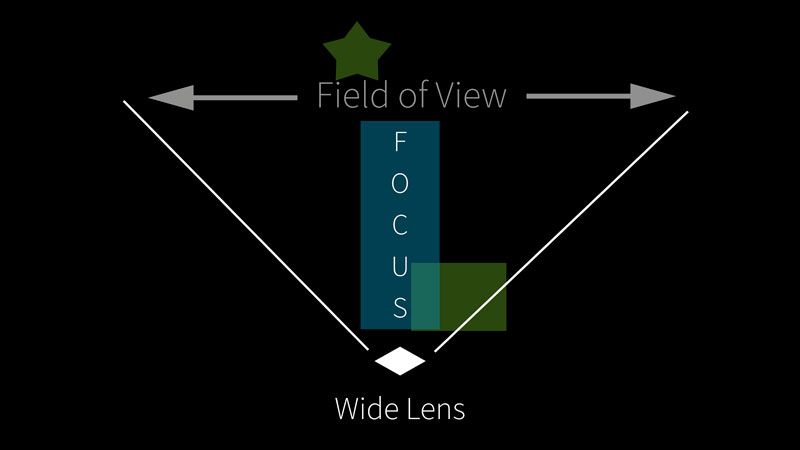
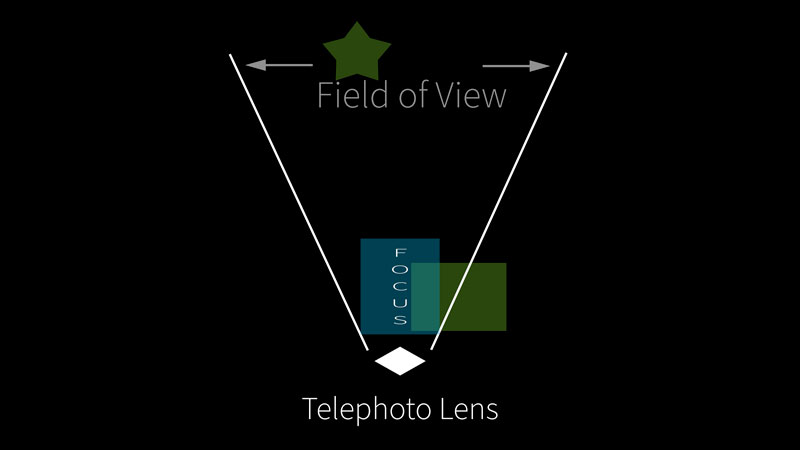
Another advantage of using a tele lens is it narrows the field of vision. In this shot, I have the leaf very close and the lamp on the side table is about 5 feet (or a meter and half) away.
Now, with the native wide lens of the Samsung S9, the lamp looks quite small in the frame. And if we’re directing the viewer’s attention from one object to another, the effect is diminished when the second object is so small – it’s not so clear what we are directing the audience to.
But with a tele lens we can narrow the field of view and make it clearer what we are telling the audience to look at.
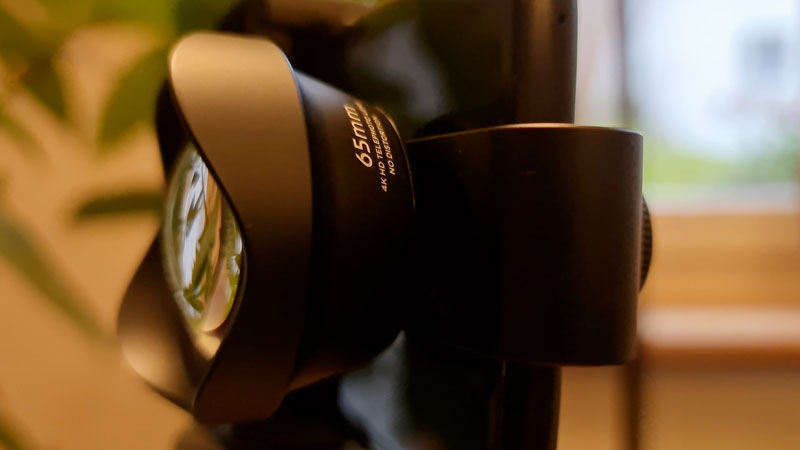
I love this cheap little Ulanzi 65mm tele converter lens. It’s very affordable. I think I picked this up for about $25-30. Now see the difference between the 2 shots. When I’m using the tele, the focus pull is stronger, in my opinion.
Which is best?
ProTake is certainly the easiest to use when it comes to setting the automatic focus pull. On the downside, you can’t adjust speed. Plus, the smaller wheel is not so good for adjusting focus, if you want to do it by hand.
FiLMiC and McPro24fps are pretty similar, although FiLMiC can be a bit fiddly to set, especially with a smaller screen. Plus, McPro24fps has that extra feature with the gamma curve, although I couldn’t really tell any difference.
Eager to learn more?
Join our weekly newsletter featuring inspiring stories, no-budget filmmaking tips and comprehensive equipment reviews to help you turn your film projects into reality!