Insta360 Flow 3-Axis Smartphone Gimbal – Review & Tutorial – vs DJI Osmo Mobile 6
I’ve been sent another fantastic gimbal. This time by a company who have never made a gimbal before. Looks like 2023 is starting off as a great year for smartphone gimbals.
Insta360 are known mostly for their 360 cameras, a few of which I’ve looked at for the channel. But now they’ve put their minds to a 3 axis smartphone gimbal, the Insta360 Flow. While there are some features which look familiar, they’ve also included some excellent new and unique design ideas.
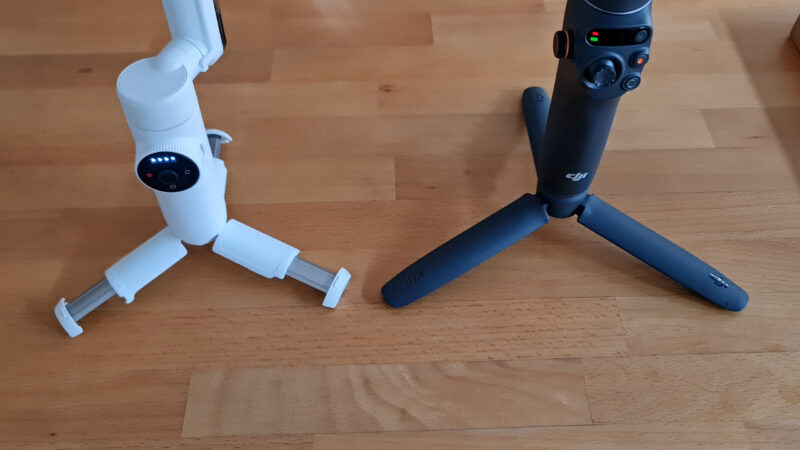
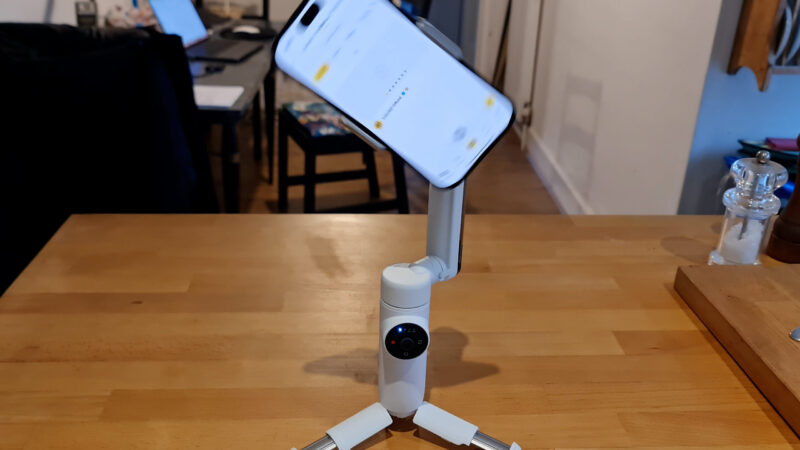
The gimbal folds up very neatly indeed, with tripod legs inbuilt into the handle.
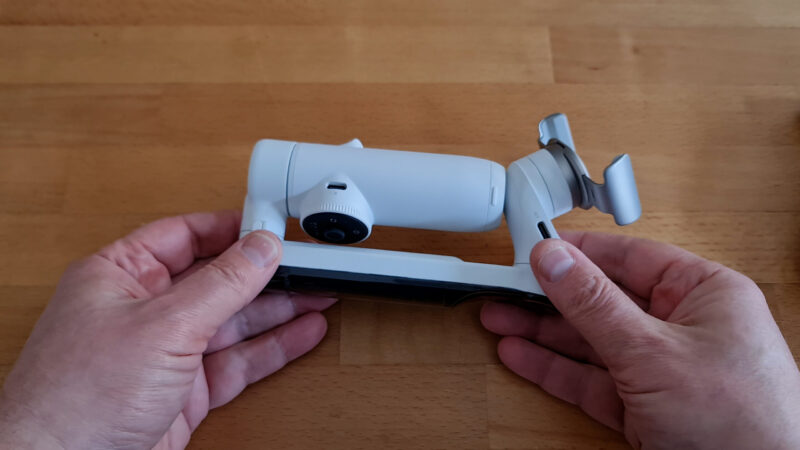
The arm is clear plastic, so you can see the electronics inside, which is a bit different. Insta360 tells me you can place custom designs inside so you can pimp your gimbal a bit. There will be designs available via their website, like they did with the Insta360 GO 2.
Before You Buy
Check out my FREE Full Guide for the Insta360 Flow.
Insta360 Flow vs DJI Osmo Mobile 6
The Insta360 Flow is really a direct competitor to the DJI Osmo Mobile 6. But how does it compare?
Insta360 sent me a list of all the ways they think the Flow is better. But rather than take their word for it, let’s put the gimbals to the test.
All-in-One Design
First of all, they say the Insta360 Flow has an all-in-one design because the gimbal has a tripod, cold shoe and extendable handle inbuilt. Whereas with the Osmo Mobile 6 you need to add the tripod and a cold shoe mount.
One concern with the inbuilt legs is that if one gets broken, you can’t replace it. With other gimbals the mini tripod can be replaced pretty cheaply. As well, these legs are not as stable as the traditional mini tripod legs you get with gimbals. However, there’s nothing to stop you using mini tripod legs instead, it still has the tripod port at the bottom.
Having tested the gimbal for a few hours, it is definitely very convenient with inbuilt legs. I did notice it wobbling a bit during the timelapse shots, because it was a bit windy. But the stabilisation of the iPhone 14 Pro was able to smooth it out.
As well, you can actually fold up the Flow and keep the clamp and phone attached. With the Osmo Mobile 6, you need to remove the clamp before you fold it.
Fast Deployment
Insta360 says the Flow has a 1-step system which makes it faster than the Osmo Mobile 6 to mount your phone and be ready to start using the gimbal.
In my test, the Insta360 Flow was definitely a touch faster. And I’d say it’s also easier, because you can mount the phone while it’s still folded.
Better Tracking
Insta360 makes a number of points about the Flow gimbal’s AI tracking features and how they are an improvement on the Osmo Mobile 6’s tracking.
First of all, the Flow can identify a person tracked after tracking is lost and then start tracking them again. And is, in general, better at recovering tracking of a person after tracking is lost for a few seconds. When I tested them, the Flow kept on tracking and searching for longer than the Osmo Mobile 6.
Indeed, the Insta360 Flow maintained tracking even after I hid around the corner, while the Osmo Mobile 6 didn’t. But only with the main camera. When I tried the front selfie camera, neither gimbal was able to maintain tracking.
Tracks After Subject Changes
Secondly, Insta360 says the Flow can recognise a subject (either a person or object) and keep tracking, even after the subject changes angle and therefore looks different.
I tested this claim with a pot which I picked because the pattern around the side makes it look very different when you turn it on its side. Again, the DJI Osmo Mobile 6 wasn’t able to keep tracking when I turned it around, while the Flow could.

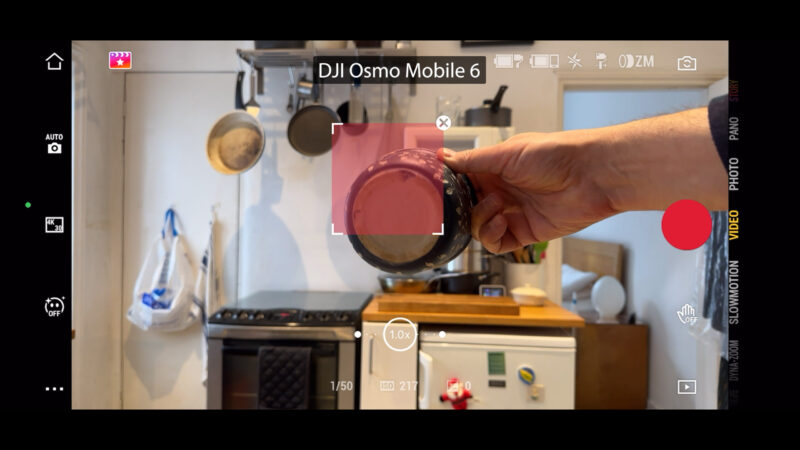
However, I did notice that the Flow lost track when I moved the pot around more quickly. Most of the time, it found the pot again. It did finally give up, so it’s not infallible. But it is definitely better at tracking than the DJI gimbal.
Slow Motion & Zoomed-in Tracking
The Insta360 Flow supports tracking even in slow motion mode, whereas the Osmo Mobile 6 doesn’t. When zooming, the Insta360 Flow can keep tracking up to the zoom limit of your device. The Osmo Mobile can only keep tracking up to 3x zoom.
Again, the Insta360 Flow passed the test. Not sure how often you would use that but still, it can do it.
Insta360 Flow – No Gesture Control
When it comes to tracking, the main advantage the Osmo Mobile 6 has is the gesture control feature, which is absent from the Insta360 Flow gimbal. Having gesture control definitely makes it easier when filming solo, especially if you want to use the main camera rather than the selfie camera.
Better Mode Switching
Now this is one of the features of the Flow which is new and unique and it’s pretty cool too. To change modes, all you do is swipe your thumb around the black interface. With the Osmo Mobile 6, you press a button but you can only go in one direction, left to right. If you want the mode to the left, you need to cycle all the way around.
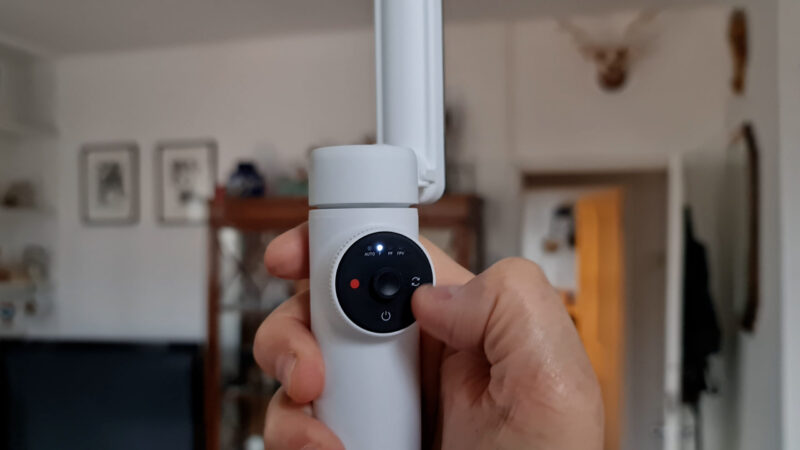
With the Flow, you can swipe left or right and it works both ways. To cycle through modes, just keep circling your thumb around.
With the Flow you can also switch between front and back cameras while recording. With the Osmo Mobile 6 you need to stop recording to switch. This makes vlogging a bit easier as you don’t have to interrupt recording to change your view.
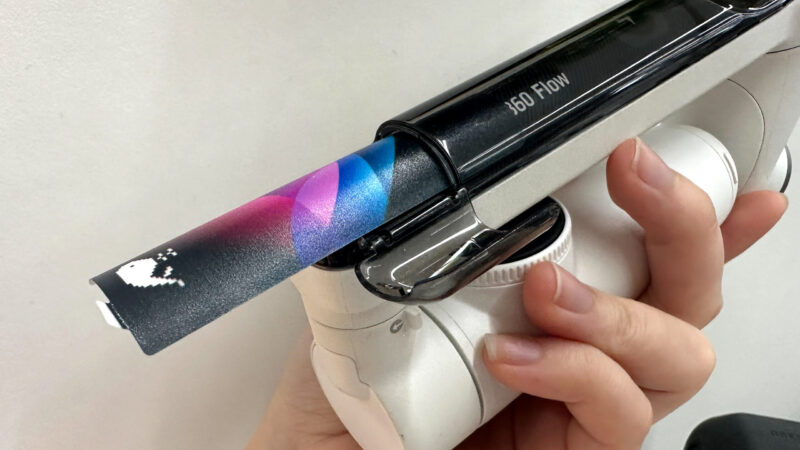
Better Lens Selector
Switching lenses is also easier. This circular control panel also has a knob part which you can twist. And it’s very easy to operate with your thumb while holding it.
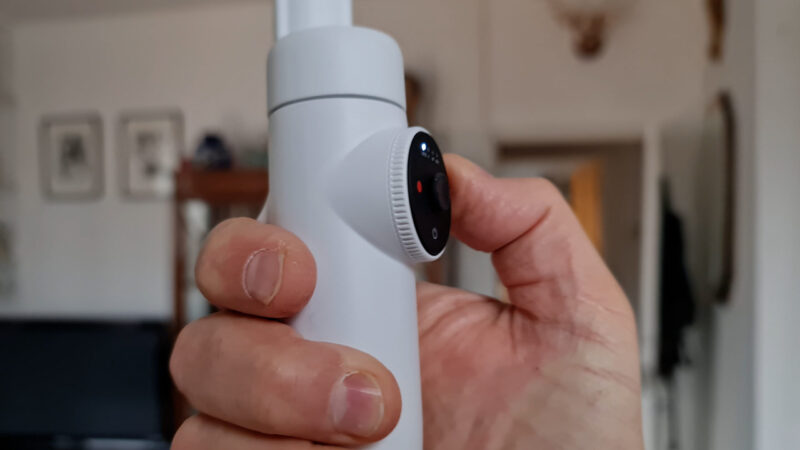
Pull to the left and hold to zoom out. Pull to the right and hold to zoom in. Pull and let go and it snaps to the next camera. So that’s probably the best lens changing control I’ve used on a gimbal.
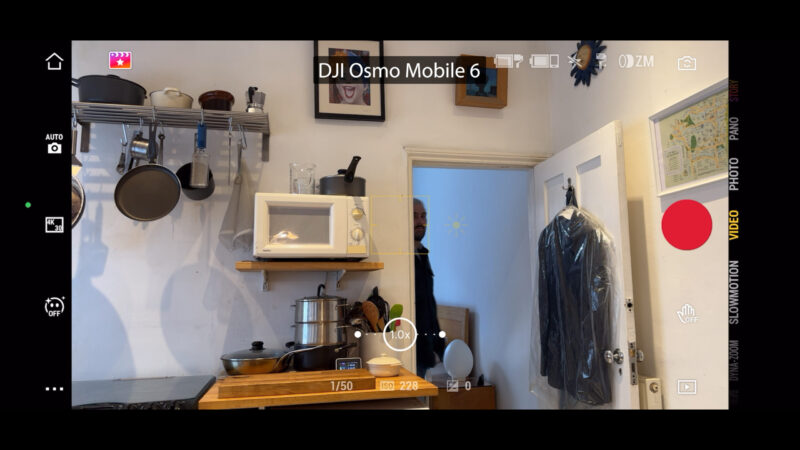
With the Osmo Mobile 6 you can use the zoom knob but it’s more tricky. Otherwise you have to use control on the smartphone screen.
Easier Media Preview
Another nice feature allows you to easily preview the last clip. Just tap and hold on the switch button. The Osmo Mobile 6, on the other hand, requires that you use the screen interface.
Auto landscape to portrait
If your phone is in vertical mode but the clip is horizontal, it actually automatically switches the phone to horizontal so you can preview the clip with the full screen. And vice versa as well.
This also works when you switch to the home screen. The home screen reads in vertical mode so if you are in horizontal mode in the shooting part of the app, then tap the home screen button, it switches automatically so you can read it easier.
Which is a nice touch, isn’t it?
Smooth Hyperlapses
Another cool thing I noticed when I was filming a hyperlapse (which Insta350 calls TimeShift), when you turn a corner the gimbal pans very slowly. And this is perfect for hyperlapse because if you pan too quickly, it can look jerky.
All-Day Battery Life
The Insta360 Flow has a much more powerful battery, which will last almost twice as long at 12 hours. While you probably won’t use your gimbal for 12 hours straight, the extra battery means you have more juice available to use your gimbal as a charger for your phone, should you need it.
Other features
The Insta360 Flow has some other features which are probably worth mentioning.
The Flow can shoot 360° Panorama Photos and Insta360 says this is the only smartphone gimbal that can do that.
There’s also a thing called Hoop Mode, which uses AI to capture highlights of a basketball game. The AI recognizes when you make a basket and autosaves the highlights.
There’s also Widescreen Mode which crops the frame to a cinematic 2.35:1 frame ratio and allows you to add different coloured filters. Actually, filters are also available when you’re not in Widescreen mode.
Max Payload
When it comes to how much weight each gimbal can carry, they appear to be about the same. I tested the Flow with an iPhone 14 Pro, Moment case & 1.33x anamorphic and it handled that setup fine. But I wouldn’t want to load it up with much more than that.
Advantages of the Osmo Mobile 6
So what does the DJI Osmo Mobile 6 do better than the Insta360 Flow?
One thing is the zoom control which can also be used as a focus control, which allows you to shoot focus pulls. Another advantage for the Osmo Mobile 6 is the touch sensitive joystick, which allows you to move the gimbal at different speeds.
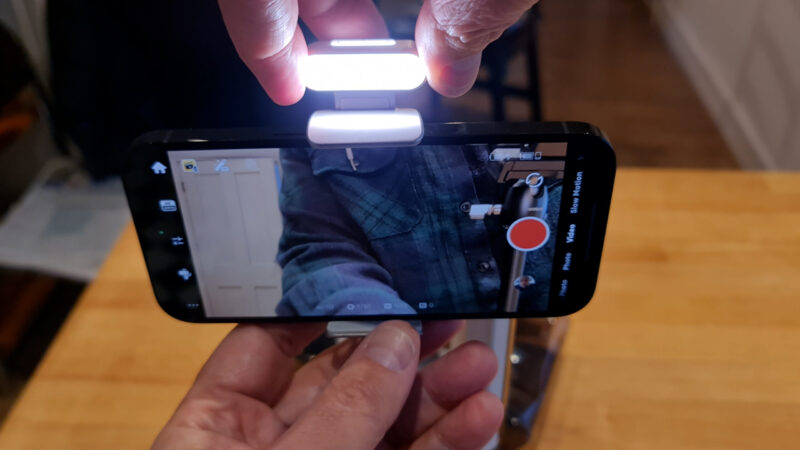
Fill Light
The Insta360 Flow Creator Kit comes with a fill light. Clip it onto the clamp and then plug the USB C cable into the port on the arm. You can face it either way.
Quick Start
The Insta360 Flow has the exact same quick start feature used by the DJI Osmo Mobile 6. With a recent iPhone, as soon as you power on the Flow, you get a notification prompting you to open the Insta360 app. So you can start shooting a little bit quicker.
For this to work you need to enable it in the Insta360 app as well as allowing notifications for the app and location information in your iPhone.
Conclusion
For a fold up, portable smartphone gimbal, I really like the Insta360 Flow. To me this feels like the next step in lightweight gimbal design. This is serious competition for DJI and Zhiyun, which will hopefully push them to be a bit more innovative with their foldable models in the future.
This SmartWheel, which was inspired by the classic Apple iPod design, is a great bit of innovation. Only thing I would add is to allow the zoom wheel to also control focus. The magnetic clamp is obviously straight from the OM gimbals, but the way you can power up and be ready to start filming is really well thought out.
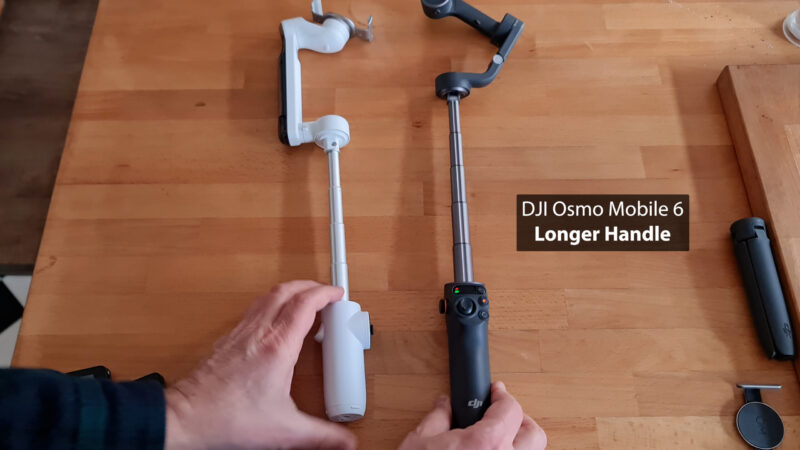
Then there’s the extendable grip, inbuilt tripod legs and there’s even the option to add a more comfortable grip for bigger hands.
So I went out filming to give it a proper test and the Insta360 Flow did not disappoint. I also like the action of the gimbal when performing tilt shots. You get a nice ease in and out which looks pretty pro.
Being able to switch lenses with a flick of the zoom wheel is a dream compared to other gimbals I’ve tried.
Having a gimbal that folds away so compactly really makes this truly portable. I love the controls and the design. Look at the difference between this and Osmo Mobile 6. I’ve only had the gimbal for a few days, but this gimbal now makes other fold-up gimbals look a bit like relics of the past.
Getting Started
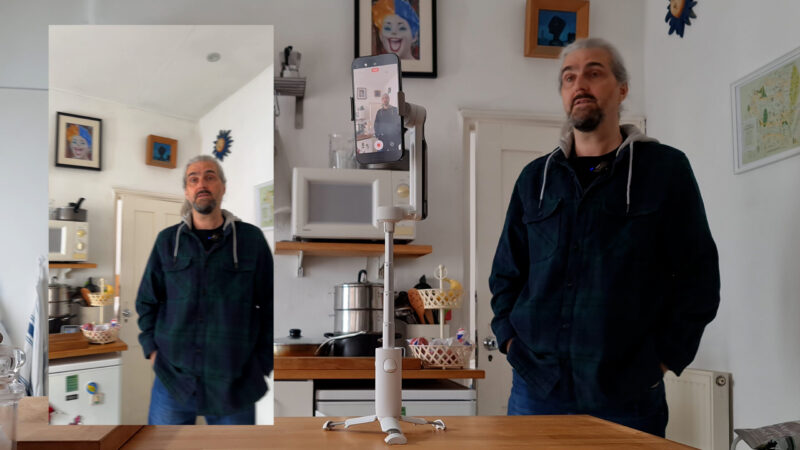
After unboxing your Flow (that sounds like a meditation technique, doesn’t it?), you need to install the Insta360 app, connect the gimbal and activate it.
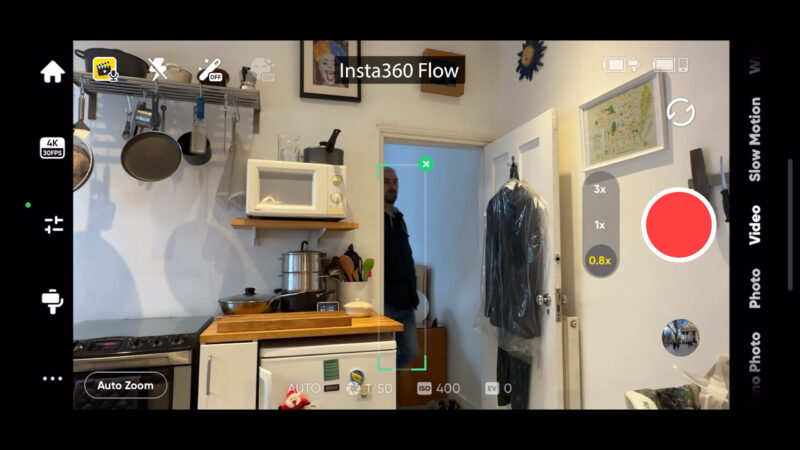
Place your phone in the clamp so the cameras are on the side of the clamp indicated by this symbol.
Mount the phone to the gimbal. Twist the arm and the gimbal will power on and place your phone in vertical mode.
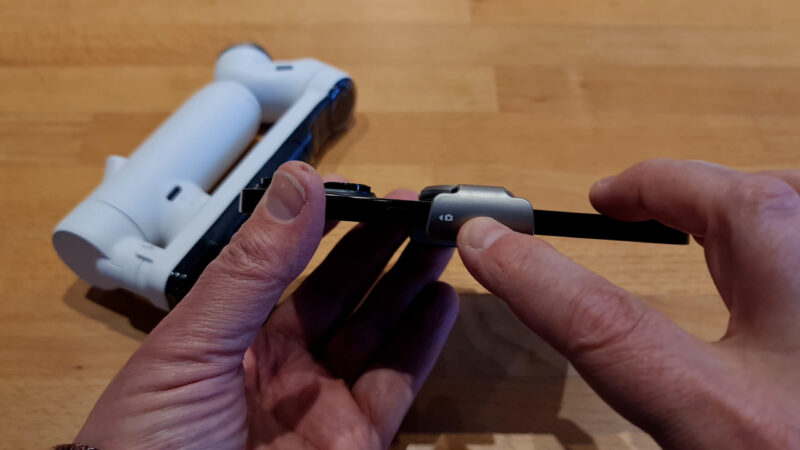
The handle is very short and not too comfortable. At least, for me anyway. But you can simply extend it at the bottom.
If you extend it further, you now get the tripod legs.

Insta360 Controls – SmartWheel
At the bottom is the power button. The gimbal powers on and off when you open and close it. But you can also power it on and off by long pressing the power button.

If you short press the power button, the lights flash telling you how much battery remains. If you short press the power button twice the gimbal goes into sleep mode. To wake up the gimbal, press any button once.
Record Button
Press the record button to start recording or take a photo. If you’re in photo mode and you long press this button, your camera will shoot a burst of photos.

Change Modes
The Insta360 Flow has 4 main modes: Auto, Follow, Pan Follow and FPV.
To switch modes, swipe around the SmartWheel with your thumb or finger. You can also double tap lightly on the record or switch buttons to advance the mode left or right. But don’t press down the button, just tap lightly like tapping your smartphone screen.
Modes
The Insta360 modes are mostly the same as we are used to using with other gimbals. But the first mode of the 4 is different and it’s simply called Auto.
Insta360 says Auto mode is good for beginners as it will adjust to what you are doing to give you the best results. Again, this is perhaps another Apple influence. Like many iPhone features, Auto mode does the thinking for you.
For example, if the gimbal detects you are running, it will be less sensitive and more stable. If you are walking or standing still, the gimbal will be more sensitive.
In Follow mode, the gimbal will not follow roll movements, but will follow tilt and pan movements.
In Pan Follow, the gimbal will only follow pan movements. However, like the Osmo Mobile 6 this gimbal has such limited tilt movement that you only have to tilt the gimbal at a small angle and it will follow.
In FPV mode, the gimbal follows movement on all 3 axes. So this is great for more expressive camera movements. As well, if you twist the zoom wheel in this mode the gimbal will roll the camera to create a spin shot.
Trigger Button
Press the trigger once to start tracking. Press again to stop tracking.
2 taps on the trigger recentres the gimbal.
Press 3 times to rotate the camera 180°. This can be useful if you want to capture yourself with the better quality main camera.
While you hold the trigger down, the gimbal will be in locked mode. This means the gimbal will not react to any movements. This is good for shots where you want to move in a straight line.
Tap, release and then hold the trigger to enter Active Plus mode. This is like Sport mode in the DJI gimbals and it means the gimbal will react quicker to movements.
If you are on the home page, tap the trigger one time to go into shooting mode.
Switch Button
Press the switch button once to switch between front and rear cameras. This works whether you are recording or not.
Press the switch button twice to switch between landscape and portrait mode.
Triple press the switch button to switch between photo and video mode.
Now if you long press on the switch button, the Insta360 app enters Player Mode.
Player Mode
In player mode, you can view media you have captured with the gimbal. The last item you capture will be viewed and if it’s a video it will start playing automatically.
Now, if you do that circular swiping motion you can skip backwards and forwards through a video clip. To play a clip, tap the trigger (or screen). Tap again to pause.
You will now have 4 options at the bottom to favourite, get info, unmute or trash the clip.
Press the record or the switch button to cycle through all your captured media.
You can use the zoom wheel to zoom in and out of any media. And you can then use the joystick to navigate around a photo.
Finally, press the power button to return to shooting mode.
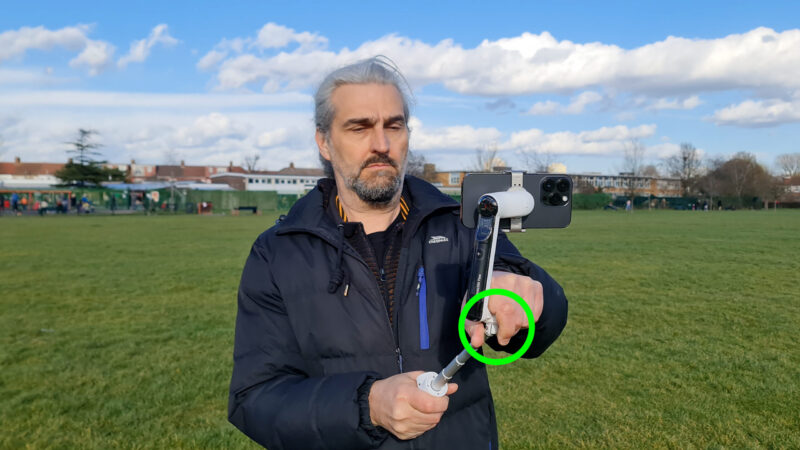
Extended Handle Tips
Here’s some tips for getting the most out of the extending handle. These are shots you really can’t get holding your phone in your hands, no matter how good the stabilisation is. Unless you happen to have exceptionally long arms.
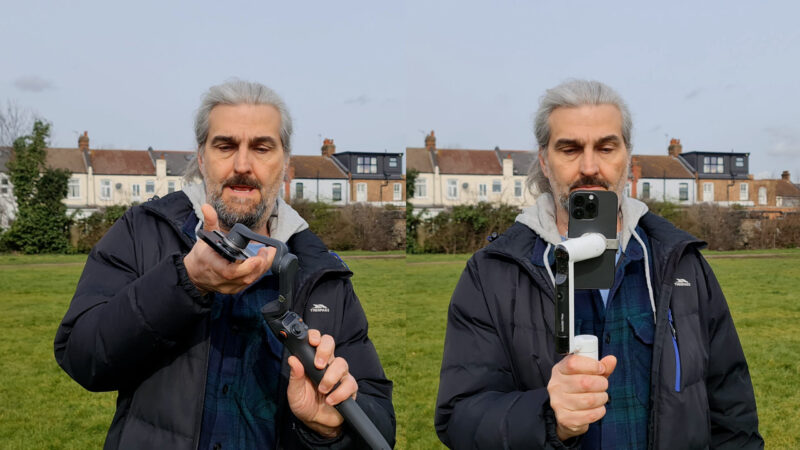
The most obvious is using it to get a selfie photo or video. Pull it out as far as it will go and then you can adjust the angle.
I’ve used it to film myself with the selfie camera as well as the main camera. Usually you will get better quality with the main camera, but of course framing is harder.
To use the main camera, first tap the trigger 3 times to rotate 180°. Again set the angle manually.
The extended handle can also be used with the gimbal on the tripod legs. If you are filming yourself, tap the trigger to start tracking. Press record and off you go.
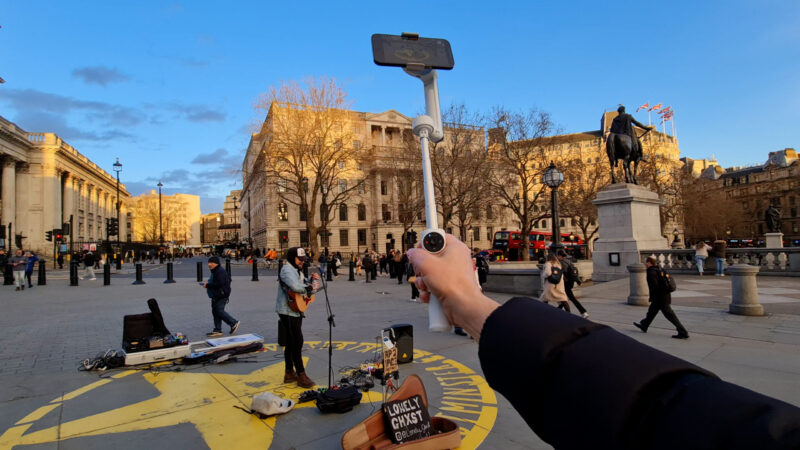
The extendable handle can also be used to get high and low angles that would normally be beyond your reach.
Extend the handle and lower the camera to the ground. The camera will flip upside down, but it’s fine as smartphone cameras are designed to shoot upside down.

Use the joystick to angle upwards slightly. Start recording and move along in a straight line. This shot looks really cool if you motivate the camera movement by tracking movement in the frame.
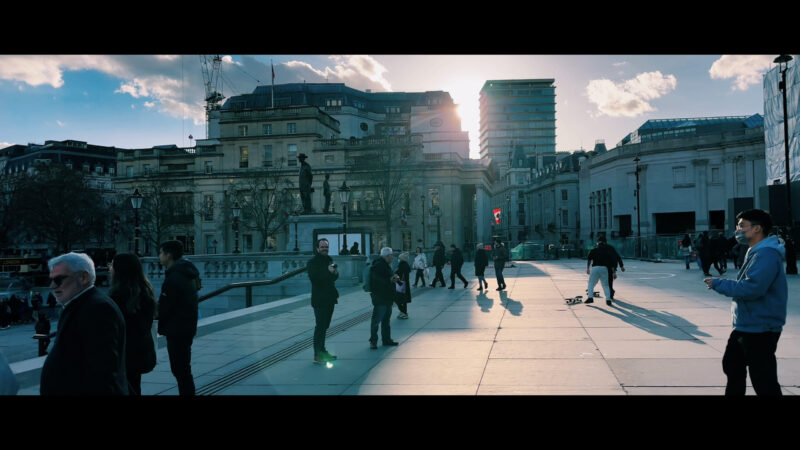
I was able to get an angle down shot I got of some buskers in Trafalgar Square in a similar way. Just extend the handle, use the joystick to get the angle right, start recording and circle around the subject.
To make these shots look extra smooth, I will often shoot at 60fps and slow the shot to 30fps when editing.
Smartphone Videography – Beginner to Advanced
If you want to know more about filmmaking, my book Smartphone Videography – Beginners to Advanced is now available to download for members on Patreon. The book is 170 pages long and covers essential smartphone filmmaking topics:
Things like how to get the perfect exposure, when to use manual control, which codecs to use, HDR, how to use frame rates, lenses, shot types, stabilisation and much more. There’s also my Exploring the Film Look Guide as well as Smartphone Colour Grading, as well as over 50+ video lessons covering topics such as cinematic camera movement, framing and editing.
If you want to join me there follow this link.

Thank you for the in-depth review! Wondering if you tried it with a lens and filter on the iphone 14pro? Also no one seems t make mention of if it can work with counter weights like some of its competition?
the Flow does not have a counterweight port
How does it do with crane shots on a monopod. How is the tilt axis limit? Would I need to build something like this:
https://www.youtube.com/watch?v=vnE2Yav4XmE
Basically I’m wondering if it has better range than any of the DJI devices (which all apparently suffer from the same issue as the Osmo 3 in the linked video.
I use a monopod to get crane shots with all the Osmo Mobile gimbals and the Insta360 Flow works the same. I used it for a short film a few days ago and it worked fine. Check out my OM tutorials on YouTube to see how it’s done.
Is there a work around for not allowing the insta360 app access to your whole photo/video gallery on your phone? Isn’t this a privacy concern for anyone?