Master Your DJI Pocket 2 – Epic Tutorial Instructions Creator Combo
In this article you will learn everything you need to know about your DJI Pocket 2 camera-gimbal.
I’m using the Pocket 2 Creator Combo but there’s not too much difference in how they operate and what you can achieve. What I like about the DJI Pocket cameras is that they open up some creative opportunities not available using a smartphone and the OM 4.
So I’m going to show you how to get some spectacular shots using a DJI Pocket 2 camera. I’ll also talk about the different modes, when to use them and how to get the most from them. I’ll talk about the DJI Mimo app and how it works with the Pocket cameras.
If you’ve just bought one and you’re getting started for the first time, the next section is for you. If you’ve already set up your Pocket and have some experience using it, you can skip to the following parts.
Setting Up Pocket 2 & Creator Combo
If you purchased the creator combo like me, your box arrives with all kinds of extras. At first, it might look a bit intimidating. So the best thing is to make yourself your favourite drink and give yourself the time to work through this.
I already have the DJI Mimo app on my phone. But if you don’t then you may as well get that downloaded and installed. You will need the Mimo app to activate the Pocket camera. But also you can use it to control the DJI Pocket 2 and get a bigger screen to look at, as well.
You can remove all the protective stickers. There’s a lot of little bits and pieces here so we will want to keep those organised. There’s space in the case to store the wide angle adapter (there’s a magnet to keep it in place) and the smartphone connectors.

The very first thing to do is activate your DJI Pocket 2.
Activation
To activate your DJI Pocket 2 you will need a smartphone with the DJI Mimo app installed. You will need a memory card installed into the Pocket as well – this doesn’t come with the device so if you don’t have one you will need to buy one.
The one I have is a SanDisk Extreme Pro 128GB. It just slots into the side with the metal stripes facing upwards. Power up the Pocket camera by pressing and holding the power button on the side.
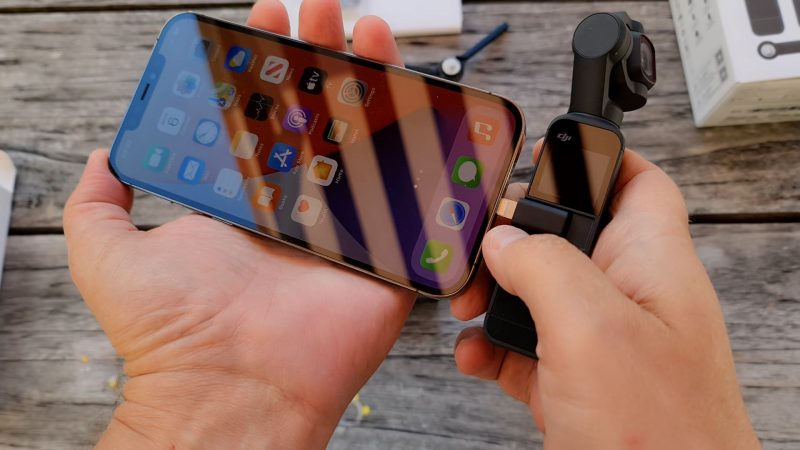
To connect your smartphone, DJI provides 2 connectors. A USB C for Android devices and a lightning connector for iPhones. As soon as you connect your smartphone, the DJI Mimo app boots up automatically. At least it did with my iPhone 12 Pro Max.
Now you just need to go through the activation procedure, which involves DJI sending you an activation code via email. After that, you will probably be prompted to install a firmware update. I recommend you install that.
Once that is all done, your Pocket gimbal is ready to go.
DJI Pocket 2 Power Up Tip
There’s a power button on the side of the gimbal. Press and hold and the camera powers on, with the camera facing towards you – in selfie mode.
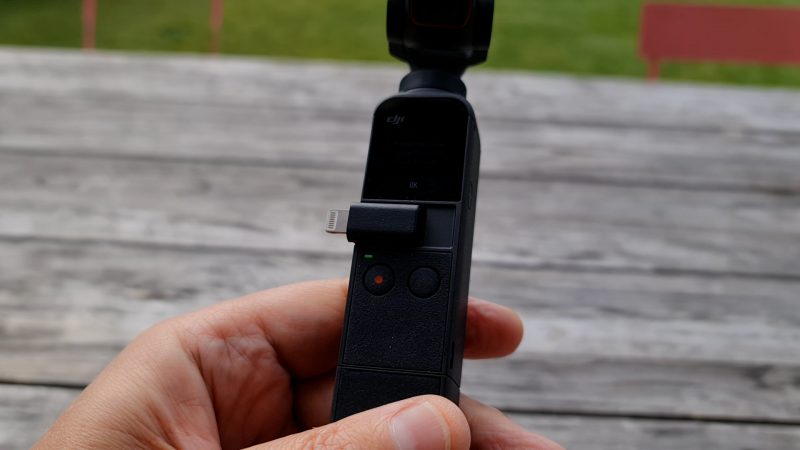
But on the front of the DJI Pocket 2 there are 2 buttons. The one with the red dot is the record button for video or shutter button for photos. The one on the right, with no red dot, is the mode button. But if you use this as the power button, tap and hold, the camera will start facing away from you.
So these 2 power on buttons allow you to get started filming more quickly. If you know you want to film yourself, use the side button. If you know you want to film something else, use the front button.
OK, let’s get a feel for this camera. Boot up so the camera is facing away from you and hold it by the handle. Now just twist it a little bit left and right.
Ease In, Ease Out
Notice that when you move, the camera eases in and out of the movement. The camera doesn’t move exactly as you move. Rather it slowly speeds up, so it’s behind your movement and then it catches up.
As well, when you stop moving, the camera doesn’t just stop. It slows to a stop.
I think some users see this as a problem, almost like a design flaw. But it’s really not. This is designed to act like this because it gives you smoother, more cinematic camera movements.
I’ll talk about that more later, but before you go any further, it’s a good idea to just spend a moment playing around with this. Get a feel for it, because you’ll want to incorporate this into your camera movements when you’re filming.
The reason you bought this is for the movement. If you’re not using the movement, there’s not really much point in using the Pocket.
Recording
When you press the button with the red circle the Pocket starts recording. Note that when you start recording it beeps once and when you stop recording it beeps twice. It’s good to remember that because one of the most common errors is to get those mixed up.
Mini Control Stick
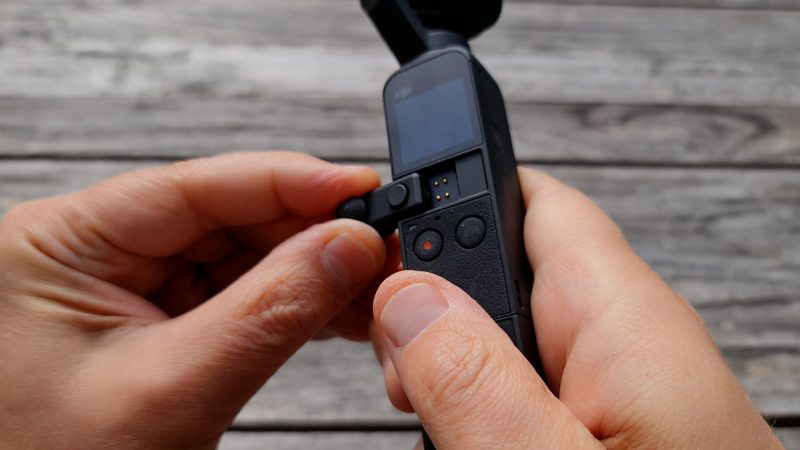
This is the mini control stick for the DJI Pocket 2. The original Pocket comes with a control wheel. By the way, the extras for the original Pocket all work with the Pocket 2. So if you have the control wheel already, you can use it with the Pocket 2.
Remove the smartphone connector and replace it with the control stick. The button goes on the right.
If this is your first time using the Pocket, when you use items for the first time, the gimbal offers you some quick start guides. You can use those or just let me explain everything for you (I recommend the latter).
Once you have the mini control stick in place, you can use it to tilt and pan the camera. Or, if you switch it to zoom, you can also use it to zoom in and out.
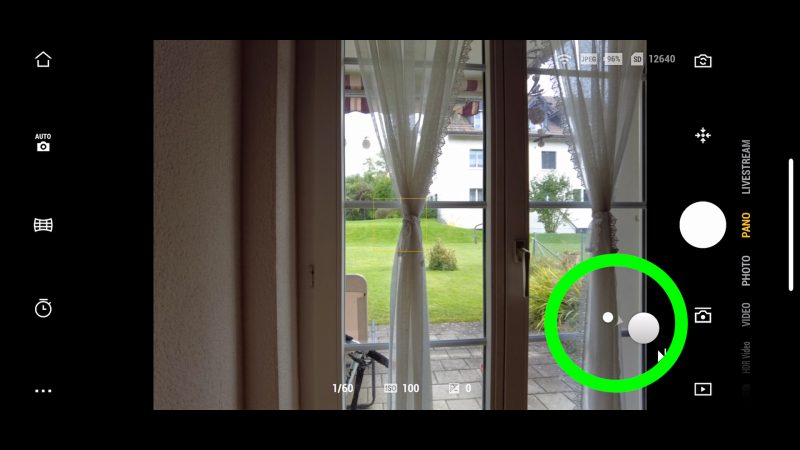
Note that when you have tilt & pan selected, there’s a slider (with a plus and minus sign) at the right side of the screen which can be used to zoom. Swipe up and down on the slider to zoom.
You can use the button on the right to move through the different modes. If you’ve used a gimbal before, you’ll be familiar with these modes.
DJI Pocket Modes
The DJI Pocket offers you 4 modes: Follow, Tilt Locked, FPV and Locked.
The first 3 modes are accessed using the control stick button. To access Locked mode, press and hold the modes button (the button beside the record button). When you release the button, the Pocket will exit Locked mode.
More about modes later.
You will notice that there’s very few controls on the gimbal itself, even after we added the control stick. But you can access many many different settings using the little Touchscreen.
So let’s look at how the screen works and some basic settings.
Touchscreen Controls
To access most of the Pocket gimbal settings, swipe up, down left or right. All 4 directions open up various options and menus.
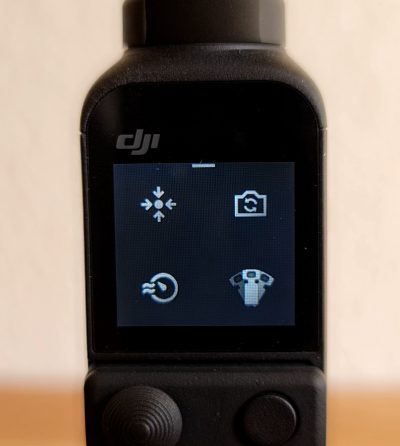
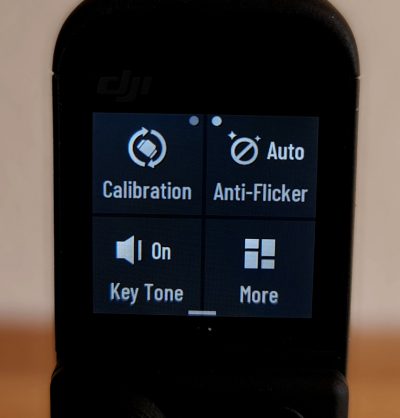
Swipe DOWN on the screen and you will get a cog symbol. Tap that to open up more settings. But you can also swipe left and right on this screen to access yet more settings.
Swipe RIGHT on the screen and you will open up the gallery containing your videos and photos. LEFT swipe to go back to the main screen.
Swipe LEFT on the screen to open up shooting mode options. You can choose video, photo and HDR video plus other modes like Slow-Mo and Timelapse. Swipe RIGHT to go back to the main screen.
Finally, swipe UP to access a screen with 4 control buttons. Top left recenters the camera, top right flips from front to rear facing camera. Bottom left switches between fast and slow follow mode and finally bottom right switches modes.
Function Button
The button to the right of the record button is called the Function button. Here’s some functions controlled by the function button.
- 1 tap to switch between photo and video mode.
- 2 taps to recenter the camera.
- 3 taps to flip the camera between facing away to facing towards you.
Another tip: when you are using the touchscreen controls, the function button acts as a back button. So if you change a setting, you can get back to the main screen quickly by tapping the function button.
So now you have a pretty good understanding of how your Pocket gimbal operates. Just using the Pocket on it’s own like this, you are going to spend a lot of time swiping around on this little screen.
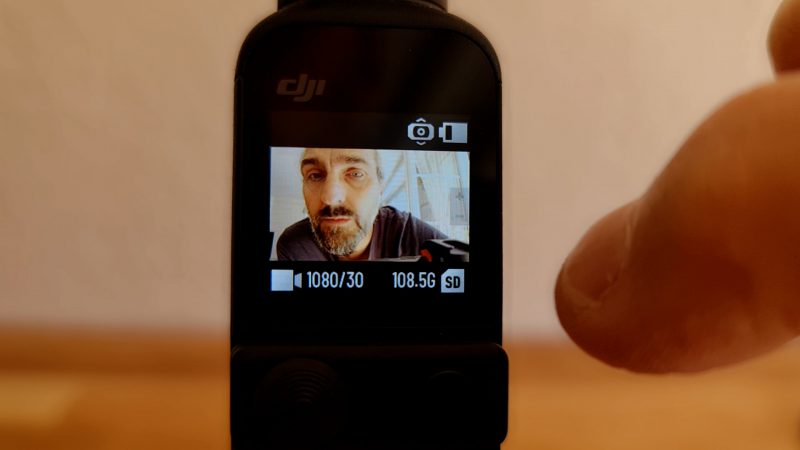
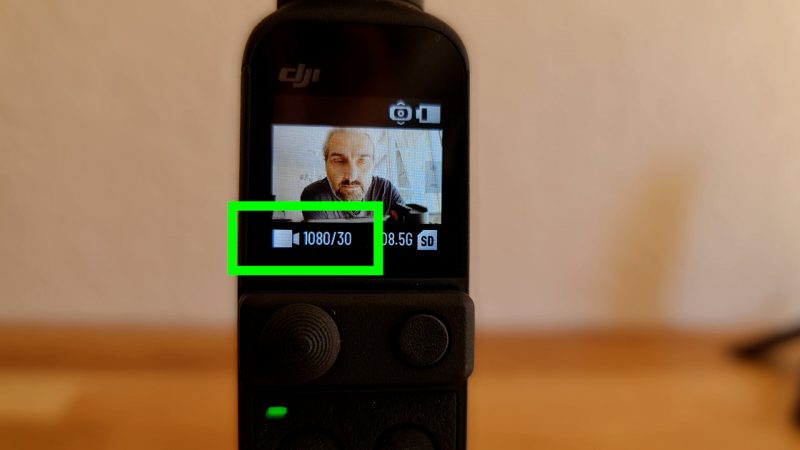
Resolution & Frame Rate
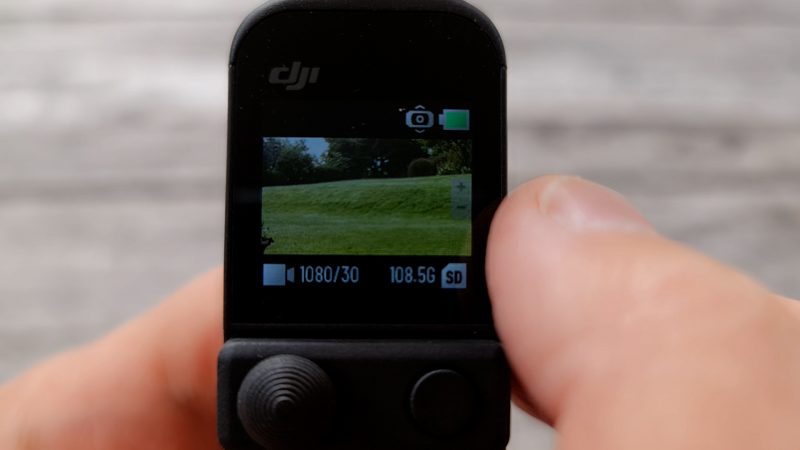
When the Pocket gimbal is in video mode, in the bottom left corner of the screen you can see 2 numbers. In the image below, it says 1080/30. That means the video is set to shoot FHD (or Full High Definition) video at 30 frames per second.
Videos come in different resolutions and different frame rates which make a difference to how your video looks. Resolution relates to the number of pixels contained within one frame of video.
Setting Resolution & Frame Rate
If you tap these numbers on the screen, you open up a settings menu to adjust resolution and frame rate. Swipe up and down on the left of the screen to set resolution and the right of the screen for frame rate.
There’s 3 options for resolution: 1080, 2.7K and 4K. Unless you’re saving memory space, you might as well use the highest resolution which is 4K. That said, certain features aren’t available at 4K resolution. Like HDR video, for example.
Frame rates available go from 24fps up to 60fps.
24fps is the standard film look frame rate. Most movies are still shot and played back at 24fps. Higher frame rates look more digital.
However, higher frame rates can be used for slow motion effects as well. You can shoot at 60fps and play back at 24fps to create nice, cinematic slow motion. Even shooting at 30fps and playing back at 24fps creates an interesting, subtle slow motion effect.
Battery Life
One thing to be aware of is that the battery life of a Pocket 2 is not that long. DJI says the battery lasts up to 140 minutes. That’s just over 2 hours, and in reality most of the time probably less than that.
To charge the battery, connect to the USB C port at the bottom. When charging, you get a flashing green light.
Gimbal Modes
The Pocket has 4 modes which change how the gimbal motors work to keep the camera steady. There’s Follow mode, Tilt Locked mode, FPV mode and Locked mode.
The DJI Pocket contains a 3 axis gimbal and a camera, all in one device. To better understand how the different modes work, it’s good to understand the terminology when we talk about camera movement.
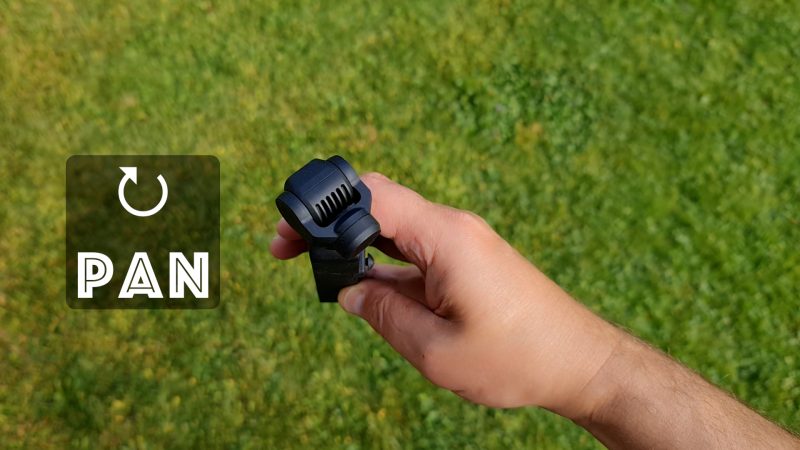
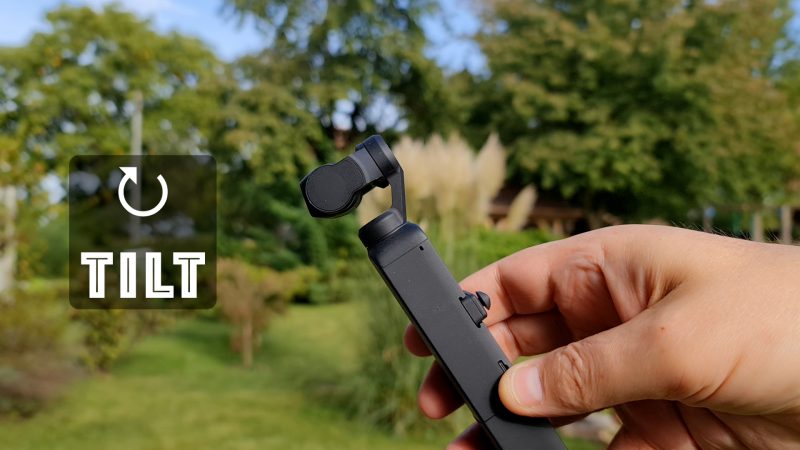
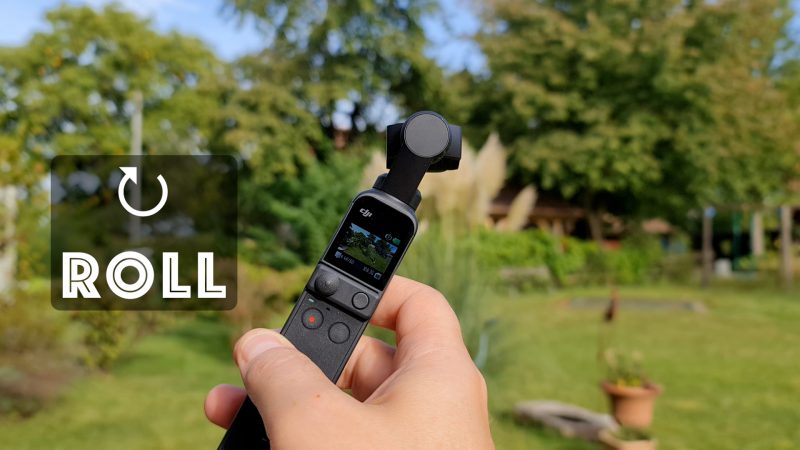
Each axis has a word which describes the movement controlled by that axis. There’s the pan axis, the tilt axis and the roll axis.
The pan axis refers to when you move your camera left to right, in a twisting movement.
The tilt axis refers to when you move your camera to tilt forwards or backwards.
The roll axis refers to when you move your camera at an angle to the horizon.
It might be helpful to think of each mode in terms of movements it follows.
- Locked mode doesn’t follow any movements.
- Tilt Locked mode follows 1 movement: pan movements.
- Follow mode follows 2 movements: pan and tilt movements.
- FPV mode follows all 3 movements: pan, tilt and roll.
So let’s look at these modes, what they do and when you might want to use them.
Follow Mode
Follow mode follows your movement when you pan left or right and when you tilt backwards and forwards but it does not follow your movement if you roll the camera.
This mode is the most natural mode. It’s the most similar to how we view the world. We look left and right, or up and down, but we don’t often look at things sideways. That’s why, in follow mode, the gimbal tries to keep the camera level with the horizon.
This mode is a useful all-purpose mode. For example, if you are filming a travel video and you want the freedom to have the camera explore the surroundings. Maybe there’s a tall building and you want to be able to approach and then tilt upwards to show it.
Tilt Locked mode
Tilt locked mode follows your movement when you pan left or right but does not follow your movement when you tilt backwards or forwards or when you roll the camera.
In other words, it only follows your pan movement.
Tilt locked mode is useful when you are filming a subject and you want the camera to remain focused on them. You don’t want the camera to tilt up or down. So use this mode for any kind of tracking shot.
FPV mode
FPV mode (or First Person View) follows all your movements, on the pan, tilt and roll axis.
That means you can now shoot video where the camera turns against the horizon. This is not how we normally view the world, so when would we use this kind of shot?
FPV mode allows us to be more creative and to do something unusual. We can create spin shots and shots with creative camera movements. When edited together, these kinds of shots can really grab the audience’s attention.
Locked mode
The 4th mode is locked mode. In Locked mode the gimbal tries to keep the camera pointing in the same direction, no matter which way you move.
To get into Locked mode just press and hold the Function button, which is the button to the right of the record button. With the Function button held down, you will see a padlock appear in the top right of the screen. When you let go of the button, the gimbal goes back to whatever mode you had it in before and the padlock disappears.
When should we use this mode? One reason could be that you want the camera to stay facing the same direction while your movement is more than just walking in one direction. For example, if you need to walk around an object and want the camera to fly over it.

Once you’ve got the hang of the basic controls on the DJI Pocket, you’ll probably want to get a bit more advanced with the settings to get better image quality. One way to really improve the look of your videos is to start using exposure controls.
Exposure Controls
Video from the DJI Pocket has quite low dynamic range, if you compare it to a mirrorless or a DSLR or even one of the recent flagship smartphones.
If you want to shoot better videos (or photos) it’s important to understand the dynamic range of your camera. When we talk about dynamic range, we’re talking about the camera sensor’s ability to deal with varying light levels.
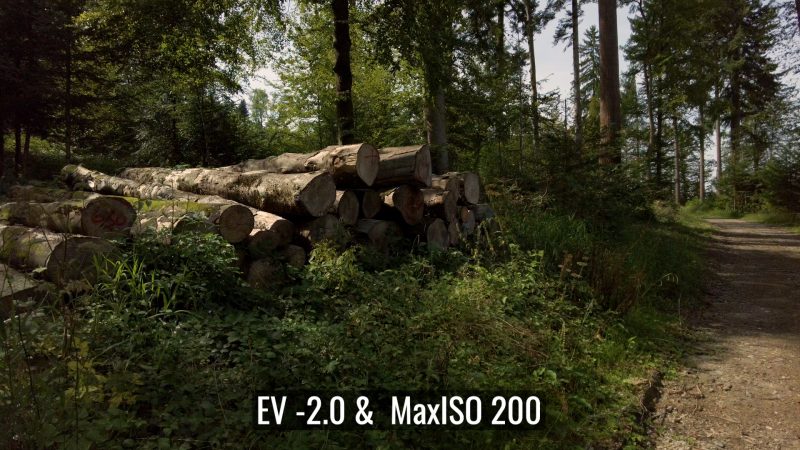
For example, in this frame below from a clip I shot with the DJI Pocket 2 I’m walking through trees in bright daylight. You can see that while the trees are exposed well, the brighter parts of the image are completely washed out. If a lot of the frame is washed out like this it really doesn’t look good. So what can we do?
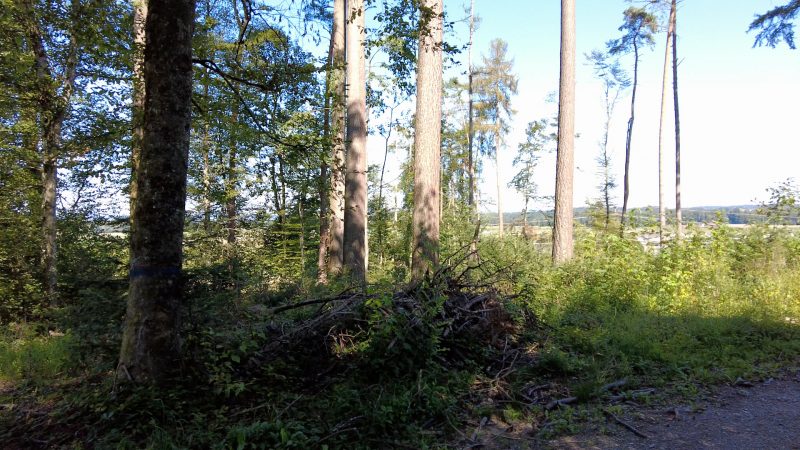
We can try to adjust the exposure so that there are less washed out areas. And to do that we need to use Pro Mode.
Pro Mode
Pro mode gives us all kinds of manual controls to change the look of the video. To get to Pro Mode, swipe down on the screen and then swipe left until you get to a button called Pro. Tap it to switch the Pocket into Pro Mode.
Now swipe back to the main screen and you can see there is a yellow symbol to show the gimbal is now in Pro mode. Tap that to open up the Pro mode settings.
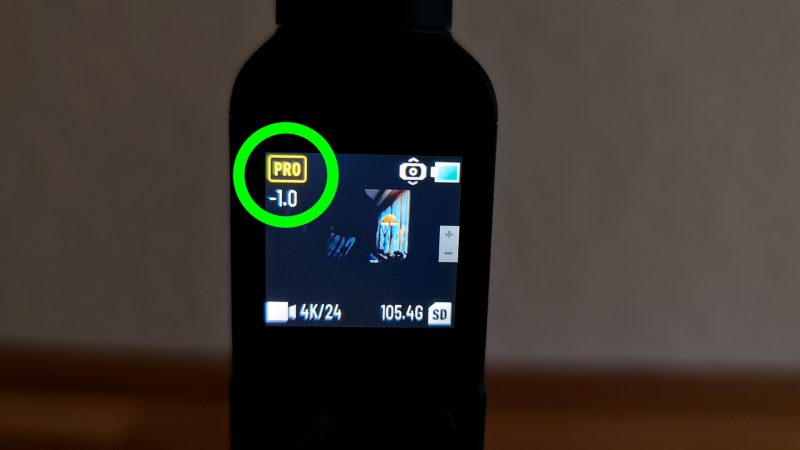
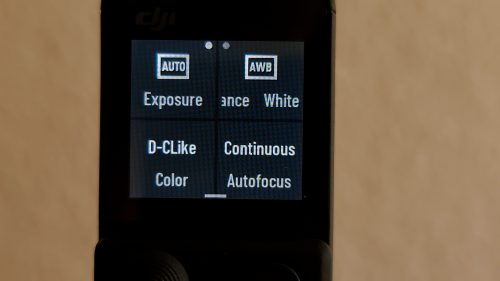
You can swipe left and right to access 2 screens which each contain Pro mode controls. We want the one which says Exposure. So tap that to open exposure settings.
Pro Mode: Exposure
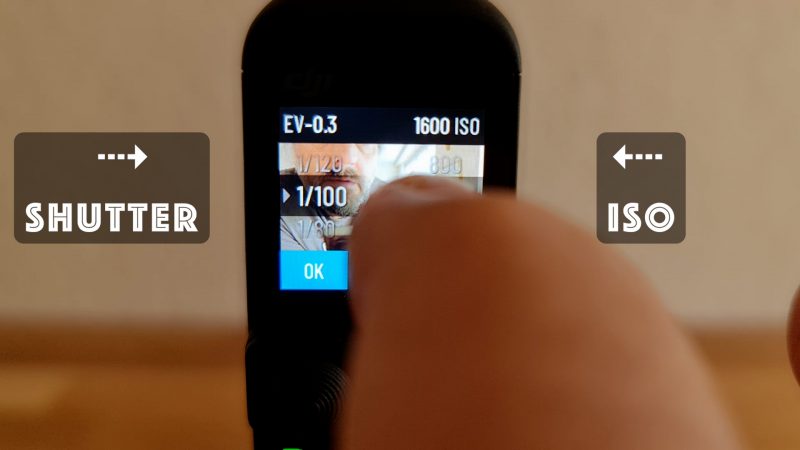
In the exposure control screen we have 2 settings at the top: shutter speed on the left and ISO on the right.

There’s also 2 ways to use exposure control. You can have it set to auto, but with some parameters or you can set it to be full manual.
Auto means the camera will try to set the best exposure whereas manual means you set them and they’ll be locked at those settings throughout the shot.
You can switch between manual and auto with the switch in the bottom right corner.
EV Compensation
If we leave it in auto for the moment, we can try using EV compensation values. Swipe up and down on the left of the screen to get a + or – value. This means the camera will still set the exposure automatically, but it will adjust that exposure based on the value you set.
In the above example where the sun is bleaching out the trees, I would probably try to bring the exposure down. So for EV I will set a negative value. But I want to balance between too much light and too much dark.
Personally, I will always lean towards more shadow than washed out white areas. Because I know I can recover some of those dark areas. As well, it looks more natural to us to see dark areas. Humans are not used to seeing washed out white when we are looking around, but we do see shadows and black, especially at night. So pushing your exposure down will result in a more natural-looking image.
On the right we see this max ISO setting, so let’s look at that.
Max ISO
With a fixed aperture camera like this, there are only 2 ways to control exposure: shutter speed and ISO. If the frame is too dark, you can push up the ISO to brighten the image. The problem is, this can result in digital noise in the image.
To prevent that, you can set a maximum ISO. Say you set it to 200, now no matter how dark it gets the camera will keep the ISO at 200 or less. So, essentially, this setting is all about controlling the digital noise in your image.
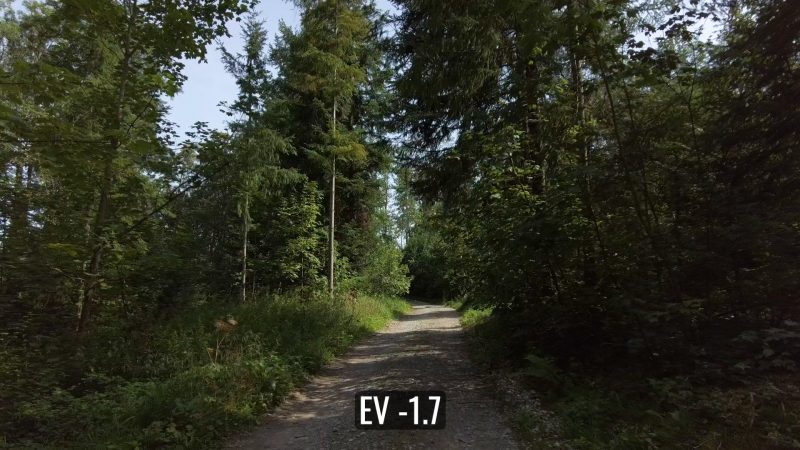
In the frame from a DJI Pocket 2 clip below, I have set the EV to a negative value and I set the max ISO to 200. You can see straight away there are now almost no washed out areas of the image. This is a big improvement on the previous clips shot using auto exposure.
That said, I could still see the exposure adjusting during the shot. Unfortunately, it didn’t change smoothly, either. For that reason, to improve things even further, we should use a fully manual setting.
Manual Exposure
If you want to lock exposure so it doesn’t change during the shot, you can switch to manual mode. Now you can set ISO and shutter speed precisely.
The advantage of locked exposure is less messy looking video, which is usually considered more professional. The disadvantage of locked exposure is it cannot adapt to changes in light conditions in the frame, as you move.
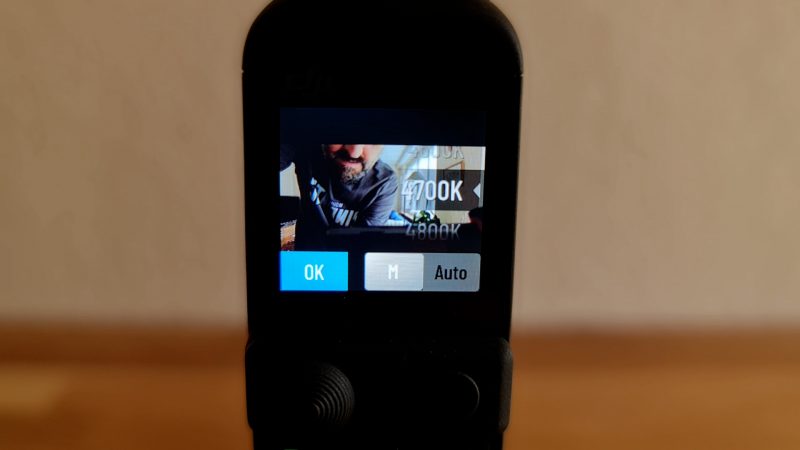
And if we’re going to go to the trouble of locking exposure, we may as well lock white balance too. So, in Pro mode, tap the yellow Pro button and then tap white balance. You can set it manually using a kelvin number. The white balance will now be fixed and won’t change during the shot.
Slow Shutter Speed
When we’re filming in bright conditions, the shutter speed needs to be fast to stop too much light hitting the sensor. But if we want smooth video, a slow shutter speed is better.
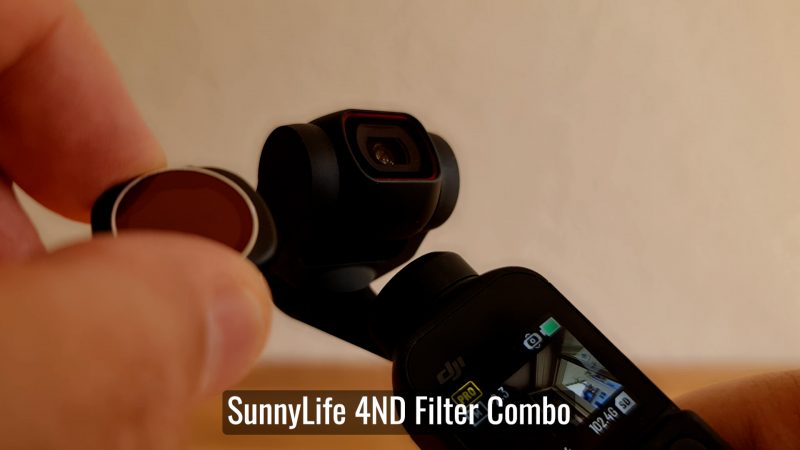
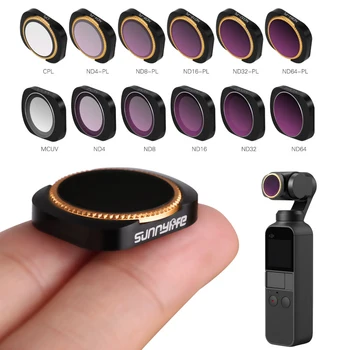
If we can get the shutter speed below 1/100 the video will look smoother. To do this in bright conditions, we will need to use some kind of ND filter. DJI sells ND filters for the Pocket gimbals, but you can also get 3rd party ND filters.
Now that you’ve got a good grounding in how the DJI Pocket (or DJI Pocket 2) works, let’s look at the other features and controls accessed via the mini touchscreen.
Touchscreen Controls
I’ve already shown you a few controls you can access from the touchscreen, like Pro mode and so on. Let’s look at some others.
Swipe UP on the screen. Now you get 4 button icons.
- Top left recenters the camera.
- Top right flips between front and back facing camera.
- Bottom left switch the follow mode speed between slow and fast.
- Bottom right switches through the 3 modes: follow, tilt locked and FPV.
Follow speed determines how quickly the gimbal reacts to your movements. So if you want really slow, smooth pan or tilt shots then switch this to slow. But when you move, remember to wait for the gimbal to catch up.
Swipe DOWN on the screen and first we get a cog icon. Tap this for 2 screens of settings, swipe left and right to access them.
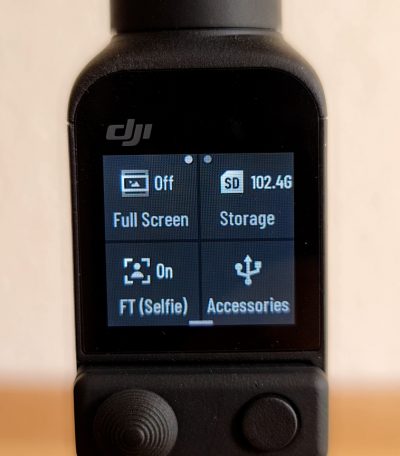
When you select the full screen mode you don’t actually record full screen, 4×3 video, as you might expect. Rather, all this does is zoom and crop off the sides of the video, for monitoring purposes. Perhaps it helps you see what’s in focus better.
Below that button is the face tracking on – off button. Switch this on and then when the camera is facing you it will try to detect a face and then keep the camera locked onto that face while you are moving around. This just helps to make sure your face stays in the centre of the frame.
The storage button simply allows you to reformat your memory card.
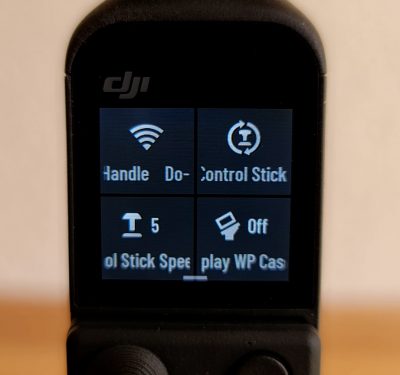
Accessories opens up more controls for various accessories. One useful setting here is control stick speed. If you want the control stick to move the camera faster or slower you can set that here.
Ant-Flicker
Swipe to the other screen because there’s one other setting that you might find useful. If you’re getting flickering from lights, you can try setting the anti-flicker. 50hz for Europe and 60hz for America.
OK use the function button to get back to the cog symbol.
Swipe RIGHT and use this button to switch what the control stick controls – pan & tilt or zoom.
Swipe LEFT past the cog to the smiley face which switches glamour effects on and off.
LEFT swipe again to find the quality on or off button. When it’s on you get a higher bitrate, but the battery will drain faster. Also, you can’t use this setting when shooting at 4K & 60fps.
Note that if you are in photo mode, instead of the quality button you get a choice between 16mp and 64mp photos.
Swipe LEFT again for Pro mode (which we already looked at) and then again for the external wireless mic. This will pair with the wireless mic included in the creator combo (or if you bought it separately).
Gallery
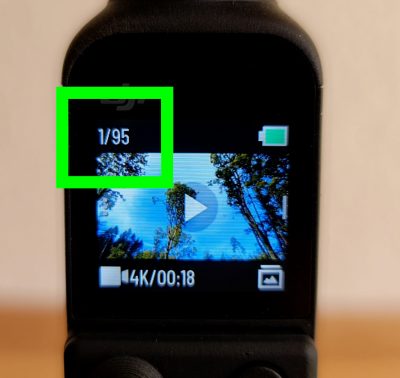
Back in the main screen, swipe right to reach the gallery. In the top left corner you can see the total number of files on the memory card and the number of the file you are currently viewing.
Swipe up and down to scroll through all your photos and videos.
If you want to delete a photo or video, swipe right once more and tap the trash can icon.
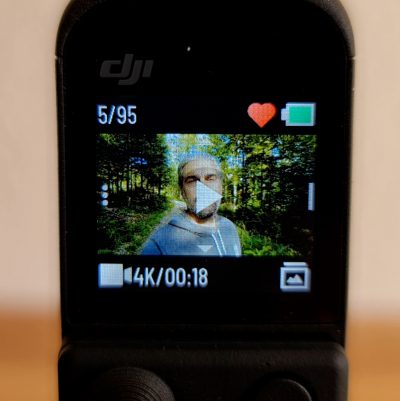
If you tap the heart icon, this file will have a heart in the top right corner. So this is useful for marking certain files as good, which will save time weeding out bad files later.
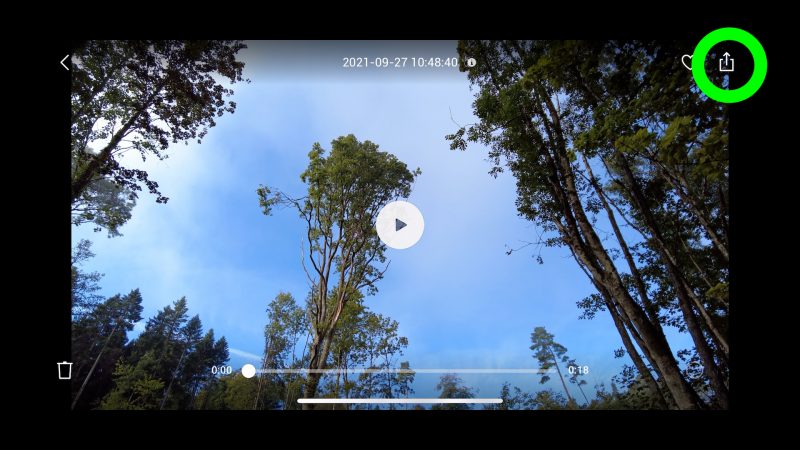
Transferring Video
Once we’ve shot some videos or maybe some photos, we will eventually want to get them off the DJI Pocket and onto our computer and maybe a smartphone, if you’re going to edit there.
You should be able to connect a cable from the DJI Pocket to your computer and do a simple file transfer. What’s supposed to happen is you connect from the base of the DJI Pocket to an input on your computer.
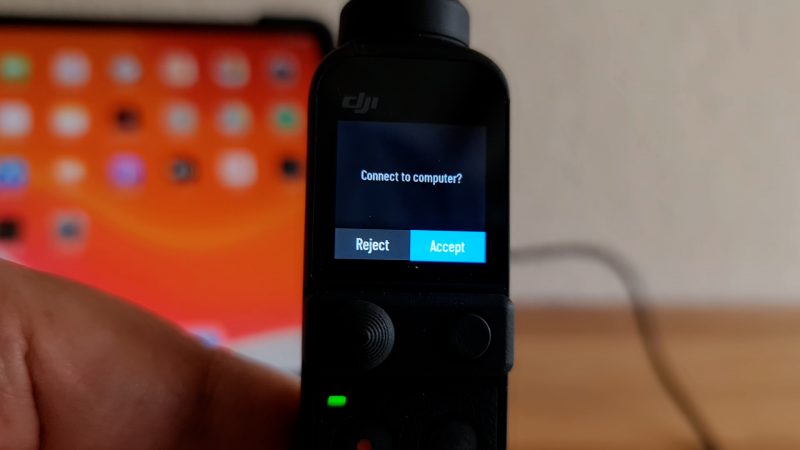
If all is good, a message pops up asking if you want to connect to your computer. If you tap yes, a new drive should appear in your system. Open it like any external drive and drag the files across.
However, when I connected to my MacBook Air which only has USB C ports, there was no message. This was using a cable I’ve used to transfer files from my smartphone so I know it works…
DJI Pocket 2 Charge / File Transfer Cable
The cable which came with the DJI Pocket 2 has 2 USB C plugs at one end and a USB A at the other, which means I’d need an adapter to connect it to my laptop. But even with an adapter it didn’t work.
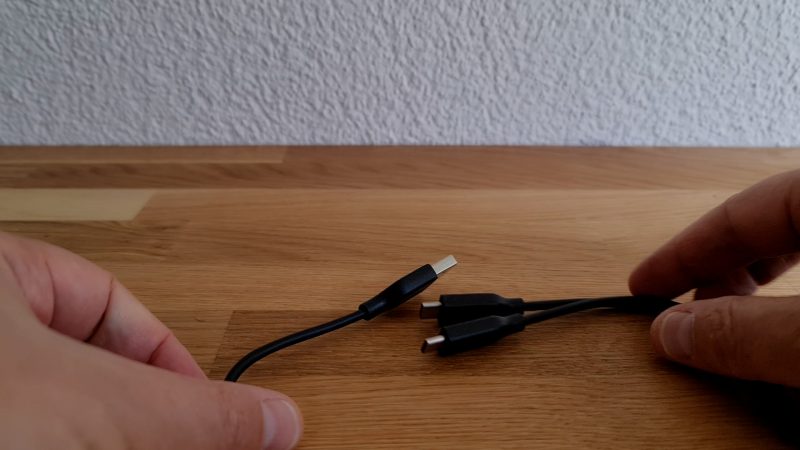
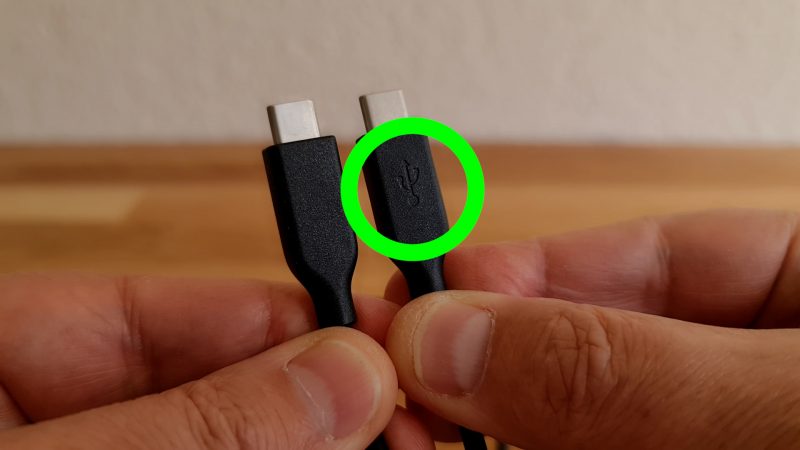
If you find you can’t get it to connect using the included cable, make sure you are using the correct plug of the 2 USB C plugs. One is for data transfer, one is for charging. So use the data transfer plug – which is marked with the little symbol.
When I connected using this cable to my iPad Pro with this adapter which luckily comes with the USB A port, it recognised it and I was able to get the files off.
The other way to get your files off is simply to use a MicroSD reader. Take out the MicroSD and plug it directly into your computer.
If you’re going to edit the video on your smartphone, you can connect it to the gimbal (either with the adapter or via bluetooth) and then download the files onto your smartphone via the Mimo app.
Wireless Connection
If you have the do-it-all handle you can connect to your Pocket gimbal wirelessly using Bluetooth. This does not come with the basic package, so you need to buy it extra or buy the creator combo, as I did.
When you connect to your smartphone, you can use the DJI Mimo app as a remote control for the Pocket. You can also connect to the wireless microphone included with the Creator Combo set.
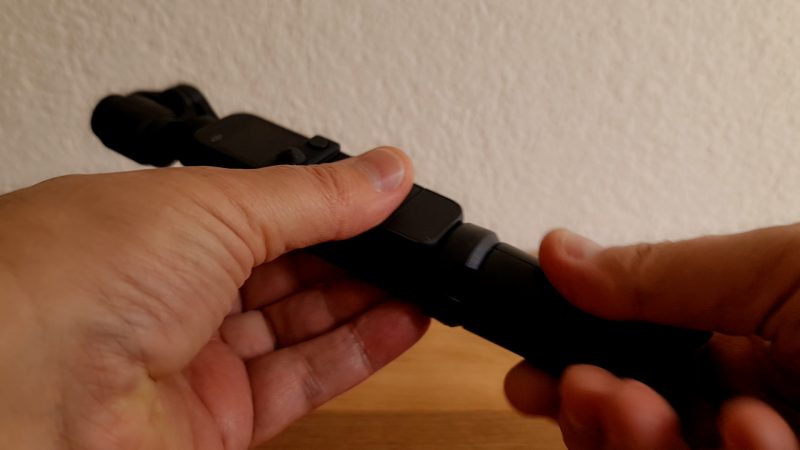
Changing Base Units
One part of this gimbal which is not too well designed is the changeable base. It ships with this little cap over the base. There’s no catch or anything, it just pulls off with brute strength.
After I exchanged it for the base with the tripod screw in it, I could not get this thing off. And while you’re trying to remove the base, struggling away, your hands keep pressing on one of the power buttons powering up the device.
Anyway, I literally couldn’t get this base from the bottom of the gimbal. Then I came up with a solution – screw a tripod or monopod into the base and now use the extra grip. It comes off much easier that way.
So now we can slide on the do-it-all base. Bear in mind, this attachment does come with a catch which you need to pull down when removing.
Bluetooth Connection
Once you have the do-it-all base fixed in place, power on and now boot up the DJI Mimo app on your smartphone. Go to “device” and it will search for any DJI devices nearby. Tap connect.
The first time you do this, you have to give your phone permission to connect. A message should pop up on the little Pocket screen and you need to tap OK. After you have done that once, next time it will connect without having to do that.
Connecting a Smartphone
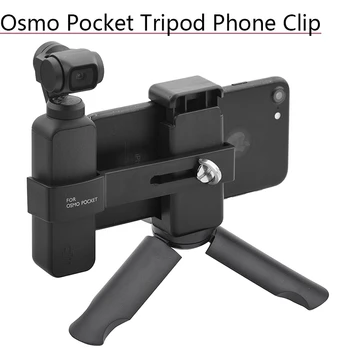
There’s 2 ways to connect a smartphone to your DJI Pocket. Without the do-it-all base, you need to use one of the smartphone adapters. Which means your smartphone needs to be attached physically to the gimbal, which is a bit precarious unless you have some kind of clamp to hold them in place.
I’ve seen some on Aliexpress for not too many dollars.
But if you have the do-it-all base, you can now connect using bluetooth. And this opens up the option of using your smartphone as a remote. This is great for solo filming.
Whichever way you use to connect a smartphone, there are many advantages. You get a bigger screen to look at, which is obviously much better. Especially as I’ve found the auto focus on the Pocket 2 is not the best and it’s almost impossible to see what’s in focus on the little screen.
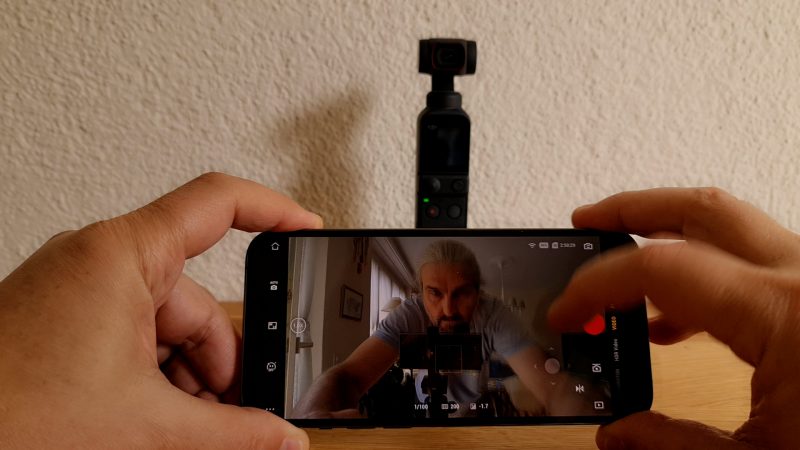
The downside is that the whole setup is bigger and takes longer to get filming. One great thing about the DJI Pocket is you just press the power button and you are ready to go. Whereas with a smartphone and a gimbal, there’s some setup time balancing and connecting and so on.
Mimo App
Your smartphone can control the DJI Pocket 2 via the DJI Mimo app. You can set mode, start and stop recording, set exposure and plenty more. There seems to be an extra mode which doesn’t appear when just using the Pocket 2 mini screen – hyperlapse mode.
Using the app, the control stick now appears as an on-screen icon. And this works a bit differently to the physical control stick on the gimbal itself. Firstly, the app control stick can control the speed of the camera movement, depending how far you push it. On the other hand, the nice smooth easing out of the shot is gone – it now just stops suddenly.
Ease Out
If you really practice, you might be able to slow to a stop using the control stick, but it would be nice to have that easing out motion with the app too. I couldn’t find any settings within the app to set control stick speed either.
One thing you can do in the app is separate the virtual control stick into 2 control sticks – one for pan and one for tilt. Just toggle off the Gimbal Easy Control switch. Now you have a pan control on the left and a tilt control on the right.
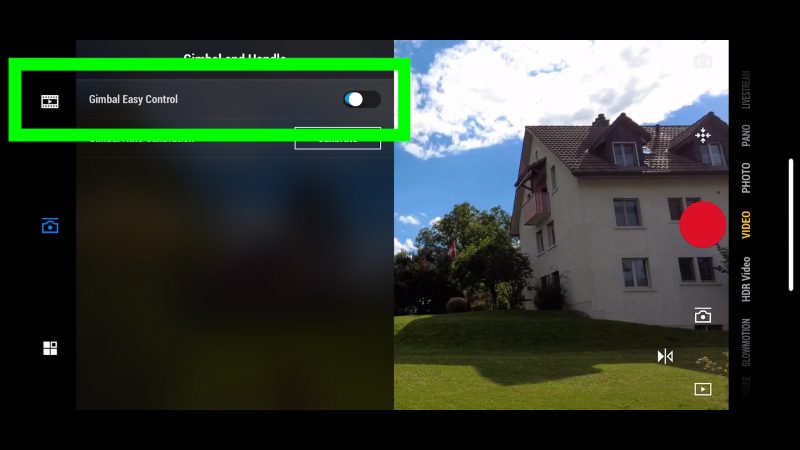
This can be useful if you are filming a shot and you only want the camera to move on one axis. There’s no chance of your finger accidentally tilting.
But using a smartphone as a remote also allows us to turn the DJI Pocket into a super camera crane.
Crane Shots
Adding some kind of handle extension to the DJI Pocket opens up some creative possibilities. We can now shoot impressive, Hollywood style crane shots, lifting the camera into the air.
We can also do shots pushing through an object. The Pocket is great for this as it’s so light and slim. This way the Pocket can reach places we wouldn’t be able to reach otherwise.
I just add a monopod and then extend the monopod as far as I need to for the shot.
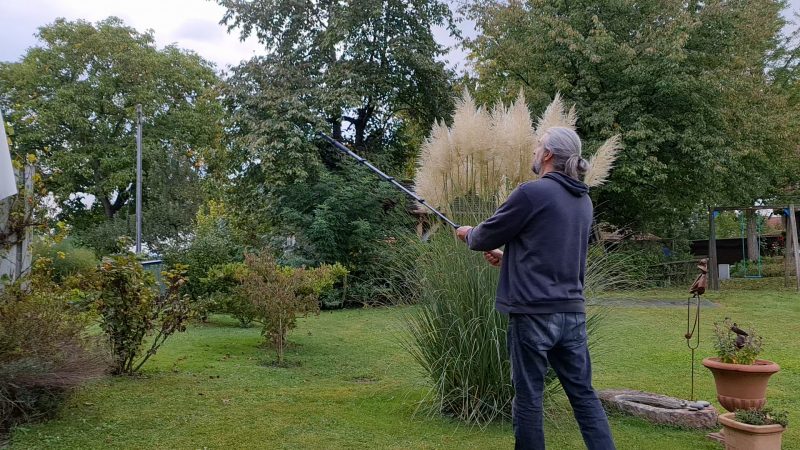
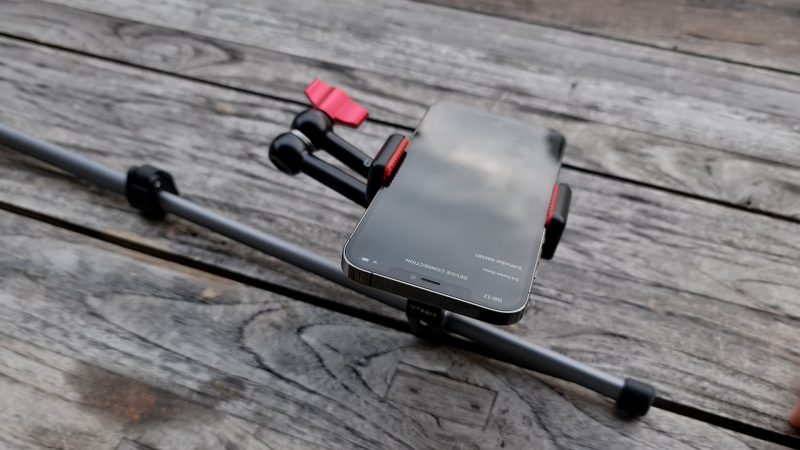
Now, if you attach your smartphone to the opposite end of the monopod, using something like this UteBit magic arm, and then connect the smartphone to the Pocket using Bluetooth, you’ve made yourself a remote controlled crane camera.
I find the best mode for a crane shot is tilt locked. That way the camera faces forward as you move the arm up and down.
I’ve been using the DJI OM 4 gimbal and a smartphone to shoot similar crane shots. The big advantage of this DJI Pocket 2 setup is you can see what you’re doing. As well, if you want to create more complex crane shots, you can combine movement of the arm with movement of the camera using remote control.
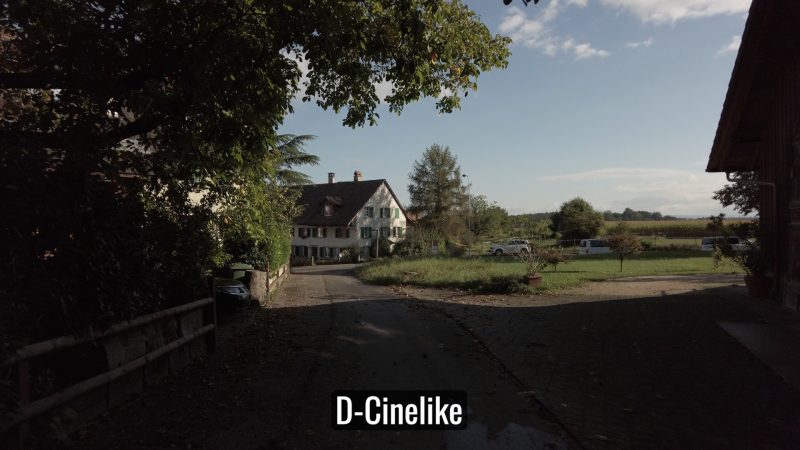
D-Cinelike
The DJI Pocket 2 has the option to shoot using a colour profile called D-Cinelike. This is a flatter profile, like a Log setting, which has less contrast and less saturation. This can then be used to add LUTs or do your own grading.
The idea is that this flatter profile will be better for grading because it retains more dynamic range. Having said that, there’s no reason you can’t simply use this without grading, if you prefer the less contrasty look.
I have to say, I really like the look of it, ungraded. But it’s also great to use when adding a grade as well.
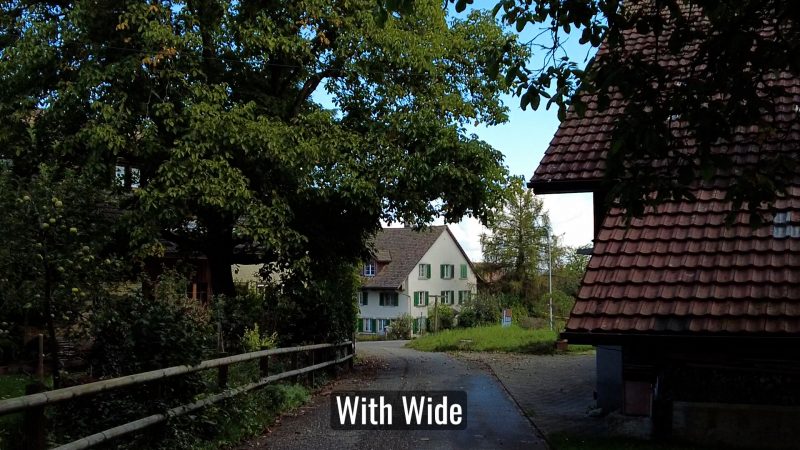
Wide Angle Lens
The Creator Combo includes a wide angle lens adapter. Like the ND filters, it’s magnetic so it sticks over the Pocket lens very easily. It’s not a dramatic difference, but it does give you a wider field of view.
Another advantage of the wide angle lens is that it makes the footage look smoother. The wider the lens, the less you notice small movements from your hand or footsteps.
Unfortunately, I wasn’t able to combine the wide angle with the ND filters I have. I’m not sure if other combinations work, but these don’t.
HDR
A quick note about HDR, which is supposed to add more dynamic range. The problem is, it crops in the image quite dramatically and as well I didn’t really notice much difference to the image. For that reason, I don’t use it.

Mobile Videography – Beginner to Advanced
If you want to know more about smartphone filmmaking, my book Smartphone Videography – Beginners to Advanced is now available to download for members on Patreon. The book is 170 pages long and covers essential smartphone filmmaking topics:
Things like how to get the perfect exposure, when to use manual control, which codecs to use, HDR, how to use frame rates, lenses, shot types, stabilisation and much more. There’s also my Exploring the Film Look Guide as well as Smartphone Colour Grading.
Members can also access all 5 episodes of our smartphone shot Silent Eye series, with accompanying screenplays and making of podcasts. There’s other materials too and I will be adding more in the future.
If you want to join me there, follow this link.

Hi.
I just saw the wonderful information you used in the pocket 2 app instructions.
The question I have is If I pause shooting a video to go to different location can I change the settings to maybe slow motion. Or other options
Peader