5 Best Video Recording Apps for iPhone
I’m gonna look at 5 apps – FiLMiC Pro, Moment, ProCam 8, Beastcam and ProTake – and see which one is best for shooting video on an iPhone.
Read my UPDATED review of 9 Best Apps for Video Recording on iPhone for 2023
There are apps that are great for social media, or fun effects, but this isn’t a video about those. This is about apps that give you manual control, Log profiles, Dolby Vision, 10-bit colour (in iPhone 12s), cool timelapse controls and more.
I’ll go through each app looking at their user interface, features, online resources like user manuals and tutorials and, finally, price. Bear in mind that different sized screens may look different when it comes to interface layout.
All of the apps in this video allow you to set and lock all the usual controls, focus, shutter speed, ISO, resolution, bitrate and white balance. They also allow you to switch lenses. The question is how well do they perform these tasks?
FiLMiC Pro – User Interface
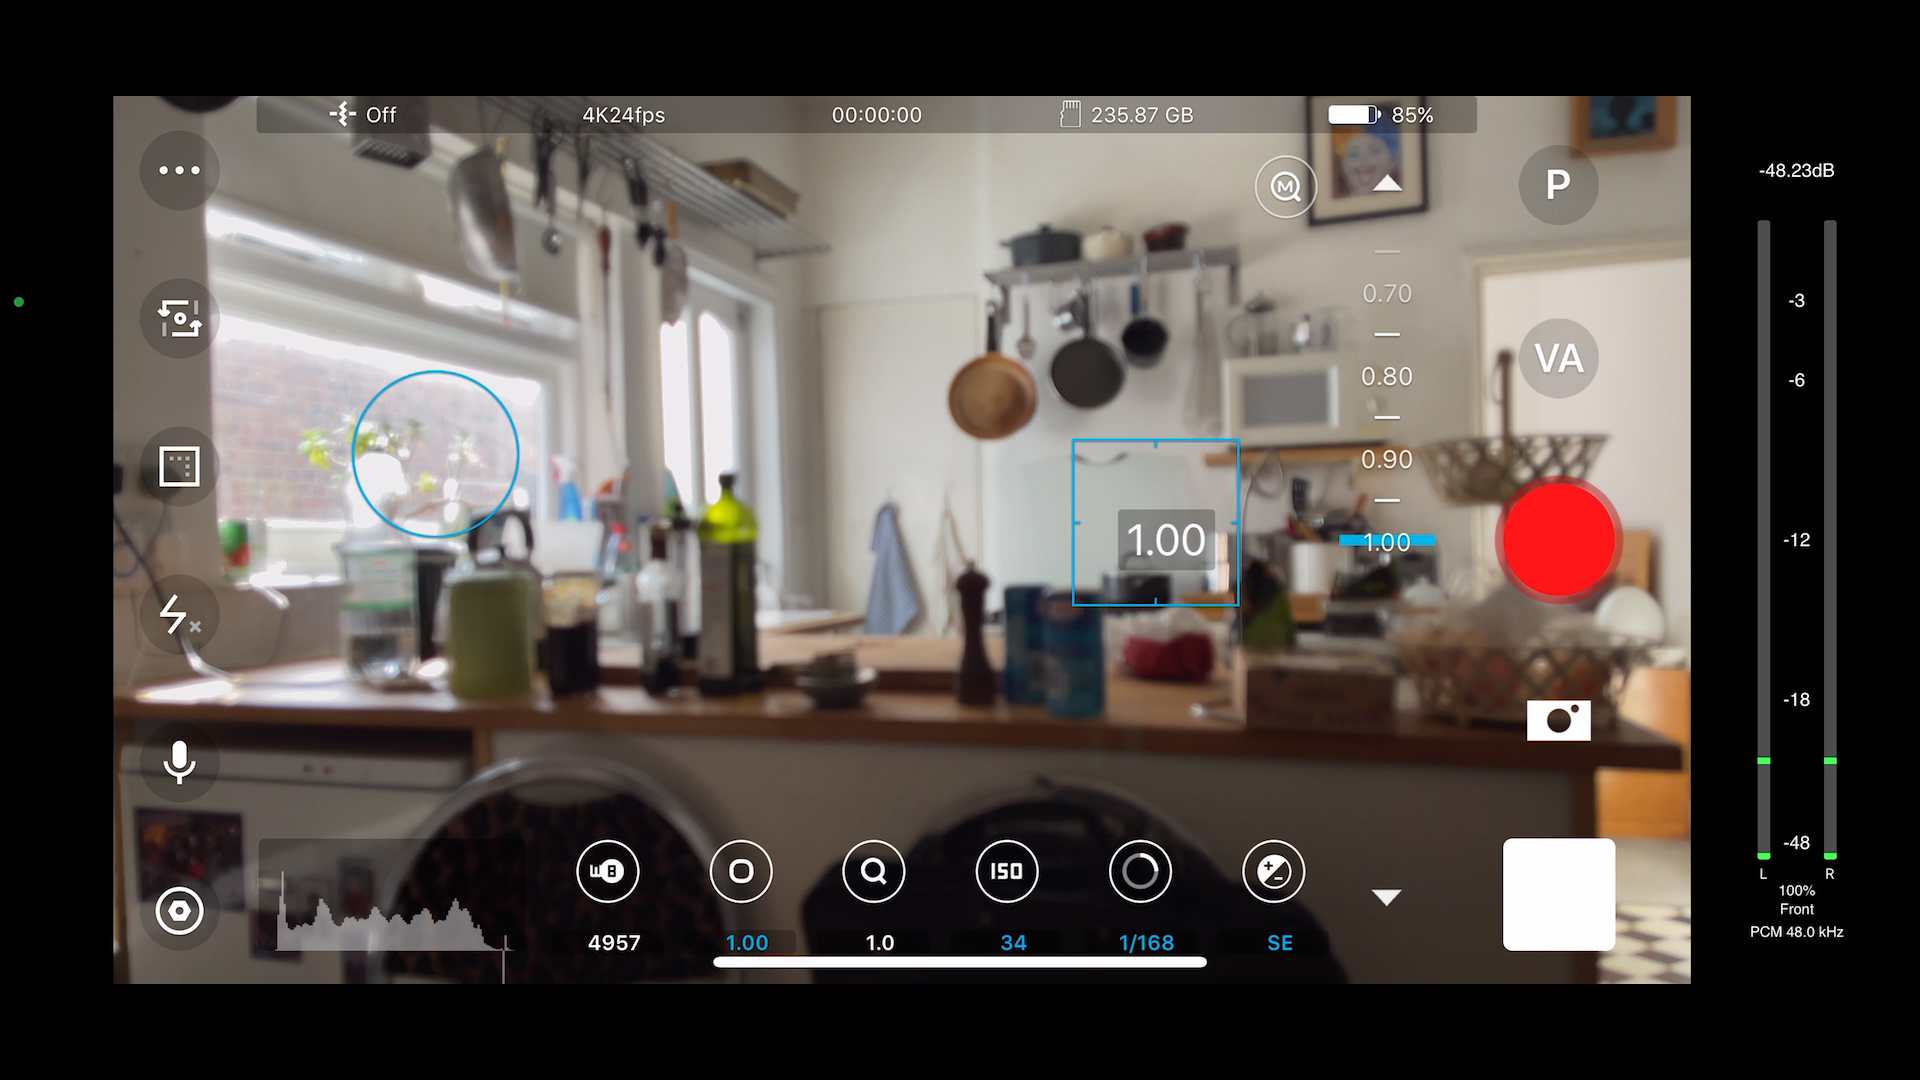
One of the first if not THE first camera app to bring you DSLR-like control over your iPhone. The interface has evolved over the years. This is necessary to accommodate a steadily increasing feature list. In fact, some might find there’s just too many features and it’s a bit overwhelming.
Personally, I think the balance is just about right. Of course, I’m somewhat biased having used the app regularly for a number of years, as well as making a lot of tutorials.
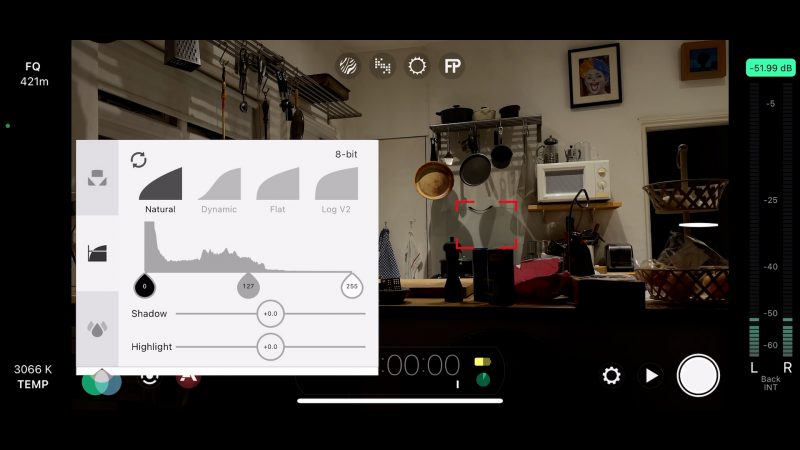
Using the focus and exposure reticles in combination with the focus and exposure wheels, it’s all pretty intuitive. Accessing advanced features like 10 bit colour, Dolby Vision and Log settings is pretty straightforward.
Some of the interface is customisable. For example, the zoom rocker can be removed. One complaint I have is the 3 dots which can be used to set an ISO bias. If you’re trying to lock shutter or ISO you can accidentally tap them, messing up your exposure. So I’d be happy if they added a button to toggle off this feature.
FiLMiC Pro – Features
FiLMiC Pro has a ton of features, giving you just about as much manual control over your iPhone as is possible.
There’s Integration with smartphone gimbals: the DJI Osmo Mobile series, Zhiyun Smooth 4 and the (unfortunately now discontinued) Movi Cinema Robot. There’s also the image flip for DoF adapters.
FiLMiC Pro offers 10-Bit and Dolby Vision on the recent iPhone 12s. Plus an updated Log V3 for use with the iPhone 12s 10-bit colour.
There’s a remote control & monitoring option, via FiLMiC Remote (although this is a separate purchase). This allows you to control or simply monitor FiLMiC Pro on one device via a 2nd device.
While FiLMiC Pro does have a timelapse feature, it doesn’t have the slow shutter speed option to give you that nice motion blur, which is great for certain shots.
FiLMiC Pro – Online Resources
FiLMiC Pro has a user manual on their website, plus plenty of helpful videos. I think the manual is a little bit out of date, but 99% of it is still relevant. Plus, because they are so well known, there are literally hundreds (or maybe thousands) of YouTubers creating helpful FiLMiC Pro content.
The FiLMiC Pro app also provides de-log LUTs to use with their Log profiles.
FiLMiC Pro – Price
Filmic Pro costs $14.99 (edit Dec 2022: now a subscription) or the equivalent depending on your local currency. But if you want the Log settings, then you will need to purchase the Cinematographer’s Kit which last time I bought it was about the same price.
It’s a one-off fee, so once you have it, it will work on all your iOS devices into the future.
Pro Camera – Moment App
Moment started out as conversion lens makers. Well, actually they started out making action cams but after losing out to GoPro, CEO Marc Barros turned to a fresh market – smartphone conversion lenses. And this time they totally nailed their marketing, focusing on the emotional side and building up a powerful YouTube presence.
And of course making some excellent conversion lenses, that also look cool on your smartphone.
Certainly, if you own Moment lenses, then it makes sense to use the app too. They even have a settings menu containing a preset for each Moment lens.
Moment – User Interface
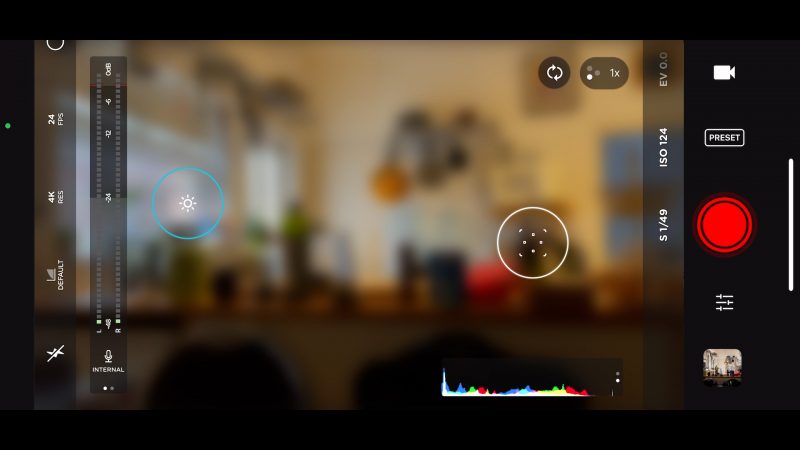
The interface is nice to look at, quite similar to Apple’s native camera app interface. It’s not too cluttered, either. Rather than distribute buttons all the way around the screen, on every side, most settings are accessed via controls at each end.
So you have 2 strips at each end. On the right we have a record button, mode switch from stills to video and access to extra settings. Next to that is the manual controls – swipe up and down to access ISO, white balance, focus, shutter speed and exposure value.
On the left we have audio levels and to the left of that more settings controls. Again, swipe up and down for the setting you need. At the bottom we have some live analytics and top corner are the controls to switch internal lenses.
If you want to use reticles like FiLMiC Pro, then tap the screen to bring those up.
I like that you can just cycle through the rear lenses without having a separate menu pop up. Just tap until you get the lens you want.
Moment – Features
The Moment app contains all the essential features for manual control. I personally don’t find the up and down sliders quite as nice to use as the wheel option, used in other apps.
Once set, the settings are displayed sideways, so it’s quite so easy to read. But I do like the fact you can set your shutter speed freely and are not locked into shutters speeds leftover from film cameras. We’re shooting digitally so let’s have the freedom to set a shutter speed of 1/29 if we want.
There’s some handy presets for quick setup. Like everyone’s favourite word combo: cinematic video. Tap one of these presets to get quickly to the settings you need. You can also input your own custom settings and save them for later use.
Sadly, I find this feature doesn’t work too well on my iPhone 12 Pro Max, as not all the settings change correctly.
The Moment app comes with a flat and a log setting, as well as the natural profile. Currently there seems to be no access to Dolby Vision or 10-bit colour, which you can access with other apps. In terms of gimbals, there is some support for DJI Osmo Mobile devices.
Moment generally tends to aim more at photographers than videographers, and in this app you will be able to shoot stills as well as video. Another plus is being able to shoot timelapse with motion blur.
Moment – Online Resources
Moment has a very popular YouTube channel which contains a few useful tutorials, but by no means comprehensive. On their website, I found a tutorial page, but some links were broken and other videos were dated back to 2018.
So, for the Moment app, to me it feels more like an afterthought. There are some Moment app enthusiasts making YouTube tutorials, as well. But they might need some hunting down. One of the downsides of covering so many bases as Moment does – especially now they’ve added dedicated camera kit to their store – is that the app gets a little skipped over.
But if you’re happy to give Moment your email, they will send you tips.
Moment – Price
The Moment camera app currently costs $6.99 in the Apple app store. And if you want the extra motion blur and timelapse features, they are an in-app purchase. $3.99 each. Although I got them both in a $3.99 bundle.
ProTake – Interface
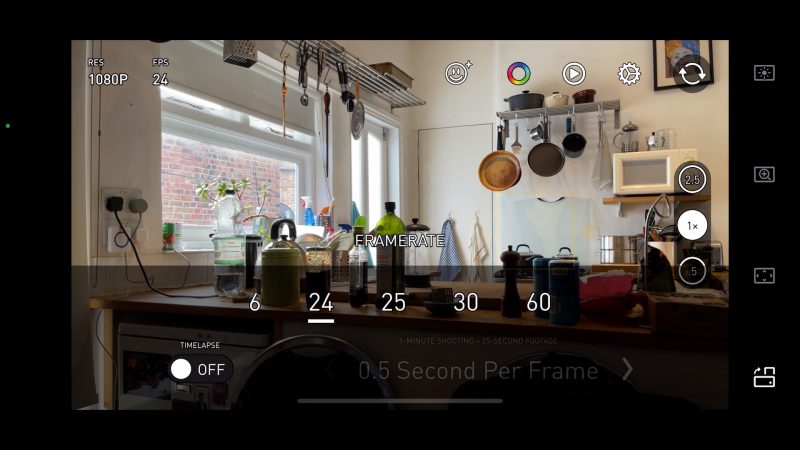
ProTake is another app that has a nice, simple interface. While it doesn’t have that old school, authentic camera feel, it’s easy on the eye. Also it carries over some elements from the Apple native app – like the exposure focus lock reticle, and the 3 lens control button on the right.
If you want to declutter the screen, a simple button tap immediately clears it – no distractions. And you don’t have to hunt around in the settings to find it, either.
This interface just feels quick and easy. So if speed is more important to you than messing around with settings, this could be the app for you. Everything is just so quick to access.
ProTake – Features
In auto mode, you have your basic controls but easier to reach. But there’s 3 other modes available: Pro, Dual and Portrait.
Pro gives you access to all the manual settings, with exposure and focus wheels similar to FiLMiC Pro. And no ISO bias to get in the way. Again, like Moment, we have a free shutter setting, which I personally prefer. You can have any shutter speed you want – 1/24, 1/ 37 and so on.
There’s 8-bit, there’s 10-bit, there’s Dolby Vision. There’s 4 different levels of stabilisation: off, standard, cinematic and extreme. If you use extreme, the monitor becomes heavily delayed but the result is nice smooth footage.
The Looks button gives you access to various filters and the Log C profile. You will need to download them first, however. Next to that is beauty mode, which gives this app that social media angle missing from the others.
There’s also portrait mode, which uses the iPhone’s LiDAR scanner to add a blurry background. And Dual mode which allows you to record from 2 different cameras at the same time. There’s 3 different layouts to choose from.
So I have to say, ProTake really comes with a remarkable number of features. Especially if you have an iPhone with a Lidar scanner and Dolby Vision.
Protake – Online Resources
Basically, almost nothing. In fact, I recently made a video showing how to pull focus with 3 different apps, including ProTake, and that seems to be one of the few tutorials around. The app is made by a company called Blink Academy Ltd, but a search for that was no help. I eventually found a webpage which is nothing but an email link.
ProTake – Price
Everything has a but. And this is ProTake’s but, so to speak. This app is free to download and you can use it in auto mode. But if you want the other modes, then there’s a subscription to pay.
ProTake currently costs $19.99 per year. So that really makes this the most expensive app in the list, if you intend using the app long term. On the plus side, this subscription covers you for both iOS and Android. I originally purchased the app on Android and all I had to do was log in to my account and the pro modes were enabled.
ProCam 8 – Interface
ProCam was used in the recent Shot On iPhone production by Apple and they produced some amazing results. With just an iPhone and ProCam… and tons of lighting kit production crew and professional post production technicians. Anyway, I was still curious as to why they used this app. Incidentally, ProCam 8 developers also make the popular Filmmaker Pro video editing app.
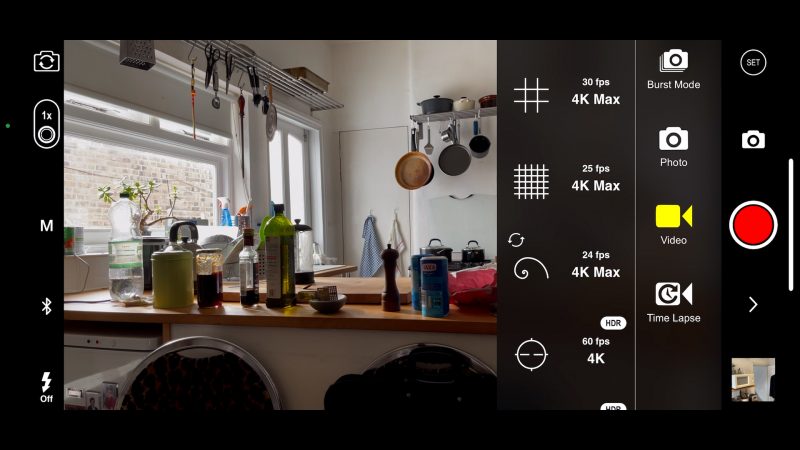
The interface is the cleanest out of all the apps. Controls are very minimal.
Press the M on the left to open up the manual controls. Above that, buttons for switching cameras. A little arrow under the record button opens up basic settings like resolution and frame rate.
So you can set your resolution and frame rate combination by scrolling up and down this long list. That’s probably going to take a bit longer than having frame rate and resolution separate.
Top right is a settings button which opens a series of menus. Here you can switch stabilisation on or off, change codec, set time-lapse and more.
ProCam 8 – Features
Like the Moment app, ProCam 8 allows you to take photos too. Aside from the usual features, there’s time lapse and portrait mode for blurry backgrounds. The other features here are for photography.
The app allows HDR Dolby Vision but no Log profile is currently available.
One feature unique to this app, compared to the other apps I’m looking at here, is what they call 4K Max video, which requires an extra in app purchase. This option shoots at a higher 4K resolution than normal – 4032×2268 – which is a 10% higher pixel count than standard 4K.
ProCam say there are a number of advantages to shooting in this format:
- 150 mbps bitrate
- A wider angle of view because there’s no stabilization
- A more accurate colour reproduction
- Superior low light performance
On the downside, you can’t use stabilization, there’s no 60fps, and the file sizes are 4 times larger. There’s also no HDR Dolby Vision option using this.
ProCam 8 – Online Resources
There’s a ProCam website with a page for tutorials. It’s pretty basic but enough to get you started. I emailed support with a query and they responded within a few hours.
Aside from that, there appears to be a few reviews of ProCam 8 but not too many tutorials on YouTube.
ProCam 8 – Price
ProCam costs about the same as other camera apps, a one-off $7.99. There are in-app purchases, which add on top. And if you want the 4K Max feature, that is an extra $4.99.
Beastcam – Interface
Beastcam Pro Camera is the long awaited camera app from Beastgrip.
Beastgrip started out making their famous grip for smartphones, which launched on Kickstarter back in 2014. Since then they have also become known for their DoF adapter, but they also produce other smartphone filmmaking kit such as conversion lenses. Their products are usually high quality, but also at the top of the price range and generally aimed at iPhones.
The Beastcam app interface has a very scientific look to it and is certainly the busiest of all those reviewed here. One reviewer compared it to something out of a fighter jet. There’s all the basic controls we need, laid out precisely around the screen.
Personally, the nerd in me enjoys having so much detail in the interface, but it might be distracting for some.
I like the way the resolution, frames per second, bitrate and bit depth are all accessed in this panel at the left. See now you can tap through each setting and immediately see what is possible. If I switch to 10 bit colour then 120 and 240 fps grey out right there telling me it’s not possible, so I don’t have to hunt in another menu to find out.
There’s focus and exposure reticles, as with other apps. One small down thumb is the subtle colour change when you lock the reticles, from white to a pastel blue. I found sometimes I can’t see if it’s locked or not.
Beastcam – Features
Beastcam doesn’t seem to carry any unique features that we don’t find in other apps. It’s more defined by the way it is laid out. The app presents all the important settings in a way that is intuitive and friendly.
There’s no log profile, and white balance has no lock on record setting, for example. On the plus side, it is also a stills camera. If you want to store presets, you will need to set up an account and be logged in. Although this has the advantage of being able to access presets on other devices.
You can shoot 4K at up to 160 mbps bitrate if you set it to “beast” level bitrate.
There are some interesting user features for the app. If you long press the app icon before opening, you can choose how you want the app to open: last setting, default or photo mode.
So there’s no flashy or gimmicky features. There’s no kind of time lapse option, let alone with motion blur. You can’t record in different ratios, all you can do is set some guides, so you will need to crop your video when editing.
So rather than tons of features, this app gives you pretty much nothing but the basics but in a well thought out way.
Beastgrip say they are implementing new features, like Log, but considering how long we had to wait for the app, I wouldn’t expect new features to arrive quickly. That said, I do like this app and I’ll use this if I know I just want to shoot nice video with no distracting extras.
Beastcam – Online Resources
Go to the Beastgrip website and you’ll find a well laid out list of tutorials, as well as some video tutorials on their YouTube channel.
The website support is really well laid out. Everything is explained in a way that’s easy to navigate. You can see they put effort into this side of things. However, it hasn’t been updated since last June. But still, when I wanted to check on a few things I found the answers quite easily.
Beastcam – Price
Beastcam is currently $14.99, which is not the cheapest, but at least there are no hidden extras.
Conclusion
So these are my best video shooting apps. I think they all have their own style and each one can appeal, depending on how you personally like to film and the features you’re looking for.
Which app do you think is currently best? Any other apps out there better than these for shooting cinematic video? Let us know in the comments.
Smartphone Video – Beginner to Advanced
If you want to know more about smartphone filmmaking, my book Smartphone Videography – Beginners to Advanced is now available to download for members on Patreon. The book is 170 pages long and covers essential smartphone filmmaking topics:
Things like how to get the perfect exposure, when to use manual control, which codecs to use, HDR, how to use frame rates, lenses, shot types, stabilisation and much more. There’s also my Exploring the Film Look Guide as well as Smartphone Colour Grading.
Members can also access all 5 episodes of our smartphone shot Silent Eye series, with accompanying screenplays and making of podcasts. There’s other materials too and I will be adding more in the future.
If you want to join me there, follow this link.
Simon Horrocks
Simon Horrocks is a screenwriter & filmmaker. His debut feature THIRD CONTACT was shot on a consumer camcorder and premiered at the BFI IMAX in 2013. His shot-on-smartphones sci-fi series SILENT EYE featured on Amazon Prime. He now runs a popular Patreon page which offers online courses for beginners, customised tips and more: www.patreon.com/SilentEye


Thank you for your information, #SimonHorrocks you are really a great writer.
I’ve used the slide lab app and I’m satisfied, now I’m using the #Vimory App for slideshow video making and really this app is very easy to use and great UI/UX and a lot of features.