How to Make a Short Film on a Smartphone
In this article, I’m going to show you how to make a short film with 3 things: FiLMiC Pro, a smartphone gimbal and a smartphone. I’ll go through everything from creating the story, preparing for the shoot, how to shoot scenes, editing and colour grading… all in one article.
By the way, you don’t have to follow all of these stages, that’s up to you and how you want to make your film.
For Silent Eye Members
As a compliment to this guide, I’m making available all the behind the scenes stuff from the 5 short films we shot for Silent Eye to our members on Patreon.
There’s all 5 episodes shot using FiLMiC Pro and a smartphone gimbal. There’s podcasts for each episode where I talk about how we made them. All 5 screenplays, the schedules, cast lists, prop lists and all kinds of other material which will give you an insight into making a short film yourself.
OK let’s get you on the road to creating some movie magic.

How to Make a Short Film with Filmic Pro, a Gimbal and a Smartphone
Everything included in this article presumes you are working with very little budget. I’ve been shooting films this way for years, so I can give you the benefit of my experience.
I will be using FiLMiC Pro and the DJI OM 4, but there’s no reason you can’t switch them for your preferred app and gimbal. The same basic principles apply.
In general, films are made in a set order of steps. You can’t start shooting without a script. Having said that, there are some notable exceptions where filmmakers arrived on set without a script. Or the script was so bad they had to rewrite the whole thing as they went.
But I wouldn’t really advise you to film that way. That’s a high risk strategy. So, the first thing you need is a story.
Coming Up With Story Ideas
If you find yourself blocked for ideas, then try to remember our lives are full of stories. From the moment we wake up and, actually, when we’re asleep, too – in the form of dreams and nightmares.
A simple and easy way to come up with ideas is to think of a story as a question. Let’s look at some examples:
Will a Jedi Knight defeat the evil Galactic Empire?
Will two lovers survive the sinking of the Titanic?
What happens when a programmer discovers we’re all living in a computer simulation?
It’s very important that your story is a question which you aim to answer by the end of the film. Also, make sure you can answer your question within say 5 or 10 minutes. I would say 10 minutes is a good maximum length for a short. If you can say it in 5 minutes or 3 minutes, even better – especially if this is your first time.
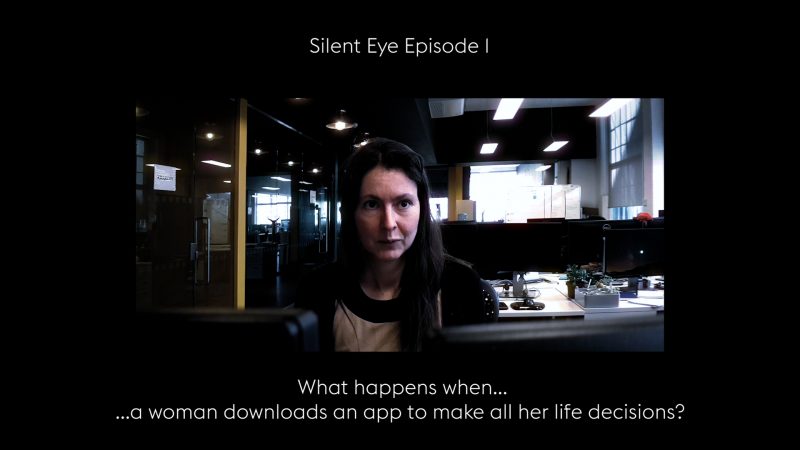
So, a Jedi Knight defeating the Galactic Empire is probably too big a question for a short film. How about a question like, “What happens when a woman follows a man who dropped his wallet?” That could be a thriller, a romance or a comedy, depending on how you write it.
Try to think of a story question and write it in the comments below.
Writing a Short Screenplay
There are many ways to write a screenplay. There’s probably hundreds of books on the subject. These books can help, but they can also burden a beginner with too much theory.
The best way to learn to write a story is by writing stories. Same with screenplays. My guess is you’ve written stories before, perhaps at school.
Remember, writing a screenplay is different to writing a novel or a short story. When you write a story, you can go anywhere and describe anything, including how characters are feeling. But a screenplay is made up of 3 basic elements:
Location, Action and Dialogue
Location is where the scene takes place. It’s written in the following form:
INT. SIMON’S HOUSE, DINING ROOM – DAY
The first 3 letters tell you whether the scene takes place inside or outside. INT stands for Interior. EXT stands for Exterior.
Then it’s the overall location followed by a specific part of that location. You might write: BUCKINGHAM PALACE as your main location and then QUEEN’S BEDROOM to be more specific.
The final part tells us whether the scene takes place during the day or at night.
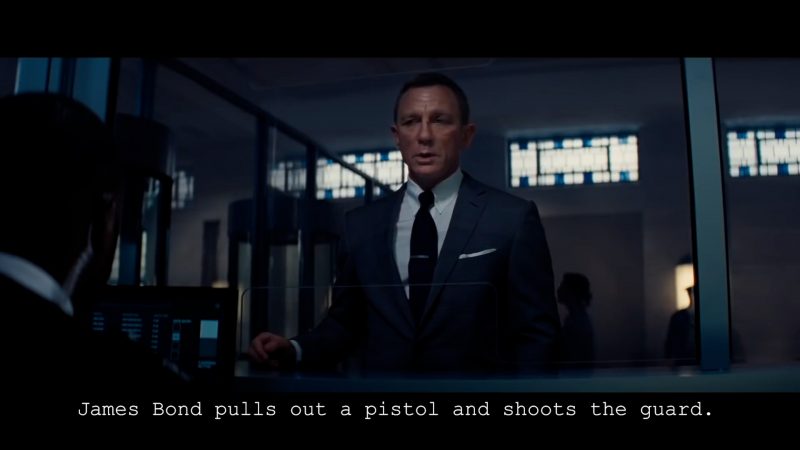
Action
Action is anything the actor’s do. You might write, “Simon sits at the dining table typing into his laptop”. Or “James Bond pulls out a pistol and shoots the guard.”
Dialogue
Dialogue is what the characters say to each other. It can also include any voice over or narration.
Before you start writing the screenplay, you might want to sketch out the story structure. When I first started writing, I would just boot up Final Draft and get typing. But now I’m wiser, I nail down the story beats first.
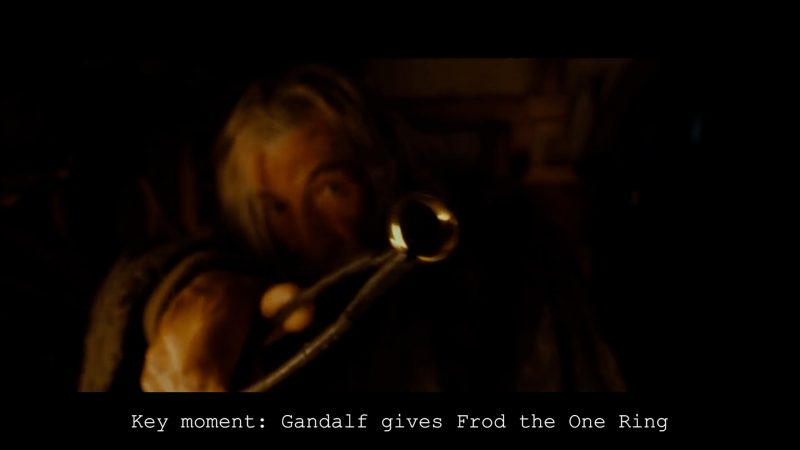
What are story beats?
They are like key moments in the drama.
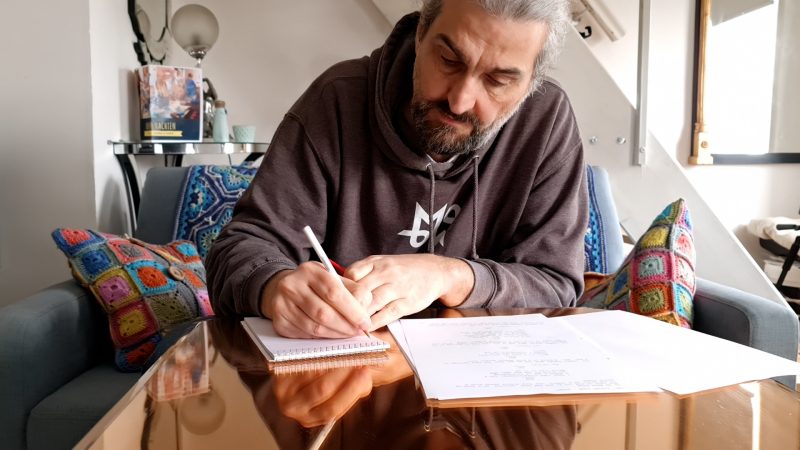
For my Silent Eye short film series, before I wrote the screenplay, I wrote about 10 lines where each line described an important moment in the plot. Spending a couple of hours doing this will save you possibly days of screenplay writing.
Once I’m happy with the basic structure I start writing the screenplay.
Best Screenwriting Apps for iPhone or Android
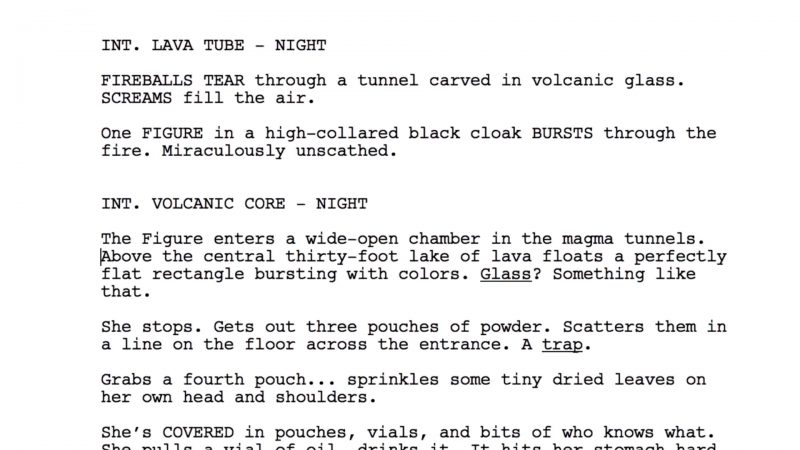
Whether you are writing a screenplay on your phone or a computer, it’s best to use some kind of formatting program. The general rule is that 1 page of script comes out as about roughly 1 minute of film. But this only applies if you have formatted your script correctly.
You want it to look like this.
There are apps you can buy or even free ones. One used by a lot of the film industry is Final Draft. Thing is, this program is pretty expensive, like $200.
But the iOS Final Draft app is only $10. So if you have an iPad or you are happy writing on your iPhone, this is a really cost effective way to get this program. It doesn’t have all the features of the full program however.
You can also look at other apps such as Highland 2, Celtx and Fade In which all have app and desktop versions. There are free versions of these apps, if you just want to get started.
There are cloud based options, such as WriterDuet, which is free.
Show Don’t Tell
There’s a general rule for storytelling of all forms that you should show the audience what is happening rather than telling them.
For example, bad writing is to have a character say: “I’m really angry!” Instead you should show the character acting in an angry way. Perhaps he smashes his computer keyboard.
In short, make ACTIONS speak louder than words. Think about how your characters act that SHOWS what kind of person they are and how they are feeling.
How to Develop a Short Script
Once you have your first draft of the script, put it to one side and forget about it. Leave it for a few days and then read it with what we call “fresh eyes”. If you give it some distance, it’s easier to spot parts that could work better.
It can be really useful to get opinions from people who don’t know the story. They will read the script as someone sitting down to watch your film the first time. They can spot things you can’t because you’re too close to the story.
Go through this procedure a few times: rewrite, leave it a few days, get other opinions, rewrite, leave it a few days… and so on. Once you’re happy the script is the best it can be, move to the next stage.
How to Write a Low Budget Film
As you don’t have a budget, don’t write things into the script that you can’t achieve without spending money. Only include locations you know you can film in. Your own house, places belonging to friends and family. Public spaces where you don’t need a permit to film, like a park.
The more things like props and costumes are sourced from what you and your collaborators already have, the more you will save on your budget. It also saves time.
Sometimes you can even use what you have as a starting point for your story. For example, how can I make a story with a toaster, an umbrella and a hat? In fact, it’s often restrictions and limits which push us into being our most creative.
Don’t write anything into your script that might turn out to be impossible or dangerous to film. As filmmakers, we are magicians, creating movie illusions. So try to think of ways to make everything very safe when filming, even if they don’t look that way in the final film.
How to Find Locations for a No Budget Short Film
The first place to look for locations are those properties you have access to in some way. I’ve shot scenes from my films in the places I was living and working. It’s much easier to ask your boss or a friend to allow you to film than someone you don’t know.
That said, some people are good at getting favours and freebies. If you are one of those people, then good luck.
If you are going to be recording dialogue at the location, make sure to check for noise levels. I’ve had quite a few bad experiences turning up to film only to find terrible background noise makes recording good audio impossible.
How to Cast a No Budget Short Film
The best way to get cast for a no budget film is to write a story around the people you know. Make sure those people are excited about the idea of being in a movie, too.
If you can’t get experienced actors, then people who feel confident performing is the next best thing. Like musicians, for example, can be a good bet.
Apart from that you can ask on social media for actors who are willing to get involved in a no budget production. Just be upfront about it. Try to offer expenses if you can, but always make sure to feed any volunteers during filming.
When I’m casting, I don’t usually do auditions. I prefer to watch showreels or meet the actor and just talk to them. I like to get a sense of who they are and how they might fit into my story.
One time, an actor who didn’t have too much experience offered to be in one episode after I put the message out on Twitter. So I asked him to video himself with his phone, but not acting just talking to the camera. From that, I could see he would fit the part very well.
Planning a Short Film Shoot
Once you’re filming, you will find yourself having to think of so many things, especially when you have a small crew. So forward planning will really help you keep things under control.
Sometimes I’m the writer, director, camera operator, prop master, managing the catering and a load of other stuff. Sometimes I’m directing the actors, making sure each shot is framed well, lit well, exposed well, in focus, trying to keep track of the shots I need, continuity, and all the while time is running out.
Shooting a movie can be a high pressure situation, so pre-planning will remove some of that pressure. Basically, make as many decisions before you start shooting as you can.
Once you have your script ready, number each scene. Having scene numbers helps to keep everyone on the same page, literally. For a professional film shoot, each scene is broken down into shots, which are then also numbered.
How to Make a Shot List for a Short Film
Go through the script and try to decide which shots you will need. Make a list of those shots and number them. For example, you might have scene 5 shot 8.
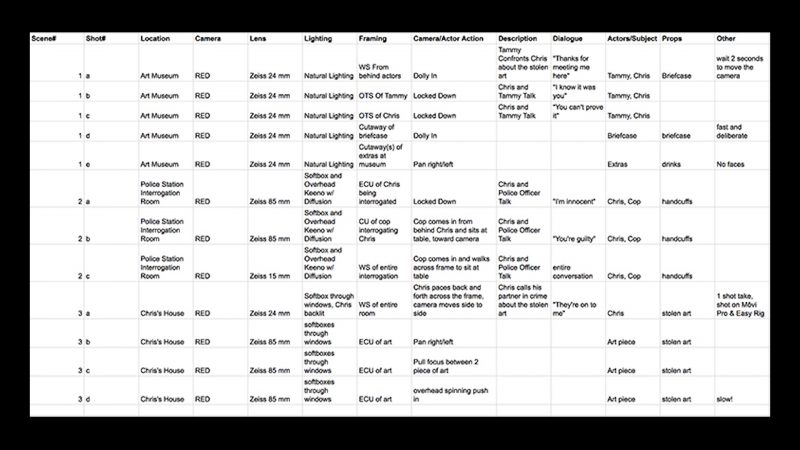
It’s up to you how detailed you are when you make this list. A professional shot list can include about 12 different factors: shot number, shot description, type of shot – like close up or wide – movement, lenses to be used, frame rate and so on.
Thing is, a professional shoot often involves a large number of people. Having a highly detailed shot list is needed so everyone can be prepared. But when shooting with a smartphone and a tiny crew, it’s probably enough to just briefly describe the shot.
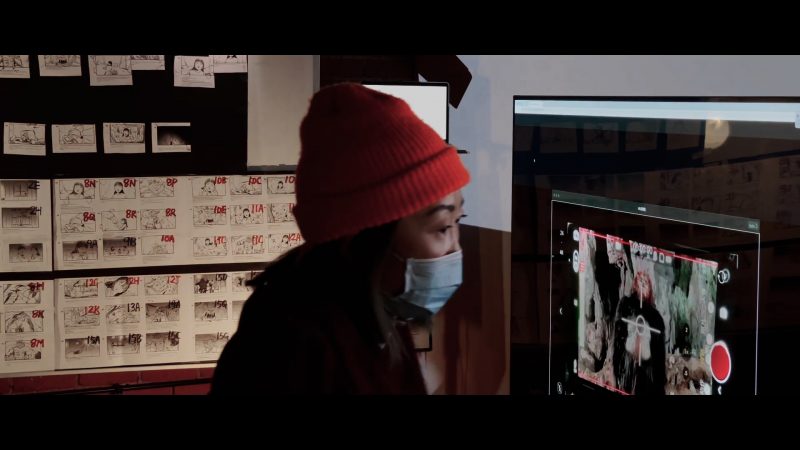
How to Create a Storyboard for a Short Film
A storyboard is like a visual representation of the shot list. This can be used for planning your shoot and as a tool for communicating your vision to other crew members. By sketching out how you see your movie, shot by shot, you can save a lot of time when filming.
You don’t have to be an amazing artist. Do the best you can to show how your story works as a film, filling each empty frame with a sketch of the intended shot. There also programs which create storyboard images, although I personally haven’t used them.
The frames should follow in the sequence you intend them to appear in the final film. If you’ve ever read a comic book or graphic novel, then you’ll understand the principle. And, as each frame is a still image, we understand a cut (or transition) will take us from one image to the next.
The storyboard shot number should match the shot list numbers. Below each box you can describe the action and dialogue taking place in the shot.
Just start with the first scene of your story. Try to “see” the story running like a film. If you don’t know where to start, watch some movies and get inspiration. See how professional filmmakers put a scene together, shot by shot.
How to Find Props & Costumes for a No Budget Short Film
Like I said earlier, it will make your life much easier if you follow the principle of using what you already have.
When we shot the first episode of Silent Eye we were working without any budget for props or costumes. Everything that appears in the film we already had or managed to get for free.
The following episodes often required props and costumes, so we raised a small budget on Kickstarter for each shoot.
In Episode 3, we needed one of those electrode caps researchers use for reading brain activity. Andrea used to work at a university in Zurich and managed to persuade them to let us use one which no longer worked.
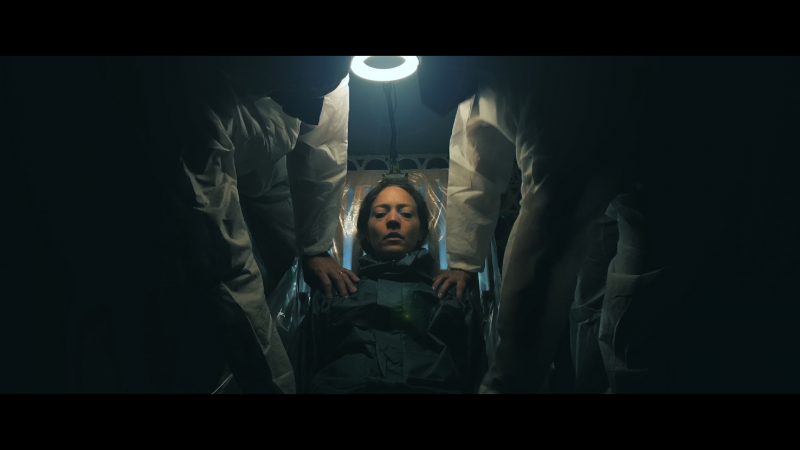
In Episode 2 we needed a defibrillator and managed to find a guy on twitter who refurbished old ones. He gave us a broken one for free.
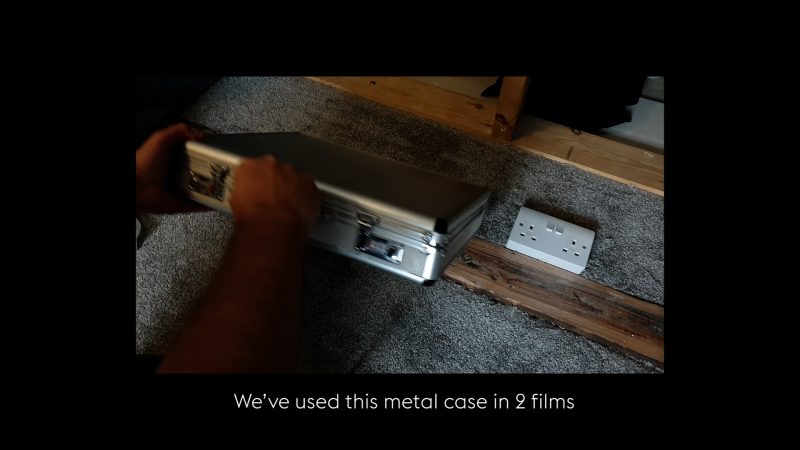
When I buy props, I look online for cheap possibilities. A metal first aid box for episode 3 was about £15 on amazon. In episode 5 we needed protective clothing and masks, again not too expensive.
There’s no reason in the plot they have to wear this protective clothing, but we wanted to give the scenes that sinister, scifi vibe. White bodysuits are only about $5 to $10 so the cost is minimal but the visual effect is striking.
When I made my feature film, I needed a box to contain human ashes. But the box also had to have a number hidden in the bottom. So I bought a second hand wooden box from a market for about $10. Then I spent some hours burning this pattern and the number into the box using a soldering iron.
When we shot our scifi series Kosmos, we needed alien cubes that glowed. Mike designed them and had them 3D printed. Then I added a glow in Adobe After Effects.
How to Schedule Short Film Shoot
Scheduling is another part of the pre-planning. The schedule lets everyone know where they need to be, at what time and for how long. It also includes details on costume and props.
When you create the schedule, you’re thinking about how long it will take to film each scene. It can be a bit tricky to know if you’ve never shot a film before.
To give you some rough guide, professional productions can look to shoot 2 pages per day on average. I usually aim for 5 pages per day.
How long each scene takes to shoot will depend on how long the scene is in pages (or fractions of pages). It will also depend on the complexity of the scene. Highly choreographed scenes will take longer. Scenes with complicated action or special effects will also take longer.
For example, in our 2nd episode of Silent Eye, we had quite a few makeup and blood effects. So I had to allow for this when scheduling those scenes.
If you’re shooting a short film, you’ll probably want a cinematic “film look”. To achieve this, you will need FiLMIC Pro (or another app).
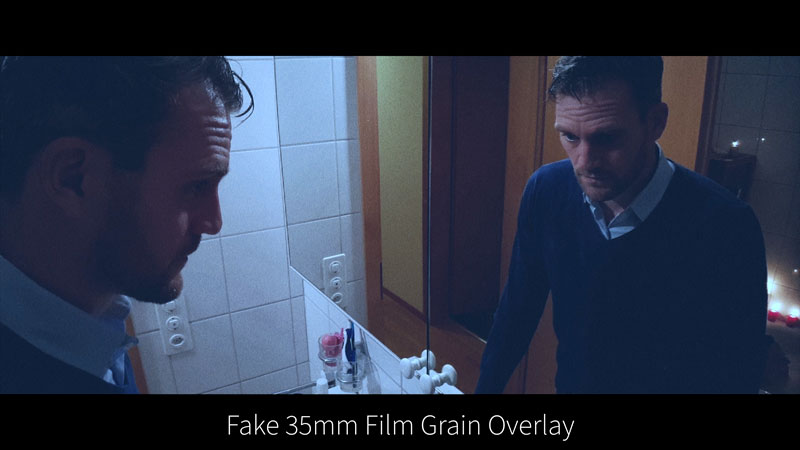
What is the Film Look?
Film has a dream-like quality to it that video doesn’t, unless you use certain settings and colour enhancements. So, when we try to create the film look, we attempt to emulate the key characteristics of film but using a digital medium.
In fact, this is quite an interesting question because many great films from the last century were shot in black and white, and with a square aspect ratio. These days, most cinema and TV is shot in some kind of widescreen format.
Another characteristic of film is that it’s mostly shot and projected at 24fps. Then there’s the 180 degree shutter rule, which dictates that your shutter speed should be close to 1/48.
Instead of digital noise, film gets grainy when pushed to compensate for low light levels.
How about a shallow depth of field? While this isn’t a property of film itself, most movies we know and love are shot using a variety of focal lengths. Some shots will have everything in focus, while others will have a blurry background and bokeh.
Film also has noticeably less contrast than digital video. Blacks are a little bit faded and whites more off-white.
How to Create the Film Look with FiLMiC Pro
First thing is to set your frame rate to 24fps. So open up camera settings and tap frame rate, now tap 24.
To make sure your shutter speed stays at 1/48, you can set it and lock it. Open up the manual controls by tapping this button here – a circle inside a broken circle. Now you have shutter speed on the left at the bottom and ISO left at the top.
Drag that wheel up and down until shutter speed says 1/48. Tap it to lock it and it turns red. Now when you drag the wheel up and down it only changes the ISO setting.
We want to keep the shutter speed at 1/48 because this creates a nice motion blur in the image. Faster shutter speeds reduce motion blur and make the image look more harsh on the eye.
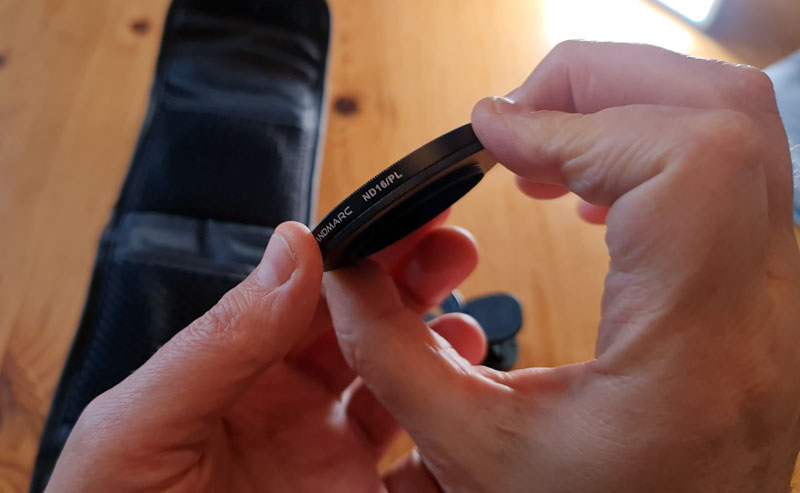
Therefore, the only way you can now set exposure is by adjusting the ISO. So what do we do if it’s too bright and we can’t lower ISO any further? Our only option is to reduce the light hitting the sensor and most people use an ND filter.
How to Fix Artificial Light Strobing in FiLMiC Pro
Electricity has a frequency which can cause strobing if it’s out of sync with your shutter speed. In Europe it’s 50hz, whereas in America it’s 60hz.
If you have this problem, set FiLMiC to 50hz in Europe and you can keep your frame rate 24fps. Shutter speed will now be at 1/50 – which creates virtually the same motion blur as 1/48. In America, you will get 1/60 shutter speed with your 24fps frame rate.
It’s not absolutely necessary for your shutter speed to be double your frame rate for the film look. 1/50 or 1/60 will still produce plenty of motion blur.
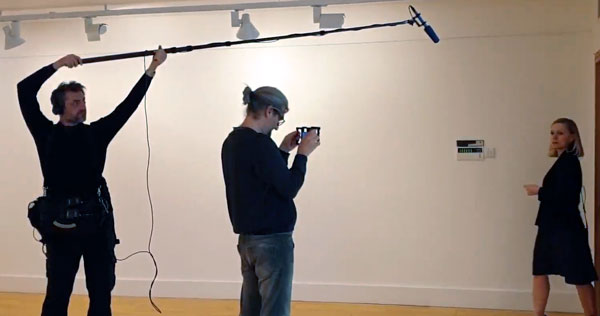
How to Shoot Takes – Filmmaking Procedure
It’s good to have a routine for capturing each shot. If there’s dialogue in the scene and you are recording audio to a separate recorder, you might want a clap to sync the audio with when editing.
That’s why film crews use a clapper board. On the board you can write all the details of the shot, so that when you edit you can read what’s on the board and you will know which shot it is when editing.
Someone, perhaps the sound recordist, will also announce the shot so that this is picked up by the microphone. On a professional film shoot, you will have someone whose job is to operate the clapper, keep it up to date and announce the shot.
The clap sound made by the board creates an audio spike to sync the sound to the image. All you do is match the spike to the point in the video where the two parts of the clapper impact.
Mobiles Off
I don’t usually use a clapper board. Instead, I get someone, like the actor in shot, to clap their hands together. Or I put my hand in frame and click my fingers. Another way is to make a loud clap or click that will be picked up by the mics on your phone and any external recorder. Then you can use the 2 sounds to sync later.
If you’re recording sound, make sure the cast and crew have their phones off or set to silent. Once nobody is making any sound they’re not supposed to, you’re ready for the take.
At this point, the director says something like “roll sound” (if audio is being recorded separately). The sound recordist starts recording and says “sound rolling”. The camera operator then starts recording and says something like “camera rolling” or “recording”.
Now the sound recordist announces the shot, like “scene 5 take 4”. This will be recorded by the camera and any separate audio, so you can match the shot to the audio file later.
Next the director says “action” or whatever they want to say to let the actors know it’s time to start acting out the scene. When the director sees the scene is finished, or the take has gone fatally wrong, she will say “cut”.
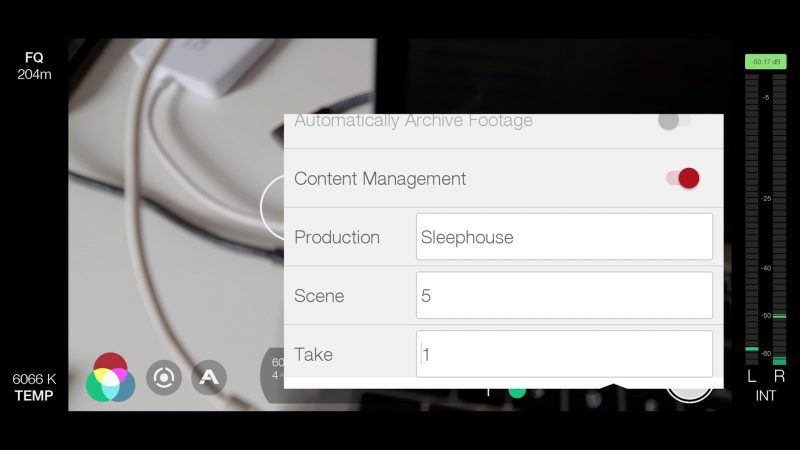
Media Management in FiLMIC Pro
FiLMiC Pro allows you to name each shot by scene and by takes. If you input the scene name and number, FiLMiC Pro will automatically progress the take number each time you start a new shot. So this can help you keep track of media when you come to edit.
These are things we often neglect when filming, and then wish we’d taken those few extra seconds when it comes to editing. That said, having someone announce each take at the start of the shot is a pretty effective way of keeping track.
Tap on CMS. Scroll down and where it says “production” enter the title of the film. Let’s say we’re shooting our 5th Silent Eye episode, Sleephouse. I write Sleephouse here.
Below, I can write the scene number. Remember we numbered the scenes in the screenplay earlier. If we’re about to shoot scene 5, I’ll put scene 5 in here.
Where it says “take” I can just leave that. So each time we do a new take, this should change automatically. You might need to make sure this is the right number. Maybe you hit record by accident and it’s now on the wrong number.
How to Direct Actors for a Short Film
Directing actors is one of the biggest challenges for new directors. Most of us are more comfortable fiddling with FiLMiC Pro settings than helping an actor evoke powerful emotions.
First thing is to understand the characters in the story as well as you can. Actors will often ask what is motivating certain actions, so they can find the emotions driving their character. This is where character consistency comes in.
If you have a character, who has spent the whole story so far running away, suddenly become full of defiance and courage, then the actor needs to know why. What is it that motivates the character – first to cowardice and then to bravery? You need to be able to explain both.
Character Motivation
One thing you should probably avoid is telling your actors how to act. One thing most actors hate is being told to be angry, laugh, cry or look happy. This is exactly how you create fake performances. Saying things like “be more natural” is also pretty unhelpful.
Rather you want to enable an actor to connect with the emotions of the scene. Explain to the actor what the character is feeling and why. Another technique is to give the actor an action verb, like “doubt” or “confront”. You might use a direction such as “you doubt what he’s saying”.
Some directors love to work with actors while others have little to do with them. Ridley Scott once told an actor cast for Gladiator, if you’re cast in a Ridley Scott movie you don’t need direction. Stanley Kubrick would have his actors perform a scene over and over and over until it clicked – almost like some kind of hypnosis.
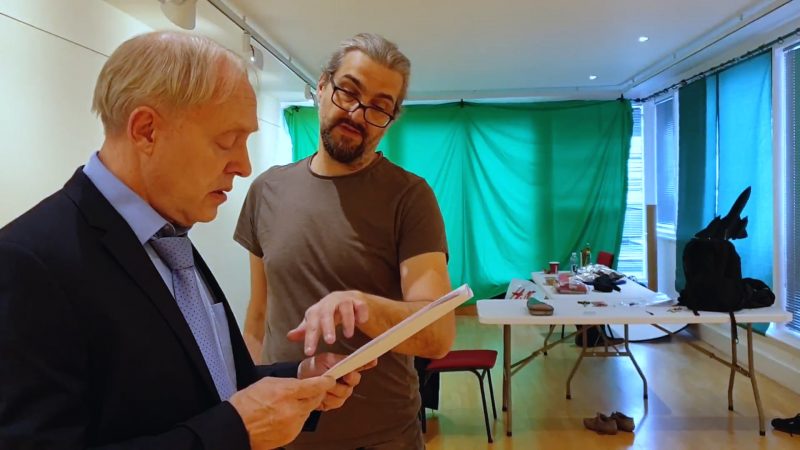
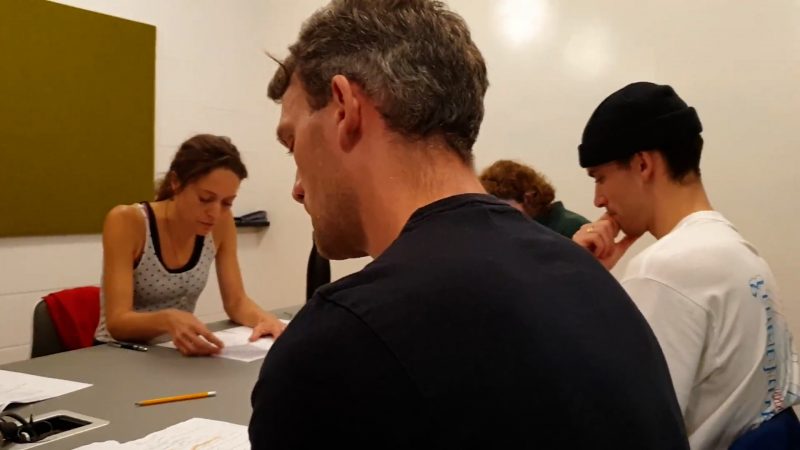
How to Rehearse Actors for a Short Film
Should you have the actors rehearse the script before filming? That depends on whether you find it productive and whether you can all afford the extra time involved.
Most of my films have been shot without rehearsal. Instead, we try to get the performance right when filming, and this involves shooting multiple takes and giving direction.
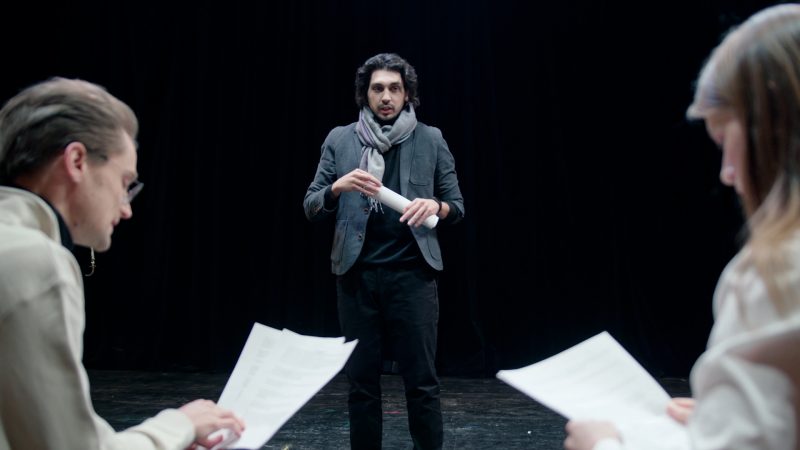
A lighter version of a full rehearsal is a table read. Just have all the actors sit around a table and read their lines. This type of rehearsal is very dialogue focused.
A full rehearsal requires space so the actors can perform their actions as well as dialogue.
OK so that’s preparation done. Let’s talk about lighting and then the shots we might need to shoot for a short film.
How to Light a Short Film
One of the biggest differences between a professional shoot and the no budget shoot is the lighting. Even if you are shooting in daylight outside, a professional shoot will have ways to control that light.
But there are a few tips I can give you to get the best results with little money.
First tip is try to use the existing lights as much as you can.
At night, have the characters stand by a window which is lit up for example. Or get close to street lamps. Find the light and locate your scene nearby.
Find the Light
In interior daytime scenes, have the characters sit by a window, side on. Daylight is such a nice light, and it’s free. As long as it’s not too bright, in which case you might need to use an ND filter.
But don’t have one character with their back to the window, unless you want their face in shadow for some reason.
When using artificial lights, these little lights are great but small lights usually create hard shadows on actor’s faces. It’s not flattering.
This is why photographers and cinematographers put lights in softboxes. This will diffuse the light, which is softer and much more flattering.
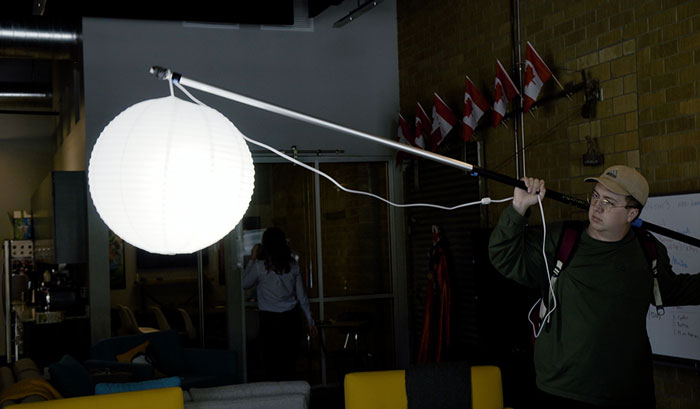
One trick is to place a light inside a cheap paper Chinese lantern.
Which Shots Are Needed for a Short Film?
Obviously, choosing shots is a creative process. There are no rules telling you the shots you have to have.
Some movies have recently been filmed in 1 long shot or a handful of very long takes. But most movies use multiple angles for every scene, unless it’s a very short scene.
Here’s some basic shots to get you started.
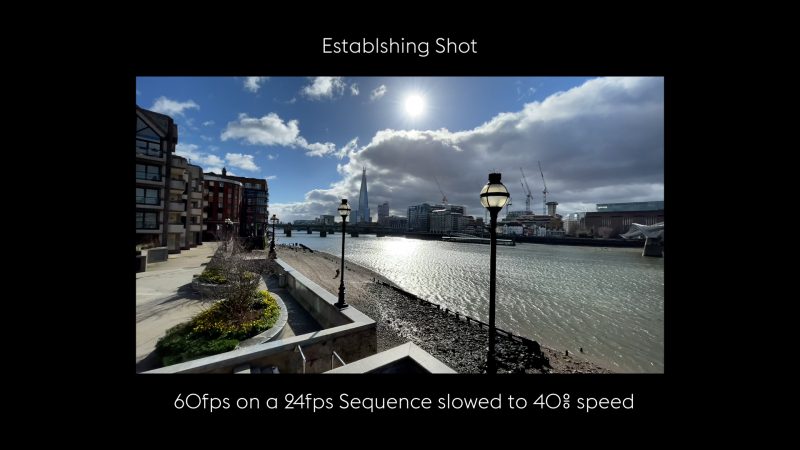
How to Shoot an Establishing Shot
We use an establishing shot to let the audience know where a scene or sequence is taking place. For example, if two characters are chatting in a cafe, you might start the scene with an exterior establishing shot to show what the cafe looks like. It also gives the audience a better idea of the kind of place it is – urban or rural, formal or trendy, and so on.
This is where you can switch to your ultra wide angle lens, if you find it appropriate. Also, this is a good moment to use your DJI Osmo Mobile gimbal. So ultra wide angle, gimbal and a slow move forward.
You could also try adding a monopod handle extension to the gimbal, to create a crane shot. In FiLMiC Pro, think about shooting 60fps and when you edit slow it to 40% on a 24fps sequence. That will give you a really nice smooth establishing shot.
If you can, try combining the camera movement with the movement of one or more characters in your story.
If you do include people in this shot, then you will probably want to shoot 24fps. Slow motion might look a bit unnatural, unless they’re gangsters and they go in shooting.
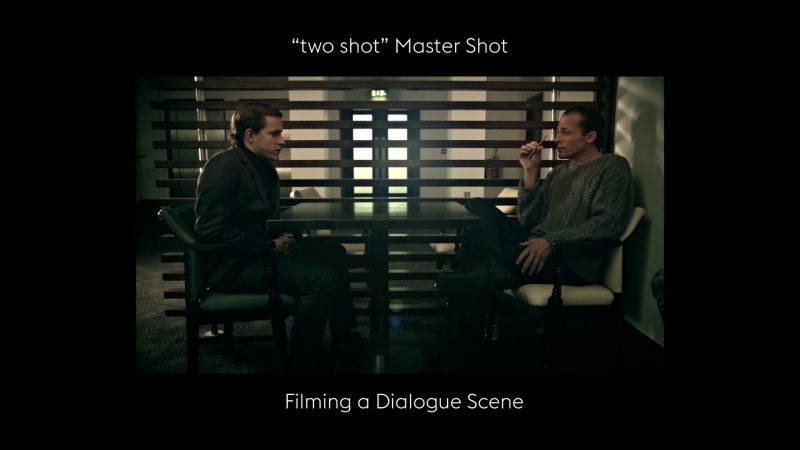
How to Shoot a Dialogue Scene
A dialogue scene is when 2 or more actors are performing dialogue from the script. The majority of dialogue scenes are between 2 characters and with the characters not moving around too much.
There’s a couple of reasons for this. One is that when filming dialogue the audio quality becomes very important. Put simply, it’s much easier to record audio when there’s 2 actors who aren’t moving than say 5 characters walking along a street.
When actors are walking it’s harder for a sound recordist to follow them. Their footsteps also make noise. If they have clip-on mics hidden under their clothes, there’s more likely to be rustling picked up by the mics.
For this tutorial, I’m just going to talk about filming 2 actors who don’t move.
Three Main Shots
When shooting a dialogue scene, think about getting 3 main shots. The first shot is what’s known as a “two-shot”. This is a wider shot which frames both actors, probably side on.
Best practice is to shoot the entire conversation from this angle and this shot then becomes what’s known as a “master shot”.
A master shot is one wide angle which covers the entire scene, from start to finish. If you get this shot then no matter what happens, you will always have this shot to fall back on when you need somewhere to cut to.
I usually film this master two-shot first as it gives the actors a chance to warm up. Because the next shots will be the “over the shoulder” close up, we want to get closer to the actor’s faces.
This style where we switch from one over the shoulder shot to the reverse over the shoulder shot is used so often because it brings the audience into the scene. If you film one actor over the shoulder, then the other actor from side-on, you might find it feels awkward when you cut between these shots.
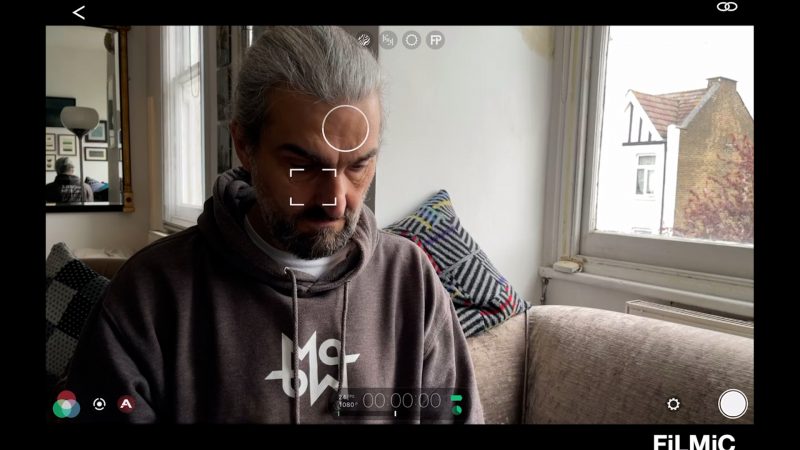
FiLMiC Pro Settings
In FiLMiC Pro, make sure you set focus on the actor’s face and lock it. Sometimes the phone automatically focuses on the background and you don’t notice until you come to edit. Also, make sure to lock white balance or have it set to lock on record.
When setting exposure, try to avoid having any part of the actor’s face bleached out because it’s over exposed. Remember the audience is mostly going to be focused on the faces. It’s better to have part of the face in shadow than bleached out, because in life we’re used to seeing shadows, not big areas of whiteness.
I recommend shooting in 4K if possible and then editing and mastering in 1080p. This gives you a lot of reframing options when editing. It’s very useful to be able to turn medium shots into close ups. It means you can get away with less shots when filming which saves time.
Say you get an amazing performance from the actor, but the shot is a bit too wide and therefore not intimate enough. With 4K mastered to 1080p you can crop in and get closer to the actor if you need to.
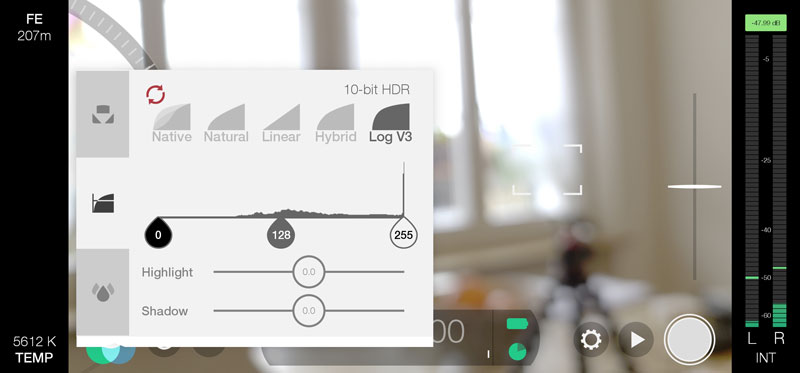
FiLMiC Pro – Should I Shoot in Log?
Personally, I’ve only shot 1 of the 5 episodes using FiLMiC Pro’s flat profile, the rest were shot using FiLMiC Pro’s natural colour. The theory is, FiLMiC Log (version 2 or 3) will give you more options when grading. And if this is what you want to do, then go for it.
But here are the downsides of using FiLMiC Pro Log. The general consensus is that FiLMiC Pro Log creates more noise, unless you keep ISO to the rock bottom minimum. They even say so on their website.
So shooting in low light means you will need to work extra hard on your lighting. Shooting with a smartphone is already tough because the small sensor is bad in low light. So you are making a bad situation worse.
Another problem is that Log uses more processing power. Your device is more likely to overheat. FiLMiC Pro even limits some devices so you can’t shoot 4K and Log at the same time. But shooting 4K, to my mind, is more useful than Log.
If you can shoot 10-bit colour and you want to shoot Log, then I would choose that. 10-bit depth gives you more colour information to work with.
This is just how I do it. Why not test both methods and see for yourself which looks best for your project?
Gimbal for Dialogue Scenes
A simple walking dialogue shot is a nice variation to have in your film. Have the actors walk towards you while you back away. If you have a mic boom then you, the actors and the sound recordist will have to move as a group.
It takes a bit of coordination but it’s not too difficult. Once you have the shot walking towards you, get the behind shot as well. Now you can cut between the 2, back and forth, during the conversation.
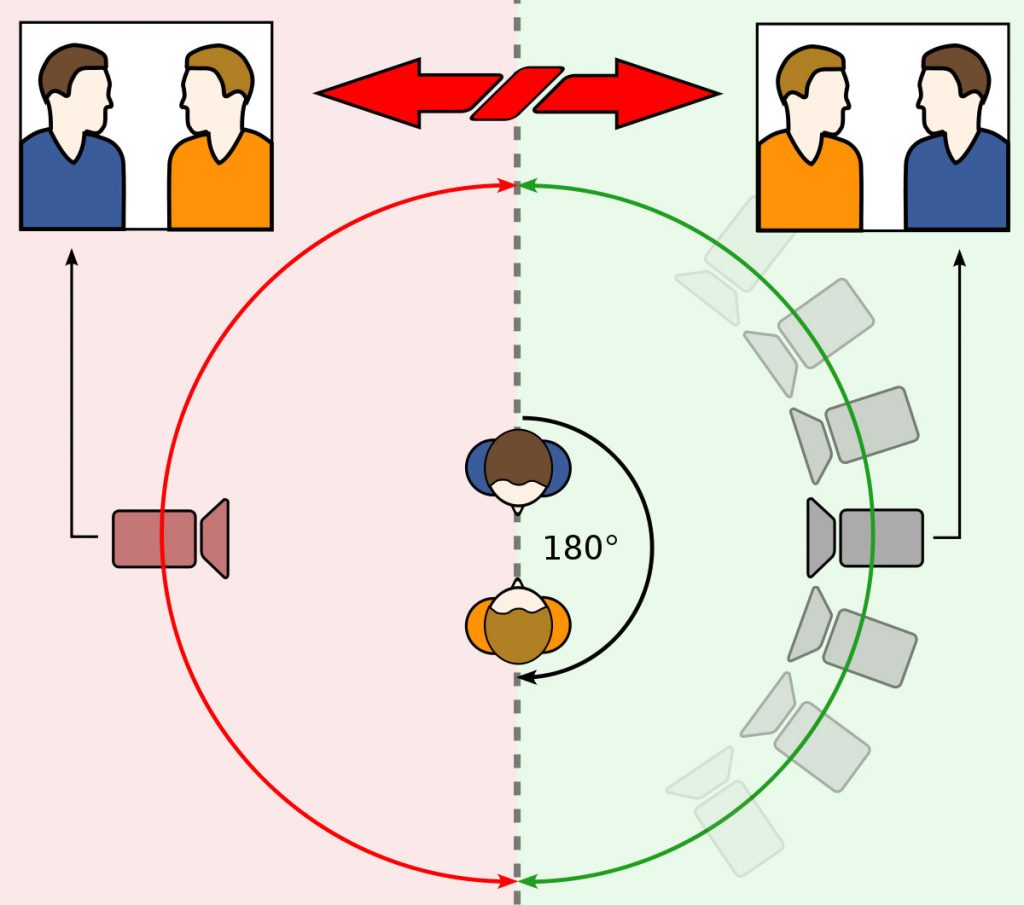
How to Shoot the Other 180 Degree Rule
There’s another rule in filmmaking which involves 180 degrees. This one relates to camera placement. Most commonly when filming dialogue scenes between 2 actors.
If you imagine a circle around your actors which encompasses the possible 360 degrees worth of camera positions from which to film the actors . Now draw a line through your actors and this line represents a line you must not cross.
In other words, the camera can be positioned anywhere around the circle, as long as you stay within one half or the other. Each half is 180 degrees.
The reason for this is that when you edit these shots together, each actor will remain on the same side of the screen. If you “cross the line” when filming, when you come to edit it feels uncomfortable, as each actor keeps switching sides.
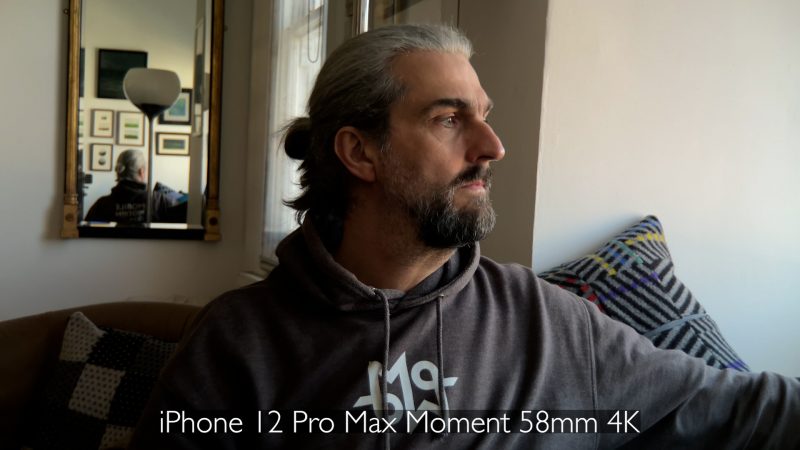
How to Shoot Close Ups
Now is the time to switch to that telephoto lens, if you have one. From testing my iPhone 12 Pro Max and Samsung Note 20 Ultra tele lenses, I found they don’t actually add much shallow depth of field, compared to the main lens. However, they will allow you to get a close up shot without moving the camera so close it becomes distracting for the actor.
If you are using FiLMiC Pro with a Samsung device, you might find there is no access to the tele lens. In my opinion, you might be better off adding a tele lens to the main camera rather than switching internal lenses. Things is, the main sensor has the best performance, using iPhone or Android, so you will get the best quality.
Close ups are used to see the reactions and emotions being displayed by the actor. They also add an extra intensity to drama. For that reason, close ups are usually reserved for the most emotional moments in the story.
Like I say, if you set FiLMiC pro to 4K and shoot medium close up. You can then push in for the full close up just by cropping in.
Smartphone Gimbal Close Up
If appropriate, you can use your DJI Osmo Mobile (or other gimbal) to achieve the classic Steven Spielberg “dolly in” close up. This shot is used to create a sense of wonder in the character as the camera pushes forward.
This shot brings us into the mind of the character. Generally, Spielberg uses this shot to indicate that the character is experiencing something greater than them, and therefore hard for their mind to deal with – whether it’s visiting aliens or the human devastation inflicted by a world war.
In general terms, it can be used to heighten the audience’s connection with the character.
How to Shoot Inserts
An insert shot is inserted into the main footage of a scene. Usually a close up of some key action in the story. But it can also be a little detail that the filmmaker wants to draw attention to.
You can also film close ups to give yourself somewhere to cut to if needed. So you might film nothing but the actor’s hands, which perhaps also reveal the characters emotions – a clenched fist for anger, a shaking hand for stress and so on.
How to Shoot Hollywood Style Gimbal Moves
It’s great to have a gimbal as part of your smartphone filmmaker toolkit. But I wouldn’t recommend you use it for every shot. Unless you have a particular idea for the look of your movie.
In most movies, these shots are used for certain moments. For tracking, for dollying in on an actor, for crane style shots and so on.
I’ll go through a few shots from Silent Eye and explain how and why I used a gimbal.
When we shot the first episode it was my first time shooting a short film with a smartphone and the first time using a gimbal. So I used it quite a bit.
Episode 1
I used it for these following and tracking shots. Plus a POV shot from the view of a character. Some dolly left and right shots too.
Episode 2
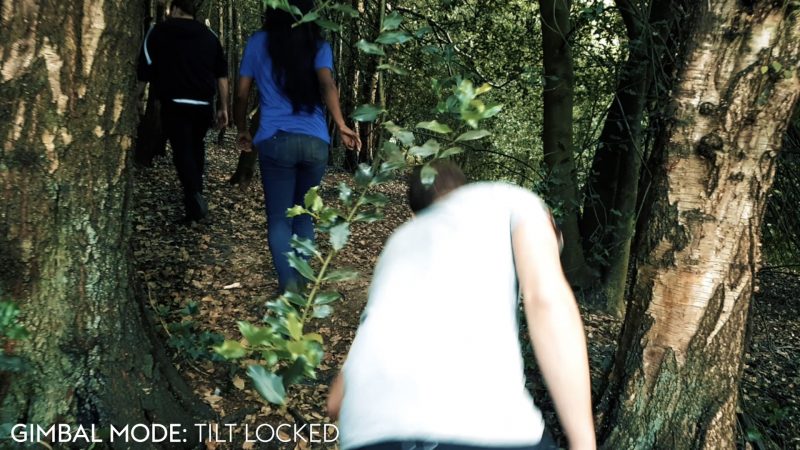
Pushing forward into the woods slowly, with the actors moving from behind me at a faster speed. I was really pleased with the way this shot came out, using movement of the gimbal with the movement of the actors.
Another shot from that episode was pretty simple but basically one gangster is waiting to do a deal with another gangster in an underground car park. So I dollied sideways as the first guy approached from way off in the distance, ending the shot on the 2nd guy in the car.
Episode 3
For episode 3, I decided to be a bit more ambitious with my gimbal moves. I wanted to try out some Hollywood style stuff and more complex movements.
This shot was at the beginning, setting up the story. I follow the actor and as he reaches the door I lifted the gimbal to end with a crane style shot.
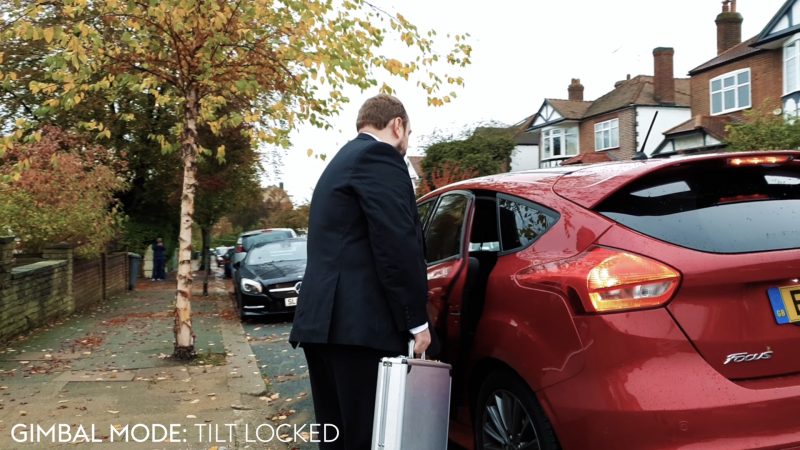
This was a shot a bit later in the story which took some coordination. We had one actor who walks along the pavement as his taxi cab arrives. Then we had another actor playing the cab driver, driving the car. Meanwhile I was following the first actor with the gimbal at the side and I then circle round as he opens the door.
So all this had to be timed to get the shot. But I really liked the way all these movements came together in one fluid shot.
Episode 5
This was from the final episode and I wanted to use these dynamic lines created by the pipes on the ceiling. I felt they added to the sinister atmosphere, plus they create an extra sense of perspective.
So I did a simple crane style shot using the gimbal, dropping down as the actor emerges from the door on the left. Then I continued the shot, pushing forward slowly.

How to Record Dialogue Audio
There’s an old low budget filmmaker proverb which says, an audience will put up with low quality images but now low quality sound. So how do we get great sound on a limited budget?
If you are going to record your actors’ voices, then you will probably need some kind of audio setup.
There are 2 main types of microphone used to record dialogue. The first is a shotgun mic and the second is a lavalier or clip on mic. Unless you are very close to the actor with the smartphone camera, I don’t recommend using the phone’s inbuilt mics.
A shotgun mic is known as a directional microphone. It’s long and thin and aims to record audio only from the direction it is pointed. And this minimises the background noise which can ruin your audio quality.
A lavalier or clip-on mic is known as an omnidirectional microphone. That means it records audio from all directions. The way this mic minimises background noise is by being as close to the actor’s mouth as possible.
A shotgun mic on a boom pole will need someone to hold the boom.
Clip-On Mics
Clip-on mics are a bit more complicated but once they are clipped on you can forget about them, to a certain extent. For narrative films, they need to be hidden in the clothes of the actor. You also need to try to avoid clothes rustling against the mic, which will make the audio unusable.
For our last episode of Silent Eye I used this Comica dual wireless clip-on setup. It’s designed to be used with smartphones, it plugs directly in and the receiver box attaches to the phone. The one downside is that it mixes the 2 mics into one audio track.
When you attach an external mic to your smartphone, FiLMiC Pro should automatically detect it and switch. But you should also check to make sure, just go into settings. If you don’t see an external mic option, that means the phone isn’t picking it up.
Using mics with your DJI Osmo Mobile might add too much weight and restrict the movement of the gimbal. That’s why we used a shotgun mic on a boom pole, recording onto an external recorder. This gives the camera operator freedom to move around.
When using a shotgun mic, try to get the mic as close as possible without getting it shot. Then aim the mic at or just below the actor’s mouth.
When you are filming outside, you get more leeway with the shotgun mic because there are no walls creating echo.
Low Budget Audio Tip
When you’re filming dialogue, a professional sound recording crew will make sure to record all the actors even if they’re not in frame. For example, when you are filming that over the shoulder shot, they will even record an actor when all you can see is their shoulder.
But, as a long time no budget filmmaker, my strategy is to focus only on the actor who is in shot. When you come to edit, all you really need is great audio that syncs with the actor in frame. If you can’t see an actor’s lips then you don’t need their audio, as you can get it from another take or overdub it later.
As well, I always focus on getting the best audio from the close ups. When you’re close up, it’s much easier to get the mic close to the actor. If you’re only using a shotgun mic on a boom, this close up shot audio will be your best audio.
How to Record Background Audio
Don’t forget to get an audio ambience of each location and each scene. This will be used later when you come to edit the shots and the audio together.
Normally, once you’re finished with a location, the sound recordist will ask everyone to be quiet while they record 2 or 3 minutes of ambient sound. This location ambience sound is then laid under the other audio to smooth over cuts or to replace unwanted noises.
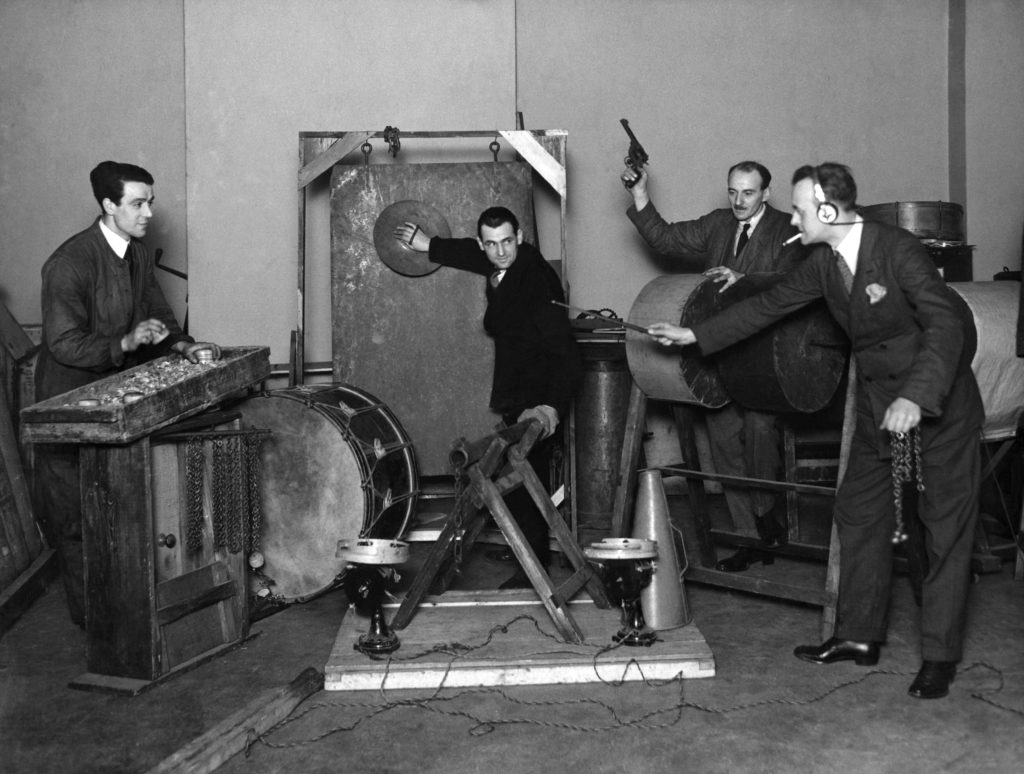
How to Record Foley and Sound Effects
Filmmaking is about creating the illusion of reality and the use of sound effects really helps in this. Remember that movies are about sounds as well as images.
Things like punches or gunshots in fight scenes, are obvious effects. But even things like a key in a lock or echoing footsteps, which you might not notice when you’re watching. These sound effects really help to add punch to the images and actions.
A lot of new filmmakers just slap some dramatic music over and think that’s job done. But adding key sound effects, if done right, is actually more powerful because it’s not so obvious. Plus it really emphasises a particular action.
If there’s no dialogue in a scene, I usually don’t record sound because it slows you down. Of course, there’s always the smartphone picking up audio anyway. And I know that I can create the sound for the scene later. It’s only synced dialogue that you need to focus on.
Later, you can get close with the mic and pick up those individual sounds. Usually, I do this after editing and I’m at what is known as “picture lock”. I go through and make notes of all the audio I need.
How to Find Free Sound Effects
These days there’s tons of free sound effects out there. The quality can be a bit hit and miss. But usually I can make something from a download or add different sounds together.
Adobe Audition has a whole load of sound effects I recently downloaded for free. Plus ambient backgrounds. The BBC has a load of free sound effects and background ambiences. I’ve used sounds from places like FreeSound and freeSFX.
For example, you might have a scene in a cafe but you will usually record it without people chatting and clattering plates and glasses. You want to get clean dialogue audio. Then later you add the atmosphere of a busy cafe under the dialogue.
How to Edit a Short Film
Editing is a huge subject on it’s own, but I will go through my basic steps. Other filmmakers will develop their own and you will too, the more you practice.
Editing – File Management
First of all, if you haven’t done so already, send all your files from FiLMiC Pro to wherever you will edit them. You can do this directly from FiLMiC Pro by opening the gallery, selecting files and then sending them.
From my iPhone to my MacBook Air, I use AirDrop, which I find really quick. From my Samsung I either use Google Drive or I connect the phone to my MacBook Air with a cable and use Android File Transfer. If you have a lot of files, this is by far the quickest way.
If you haven’t used FiLMiC Pro’s file naming feature, you will need to name the files. I watch every video to see how good it is, then name it by scene and take number.
Then I go through every audio file. Again, if they’re not already named I name them so now I can match the audio to the video file.
Once I have all my files imported into Adobe Premiere Pro, I place each video file into a folder for each scene. This saves a lot of time hunting through files to find a particular clip.
Editing – Syncing Audio
There’s 2 ways to sync audio in Premiere. First is to lay the audio clip under the video clip, but keeping the video clip’s audio track. Now you can match the visible spike in the audio timeline. Also, you can match the sound of the clap with the clapper impact (or person clapping) in the frame.
The second way is to use Premiere’s synchronise audio feature. Premiere will analyse 2 selected audio tracks and match the timing. That’s why it’s good to keep the audio recorded by the smartphone even if you record audio onto a separate device.
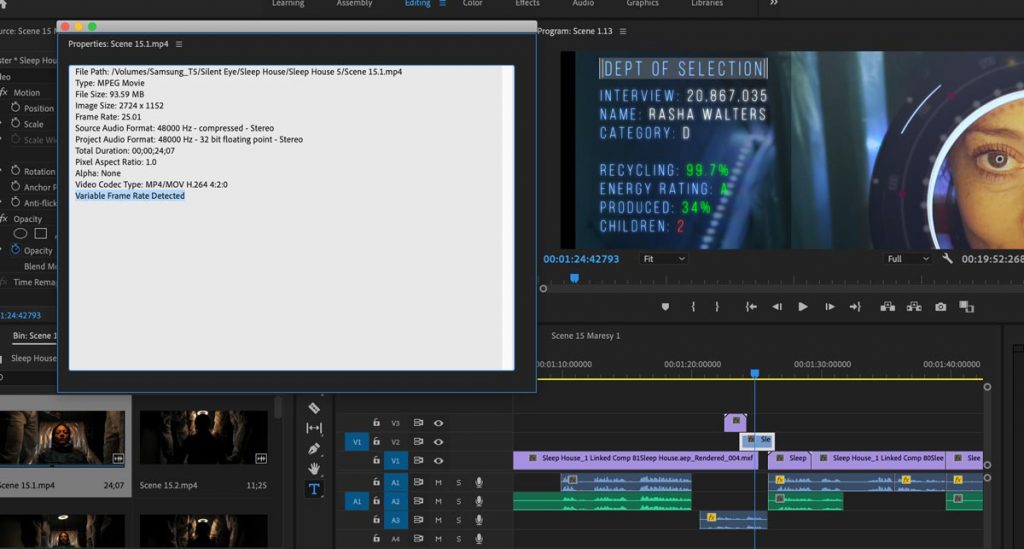
Now, bear in mind smartphones shoot what’s known as variable frame rate. And this can cause problems when syncing audio. When editing variable frame rate, software like Premiere can sometimes adjust the frame rate, especially when adding effects like colour.
Some people convert all their footage to a fixed frame rate codec before editing, which is probably sensible. You can use software such as Handbrake on Apple, Windows and Linux platforms.
Editing a Short Film, Scene by Scene
I generally work chronologically, from the first scene in the script to the last. So first I lay down any establishing or introduction shots I have. Then I start on the first scene.
First I lay down the best master shot. This shot should cover the whole scene, so it gives you a structure right away. Then it’s about deciding how you want the scene to start. Maybe leave the master shot as a kind of establishing shot.
When to cut to a close up? Maybe on the first line of dialogue. Or maybe you want to keep the wider shot for a while. It’s a creative choice.
So, each time you lay a new clip on the timeline, if you have separate audio, you will need to sync it up.
I go through the whole scene and when it feels roughly like it’s flowing the way I want, I move on to the next scene. I don’t labour too much, I just want to get a rough cut down.
Once I have the whole film at a rough cut stage, I take a few days break. Like with writing the story, your mind needs rest so you can come back and see it with fresh eyes. As well, you can show the rough edit to people to get their feedback.
Like with writing, I keep cycling through this process until we’re happy with the edit. That’s when you declare “picture lock”.
How to Colour Grade a Short Film
Colour grading is usually left until after picture lock. Get the edit right, then add colour changes and any VFX. Saves a lot of time that way.
Bear in mind, a professional colourist performs 2 types of colour work. One is colour correction and the other is colour grading. Correction is bringing the colours to a natural realistic state that fits the colour space, while grading is making creative changes to the colour.
When it comes to colouring your smartphone shot video, some care needs to be taken not to overdo things. Taking the approach of subtle tweaks and aiming for a consistent look will help you create something truly cinematic.
No matter whether you shot the film in FiLMiC Pro’s Log or natural profile, the compressed codec used by smartphones is not designed for major colour work. Too much information is discarded at source.
If you recorded 10-bit colour at maximum bitrate, you will have much more to play with, however.
Colour Grade – Correct White Balance
First step is to look and see if your video clip has the correct white balance. If not, Premiere has a white balance eyedropper tool. If there’s an area of the image which should be white, click the eyedropper on that area and you should get a more accurate white balance.
Colour Grading – the Creative Part
The colour grading process is part of the story creation. It’s not just about making your video look more cinematic. The colours you use depends on the feelings you want to convey.
Romances tend to use warm, orange and red colours. Thrillers and scifi films tend towards colder, bluer looks. Period dramas often choose a desaturated look with a sepia influence.
Silent Eye is a scifi thriller series so one of the first things I generally do is pull down the red.
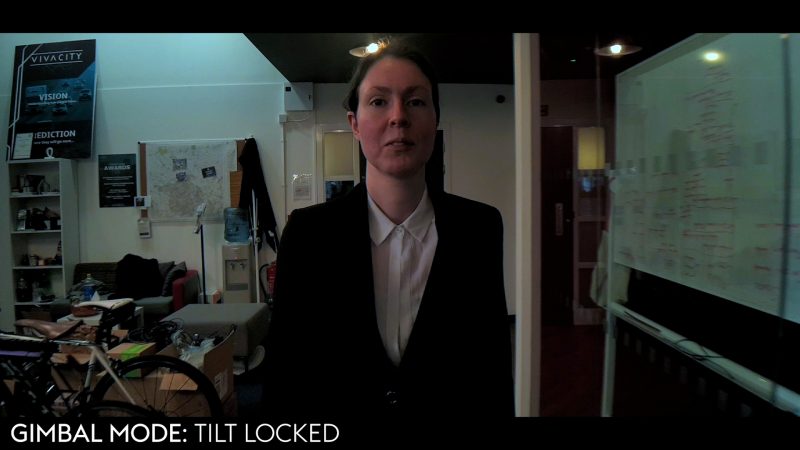
Less Contrast
Remember that film has generally less contrast than your smartphone outputs. So if you want that film look, here you can bring down the highlights and push up the shadows. This usually brings out some extra details in the shadows too.
If you search colour grading tutorials on YouTube, you’ll find most of them rarely look at skin tones. They’re aimed at people filming landscapes and buildings. But if you are making a short film, getting skin tones right is key.
If your skin tones are off, it can ruin your movie. And if you come in too heavy with your colour work, unless you mask out the skin areas, then you end up with very pink or grey or blue faces and no subtlety in tone. The faces go kinda flat.
If you can, do your colour work in DaVinci Resolve, which has a free version you can download. It’s really the best software for colour work.
How to Add Music to a Short Film
You have to be really careful with the music you use for your short. As a festival director who watches so many short films, I can tell you the music can destroy something that was otherwise good.
First tip is – less is more. I think sometimes we lose confidence in our film and think we need to punch it up with some loud, overly dramatic music.
Remember, like everything else in the making of your movie, it comes from the story. The story should motivate the choice of music. Use the music to set the scene, or enhance the emotion that’s already there.
The music needs to be consistent. Don’t go from a low, rumbling, unsettling score in one scene to a comical piano melody in the next (unless you have a solid creative reason for it).
Use the music to tie the drama together and help to make each scene feel like they all belong in the same movie. You can also use it to build the tension as the movie progresses.
The Music We Used in Silent Eye
Firstly, the title music was created by a composer who contacted me and asked if he could write some music for the show. After a couple of tries this is what he came up with and I created the animated titles to go with it.
Apart from that the music for the series is made up from free music offered online, stock music I paid for from Premium Beat and music composed specifically for an episode.
For the first 4 episodes, I used pre-written music. As an ex professional composer myself, I know how long it takes to score music for a movie. And for this series I needed to get the episodes done as quickly as possible.
David directed the last episode, and he brought in George Jennings as composer who did a fantastic job.
Some of the tracks were written by composer YouTuber Ross Budgen. He started out writing great Hollywood style music and gave it away on his YouTube channel. Then his music got a bit more interesting as he developed.
I used a couple of these more interesting tracks for some of the Silent Eye episodes. And for the 4th episode, I found a piece of music on Premium Beat and purchased it for the show.
How to Sound Mix a Short Film
A sound mix is created as part of every film production. This is where all the audio files are mixed together to create the best quality and give the most impact.
Actor’s voice tracks are filtered, EQed and have unwanted noise removed. Background ambience is laid down. Sound effects and foley are added. Then there’s the music too.
All this is then mixed together so the voices can be heard, while the music and effects still have impact. It’s all about getting the right balance so the audience gets the most from the experience. Take note Christopher Nolan…
This whole Article, as you know, is aimed at no budget productions, assuming you don’t have access to, or the budget for, a professional sound mix studio. I’m just going to tell you how I do it with no money and no studio.
Some of the episodes of Silent Eye were mixed by me in Premiere. And a couple had their audio mixed by Barnanby, who also recorded sound in a few episodes.
Barnaby definitely did a better job than me. I generally did quite a rough mix and was limited to using Premiere and some cheap computer monitors.
Audio Mixing in Adobe Premiere or Audition
While you can edit and process your audio tracks directly in Adobe Premiere, it comes with another program called Audition, which can be used for more serious audio processing. If a dialogue file has some hum or buzz in it, I can send it to Audition and run it through the hum remover.
Other than that, I just try to keep it simple. I use keyframes to adjust the voice level to try to keep it even. I wouldn’t use heavy compression, though, because it doesn’t sound natural.
My general aim is to keep all the voice stuff at a level around -6db, which I find works for streaming my videos on Amazon. There’s room for a little extra volume if a character starts shouting, for example. You need that extra room above the voice level for impact sounds, otherwise they won’t stand out.
You don’t want the normal spoken voice to be at the same level as a gunshot, a breaking window or a car crash. I mean, unless they are distant events, of course.
This is the creative part of sound mixing. You really are telling the story.
The loudness of sound effects depends on the needs of the scene. If characters are creeping through a haunted house a softly creaking floorboard shouldn’t be at max volume.
Sound mixing is such a fun and important part of filmmaking, you really shouldn’t ignore it. Any video effects or other effects can be brought to life with great sound design.
Eager to learn more?
Join our weekly newsletter featuring inspiring stories, no-budget filmmaking tips and comprehensive equipment reviews to help you turn your film projects into reality!
Thank simon for making wonderful free course in filmmaking. I am looking this course from past 4 months and learn a lot things. And I am so excited that when i finish all week i am gonna be the guy with good knowledge of filmmaking. Thank you so much for helping.