Master Your Smartphone Camera Settings using FiLMiC Pro (or other app)
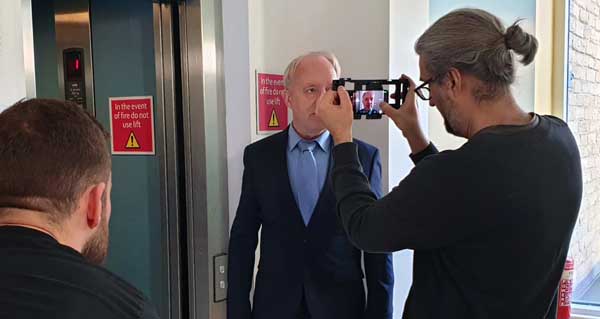
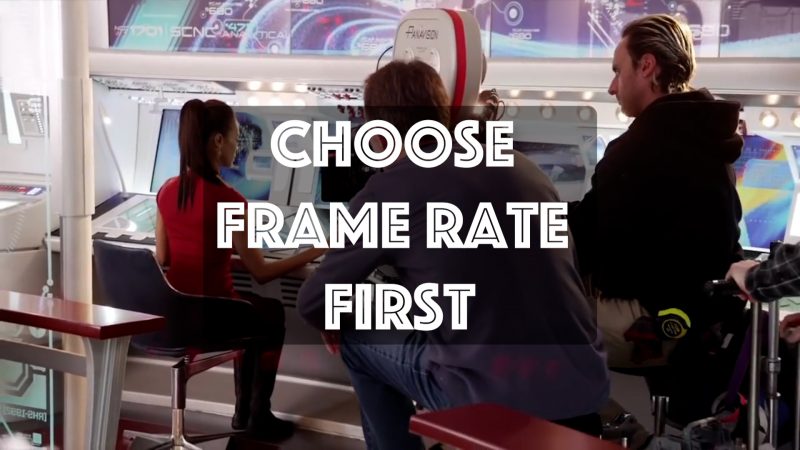
We recently shot a scifi TV series using smartphones. The show, called Silent Eye, has had over a million views on Amazon Prime, and has been recommended to viewers alongside shows made on huge budgets.
Part of our success was using settings via a camera app called FiLMiC Pro to create professional-looking cinematic-quality video.
So, how did we do it?
My name is Simon Horrocks and I’ve been an indie filmmaker for about 25 years. I’ve shot films with 16mm film cameras and digital cinema cameras. But over the last 3 and a half years I’ve shot all my movies just with smartphones.
In many ways, using a smartphone camera is like using any camera. But there are some key differences.
If you read this article, you’ll be able to use your smartphone camera with more confidence. You’ll learn how to get your exposure right. And you’ll learn how and when to use a manual control app instead of auto mode.
I’ll be going over the 6 main elements important for your smartphone camera settings. Whatever type of video you’re shooting, whatever model smartphone you have, getting these elements right will make the difference between amatuer and professional footage.
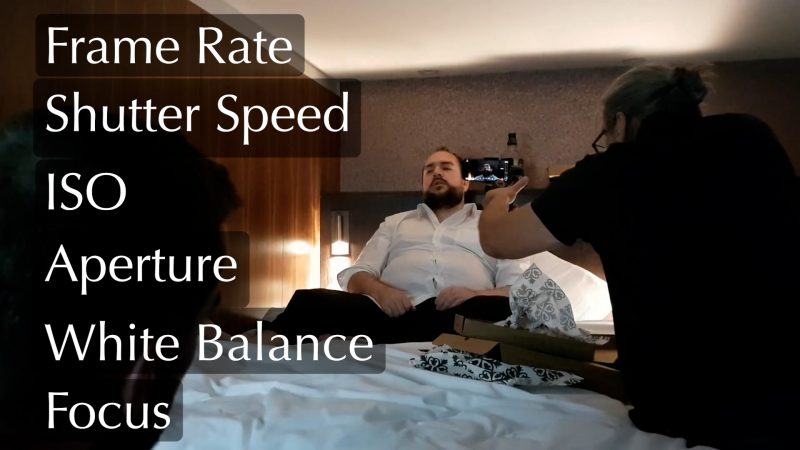
Smartphone Camera Settings: 6 ELEMENTS
These 6 elements are: Frame Rate, Shutter Speed, ISO, aperture, white balance and focus.
When applying smartphone camera settings, remember these 6 elements work together to create the look of an image or video.
Imagine they’re 6 players on a soccer team. If they work together, they’re more likely to win. But if each one does it’s own thing, it’ll end up a hopeless mess.
Today, you will learn how to combine all these elements, for correct exposure, correct focus and colours in your videos.
MANUAL CONTROL
A lot of advice around smartphone camera settings is that you must always use manual control. But that’s not always true when it comes to smartphone cameras. There are some situations where using auto or simply locking exposure and focus is the best option.
So keep watching and I’ll talk about those situations as we go through the camera settings on your smartphone.
MANUAL CONTROL APP
The absolute first thing you must consider for smartphone camera settings, is to use an app which will give you manual control on your smartphone camera.
If you have a Samsung or other android camera, you will probably have manual control already. For photos it’s simply called Pro mode and for video it’s called Pro Video mode.
If you have an iPhone, there’s no way to control things like ISO, shutter speed, white balance and focus. So you will need to download a 3rd party app.
One of the best is called FiLMiC Pro. I’ve made several FiLMiC Pro tutorials for this site, make sure to check those out if you’re going to use this app.

FiLMiC Pro isn’t the only option for manual smartphone camera settings. I’ve actually written an article going through 5 different camera apps for iPhones.
But why can’t we just shoot video with our camera in auto?
WHY NOT AUTO?
When your camera is set to auto, it will adjust exposure, white balance and focus live, even as you are recording. So, let’s be clear – this is not something a professional cinematographer would ever do, filming a movie for Netflix or something.
But why not? Having your camera adjust to get the perfect exposure and focus for every frame sounds like a good thing, doesn’t it? Well it’s certainly convenient.
Then, why don’t professionals use this?
The short answer is: it looks a bit messy.
As the camera moves, or objects move within the frame, the camera records these auto adjustments taking place. And this makes the audience more aware of the camera, which can be distracting.
That said, there IS an exception and that exception is to do with how smartphone cameras are different to other cameras. Let’s not go there just yet, because you need to know these basics of manual control first. Stay tuned for that, later in this article.
You’ve done great getting this far. But let’s talk about specific smartphone camera settings. A very important element is frame rate.
FRAME RATE
Put simply, a video’s frame rate tells you how many frames there are in 1 second of video.
So, if you set your camera to 30 frames per second, that means each second of video contains 30 still frames (which are basically photos) playing one after the next.
These photos are flashed before our eyes, one after the other, to create the illusion of movement.
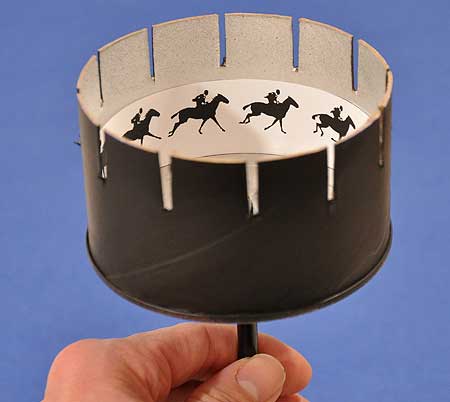
At 24 frames per second or higher, this is fast enough that your brain stops seeing still photos and sees smooth, realistic-looking movement.
Now I’m going to talk for a few seconds about film history. Because this will really help you to understand how different frames rates affect the look of your video.
THE VERY INTERESTING HISTORY of FRAME RATES
When movie cameras were first invented, there was no standard frame rate for cameras. In fact, the first cameras were hand cranked. And the interesting thing is that the operator might adjust the frame rate during the shot, depending on the emotion of the scene.
Now if there was a dramatic moment, they might turn the crank faster which would then become slow motion when it was played back. Or they might begin turning the crank slower, so the action speeds up at that point in the film.
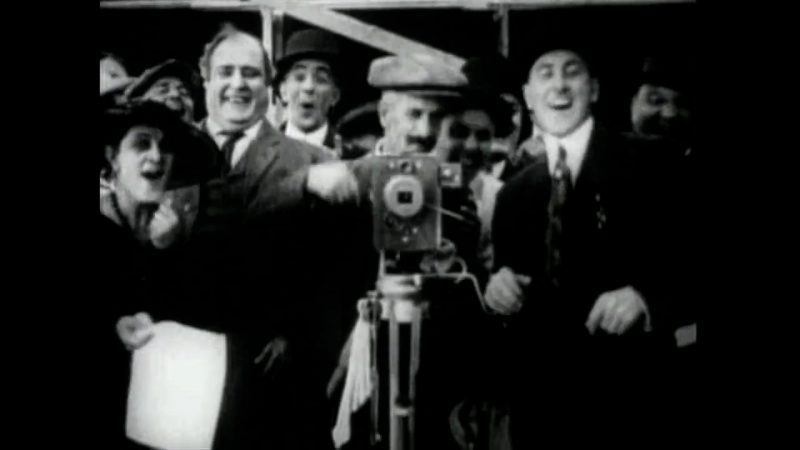
This was all cool until cameras got motors and synced sound. At which point, they agreed to a standardised frame rate. That frame rate, which is still used today in your Netflix or your Hollywood blockbusters, is 24 frames per second.
You see, I told you it wouldn’t be boring.
EFFECT OF FRAME RATE
Frame rate is important for 2 main reasons:
1. Different frame rates change the look of your video
And
2. There’s 2 frame rates to consider: the first is the frame rate you record the video at and the second is the frame rate you play the video back at.
If your head is starting to spin a little bit, then don’t worry. Remember, I’ve been doing this for 25 years. So you gotta give it at least 25 minutes, right?
The simplest way to get video that has a similar look to movies is to shoot and playback at 24fps. It’s what we are all used to because we’re used to seeing movies that way. Lower frame rates start to look choppy while faster frame rates look more like a video game.
Note, while we can shoot at different frame rates and edit those different frame rates together, when we master a video it can only be at one unified frame rate.
So every video or movie you watch will be playing to you at a set frame rate throughout the movie. As a filmmaker, this is so important. You really should know what frame rate you intend to master your video before you start filming.
What you want to avoid is to shoot some video at 25fps and some at 24fps and then try to edit them together. Because if you take a 25fps clip and play it back at 24fps, it will probably look jerky. But if you play it back at 25fps it should look smooth.
But what if we want slow motion?
SLOW MOTION
Put simply, most slow motion is achieved by recording at a fast frame rate and then playing back that video at a slower frame rate.
If you take a 24fps video and slow it to 50% speed, it will now be playing back at 12fps. And at this speed, our brains stop seeing it as smooth motion. We start to see the individual still images as still photos and it doesn’t look nearly as smooth.
Some smartphones can record at eye-wateringly fast frame rates. The Huawei P40 Pro, for example, can shoot at a ridiculous, bullet-stopping 7680fps. Compare that to what most filmmakers are happy to use for slow motion, which is 60fps.
So this extremely fast frame rate is something that smartphones can achieve which most cinema cameras can’t. That said, 60fps or 120fps is usually good for cinematic B roll slow motion.
To get slow motion from a video which you have recorded at 60fps, place it on a 24fps timeline and then slow it to 40%. If it’s 120fps, then slow it to 20%.
So that’s the basics of how frame rates work. But in smartphones they work a little differently.
FRAME RATES in SMARTPHONES
There’s something to bear in mind regarding frame rates when it comes to shooting video using a smartphone. Most smartphones shoot in a codec which uses what’s known as variable frame rate. This is done to save file space and to make it easier to stream video online.
This used to be a problem when it came to editing as variable frame rate would use much more processing power. And some editing platforms struggled to play it. These days, things have improved.
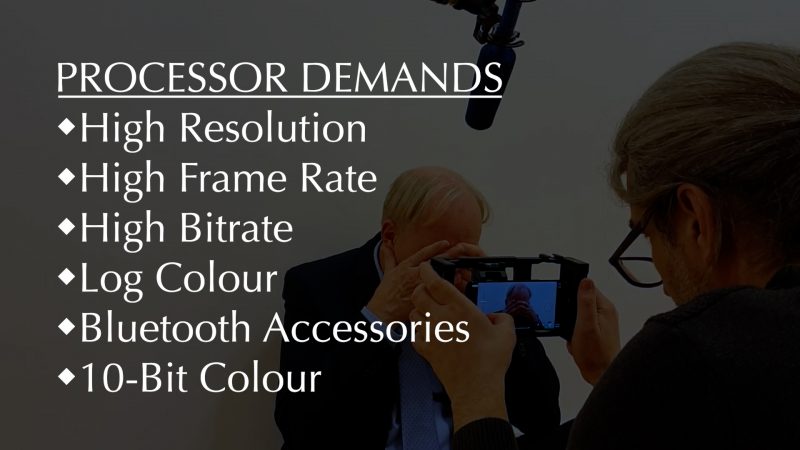
However there can be issues when you push your smartphone’s processor to it’s limit. There are things that demand lots of processing power like high resolutions, high frames rates, high bitrates, shooting in Log and so on.
If you start loading all these things onto your phone’s processor at once, you might find video starts to come out at weird frame rates. You might think you’re shooting at 60fps, but when you bring it into an editing program it says 48fps or some weird number like 44.657.
Now when you try to play this back at 60fps it looks very jerky, because the frames are not even.
So, to sum up frame rates: 24fps for the film look. Then 60fps or 120fps slowed to 24fps for nice, smooth slow motion.
You’ve already learned a lot about your smartphone camera settings, but you need to understand how frame rates work with shutter speed if you want to master this. And that’s coming up right now, as we move on to exposure.
Smartphone Camera Settings: EXPOSURE
In a normal digital camera, exposure is a combination of 3 core settings: ISO, shutter speed and aperture. These 3 settings operate together to correctly expose each frame of your video. But… and here’s the catch… like frame rate, they also change the look of the video in other ways.
First, understand that there’s no right or wrong shutter setting or ISO setting or aperture setting. It’s more about which combination works best and gives you the look you want.
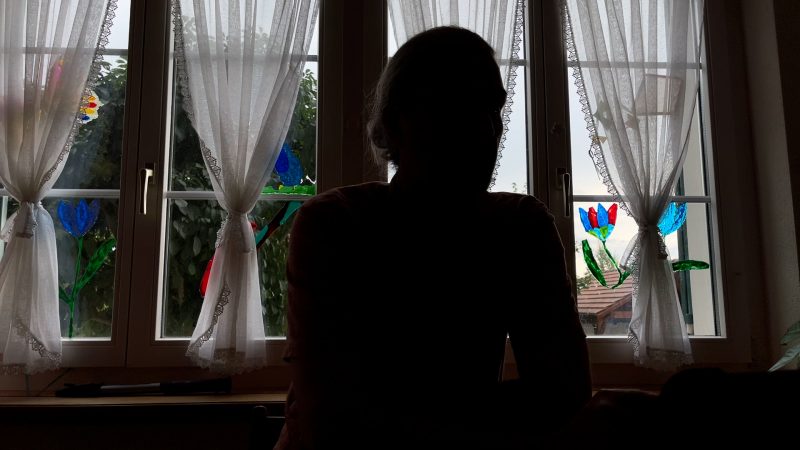
You might want your subject to be in silhouette or you might want them well lit. That’s down to your creative vision. And by learning how to use these exposure controls, it enables you to get the results you want.
Exposure is like a magic potion made of 3 ingredients. The first ingredient in the pot is ISO.
ISO
ISO is a measure of your camera’s sensitivity to light. The higher it is, the brighter your image.
You can think of the ISO control like the volume control on a music player. Increasing ISO amplifies the light signal from our sensor making the image brighter.
With a smartphone, you will need to go into that 3rd party app (or pro mode if you have it). I’m going to use FiLMiC Pro (mostly) in this article, because it’s a good app for both iPhone and Android.
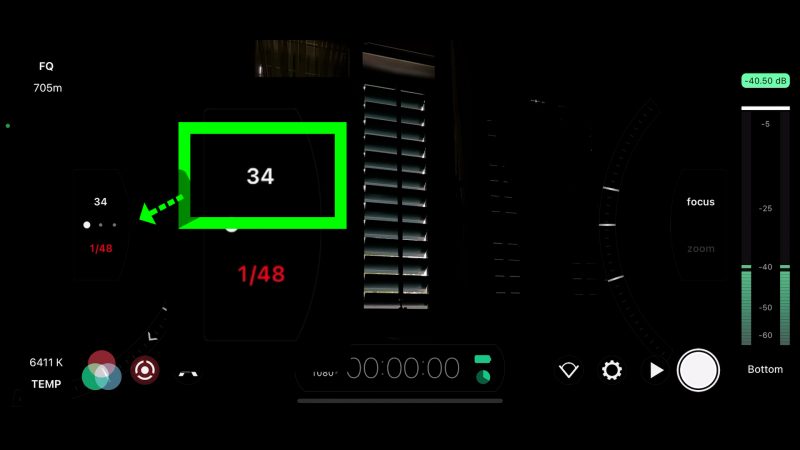
On my iPhone 12 Pro Max the ISO goes from 34 up to 3264.
Using ISO, you can get perfect exposure in just about any situation, even if there’s very little light. But there’s a downside. And that downside comes in the form of digital noise.
DIGITAL NOISE
The higher the ISO the more digital noise you will see in the image.
Digital noise looks like messy pixels moving around randomly, like a bunch of drunk ants having a night party.
While the frame might look nice and bright, these drunken ants are distracting and pretty ugly, most of the time. Sorry ants.
If I turn up the ISO here you can see the noise appearing. The higher I set it, the more noise you can see.
This is where smartphones are at a disadvantage to regular cameras, with their bigger sensors. The small sensors in our smartphones are not as good at collecting light. This means digital noise, especially in video, is more of a challenge.
With photos, there’s software in newer phones which counteracts this problem. For example, there’s night mode, which uses software to gather information from the sensor and then creates a brighter image. As this takes a moment to process for each photo it cannot yet be used for video, as it can’t process 24 or more frames per second.
The general rule with ISO is to try to keep it as low as possible. If you can, have it set to the bottom value. You will also find that different smartphones produce different amounts of noise. Usually, a smartphone with a bigger sensor will produce less noise.
Wow, we’ve already covered frame rates and ISO. Remember I said frame rate and shutter speed work closely together? So, it’s really important to understand how, and it’s coming up, right now.
SHUTTER SPEED
If you have any experience using a camera, you will probably know what shutter speed is. A shutter in a normal camera is basically a door behind the lens which opens and closes to let in light.
You might have heard about photographers from the 19th century physically removing the lens cap from the camera and then replacing it. So that was like the first ever camera shutter.
And this is still relevant to what’s going on in our smartphone cameras today.
Later, they developed mechanical shutters that opened and closed when you pressed the shutter button. But in movie cameras, the shutter is a rotating disc.
ROTATING SHUTTER
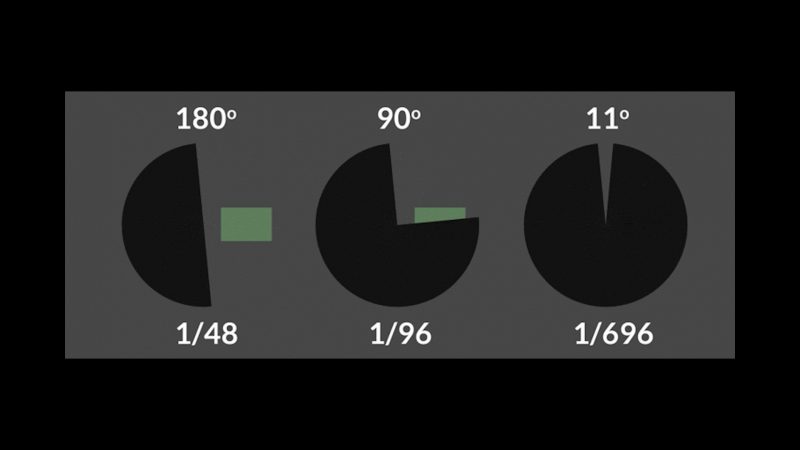
And that’s where this shutter speed to frame rate guideline comes from. You may have heard people talk about the 180 degree rule. Named that way because the rotating shutter in movie cameras that shoot film is set to 180 degrees.
Thing is, smartphones don’t have a physical shutter, opening and closing. Instead, like most other digital cameras, the sensor simply switches on and off. Just like switching a light on and off.
And the length of time the sensor is switched on is equal to the shutter speed.
Fractions of a Second
Now, you will usually see shutter speed measured in fractions of a second. You will see a fraction like 1/48 or 1/60. And if you set it to 1/48, this means the shutter is open for 1/48th of a second for each frame.
And if you are shooting at 24fps, a 1/48 shutter means it will be open half the time and closed half the time. So closed for 1/48 of a second and open for 1/48 of a second. Then closed, then open etc.
Like 180 degrees is half of a full 360 degree circle. See how the maths is all adding up? Are you connecting the dots?
Think about how these camera settings are combining already. We’re talking about shutter speed in relation to frame rates. And when we set shutter speed, we usually derive our setting from the frame rate.
So keep that in your mind when thinking about your smartphone camera settings as we move on to talk about MOTION BLUR.
OLD FRACTIONS
The way shutter speed is displayed in these fractions is actually a hangover from physical shutters. Most photographers and cinematographers are used to these fractions, so again, it’s stuck with us.
Here’s the thing – there’s no reason why shutter speed should not be represented in a simple number with a decimal point. With a digital shutter which is just switching on and off for a set amount of time, we shouldn’t be limited to these fractions of 1/48 or 1/50 or 1/60 and so on.
In fact, one free app for android users allows you to set your shutter speed in that way. However, for now we are mostly stuck with this convention from old cameras.
MOTION BLUR
Remember, video is made up of photos. Shooting at 24fps means we are taking 24 photos per second.
When cameras were first invented, the photographic plates used were very slow to react to light. To get a correct exposure, the photographer would have to remove the lens cap for several seconds for each photo. And everyone in the photo had to sit very still, because any movement would end up as blur in the photo.
If you were having a family photo taken and Uncle Bob couldn’t keep his head still, Uncle Bob would become a blurry blob!
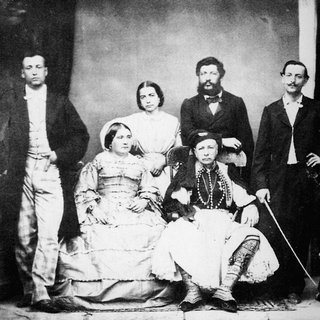
Even today, when we take photos of family and friends, we usually try to avoid that blurriness.
But in video (or movie film) it’s a different story.
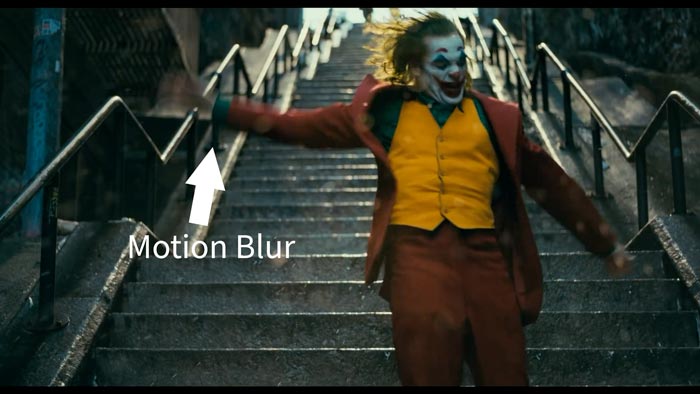
In most cases, we actually want some blur. Remember that video is 24 or 30 photos per second, flashing at our eyes, creating an illusion of movement. And if we have blur in those 24 photos, that illusion of movement is even smoother.
Put simply, more blur = more smoothness.
BRIGHTNESS VS MOTION BLUR
The speed of the shutter changes the look of your video in 2 ways:
1. Brightness
and
2. Motion blur
When they were working out how to design a film camera, about 100 years ago, they came to the compromise of 24fps combined with a 180 degree shutter. At 24fps, a 180 degree shutter gives you a shutter speed of 1/48 of a second.
For that reason, the 24fps and 1/48 shutter speed is considered the perfect combination.
Having tried various shutter speeds and frame rates, they found that 24fps with a 1/48 shutter speed was the smoothest, most natural looking they could achieve. And we’ve pretty much stuck with that ever since.
Putting it simply: a 1/48 shutter speed with 24fps will give you a nice motion blur.
Guide Not A Rule
However, it’s not a case of anything but 1/48 is wrong. If you increase the shutter speed to 1/60, for example, you would still get a good amount of motion blur. I’ll show you 2 videos, 1 has 1/48 shutter and 1 has 1/60 shutter – can you tell which is which?
If you keep pushing the shutter speed higher, eventually there will be pretty much no visible motion blur. And when you play those 24 photos one after the other, you get a much harsher-looking video. Anything moving looks very crisp.
Most of the time, this is undesirable. But, there are times when we might want a fast shutter speed look.
For example, in the movie Saving Private Ryan they used a fast shutter speed deliberately to create more dramatic battle scenes. You might also use it in a fight scene or maybe if you are filming action sports.
Slow Shutter Effect
Alternatively, you can use slow frame rates and very slow shutter speeds as an effect. Whereas fast shutter speeds make your video very crisp and present, slow shutter speeds make your video more dreamy and surreal.
Good for a dream sequence maybe. Or for depicting someone who has just been drugged, perhaps.
I really want to stress this aspect of cinematography. How you setup your camera is a creative choice informed by your knowledge of camera settings.
I don’t want you holding your camera worrying “if I don’t get this right, my videos will suck”. I want you thinking about the creative choices and what’s right for your artistic vision.
So this is where we are so far:
ISO controls brightness but adds digital noise.
SHUTTER SPEED controls brightness but adds (or removes) motion blur.
And now, to complete your understanding of the 3 core smartphone camera settings, you need to learn about aperture.
APERTURE
In a regular camera, aperture is controlled by a mechanical device which changes the size of the hole behind the lens.
If it’s smaller, more stuff is in focus but darker. If it’s bigger, less stuff is in focus but it’s brighter.
And this is one element that creates the shallow depth of field, which we use to make the background blurred out.
BLURRY BACKGROUND
Usually, in professional photography or cinematography, we try to separate the subject of the frame from the background this way.
Again, just like other settings, there’s no right or wrong amount of blurry background. This is a creative decision. More specifically, it’s about telling the audience what to look at.
If you have a wide angle, with everything in focus, you’re saying “look at the view”. If it’s a close up with the background blurred, you are saying look at the subject.
So how do we adjust aperture on our smartphone cameras? I’m sure some of you are already wondering this. Because the answer is, of course, we can’t.
FIXED APERTURE
Pretty much all smartphones have fixed aperture cameras. Samsung did briefly experiment with a dual aperture, which I have on the Samsung S9. But they eventually decided to drop it.
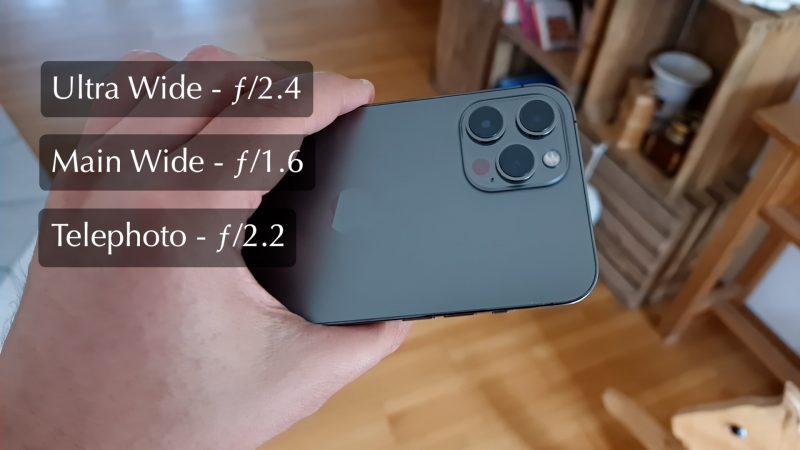
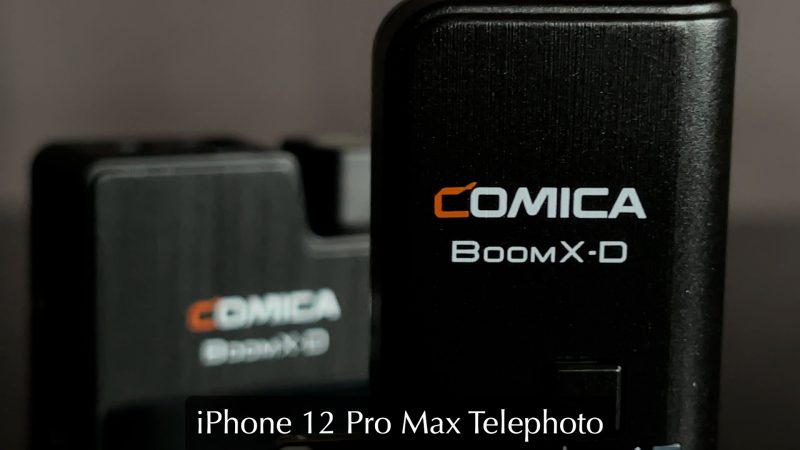
However, not all smartphone cameras have the same aperture. While each camera on this iPhone 12 Pro Max has a fixed aperture, they are also different sizes. The ultrawide camera has an ƒ/2.4 aperture, while the main camera has an ƒ/1.6 aperture and the telephoto has ƒ/2.2 aperture.
And if you have the iPhone 12 Pro, the telephoto has an ƒ/2.0 aperture.
F NUMBER
What do these sizes mean? Again, just to confuse us, the higher the F number the smaller the aperture. Remember that for blurry backgrounds we want a bigger aperture.
Taking my iPhone 12 Pro Max as an example, the main camera has a bigger aperture than the telephoto.
Here’s the thing – most professionals use a telephoto to get a shallow depth of field. That’s why telephoto lenses on our smartphones are more useful for zooming in than getting a shallow depth of field.
But they do have a use. In my last tutorial about shooting a product video, I used the telephoto lens for one shot because I could get closer to the product than if I used the main camera.
Smartphone Camera Aperture
So, while we can’t adjust aperture on our smartphones, it’s certainly something we should bear in mind. When choosing lenses, for example. We should also be aware this is a difference between smartphones and cinema cameras, which do have an adjustable aperture.
Having a variable aperture means having 3 elements which can be adjusted to set exposure. In smartphones, we only have 2 settings – ISO and shutter speed.
If you’ve watched this far, you’ve already got a great grounding in setting exposure and understand how these settings work together to control the look of your image. Now, when you have a vision in your mind of what you want to achieve, you’ll be better equipped to get the look you want.
But you’re not finished. You can’t master your smartphone camera until you understand this essential part of what a digital camera does – and that is controlling white balance.
WHITE BALANCE
What is white balance?
If the colours look off in your photo or video, there’s a very good chance the white balance is… uh… well… unbalanced. If white balance is correct, then anything that is white in the frame, should actually look white.
You can tell if white balance is off because white things have some kind of tint to them. They might look slightly yellow or slightly blue, for example.
If we go into the white balance controls in FiLMiC Pro, we can see it is controlled by 2 parameters.
Temp & Tint
The first one is temperature, which is measured in Kelvins. That’s why you see a K symbol next to the colour temperature.
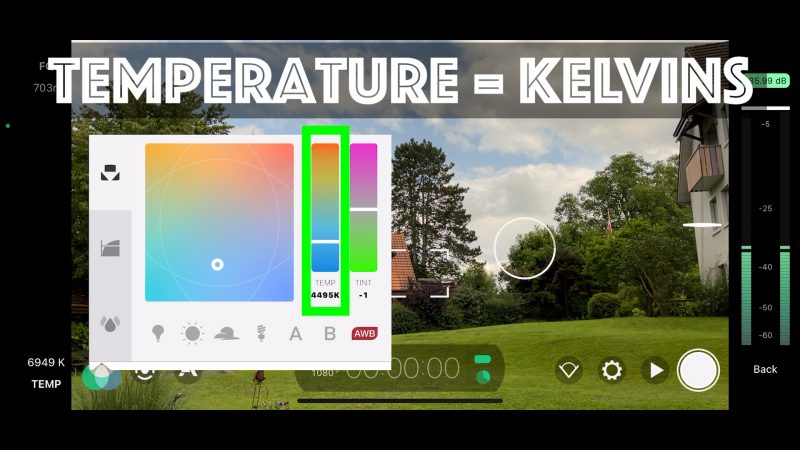
The second one is tint, which is like a specific colour overlay that adds a specific colour to the entire frame. Like placing a coloured filter over your camera lens.
While color temperature moves on a spectrum between orange and blue, tint moves on a spectrum between green and magenta.
Now, if you leave white balance on auto your camera will set white balance live, adjusting frame by frame. And like with auto exposure, this can look messy, distracting and unprofessional.
We can correct white balance in colour grading software, but this is almost impossible if the white balance changes during the shot. Even if it doesn’t change, the process of fixing white balance can make colour grading our video more problematic.
SETTING WHITE BALANCE
So what should we do to make sure our white balance is correct?
There’s actually a variety of options, depending on how much effort and time you want to give each shot.
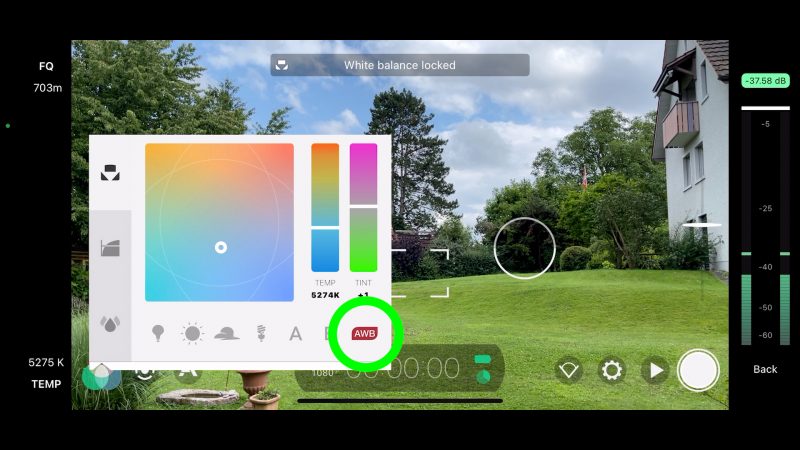
To get the most accurate white balance we can use a grey card. They’re pretty cheap and easy to use. Once we have our grey card, go to white balance controls, fill the screen with the card and then lock white balance.
In FiLMiC Pro, white balance is locked by tapping this button until it goes red. Now when you go back and get your shot, white balance will be fixed in place and white should look white.
Kitchen Towel Hack
Another option is to use a piece of kitchen towel instead of the grey card, which is almost as effective.
So, when it comes to smartphone camera settings, how often do we need to set white balance?
Basically, every time the colour of the lighting in the frame changes.
Practically speaking, having a consistent, correct white balance is important when you’re editing shots together and you don’t want the colour to keep changing between shots.
For example, if you’re filming a dialogue scene in a movie or a wedding, consistent colour temperature between the shots will make your final video look much more professional.
LOCK ON RECORD
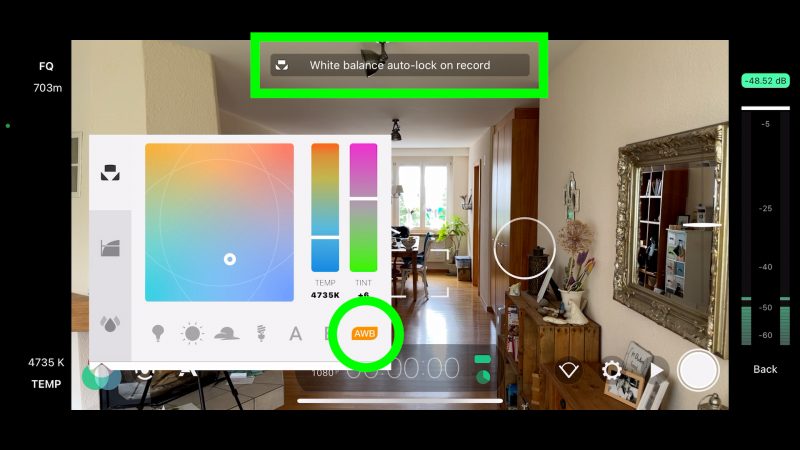
Now, if you don’t have the time to keep setting white balance, the next best option is just to make sure white balance doesn’t change during the shot.
FiLMiC Pro has an option to lock on record white balance. When you set it to lock on record, white balance will still adjust between shots. But once you hit record, the white balance locks so it will be consistent throughout the shot.
And having a consistent white balance throughout the shot means it looks more polished, more professional and is much easier to fix with colour grading software.
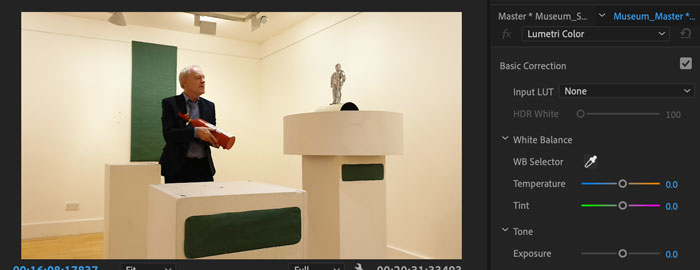
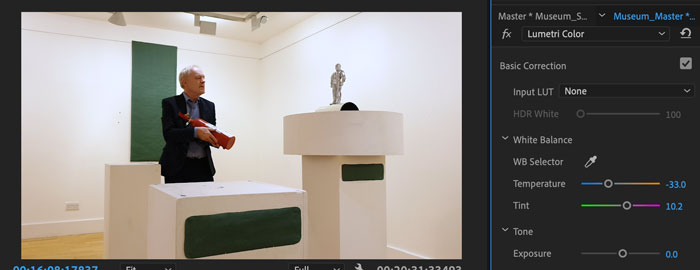
FIXING WHITE BALANCE IN POST
This can be done in various editing programs. But I’m going to tell you how I do it in Adobe Premiere Pro.
In Premiere Pro, there’s an eyedropper tool which allows you to click on an area of the image you know should be white. The part you clicked should now go white and the colour balance is adjusted across the whole frame.
Below this tool in Adobe Premiere we again have these two parameters: temperature and tint, just like we saw in FiLMiC Pro.
You’ve covered so much and you are well on your way to mastering your smartphone camera. But you won’t have mastered your smartphone camera until you understand focus.
Smartphone Camera Settings: FOCUS
I don’t think I really need to explain what focus is. But if you want your videos to look more professional, then you need to use focus correctly.
Once again, if we don’t lock focus, movement within the frame will cause the focus to keep adjusting. This can be really obvious and distracting.
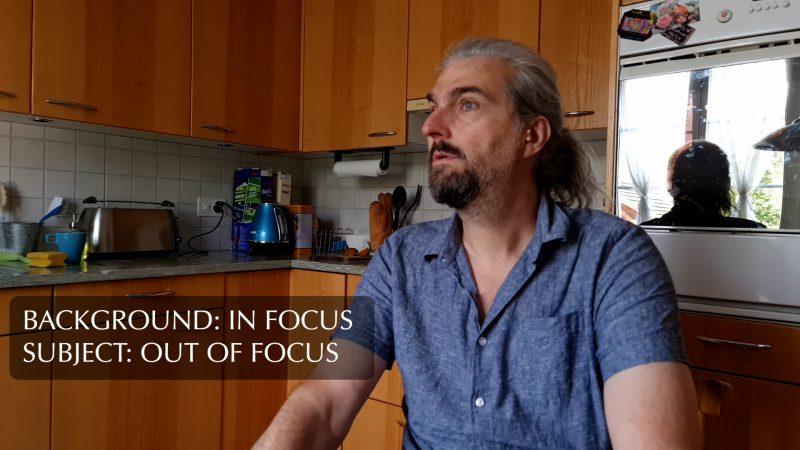
Also, auto focus will quite often focus on the wrong thing.
Have you ever filmed a subject, thinking everything looks fine, but when you came to edit you found the background is in focus and the subject is not?
These days, smartphones are getting better at face detection. This means auto focus will look for human faces and prioritise them.
Actually, some Samsung devices also have a focus tracking feature that locks focus on a certain object, even if it moves out of frame and back again.
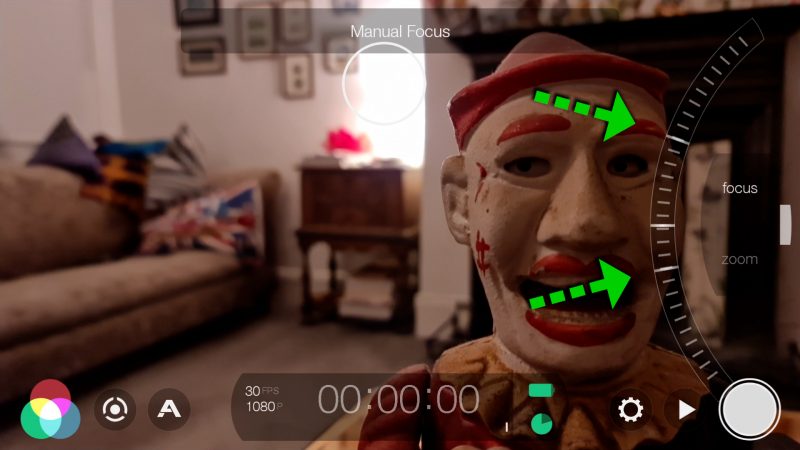
SETTING FOCUS
In FiLMiC Pro, we have a focus wheel which we can use to set and lock focus among other smartphone camera settings. This and some other apps also allow you to create an automated focus pull. There’s also focus peaking which is an analytics tool to help us when setting focus.
So the first thing is to make sure the subject is in focus and the focus is locked. If the subject doesn’t move too much, all good. But if the distance between the camera and subject changes during the shot, they will probably go out of focus.
In a professional movie set up, there will be someone called a “focus puller” whose job is to maintain correct focus during the shot. As most of us don’t have the luxury of a focus puller, we need other strategies.
Focus Strategies
For example, we could leave focus on auto and hope it adjusts correctly. We can use features like focus object tracking. Or we can try to pull focus ourselves during the shot, using software like FiLMiC Pro or Samsung Pro Video.
We can also use a focus pull to tell the audience what to look at. This is used in movies all the time, going from one important object to another in one shot.
What you have learned so far is a huge step towards professional level videography. But no pro is going to film outside in daylight without one of these – an ND filter. So let me explain why they’re so important.
ND FILTERS
If you don’t have one already, I really recommend you get some kind of ND filter system for your smartphone. ND filters are like sunglasses for your camera. They reduce the light hitting the sensor.
As we’ve just learned, smartphones have 1 element less than regular cameras when it comes to setting exposure because they have fixed aperture lenses. With an ND filter you get another option for controlling exposure.
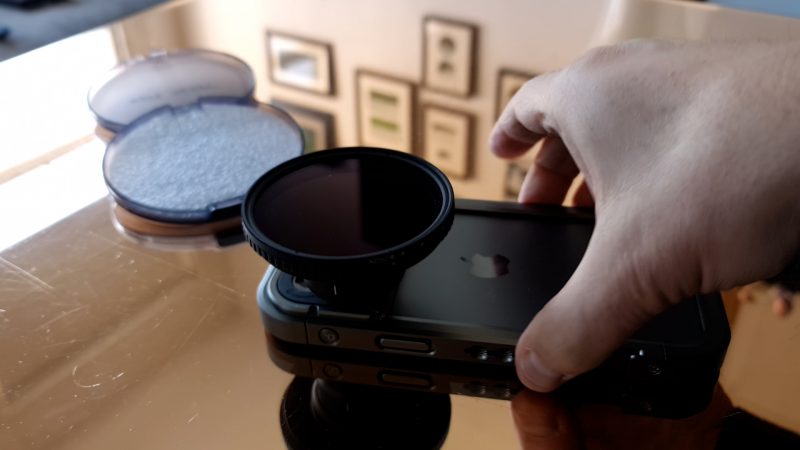
But the main reason for using an ND filter is to reduce your shutter speed in bright conditions for that smooth, cinematic motion blur.
Buying ND filters can be a bit confusing. I’ve wasted money buying the wrong ones until I understood that ND filters come in different strengths, measured in stops.
STOPS
Again, this word “stop” comes from traditional photography cameras. But it’s useful to know what a stop is, because it relates to other settings as well.
1 stop of exposure doubles or halves the amount of light hitting the sensor. For example, changing shutter speed from 1/60 to 1/30 is one stop because it doubles the light hitting the sensor.
Going from 100 ISO to 200 ISO is also equivalent to one stop. Or 200 ISO to 400 ISO.
So let’s say you had your ISO at 200 and you put a 1 stop ND filter over the lens. The exposure would be stopped down as if you had adjusted ISO to 100.
Therefore, a 1 stop ND filter will allow you to reduce shutter speed by 1 stop. For example, from 1/96 to 1/48.
Exposure Puzzles
So you can see that with smartphone camera settings, exposure is a mathematical puzzle. Add one stop here, take one stop there.
Common strengths of neutral density (ND) filters are 3-stop, 6-stop and 10-stop.
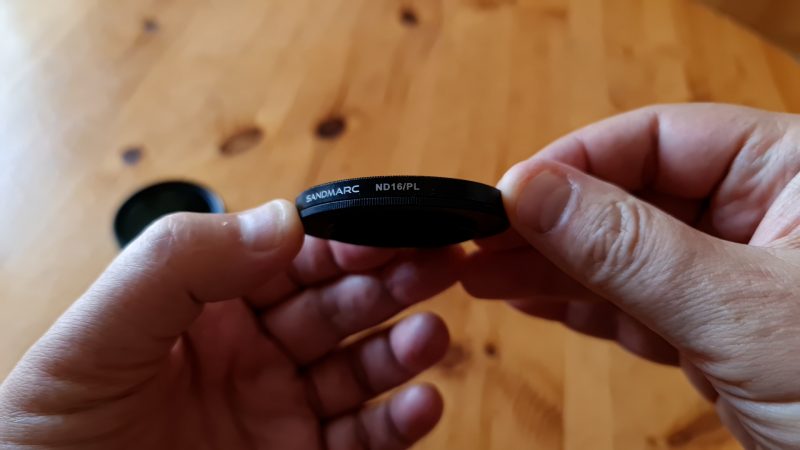
Just to confuse us, ND filters have an extra number to measure their strength. This is a set of 3 variable ND filters sent to me by Sandmarc. They simply clip over the lens.
ND Numbers
Now ND16 equals 4 stops of light reduction (the PL in this example below stands for polarising, which is another type of filter for reducing glare).
ND32 equals 5 stops of light reduction and ND64 equals 6 stops of light reduction. Again, each stop doubles the number. And remember, each stop of ND filter cuts the light hitting the sensor by half.
So many videos will tell you you absolutely must use manual controls. But shooting with a smartphone, I do sometimes use auto mode. Let’s talk about when you might want to keep your camera on auto.
AUTO vs MANUAL
When you’re shooting with smartphones, using manual smartphone camera settings isn’t always the best option. That’s because smartphone cameras have developed differently to normal cameras.
One of the biggest differences is a thing called dynamic tone mapping. And this is particularly important to you if you’re using an iPhone.
However, even Samsung and other phone makers are now using dynamic tone mapping in their cameras. As well, many modern TV sets also use dynamic tone mapping.
If you’re serious about shooting high quality video with your smartphone, you need to understand what’s going on with dynamic tone mapping.
DYNAMIC TONE MAPPING
Dynamic tone mapping adjusts the exposure differently for areas of the image, if there is a wide contrast in brightness levels.
For example, when you’re filming a landscape in daylight, the tone mapping function works to reduce the brightness of the sky. Meanwhile, the area beneath the sky is at a different exposure setting. It kind of draws a line around all the dark areas and pulls down the ISO for the brighter areas.
So, what does dynamic tone mapping have to do with manual exposure?
Well, with iPhones especially, dynamic tone mapping overrides your manual control settings. In certain situations, like moving from light to dark areas, even if you have exposure locked, you will see darker areas getting lighter or light areas getting darker.
This is because dynamic tone mapping is working to even out the exposure across the image. Thing is, mobile cameras, with their small sensors, have pretty low dynamic range compared to regular cameras.
This low dynamic range means that when you set exposure, you will often have to choose whether to expose the bright areas or the dark areas.
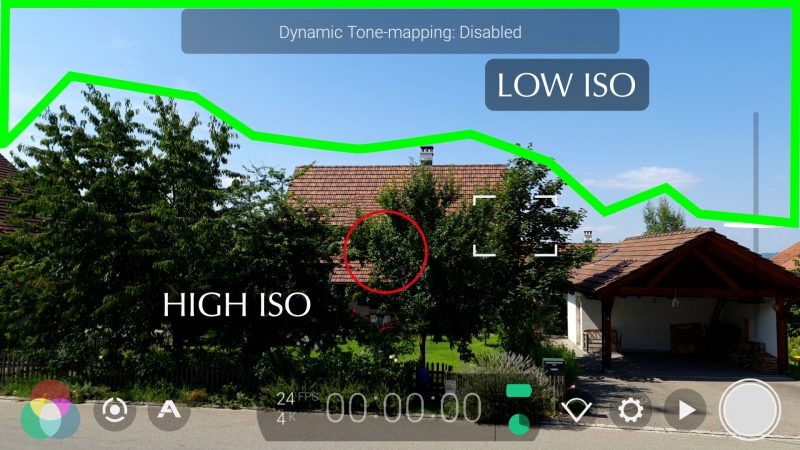
DYNAMIC RANGE
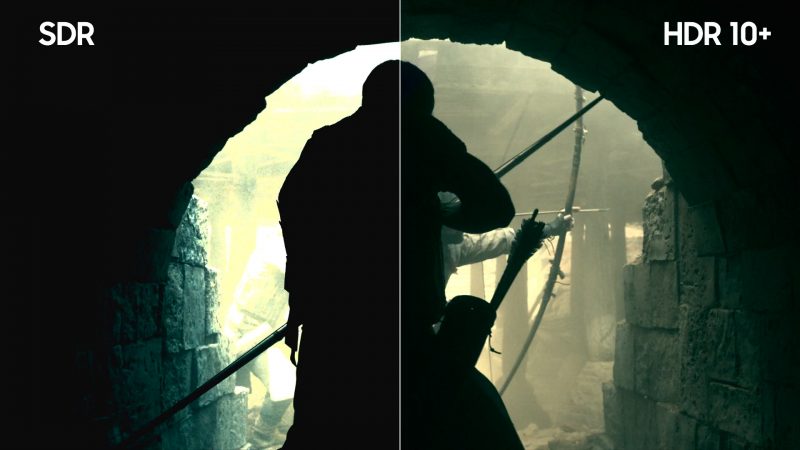
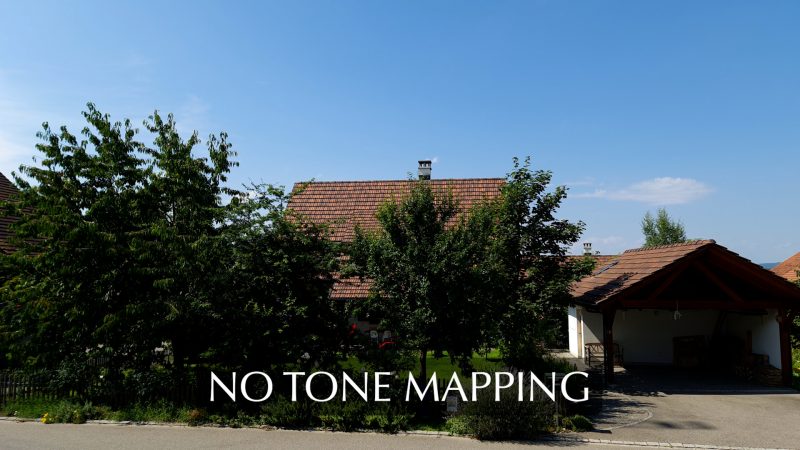
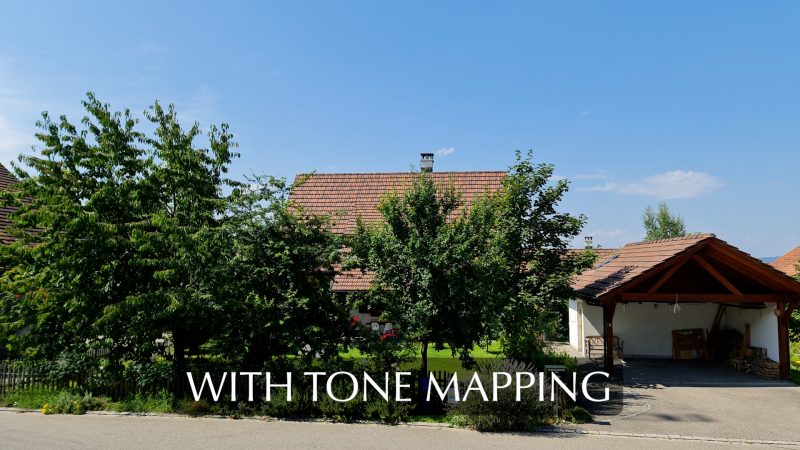
The contrast between sky and land, for example, is too much for the sensor to cope with. So you will either have a blown out white sky or you will have a correctly exposed sky but the land below will be very dark or even black.
But by using dynamic tone mapping, the sky and land will be exposed with different settings. When you see people going “wow the new iPhone has incredible dynamic range, better than my Blackmagic!”, it’s because of this dynamic tone mapping.
So we can see the advantage of dynamic tone mapping. But we can also understand that it comes with a downside.
Thing is, when you go into Samsung Pro Video mode, it actually switches off dynamic tone mapping. So at least you have the choice to use it or not. But with iPhones, currently they do not allow the feature to be disabled, even when using a 3rd party app like FiLMiC Pro.
Now I’m going to tell you when you should think about using auto exposure.
ADVANTAGES OF AUTO
I actually shoot a lot of my B roll using auto mode. This was all shot using auto mode on the iPhone 12 Pro Max.
Why do I use auto mode?
One reason is that it’s quicker than messing about with smartphone camera settings. In some shots, I might have the iPhone on the end of a monopod, so I’m not able to see what I’m filming. Rather than try to guess the right settings, I trust the iPhone to get it right.
For these kinds of shots, my working method is to try auto mode first. If it comes out well, I’ve just saved myself a bit of time. But if it doesn’t look good, then I can try different options. Like using an app or locking exposure in the native app.
Bear in mind, even if I do lock exposure, I know the dynamic tone mapping is going to keep adjusting the exposure in certain areas anyway. Rather than fight against this, I often try to work with it and use this technology to my advantage.
Other times I will use the exposure and focus lock feature in the native app. This also gives you quite a bit of control and again it’s faster than using a 3rd party app.
Now, here’s a little camera hack for you…
SHUTTER SPEED HACK
Did you know you can reduce your shutter speed and create extra motion blur simply by adding an ND filter? This is because your smartphone camera will automatically slow the shutter speed when less light is available.
So that’s just a little tip to bear in mind. Even in auto mode, you can still control your shutter speed by using an ND filter. And that’s why an ND filter should probably be the first thing on your kit list.
Smartphone Video – Beginner to Advanced
If you want to know more about smartphone filmmaking, my book Smartphone Videography – Beginners to Advanced is now available to download for members on Patreon. The book is 170 pages long and covers essential smartphone filmmaking topics:
Things like how to get the perfect exposure, when to use manual control, which codecs to use, HDR, how to use frame rates, lenses, shot types, stabilisation and much more. There’s also my Exploring the Film Look Guide as well as Smartphone Colour Grading.
Members can also access all 5 episodes of our smartphone shot Silent Eye series, with accompanying screenplays and making of podcasts. There’s other materials too and I will be adding more in the future.
If you want to join me there, follow this link.

Great explanation as ever. I don’t go anywhere without my ND filter – mainly for ICM stills for my DSLR. I never understood what the numbers are. I do now.
thanks Anne! Happy that you came away with useful info
Great little article this, thanks. Btw, I’m loving your YouTube channel
thanks Gavin! Glad you found it helpful